jose ole taquitos cooking instructions

José Olé Taquitos offer a convenient and flavorful snack or light meal, gaining popularity for their ease of preparation and satisfying taste․ These rolled tortillas, filled with seasoned meat, are a staple in many households, providing a quick and tasty option for busy individuals and families seeking a delightful culinary experience․

What are José Olé Taquitos?

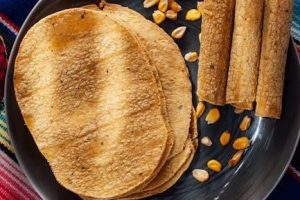
José Olé Taquitos are a frozen snack food consisting of tightly rolled, seasoned beef or chicken encased in a crispy tortilla shell․ They represent a convenient and flavorful take on traditional Mexican taquitos, offering a quick and easy meal or appetizer option․ These taquitos are pre-cooked and frozen, requiring minimal preparation time before consumption․

Typically found in the frozen food section of grocery stores, José Olé Taquitos come in various flavors and package sizes to cater to different preferences and household needs․ They are designed to be heated and enjoyed with a selection of dips and sides, providing a versatile and satisfying culinary experience․ The brand focuses on delivering a consistently tasty and convenient product for consumers seeking a hassle-free snack or meal solution․

Why are they Popular?

José Olé Taquitos have gained widespread popularity due to their exceptional convenience and appealing flavor profile․ Their frozen format allows for a readily available snack or quick meal, ideal for busy lifestyles․ The pre-cooked nature significantly reduces preparation time, making them a go-to option when time is limited․

Furthermore, the savory seasoning and crispy texture of the taquitos contribute to their broad appeal․ They offer a satisfying crunch and a flavorful experience that resonates with a wide range of palates․ The brand’s consistent quality and affordability also play a crucial role in their sustained success, making them a popular choice for families and individuals alike․ Their versatility, pairing well with various dips and sides, further enhances their desirability․

Understanding the Packaging

José Olé Taquitos packaging clearly displays crucial details like net weight and a complete ingredient list, ensuring informed consumer choices and dietary awareness․

Types of José Olé Taquitos Packaging

José Olé Taquitos are primarily available in two distinct packaging formats, catering to varying consumer needs and purchase preferences․ The most common is the frozen retail box, typically containing between 20 and 30 taquitos, designed for family consumption and convenient storage in the freezer․ These boxes feature vibrant graphics showcasing the product and clear cooking instructions․

Additionally, José Olé offers smaller, single-serve packaging options, often found in convenience stores or as part of meal deals․ These individual packs usually contain 6-8 taquitos, ideal for a quick snack or individual meal․ While the materials differ – boxes are cardboard, individual packs are often plastic film – both prioritize maintaining product freshness and providing essential information like ingredients and nutritional facts․ The packaging consistently emphasizes ease of preparation, highlighting oven, microwave, and air fryer compatibility․

Identifying Package Information (Net Weight, Ingredients)

José Olé Taquitos packaging prominently displays crucial information for consumers․ The net weight, indicating the total quantity of taquitos within, is clearly stated in both ounces and grams, usually on the front or side panel․ A comprehensive ingredient list is mandatory, detailing all components used in the product, including seasonings, meat sources, and tortilla composition․ This list is vital for individuals with allergies or dietary restrictions․

Nutritional information, presented in a standardized Nutrition Facts panel, outlines calorie count, fat content, sodium levels, and macronutrient breakdown per serving․ Additionally, allergen warnings – commonly noting wheat and soy – are highlighted․ Look for “best by” or “sell by” dates to ensure freshness․ Finally, cooking instructions, detailing oven, microwave, and air fryer methods, are prominently featured, often with visual cues for ease of understanding․

Cooking Methods: A Comprehensive Guide

José Olé Taquitos offer versatile cooking options: oven baking for crispness, microwaving for speed, and air frying for a healthier, equally crunchy result – choose your preference!

Oven Baking Instructions

For optimal results when oven baking José Olé Taquitos, preheating is crucial․ Set your oven to a consistent 400°F (200°C)․ Arrange the frozen taquitos in a single layer on a baking sheet – avoid overcrowding to ensure even cooking and maximum crispness․

Baking time varies depending on the quantity, but generally, 8-10 minutes is sufficient for a batch of 10-12 taquitos․ For larger quantities, you may need to add a few extra minutes․ Halfway through baking, flip the taquitos over to promote even browning and crisping on all sides․

Monitor closely to prevent burning, and remove from the oven when golden brown and heated through․ Allow to cool slightly before serving, as the filling will be very hot․ Oven baking delivers a wonderfully crispy texture, enhancing the overall flavor experience of these convenient taquitos․

Recommended Oven Temperature

The consistently recommended oven temperature for cooking José Olé Taquitos is 400°F (200°C)․ This temperature strikes a perfect balance, ensuring the taquitos cook thoroughly while achieving a desirable level of crispness․ Lower temperatures may result in soggy taquitos, while higher temperatures risk burning the exterior before the interior is heated through․

Maintaining a stable 400°F is key throughout the baking process․ Avoid opening the oven door frequently, as this can cause temperature fluctuations․ A properly preheated oven is also essential; allow sufficient time for the oven to reach the set temperature before placing the taquitos inside․

Using an oven thermometer can help verify the accuracy of your oven’s temperature setting․ Adhering to this recommended temperature will consistently deliver perfectly cooked, golden-brown, and deliciously crispy José Olé Taquitos every time․

Baking Time Guidelines

For a standard batch of José Olé Taquitos, a baking time of 10-12 minutes is generally recommended when using an oven preheated to 400°F (200°C)․ However, this timeframe can vary slightly depending on your oven and the quantity of taquitos being baked․

To ensure even cooking, arrange the taquitos in a single layer on a baking sheet․ Avoid overcrowding, as this can hinder proper heat circulation․ Halfway through the baking time (around 5-6 minutes), flipping the taquitos can promote uniform browning and crispness․

Check for doneness by observing the color and texture․ The taquitos should be golden brown and crispy․ Allow a brief cooling period before serving, as they will be very hot immediately after baking․ Adjust baking time slightly for larger or smaller batches, always prioritizing thorough heating․

Microwave Instructions

Microwaving José Olé Taquitos offers a remarkably quick cooking method, ideal for a speedy snack․ However, achieving optimal texture requires attention to power levels and timing․ Generally, a microwave operating at 1000 watts is recommended for best results․

For a single serving (typically 2-3 taquitos), microwave on high for approximately 60-90 seconds․ Larger portions will necessitate extended cooking times – add 30-second increments until heated through․ Always use a microwave-safe plate and avoid stacking the taquitos to ensure even heating․

Be cautious, as microwave heating can sometimes result in uneven temperatures․ It’s crucial to check the internal temperature to guarantee they are adequately heated before consumption․ A brief resting period post-microwaving can help distribute heat more evenly․

Microwave Power Levels & Cooking Times

Microwave power significantly impacts José Olé Taquitos’ cooking time and texture․ A 1000-watt microwave typically requires 60-90 seconds for 2-3 taquitos․ However, adjustments are necessary for varying wattage․

For 700-watt microwaves, increase cooking time to 90-120 seconds․ At 1200 watts, reduce the time to 45-60 seconds․ Always start with the lower end of the time range and add 15-second intervals until heated through․

Using a lower power level (50-70%) can promote more even heating, though it will extend the overall cooking duration․ Monitor closely to prevent the taquitos from becoming soggy․ Consistent checking is key to achieving a perfectly heated, crispy exterior and warm interior․

Tips for Even Heating

Achieving evenly heated José Olé Taquitos in the microwave requires a few simple techniques․ Arrange the taquitos in a single layer on a microwave-safe plate, ensuring they don’t overlap․ Overlapping can lead to uneven cooking, with some areas remaining cold while others become overly heated․

Rotating the plate halfway through the cooking process is crucial for distributing heat evenly․ Consider placing a paper towel underneath the taquitos to absorb excess moisture, preventing a soggy texture․

If your microwave has a turntable, utilize it for consistent heat distribution․ For non-turntable microwaves, manual rotation is even more important․ Regularly check for hot spots and adjust cooking time accordingly for optimal results and a satisfying crunch․

Air Fryer Instructions

The air fryer is a fantastic method for achieving crispy, golden-brown José Olé Taquitos! Preheat your air fryer to 380°F (190°C) for optimal results․ Arrange the taquitos in a single layer within the air fryer basket, avoiding overcrowding to ensure even cooking and maximum crispiness․

For best results, lightly spray the taquitos with cooking oil – this enhances browning and texture․ Air fry for 6-8 minutes, flipping halfway through to guarantee uniform crispness on all sides․

Keep a close watch during the final few minutes to prevent burning․ The air fryer delivers a remarkably crunchy exterior while maintaining a warm, flavorful interior, making it a preferred cooking method for many taquito enthusiasts․

Optimal Air Fryer Settings

For consistently perfect José Olé Taquitos, utilizing the correct air fryer settings is crucial․ The ideal temperature range falls between 380°F (190°C) and 400°F (200°C)․ Starting at 380°F generally yields excellent results, promoting even cooking without excessive browning․

Regarding air fryer functions, select the standard “Fry” or “Roast” setting․ Avoid settings designed for delicate items, as a higher heat is needed for optimal crispness․ If your air fryer has a pre-set for frozen foods, this can also be a suitable option, though monitoring is still recommended․

Experimentation is key! Different air fryer models may vary, so slight adjustments to temperature or time may be necessary to achieve your preferred level of crispiness․ A light spray of oil is also recommended for enhanced texture․

Air Frying Time & Temperature

Achieving golden-brown, crispy José Olé Taquitos in your air fryer typically requires between 6 to 8 minutes of cooking time․ Begin by preheating your air fryer to 380°F (190°C) for optimal results․ Arrange the taquitos in a single layer within the air fryer basket, ensuring they aren’t overcrowded to allow for even heat circulation․

Halfway through the cooking process – around the 3-4 minute mark – pause and gently flip the taquitos․ This ensures both sides become uniformly crispy and prevents sticking․ Continue air frying for the remaining time, closely monitoring to prevent burning․

Cooking time may vary depending on your air fryer model and the initial temperature of the taquitos․ Always check for internal warmth and desired crispness before serving․ A final temperature of 165°F (74°C) is recommended․

Serving Suggestions & Accompaniments

Elevate your José Olé Taquitos with vibrant toppings and complementary sides for a complete and satisfying meal experience, enhancing their delicious flavor profile․

Dipping Sauces for José Olé Taquitos

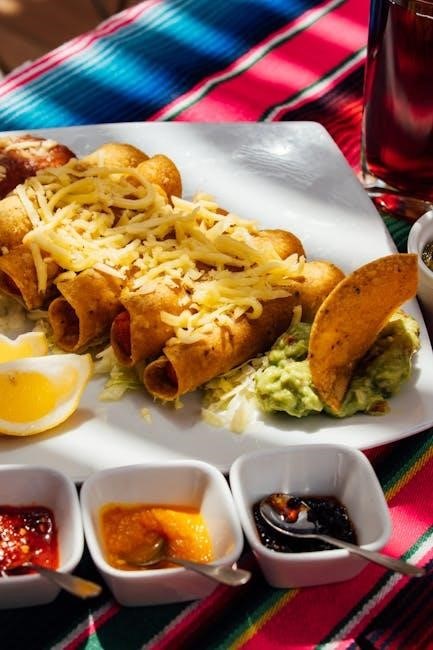
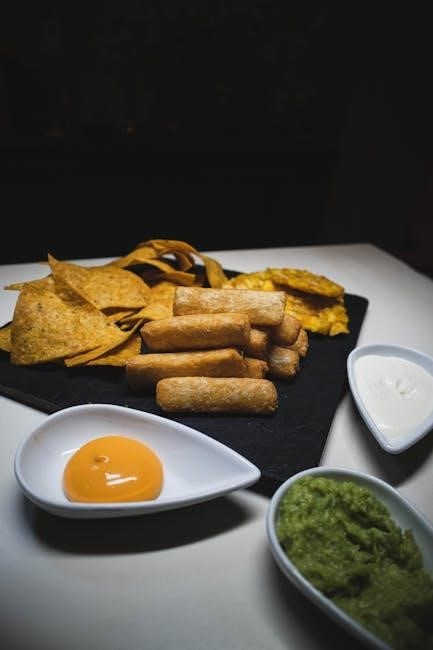
José Olé Taquitos truly shine when paired with the right dipping sauces, transforming a simple snack into a flavorful fiesta! Classic options like sour cream and guacamole are always crowd-pleasers, offering cool and creamy contrasts to the crispy taquitos․ For those who enjoy a bit of spice, a vibrant salsa – ranging from mild pico de gallo to fiery habanero – adds a delightful kick․

Beyond the traditional, explore creamy chipotle sauce, a tangy lime crema, or even a drizzle of queso fresco for added richness․ A cool and refreshing avocado ranch is also a fantastic choice․ Don’t be afraid to experiment with different combinations to discover your perfect pairing! Consider the heat level of the taquitos themselves when selecting a sauce, balancing flavors for an optimal experience․ Ultimately, the best dipping sauce is the one you enjoy most!

Side Dishes to Complement Taquitos

José Olé Taquitos are wonderfully versatile and pair beautifully with a variety of side dishes, creating a complete and satisfying meal․ A fresh and vibrant Mexican rice is a classic accompaniment, offering a fluffy and flavorful base․ Alternatively, a zesty black bean salad provides a protein-packed and colorful addition․

For a lighter option, consider a simple green salad with a lime vinaigrette․ Elote, or Mexican street corn, adds a sweet and savory element that complements the taquitos perfectly․ A side of refried beans, topped with cheese and a dollop of sour cream, is another comforting choice․ Don’t forget a sprinkle of chopped cilantro and a wedge of lime to brighten up the plate! Ultimately, sides that offer contrasting textures and flavors will elevate your taquito experience․

Safety Precautions & Common Mistakes

Always ensure taquitos reach an internal temperature of 165°F (74°C)․ Avoid overcrowding cooking surfaces and carefully handle hot taquitos to prevent burns and ensure optimal crispness․

Handling & Storage Guidelines

Proper handling and storage are crucial for maintaining the quality and safety of José Olé Taquitos․ Before cooking, keep taquitos frozen at 0°F (-18°C) or below to preserve their texture and flavor․ Avoid thawing at room temperature; instead, utilize the refrigerator or microwave’s defrost setting if needed․

Once opened, any unused portion should be tightly sealed in an airtight container or freezer bag and returned to the freezer immediately․ Do not refreeze taquitos that have already been thawed․ Leftover cooked taquitos should be refrigerated within two hours and consumed within three to four days for optimal freshness․ Always discard any taquitos exhibiting signs of spoilage, such as unusual odor or discoloration․ Maintaining these guidelines ensures a safe and enjoyable experience with every serving․

Avoiding Common Cooking Errors

Several common errors can impact the quality of your José Olé Taquitos․ Overcooking leads to dryness and a brittle texture, while undercooking results in a cold center․ Ensure consistent heating by arranging taquitos in a single layer, avoiding overcrowding in the oven, microwave, or air fryer․

Pay close attention to recommended cooking times and temperatures for your chosen method․ For oven baking, rotating the taquitos halfway through promotes even browning․ When microwaving, use appropriate power levels and check for hot spots․ In an air fryer, shaking the basket periodically ensures uniform crispness․ Ignoring these details can compromise the delightful crunch and savory flavor that José Olé Taquitos are known for, so careful attention is key!

Nutritional Information

José Olé Taquitos, while convenient, contain varying calorie counts and macronutrient profiles depending on the variety․ Always check the packaging for specific allergen details and nutritional facts․

Calorie Count & Macronutrient Breakdown

José Olé Taquitos nutritional content varies based on the specific flavor and quantity consumed․ A typical serving size, around three taquitos, generally contains approximately 140-160 calories․ These calories primarily derive from carbohydrates and fats, with a moderate amount of protein․

A breakdown reveals roughly 10-12 grams of total fat, including saturated and trans fats, contributing to the overall calorie count․ Carbohydrates usually range between 15-18 grams, with a small amount of dietary fiber․ Protein content is typically around 4-6 grams per serving․

It’s important to note that these figures are estimates and can fluctuate․ Individuals monitoring their intake should always refer to the detailed nutritional information panel on the product packaging for the most accurate data․ Considering portion sizes is crucial for maintaining a balanced diet while enjoying this convenient snack․

Allergen Information

José Olé Taquitos may contain several allergens that individuals with sensitivities should be aware of․ Wheat is a primary allergen, as the taquitos are made with flour tortillas․ Soy is also commonly present, often utilized in the seasoning or oil used during processing․ Milk derivatives may be included in certain varieties or flavorings․

Additionally, some taquitos may contain traces of egg or fish, depending on the manufacturing process and shared equipment․ It is crucial to carefully review the ingredient list on the packaging to identify potential allergens․ Manufacturers often include “may contain” statements to alert consumers to possible cross-contamination․

Individuals with severe allergies should exercise extreme caution and contact the manufacturer directly for detailed allergen information․ Always prioritize reading the label before consumption to ensure a safe and enjoyable experience․

see operator’s manual mercedes

Understanding Your Mercedes-Benz: A Guide to Operator Manuals

Navigating your Mercedes-Benz requires understanding its intricate systems; therefore, accessing the correct operator’s manual – whether physical or digital – is paramount for optimal vehicle performance and longevity.

Mercedes-Benz operator manuals are comprehensive guides designed to unlock the full potential of your vehicle, spanning models from 1986 to 2020. These manuals evolved alongside the vehicles themselves, beginning as straightforward repair guides and transitioning into detailed user manuals, now often available digitally.

Initially focused on repair procedures – like those for the 722.5 automatic transmission or OM470LA/OM471LA engines – manuals gradually incorporated more user-focused information. Today’s manuals, such as the newly linked “Mercedes Manual,” provide detailed instructions on features, diagnostics, and maintenance.

Whether you possess a physical copy, a PDF download, or access online resources, understanding the manual’s structure and content is crucial. These resources are essential for both routine maintenance and addressing specific issues, ensuring a safe and enjoyable driving experience.

Why Refer to the Operator’s Manual?

Consulting your Mercedes-Benz operator’s manual is vital for maximizing vehicle performance and ensuring safety. It provides detailed insights into specific model features, from engine specifications to complex electrical systems. Understanding warranty periods and coverage, as outlined in the manual, protects your investment.

The manual guides you through scheduled service requirements, helping maintain optimal vehicle condition. It’s also invaluable for diagnosing minor issues and understanding warning lights. Accessing information on the Mercedes-Benz High-Power Charging Network, for example, is simplified with manual guidance.

Furthermore, manuals offer crucial information for specific components, like installation procedures for engine undershields (GLC Series). Whether dealing with a classic W115 Diesel or a modern model, the manual is your primary resource for informed ownership and responsible vehicle care.

Historical Overview of Mercedes-Benz Manuals (1986-2020)

From the W124 era to modern models, Mercedes-Benz manuals evolved, reflecting technological advancements and providing increasingly detailed repair and operational guidance for owners.

Early Manuals (1986-1995) ⎯ W124, W129

During the late 1980s and early 1990s, Mercedes-Benz operator manuals for the W124 and W129 series – iconic models like the E-Class and SL – were characterized by a more concise, technical approach. These manuals, often featuring detailed diagrams and illustrations, focused heavily on mechanical components and routine maintenance procedures.

Information was presented in a straightforward manner, assuming a degree of mechanical aptitude from the owner. While covering essential aspects like fluid checks, filter replacements, and basic troubleshooting, these early manuals lacked the comprehensive, user-friendly format of later editions. They served as vital resources for both owners and independent mechanics, providing a foundational understanding of these sophisticated vehicles.

Repair service manuals were also available, offering even more in-depth technical details for complex repairs. These early documents laid the groundwork for the evolution of Mercedes-Benz’s commitment to providing owners with the knowledge to maintain their vehicles.

Mid-Generation Manuals (1994-2002) ⎯ W140, W202

The mid-1990s to early 2000s saw a shift in Mercedes-Benz operator manuals with the introduction of the W140 (S-Class) and W202 (C-Class) models. These manuals began to incorporate more detailed explanations, catering to a broader audience with varying levels of mechanical experience.

Increased emphasis was placed on the growing complexity of vehicle systems, including early iterations of electronic controls and safety features. Diagrams became more refined, and troubleshooting guides were expanded to address common issues. The W202 manuals, in particular, were widely circulated and often available online as PDF downloads, reflecting the increasing accessibility of information.

These manuals represented a transition towards a more user-centric approach, balancing technical detail with clarity and ease of understanding, preparing owners for the technologically advanced vehicles to come.

Modern Manuals (2002-2020)

From 2002 onwards, Mercedes-Benz operator manuals underwent a significant digital transformation. While physical copies remained available, the focus shifted towards comprehensive online resources and integrated vehicle systems. Manuals for models within this period, like the GLC series, often included supplemental installation guides – such as those for engine undershields – alongside the core owner’s information.

These manuals became increasingly interactive, with searchable databases, video tutorials, and links to online support forums. Diagnostic information, once reserved for technicians, began to appear in a simplified format for informed owners.

The emergence of “Mercedes Manual” – a newly linked user guide – exemplifies this trend, offering a centralized platform for accessing vehicle-specific information. Warranty details and service scheduling were also prominently featured, reflecting a commitment to customer support and long-term vehicle care.

Key Components Covered in Mercedes-Benz Manuals

Mercedes manuals detail crucial components: engine specifications (OM470LA, OM471LA), 722.5 transmission systems, electrical diagnostics, and comprehensive body/chassis information.

Engine Specifications & Maintenance (OM470LA, OM471LA)

Mercedes-Benz operator manuals provide exhaustive details regarding engine specifications for models featuring the OM470LA and OM471LA engines. These sections meticulously outline critical parameters such as displacement, horsepower, torque curves, and compression ratios.

Beyond basic specifications, the manuals delve into essential maintenance procedures. Owners will find detailed instructions for oil changes, filter replacements (air, fuel, and oil), coolant flushing, and spark plug maintenance. Torque specifications for all relevant fasteners are also included, ensuring proper assembly and preventing damage.

Furthermore, the manuals cover diagnostic procedures for common engine issues, assisting owners and technicians in identifying and resolving problems efficiently. Diagrams and illustrations accompany the text, enhancing clarity and understanding. Regular adherence to the recommended maintenance schedule, as outlined in the manual, is crucial for preserving engine performance and extending its lifespan.

Transmission Systems ⎼ The 722.5 Automatic

Mercedes-Benz operator manuals dedicate significant attention to the 722.5 automatic transmission, a cornerstone of many models from the 1980s through the early 2000s. These manuals provide a comprehensive overview of the transmission’s operation, including its hydraulic control system and electronic components.

Detailed sections cover fluid level checks, fluid change intervals, and the proper type of transmission fluid to use – crucial for maintaining optimal performance and preventing premature wear. Diagnostic charts assist in troubleshooting common issues, such as slipping gears or harsh shifting.

The manuals also explain the function of the transmission’s various modes (e.g., Economy, Sport) and provide guidance on selecting the appropriate mode for different driving conditions. Understanding the intricacies of the 722.5, as detailed in the manual, empowers owners to ensure its longevity and smooth operation.

Electrical Systems & Diagnostics

Mercedes-Benz operator manuals offer extensive coverage of the vehicle’s complex electrical systems. These sections detail the location and function of key components like the battery, alternator, starter, and various sensors. Wiring diagrams, though sometimes simplified, provide a visual guide to tracing circuits and identifying potential issues.

The manuals also include diagnostic procedures for common electrical problems, such as faulty lights, malfunctioning power windows, or issues with the central locking system. Instructions on using a multimeter to test voltage and continuity are often included.

Furthermore, information on the vehicle’s electronic control units (ECUs) and their role in managing engine performance and other systems is provided. Understanding these systems, as outlined in the manual, is vital for both routine maintenance and troubleshooting more complex electrical faults.

Body & Chassis Information

Mercedes-Benz operator manuals dedicate sections to the vehicle’s body and chassis, detailing specifications crucial for maintenance and repair. This includes information on body dimensions, weight distribution, and materials used in construction. Details regarding the chassis – suspension components, steering systems, and brake assemblies – are also thoroughly documented.

The manuals often provide guidance on proper tire inflation, wheel alignment, and recommended maintenance intervals for suspension parts. Information on identifying and addressing body corrosion is frequently included, alongside instructions for minor body repairs.

Furthermore, details about the vehicle’s structural components and their impact on safety are outlined. Understanding these aspects, as presented in the manual, is essential for maintaining the vehicle’s integrity and ensuring optimal handling and safety performance.

Accessing Mercedes-Benz Operator Manuals

Locate physical manuals within the glove compartment, or explore digital versions via online resources and the Mercedes Manual platform for convenient access.

Physical Manuals ⎯ Location & Contents

Traditionally, your Mercedes-Benz operator’s manual is found securely nestled within the glove compartment, readily available for immediate reference. These comprehensive guides aren’t simply checklists; they are detailed compendiums of information designed to unlock the full potential of your vehicle. Expect to find sections covering everything from basic operation – lights, wipers, and climate control – to more complex systems like the 722.5 automatic transmission and intricate electrical systems.

Early manuals, particularly those from the W124 and W129 eras (1986-1995), often featured robust binding and detailed diagrams. Later editions, accompanying models like the W140 and W202 (1994-2002), continued this trend, expanding coverage to include emerging technologies. Even for classic models like the W115 Diesel, though often in German, these manuals provide invaluable insight. Contents typically include safety precautions, maintenance schedules, troubleshooting guides, and detailed specifications for components like the OM470LA and OM471LA engines.

Remember to retain your physical manual, as it serves as a crucial resource throughout your ownership experience.

Digital Manuals & Online Resources

In today’s digital age, accessing your Mercedes-Benz operator’s manual extends far beyond the physical guidebook. Mercedes Manual represents a newly linked, user-friendly platform offering convenient access to a wealth of information. These digital resources mirror the content of the printed manuals, providing detailed explanations of vehicle features, maintenance procedures, and troubleshooting tips.

Furthermore, Mercedes-Benz provides extensive online resources, including downloadable PDF versions of manuals for various models, spanning from the classic W202 to the modern GLC Series (including specific installation manuals like the engine undershield). These resources are particularly useful for owners seeking information on specific components, such as the 722.5 transmission or OM470LA engine.

The availability of digital manuals ensures that assistance is always at your fingertips, whether you’re at home or on the road. These resources complement the physical manual, offering a comprehensive support system for your Mercedes-Benz.

Mercedes Manual – Newly Linked User Guides

Mercedes Manual signifies a significant advancement in accessing vehicle information, offering newly linked user guides designed for intuitive navigation and comprehensive support. This platform acts as a central hub, streamlining the process of understanding your Mercedes-Benz’s features and functionalities. Welcome messages greet new users, emphasizing the guide’s purpose: to help you master your vehicle’s capabilities.

These guides aren’t simply digital replicas of printed manuals; they are dynamically linked resources, potentially offering interactive elements and tailored information based on your specific model. The platform aims to provide a seamless experience, mirroring the quality and precision associated with the Mercedes-Benz brand.

Whether you’re a first-time owner or a seasoned enthusiast, Mercedes Manual provides a valuable tool for maximizing your driving experience and ensuring your vehicle remains in peak condition. It’s a modern approach to vehicle ownership support.

Specific Model Series Manuals

Dedicated manuals exist for series like the W115 Diesel (German language), W202, and GLC, including installation guides for components like the engine undershield, aiding owners.

W115 Diesel Manuals (German Language)

For enthusiasts and owners of the classic Mercedes-Benz W115 Diesel, a dedicated operator’s manual is available, though notably, it is published in German. This 68-page PDF document provides crucial insights into the operation and maintenance of these iconic vehicles, often referred to as the “Strich-Acht” (Stroke-Eight) due to their distinct styling.

The manual details specific procedures and technical information relevant to the diesel engines powering the W115 series. While the language barrier may present a challenge for some, it remains an invaluable resource for those seeking authentic, original documentation. Accessing this manual allows owners to delve deeper into the mechanics and intricacies of their W115 Diesel, fostering a greater understanding and appreciation for its engineering. It’s a vital tool for restoration projects and ensuring the continued reliability of these vintage Mercedes-Benz automobiles.

W202 Manuals

Owners of the Mercedes-Benz W202, often recognized as the C-Class from the mid-1990s to early 2000s, can locate dedicated operator’s manuals in PDF format. These manuals serve as comprehensive guides to understanding the vehicle’s features, operation, and maintenance procedures. Available for free download, these resources are incredibly valuable for both new owners and those familiar with the model.

The W202 manuals cover a wide range of topics, from basic controls and instrumentation to more complex systems like the engine, transmission, and electrical components. They provide detailed instructions and diagrams to assist with troubleshooting and routine maintenance tasks. Accessing these manuals empowers owners to take better care of their W202, ensuring its longevity and optimal performance. They represent a direct link to the original manufacturer’s guidance, offering clarity and accuracy for all aspects of vehicle ownership.

GLC Series Manuals (Installation Manuals ⎼ Engine Undershield)

Specific installation manuals, such as those for the engine undershield on the Mercedes-Benz GLC series (models 3246 and 3247), are available as downloadable PDFs. These documents provide detailed, step-by-step instructions for installing this crucial protective component, safeguarding the engine bay and transmission elements from potential damage.

The manuals typically include diagrams illustrating the correct placement of the undershield and the necessary hardware. They are essential for technicians or DIY enthusiasts undertaking this installation. Proper installation ensures optimal protection against road debris and impacts. These resources demonstrate Mercedes-Benz’s commitment to providing comprehensive support for vehicle maintenance and repair, extending beyond the standard operator’s manual to cover specific component installations.

Warranty & Service Information

Mercedes-Benz offers comprehensive warranty coverage, typically 24 months, alongside convenient service scheduling and access to the premium High-Power Charging Network for EV owners.

Warranty Periods & Coverage

Understanding your Mercedes-Benz warranty is crucial for peace of mind. Typically, a new Mercedes-Benz vehicle comes standard with a 24-month/unlimited mileage warranty, covering defects in materials or workmanship. This foundational coverage protects against unexpected repair costs during the initial ownership period.

However, specific warranty terms can vary based on the model year, vehicle type, and any extended warranty packages purchased. Crucially, the operator’s manual details the precise scope of coverage, including what components are included and any limitations that may apply. It’s essential to review this section carefully.

Furthermore, certain components, like wear-and-tear items, may have separate warranty durations. The manual also outlines the process for filing a warranty claim, ensuring a smooth and efficient experience should the need arise. Always retain your service records as proof of maintenance, which can be vital for warranty validation.

Scheduling Service

Maintaining your Mercedes-Benz according to the manufacturer’s recommendations is vital for its longevity and performance. Your operator’s manual provides a detailed service schedule, outlining the necessary maintenance tasks at specific mileage or time intervals. This schedule encompasses everything from oil changes and filter replacements to more complex procedures.

Adhering to this schedule not only ensures optimal vehicle operation but also helps preserve your warranty coverage. The manual will specify the recommended service intervals for various components, allowing you to proactively address potential issues before they escalate.

Mercedes-Benz also offers convenient online tools and dealership services for scheduling maintenance appointments. Refer to your manual for information on accessing these resources. Regular servicing, as outlined in the manual, is an investment in your vehicle’s future, safeguarding its value and reliability.

Mercedes-Benz High-Power Charging Network

For owners of Mercedes-Benz electric vehicles, the High-Power Charging Network provides a premium and convenient charging experience. Your vehicle’s operator manual contains crucial information regarding accessing and utilizing this network effectively. It details how to locate charging stations, initiate charging sessions, and understand the various charging options available.

The manual will also explain the network’s payment methods and any associated fees. Mercedes-Benz is continually expanding its charging infrastructure, offering faster charging speeds and increased accessibility. Understanding the network’s features, as described in your manual, will maximize your EV ownership experience.

Furthermore, the manual may provide details on compatible charging adapters and any specific requirements for utilizing the High-Power Charging Network with your particular model. This network represents a commitment to sustainable mobility, and your manual is the key to unlocking its full potential.

power of seduction pdf

Robert Greene’s exploration delves into the subtle art of influence, analyzing historical figures like Cleopatra and JFK, alongside classic literature examining seduction’s timeless, amoral dynamics.

This work dissects how to captivate, overcome resistance, and wield a potent, often misunderstood, form of power – a skill honed throughout civilizations.

The Historical Context of Seduction

Throughout history, seduction has been a potent force, shaping empires and influencing destinies. From the legendary allure of Cleopatra, who captivated Roman leaders, to the charismatic appeal of John F. Kennedy, its power is undeniable.

Robert Greene’s analysis traces this history, examining how figures throughout time have mastered the art of influence. Ancient texts, like those by Ovid and Casanova, offer timeless insights into the techniques employed. The study of seduction isn’t merely about romantic conquest; it’s about understanding the dynamics of power and control, and how they’ve played out across civilizations.

This historical lens reveals seduction as a fundamental aspect of human interaction, a subtle yet effective means of achieving one’s desires.

Robert Greene and the Study of Seduction

Robert Greene, renowned for his works on strategy and power, brings a unique perspective to the study of seduction. With a background in classical literature, he approaches the subject not as a mere technique, but as a complex interplay of psychology, history, and social dynamics.

His book, The Art of Seduction, builds upon the foundations laid by thinkers like Freud and Kierkegaard, offering a comprehensive framework for understanding and mastering this subtle art. Greene identifies universal principles and archetypes, providing readers with an “indispensable primer” for navigating the game of influence.

He emphasizes that seduction is an amoral force, a timeless game with its own set of rules.

Core Principles of Seduction

Seduction hinges on understanding human psychology, creating desire, and mastering nonverbal cues – a timeless game of influence rooted in strategic manipulation.

Understanding the Psychology of Attraction

Attraction isn’t merely physical; it’s a complex interplay of psychological triggers. Robert Greene’s work emphasizes that people are drawn to what they perceive as missing within themselves, or what represents an idealized version of their desires.

This creates a dynamic where seduction isn’t about direct pursuit, but about subtly embodying qualities that evoke longing and fascination. Understanding insecurities, vulnerabilities, and unconscious needs is paramount.

The power lies in projecting an aura of mystery, offering a glimpse of fulfillment, and skillfully manipulating emotional states to create a compelling, irresistible pull. It’s about tapping into primal desires and unmet emotional needs.

The Nine Seductive Personas

Robert Greene identifies nine distinct archetypes – or “personas” – that embody different approaches to seduction. These aren’t about becoming someone else, but about strategically adopting traits to exploit vulnerabilities and ignite desire.

These personas range from the alluring Siren and dangerous Rake, to the seemingly perfect Ideal Lover and detached Dandy. Mastering these roles allows for adaptability and nuanced control over the seductive process.

Each persona represents a different psychological key, unlocking specific responses and creating a tailored experience for the target, maximizing the potential for captivating influence.

The Nine Seductive Personas – Detailed Breakdown

Greene’s detailed analysis unveils each persona’s strategies, psychological effects, and historical examples, offering a comprehensive guide to mastering the art of captivating others.

The Siren: Mastering the Art of Allure

The Siren embodies irresistible feminine power, captivating through indirectness and a carefully constructed illusion. Robert Greene details how Sirens exploit desires, creating a captivating aura of mystery and unattainability.

They master the art of nonverbal communication – seductive glances, alluring body language – and employ delayed gratification to heighten anticipation. Unlike direct approaches, the Siren’s power lies in suggestion and the projection of fantasies.

This persona doesn’t offer satisfaction; she promises it, drawing victims into a web of longing. Understanding this dynamic is crucial for wielding the Siren’s seductive influence effectively.

The Rake: The Dangerous and Irresistible

The Rake, as outlined by Robert Greene, represents a masculine archetype built on audacity and a disregard for convention. He thrives on risk, projecting an image of dangerous freedom that proves intensely attractive. Unlike the Ideal Lover’s perfection, the Rake embraces flaws, even flaunting them.

His seduction isn’t about promises, but about demonstrating power and control. He’s a master of the dramatic entrance and exit, creating an aura of unpredictability.

The Rake’s appeal stems from offering a taste of rebellion and a thrilling escape from societal norms, captivating those yearning for excitement.

The Ideal Lover: Creating an Illusion of Perfection

Robert Greene details The Ideal Lover as a persona focused on mirroring desires and fulfilling fantasies. This archetype doesn’t reveal their true self, instead crafting an image of perfection tailored to their target’s deepest longings.

They are attentive listeners, masters of empathy, and skilled at anticipating needs. The illusion is key; it’s about seeming to be everything the other person wants, creating a powerful emotional connection.

This persona thrives on idealized projections, offering a temporary escape into a world of perfect affection and understanding, though ultimately built on artifice.

The Dandy: The Power of Style and Indifference

Robert Greene presents The Dandy as a persona wielding power through impeccable style and cultivated indifference. This archetype isn’t about blatant pursuit, but about radiating an aura of self-sufficiency and refined taste.

They create a captivating contrast – appearing emotionally detached while possessing undeniable allure. Their meticulous appearance and air of superiority pique curiosity and inspire desire in others.

The Dandy’s indifference is a calculated move, suggesting they are above needing affection, making any attention received feel exceptionally valuable.

The Natural: Appearing Effortless and Authentic

Robert Greene describes The Natural as a seductive persona built on seeming effortless and genuine. Unlike calculated strategies, this archetype projects an unstudied charm, appearing free from self-consciousness or manipulation.

They possess a relaxed confidence that disarms others, creating a sense of comfort and trust. This authenticity is incredibly appealing, as people are drawn to those who seem real and unpretentious.

The Natural’s power lies in their ability to make others feel at ease, fostering a connection built on genuine interaction rather than contrived allure.

The Coquette: Teasing and Withholding Affection

Robert Greene identifies The Coquette as a master of delayed gratification, wielding the power of teasing and withholding affection to ignite desire. This persona doesn’t offer easy access, instead creating a tantalizing dance of approach and withdrawal.

By remaining slightly out of reach, The Coquette fuels the target’s imagination and intensifies their longing. This strategy taps into the psychological principle that scarcity increases value, making affection all the more coveted.

It’s a delicate balance, requiring skill to avoid appearing cold or uninterested, but when executed effectively, it’s profoundly seductive.

The Charmer: Social Grace and Disarming Wit

Robert Greene portrays The Charmer as a master of social dynamics, effortlessly navigating interactions with grace and disarming wit; This persona excels at making others feel comfortable and special, creating an immediate connection through genuine-seeming interest.

The Charmer’s wit isn’t about superiority, but about playful engagement, subtly highlighting the target’s positive qualities and shared sensibilities. They possess an uncanny ability to mirror body language and adapt to social cues, fostering rapport.

This creates a sense of ease and trust, lowering defenses and opening the door to deeper connection.

The Charismatic: Commanding Attention and Inspiring Devotion

Robert Greene describes The Charismatic as a figure who radiates self-assurance and possesses an almost magnetic pull. Unlike the Charmer’s subtle approach, the Charismatic commands attention, inspiring devotion through a powerful presence and compelling vision.

They project an air of destiny, making others feel as though they are part of something larger than themselves; This persona often possesses exceptional storytelling abilities, weaving narratives that captivate and ignite the imagination.

Their confidence is infectious, drawing people into their orbit and fostering a sense of unwavering loyalty.

The Star: Projecting an Aura of Mystery and Grandeur

Robert Greene details The Star as a persona built on illusion and distance, radiating an aura of unattainable grandeur. They cultivate an air of mystery, carefully controlling their image and revealing only glimpses of their true selves.

This creates a powerful allure, as people are drawn to what they cannot fully grasp. The Star thrives on admiration and attention, but remains emotionally detached, maintaining a sense of superiority.

Their actions are often dramatic and unconventional, further enhancing their enigmatic appeal and solidifying their captivating presence.

Strategies for Effective Seduction

Greene’s strategies emphasize creating intense desire, mastering nonverbal cues, and employing patience; these elements are crucial for breaking down resistance and establishing control.

Creating Need and Desire

Robert Greene illuminates that seduction isn’t about instant gratification, but a calculated process of building escalating tension and desire within the target. This involves initially concealing your intentions, creating a sense of mystery and intrigue that draws them in.

The key is to subtly demonstrate value – not by overt displays, but through carefully crafted actions and words that hint at your unique qualities.

Furthermore, strategically withholding affection and attention amplifies their longing, transforming you into an object of intense fascination. This carefully orchestrated dance of approach and withdrawal is fundamental to igniting a powerful emotional need.

Mastering Nonverbal Communication

Robert Greene emphasizes that seduction is largely a nonverbal game, where subtle cues and body language speak volumes. Mastering these signals is crucial for creating attraction and influencing perceptions. Maintaining eye contact – not staring, but a confident, lingering gaze – establishes a powerful connection.

Mirroring your target’s body language subtly builds rapport and creates a sense of familiarity.

Controlled touch, delivered at the right moment, can escalate the physical tension. However, it must be done with finesse and sensitivity, respecting boundaries. These nonverbal signals bypass conscious defenses, directly impacting emotional responses.

The Importance of Timing and Patience

Robert Greene stresses that seduction isn’t about immediate conquest; it’s a slow burn requiring meticulous timing and unwavering patience. Rushing the process creates resistance and reveals desperation, instantly diminishing your allure. Observe your target, identify their vulnerabilities, and strategically introduce yourself into their orbit.

Create a sense of anticipation and mystery, slowly revealing layers of your personality.

Avoid overwhelming them with attention; instead, employ calculated withdrawals to heighten their desire. Patience allows you to build a deep connection, fostering trust and ultimately, irresistible attraction.

Advanced Seduction Techniques

Greene details exploiting vulnerabilities through language and storytelling, crafting narratives that resonate with desires and insecurities, ultimately breaking down psychological defenses and fostering enthrallment.

Identifying and Exploiting Vulnerabilities

Robert Greene’s work emphasizes that successful seduction isn’t about overt charm, but a keen understanding of human weaknesses. It requires observing subtle cues – insecurities, unmet needs, and hidden desires – within a target.

This isn’t about malicious manipulation, but recognizing pre-existing vulnerabilities; The skilled seducer then subtly amplifies these feelings, presenting themselves as the solution or the missing piece.

Greene suggests tailoring your approach to each individual, crafting a persona that specifically addresses their weaknesses, offering validation, or fulfilling a longing they haven’t even consciously acknowledged. This requires empathy, observation, and a strategic mindset.

The Role of Language and Storytelling

Robert Greene highlights that language in seduction isn’t about directness, but suggestion and evocative imagery. Skilled seducers employ ambiguity, metaphors, and carefully chosen words to bypass conscious defenses and appeal to the subconscious.

Storytelling is paramount; crafting narratives that resonate with the target’s desires and fantasies. These stories don’t need to be factual, but emotionally compelling, painting a vivid picture of a shared future or a desired experience.

The goal is to create a captivating atmosphere, drawing the target into a world of illusion and possibility, where resistance weakens and susceptibility increases.

Avoiding Common Seduction Mistakes

Greene cautions against overt advances, emphasizing subtlety. Recognizing and resisting manipulative tactics is crucial; genuine connection, not control, fosters lasting allure and avoids damaging outcomes.

The Dangers of Being Too Obvious

Robert Greene highlights that directness in seduction often backfires, destroying the necessary illusion and mystery. An overt display of desire signals desperation, diminishing your perceived value and triggering resistance.

Subtlety is paramount; the art lies in indirect maneuvers, creating a slow burn of attraction. When intentions are transparent, the target feels controlled, losing agency and erecting defenses.

The most effective seducers operate from a position of concealed power, allowing the target to believe they are initiating the connection. This creates a psychological dynamic where desire feels organic and freely given, rather than imposed.

Recognizing and Resisting Manipulation

Robert Greene’s work, while exploring seduction, implicitly warns against its darker side: manipulation. Understanding the tactics – creating need, exploiting vulnerabilities – is crucial for self-protection. Recognizing patterns of control, such as excessive flattery or guilt-tripping, is the first step to resistance.

Maintain emotional detachment and critically assess the seducer’s motives. Trust your instincts; if something feels off, it likely is. Establishing firm boundaries and asserting your autonomy are vital.

Remember, genuine connection is built on mutual respect, not coercion or deception.

The Ethical Considerations of Seduction

Greene’s analysis highlights power dynamics and the necessity of consent; responsible application of seductive techniques demands awareness and respect for another’s agency.

Power Dynamics and Consent

Robert Greene’s work, while dissecting the mechanics of seduction, implicitly raises crucial ethical questions regarding power imbalances. The very act of seeking to influence another inherently involves a degree of control, and understanding this dynamic is paramount.

Genuine connection cannot flourish when built upon manipulation or coercion. Consent must be freely given, informed, and ongoing – never assumed or subtly extracted. Ignoring these principles transforms seduction from an art into a form of exploitation.

Acknowledging vulnerabilities, as Greene details, carries a moral responsibility; exploiting them is unethical. True mastery lies not in domination, but in fostering mutual desire and respect.

Responsible Use of Seductive Techniques

Understanding the principles outlined in Robert Greene’s The Art of Seduction demands a commitment to ethical application. These techniques, while potent, are tools – their impact determined by the wielder’s intentions.

Employing charm, allure, or strategic communication should aim to create genuine connection, not to manipulate or deceive. Self-awareness is crucial; recognizing personal motivations prevents exploitation of others’ vulnerabilities.

Prioritize building rapport and fostering mutual respect. Seduction, responsibly practiced, enhances interactions, while misuse erodes trust and causes harm. Consider the long-term consequences of your actions.

Resources for Further Learning

Robert Greene’s works, including The 48 Laws of Power and The Art of Seduction, offer deep insights. Explore online forums for discussion!

Recommended Books by Robert Greene

Robert Greene offers a compelling library for those seeking to understand influence and manipulation. The Art of Seduction is, of course, essential, providing a historical and psychological dissection of captivating figures and techniques.

However, don’t overlook The 48 Laws of Power; while broader in scope, it lays a crucial foundation for understanding the dynamics at play in seductive interactions.

The 33 Strategies of War can also prove insightful, offering strategic thinking applicable to navigating complex social landscapes. Finally, Mastery explores the dedication and skill required to truly excel – a quality that enhances any attempt at influence.

Online Communities and Forums

While dedicated forums specifically centered on Robert Greene’s The Art of Seduction are somewhat limited, broader communities focused on psychology, social dynamics, and self-improvement often host relevant discussions.

Reddit’s r/seduction, though sometimes controversial, can offer diverse perspectives and real-world experiences. Caution is advised, as quality varies greatly.

Exploring platforms like Quora, searching for keywords related to the book or its concepts, can yield insightful answers and analyses. Furthermore, Goodreads provides book-specific discussion groups where readers share interpretations and critiques.

bianchi size guide

Bianchi Size Guide: A Comprehensive Overview (Updated February 15, 2026)

Navigating Bianchi sizing requires understanding varied bike types—mountain, road, and junior—with specific measurements like inches, centimeters, and wheel diameter for optimal fit.

Bianchi, a legendary Italian cycling brand, offers a diverse range of bicycles, each requiring a unique approach to sizing. Finding the correct size is paramount for comfort, efficiency, and overall riding enjoyment. This guide provides a comprehensive overview of Bianchi’s sizing methodologies, covering mountain bikes, road bikes, and children’s models.

Understanding that a ‘one-size-fits-all’ approach doesn’t exist is crucial. Factors like rider height, inseam, arm length, and flexibility all influence the ideal frame size. Bianchi utilizes both traditional sizing conventions (Italian, European, US) and incorporates modern geometry considerations. We’ll delve into key measurements like standover height and reach, and explore how Bianchi’s specific technologies impact fit, ensuring you select a bike perfectly tailored to your individual needs.

Understanding Bianchi Bike Types & Sizing Differences

Bianchi’s sizing varies significantly between bike types, reflecting their distinct geometries and intended uses. Mountain bikes are typically sized in inches, prioritizing standover clearance and maneuverability, while road bikes utilize centimeters, focusing on reach and stack for aerodynamic efficiency and endurance. Junior bikes are sized by wheel diameter, aligning with a child’s height and developmental stage.

Road bikes like the Oltre RC and Sprint demand precise sizing for optimal performance, often requiring professional bike fitting. Mountain bike sizing is more forgiving, but still crucial for control. Bianchi’s Eros models, blending road and gravel characteristics, present a unique sizing consideration. Understanding these differences is key to selecting the right Bianchi for your riding style and terrain.

Mountain Bike Size Guide

Bianchi mountain bikes cater to diverse riders with a range of frame sizes, typically from 15 to 21 inches. Selecting the correct size ensures optimal control, comfort, and efficiency on trails. Rider height is the primary factor, but inseam length and riding style also play crucial roles.

A smaller frame enhances maneuverability, ideal for technical terrain, while a larger frame provides stability at higher speeds. Consider your experience level and preferred riding position. Proper sizing minimizes the risk of injury and maximizes performance. Always prioritize a comfortable reach to the handlebars and sufficient standover clearance.

Bianchi Mountain Bike Sizes (Inches)

Bianchi offers a spectrum of mountain bike sizes, generally ranging from 15 inches up to 21 inches. These sizes correspond to different rider heights and body proportions, ensuring a tailored fit for various terrains and riding styles. A 15-inch frame typically suits riders around 5’2” to 5’5”, while a 17-inch frame fits those between 5’5” and 5’8”.

Moving up, 19-inch frames accommodate riders from 5’8” to 5’11”, and 21-inch frames are designed for individuals exceeding 5’11”. It’s crucial to remember these are guidelines; individual preferences and body geometry can influence the ideal size. Always consider a professional bike fit for precise sizing.

Rider Height & Mountain Bike Size Correlation

Establishing a strong correlation between rider height and appropriate mountain bike size is fundamental for comfort and control. Generally, riders between 5’2” and 5’5” often find a 15-inch frame suitable, while those ranging from 5’5” to 5’8” typically benefit from a 17-inch size.

For individuals between 5’8” and 5’11”, a 19-inch frame is often ideal, and those taller than 5’11” usually require a 21-inch frame. However, leg length and torso proportions significantly impact fit. A professional bike fit considers these factors, ensuring optimal reach and standover clearance for a confident riding experience.

Road Bike Size Guide

Bianchi road bikes utilize a centimeter-based sizing system, differing from mountain bike inch measurements. Selecting the correct size is crucial for efficiency and endurance. Frames range from 47cm to 61cm, catering to diverse rider heights and body proportions.

Understanding the nuances of Italian, European, and US sizing conventions is essential, as conversions can be confusing. A 53cm frame often suits riders around 5’8” to 5’10”, while a 56cm frame typically fits those between 5’10” and 6’0”. Precise fit requires considering reach, stack, and individual flexibility, often best determined through a professional bike fitting.

Bianchi Road Bike Sizes (Centimeters)

Bianchi road bike sizing is primarily expressed in centimeters, offering a more granular fit compared to traditional inch measurements. Available sizes typically range from 47cm to 59cm, with some models extending to 61cm to accommodate a wider spectrum of riders.

A 47cm frame generally suits riders around 165-170cm (5’5” – 5’7”), while 50cm fits those approximately 170-175cm (5’7” – 5’9”). Progressively, 53cm, 55cm, 57cm, and 59cm cater to heights of 175-180cm, 180-185cm, 185-190cm, and over 190cm respectively. These are guidelines; individual proportions and flexibility significantly influence optimal size selection.

Converting Road Bike Sizes (Italian, European, US)

Bianchi, steeped in Italian cycling tradition, often presents sizing differently across markets, necessitating conversions for clarity. Italian sizing frequently aligns directly with centimeter measurements (e.g., 54cm). European sizing often mirrors Italian standards, though some brands may deviate slightly.

US sizing, however, typically uses Small, Medium, Large, and Extra Large. Roughly, a 54cm Bianchi equates to a US Medium. A 56cm corresponds to a Large, and 58cm to an Extra Large. It’s crucial to consult specific Bianchi size charts, as variations exist between models. Always prioritize centimeter measurements for the most accurate fit, avoiding generalizations.

Children’s Bike Size Guide

Selecting the correct Bianchi junior bike ensures a safe and enjoyable riding experience for young cyclists. Sizing primarily revolves around wheel diameter, with common sizes including 16-inch and 20-inch wheels. A 16-inch wheel is generally suitable for children aged 4-7, while 20-inch bikes cater to ages 6-9, though height is a more reliable indicator.

Consider the child’s inseam and overall height. Bianchi Junior XR16 models, for example, are designed for younger riders. Proper fit allows for comfortable reach to the handlebars and easy ground contact; Prioritize a bike that allows growth, but isn’t excessively large.

Bianchi Junior Bike Sizes (Wheel Diameter)

Bianchi Junior Bike Sizes (Inches)

Bianchi offers a range of junior bikes categorized primarily by wheel diameter, influencing bike size and rider suitability; The most common sizes include 16-inch, 20-inch, and 24-inch wheels. A 16-inch wheel is typically the starting point for young riders, ideal for developing balance and coordination. Moving up, 20-inch wheels provide increased stability and speed for growing children.

Larger 24-inch wheels are suited for older or taller kids, bridging the gap to adult-sized bikes. Bianchi’s Junior XR models exemplify this sizing approach, offering age-appropriate geometry and components. Selecting the correct wheel size is crucial for a comfortable and confident ride.

Age & Height Recommendations for Bianchi Junior Bikes

Determining the right Bianchi junior bike involves considering both age and height, though height is the more critical factor. Generally, children aged 4-7 years (approximately 95-115cm tall) fit 16-inch wheel bikes. Riders aged 7-10 years (115-135cm) typically transition to 20-inch wheels.

For children aged 10-12 years (135-150cm), a 24-inch wheel bike is usually appropriate. These are general guidelines; individual variations exist. Always prioritize a comfortable standover height, ensuring a few centimeters of clearance between the top tube and the child’s inseam for safety and control.

Key Measurements for Accurate Sizing

Achieving a proper bike fit with a Bianchi requires understanding key measurements beyond just frame size. Standover height—the clearance between the top tube and your inseam—is crucial for safety and control, allowing for comfortable maneuvering. Top tube length and reach significantly impact riding posture and handling.

Reach, the horizontal distance from the bottom bracket to the head tube, influences how stretched out you are on the bike. These measurements, combined with seat height and handlebar position, determine overall comfort and efficiency. Accurate sizing ensures optimal power transfer and reduces the risk of injury.

Standover Height Explained

Standover height is a vital measurement for Bianchi bike sizing, representing the distance between the top tube and your inseam while standing over the bike. Adequate clearance—typically 1-2 inches for road bikes and 2-4 inches for mountain bikes—is essential for safety, preventing accidental contact during dismounts or challenging terrain.

Incorrect standover height can lead to discomfort and control issues. Measuring accurately involves wearing cycling shoes and standing with both feet flat on the ground. Prioritizing sufficient clearance ensures confident handling and prevents potential injuries, contributing to a more enjoyable and secure riding experience with your Bianchi.

Top Tube Length & Reach Considerations

Top tube length and reach are crucial Bianchi sizing factors influencing rider posture and control. Top tube length, the horizontal distance from the head tube to the seat tube, impacts overall bike fit and handling. Reach, measuring from the bottom bracket to the head tube, determines the extension to the handlebars.

Shorter top tubes and reach suit more upright, comfortable positions, while longer dimensions promote aggressive, aerodynamic stances. Considering arm length and flexibility is vital for selecting the correct size. A professional bike fit can precisely determine optimal measurements, ensuring efficient power transfer and minimizing strain during rides on your Bianchi.

Bianchi Specific Sizing Technologies

Bianchi employs unique frame geometry and carbon fiber layup techniques impacting bike fit and performance. Their approach prioritizes a balance between responsiveness and comfort, tailoring designs to specific bike types – road, mountain, or e-bikes. Frame geometry influences handling characteristics, while carbon fiber layup affects stiffness and compliance.

Bianchi’s engineering focuses on optimizing power transfer and rider connection. Different carbon fiber compositions are strategically used to enhance ride quality and reduce fatigue. Understanding these technologies is key to selecting a Bianchi that complements your riding style and body type, ensuring a personalized and efficient experience.

Bianchi’s Approach to Frame Geometry

Bianchi’s frame geometry is meticulously designed, varying significantly between models like the Oltre RC, Sprint, and Eros. This approach prioritizes specific riding characteristics – aerodynamic efficiency for the Oltre RC, agility for the Sprint, and endurance comfort for the Eros. Key elements include head tube angle, seat tube angle, and chainstay length, all influencing handling and stability.

Bianchi aims for a balance between responsiveness and stability, considering rider position and intended use. Their geometries are often described as progressive, incorporating modern design principles for enhanced performance. Understanding these nuances is crucial for selecting a frame that aligns with your riding style and preferences.

Impact of Bianchi’s Carbon Fiber Layup on Fit

Bianchi’s carbon fiber layup significantly influences a bike’s ride quality and, consequently, fit perception. Different carbon fiber arrangements affect frame stiffness, compliance, and vibration absorption. A stiffer layup, common in models like the Oltre RC, demands a precise fit for optimal power transfer and control.

More compliant layups, found in endurance bikes, offer a more forgiving fit, accommodating a wider range of rider positions. Bianchi strategically manipulates carbon fiber orientation to tailor each frame’s characteristics. This impacts how a bike feels and how well it conforms to a rider’s body, making a professional bike fit even more critical;

Sizing for Bianchi Oltre RC Models

The Bianchi Oltre RC, a performance-focused road bike, requires meticulous sizing due to its aggressive geometry. Size charts typically range from 47cm to 59cm, correlating with rider height and inseam measurements. However, individual flexibility and riding style are crucial considerations.

Riders should prioritize reach and stack measurements for a comfortable yet aerodynamic position. Consulting the Oltre RC size chart, alongside a professional bike fit, is highly recommended. Component choices, like stem length and handlebar width, further refine the fit. A proper fit maximizes power transfer and minimizes discomfort during long rides.

Oltre RC Size Chart & Rider Profile

The Bianchi Oltre RC size chart typically aligns sizes with rider height and inseam, but consider individual body proportions. A rider profile for a 55cm Oltre RC generally falls between 175cm ⎼ 183cm (5’9” ⎻ 6’0”) in height, with an inseam around 81cm ⎻ 86cm.

However, flexibility and preferred riding position significantly impact the ideal size. More flexible riders might size down for a more aggressive posture, while those prioritizing comfort may opt for a larger frame. Professional bike fitting is crucial to determine the optimal size and component selection for maximizing performance and comfort on the Oltre RC.

Sizing for Bianchi Sprint Models

Bianchi Sprint models cater to performance-oriented riders, demanding precise sizing for optimal handling and power transfer. The size chart correlates frame size (400mm-61cm) with crank arm length (165mm-175mm), crucial for efficient pedaling. A 55cm Sprint typically pairs with a 172.5mm crank arm, while a 61cm frame utilizes a 175mm crank arm.

Beyond frame size, consider reach and stack measurements. Component selection, like stem length, further fine-tunes the fit. Prioritizing a professional bike fit ensures the Bianchi Sprint perfectly complements your body geometry and riding style, maximizing both comfort and performance.

Sprint Model Size Chart & Component Lengths (Crank Arms)

The Bianchi Sprint size chart links frame dimensions to appropriate crank arm lengths for optimized pedaling efficiency. A 400mm frame typically requires 165mm crank arms, while 44/53cm frames utilize 170mm. For 55/59cm frames, 172.5mm crank arms are recommended, and the largest 61cm frame size pairs with 175mm crank arms.

These recommendations are starting points; individual biomechanics may necessitate slight adjustments. Shimano SM-BB72-41B press-fit bottom brackets are standard. Correct crank arm length minimizes knee strain and maximizes power output, crucial for the Sprint’s performance focus. A professional bike fit is highly recommended.

Sizing for Bianchi Eros Models

Bianchi Eros models cater to a range of riders, blending classic steel frames with modern components. Frame sizes typically span 400mm-44/53cm, 420mm-55/59cm, and 440mm-61cm, accommodating diverse body types. These bikes feature a carbon frame material, offering a balance of comfort and responsiveness.

The Eros boasts a 22-speed drivetrain, providing versatility for varied terrain. Selecting the correct size ensures optimal handling and comfort. Consider a professional bike fit to fine-tune the setup, maximizing efficiency and enjoyment. The Eros is a great choice for endurance riding and recreational cyclists.

Eros Model Size Ranges & Frame Materials

The Bianchi Eros range utilizes primarily steel frames, offering a classic ride feel and durability. Size options generally include 400mm (44/53cm), 420mm (55/59cm), and 440mm (61cm), catering to a broad spectrum of rider heights. These measurements refer to the seat tube length, a key indicator of frame size.

While steel is the dominant material, some Eros variations may incorporate aluminum components for weight reduction. Selecting the appropriate size is crucial for comfort and efficiency. A properly fitted Eros will enhance your riding experience, providing optimal power transfer and control. Consider your inseam and reach when choosing a size.

Tools & Resources for Finding Your Bianchi Size

Determining your ideal Bianchi size doesn’t have to be a guessing game! Several online Bianchi size calculators are available, utilizing your height and inseam to suggest appropriate frame sizes. However, these are merely starting points. For a truly accurate fit, a professional bike fit is invaluable.

A qualified bike fitter will assess your body geometry, riding style, and flexibility, making precise adjustments to saddle height, handlebar reach, and other critical parameters. This personalized approach ensures optimal comfort, efficiency, and injury prevention. Don’t underestimate the benefits of expert guidance when investing in a Bianchi.

Online Bianchi Size Calculators

Bianchi doesn’t currently offer a dedicated, official size calculator on their website as of February 15, 2026. However, numerous third-party bicycle size calculators can provide a reasonable estimate based on your height and inseam measurements. These tools generally ask for your physical dimensions and then suggest a corresponding Bianchi frame size range.

Remember that these calculators are approximations. Factors like flexibility, riding style, and preferred bike handling characteristics aren’t accounted for. Use the calculator results as a starting point, but prioritize a professional bike fit for the most accurate and comfortable sizing. Always cross-reference with the size charts provided for specific Bianchi models.

Professional Bike Fit Importance

A professional bike fit is crucial for maximizing comfort, efficiency, and preventing injuries when riding a Bianchi. Unlike online calculators, a fit session considers your unique anatomy, flexibility, riding style, and any physical limitations. Experienced fitters use specialized tools and motion capture technology to analyze your position.

They’ll adjust saddle height, handlebar reach, and cleat position to optimize power transfer and reduce strain. A proper fit ensures the bike complements your body, not the other way around. Investing in a professional fit, especially for higher-end models like the Oltre RC or Sprint, is highly recommended for a truly personalized riding experience.

Frequently Asked Questions (FAQs) About Bianchi Sizing

Q: Can I use a standard size chart for all Bianchi bikes? A: No, sizing varies between mountain, road, and junior models. Refer to the specific guide for each bike type.

Q: What if I fall between sizes? A: It’s generally better to size down, especially on road bikes, and adjust with stem length. A professional bike fit can refine the choice.

Q: Do Bianchi frames run true to size? A: Bianchi’s sizing is generally consistent with European standards, but individual models may have unique geometries. Always consult the specific size chart.

Where to Buy & Get Fitted for a Bianchi Bike

Authorized Bianchi Dealers: Locate a local retailer through Bianchi’s official website for genuine products and expert advice. These dealers often provide professional bike fitting services.

Online Retailers: Several online stores, like Turbosport, offer Bianchi bikes with varying shipping options. However, a physical fitting is highly recommended before purchase.

Professional Bike Fit: Investing in a professional bike fit ensures optimal comfort, efficiency, and injury prevention. Seek qualified fitters experienced with Bianchi geometries.

brother p-touch manual pdf

Brother P-Touch Manual PDF: A Comprehensive Guide

Today, February 15, 2026, accessing a Brother P-Touch manual PDF offers detailed support, including a PT-2700 guide with 82 pages and 5.48MB size.

Understanding Brother P-Touch Label Makers

Brother P-Touch label makers are renowned for their versatility and reliability, catering to diverse labeling needs – from home organization to professional applications. These devices utilize thermal transfer technology, creating durable, legible labels. Understanding the core components and functionalities, as detailed within the Brother P-Touch manual PDF, is crucial for optimal performance.

The manual elucidates the significance of Bit/Word device types and their respective ranges (e.g., M_Bit, Auxiliary Relays, Input Relays), impacting memory allocation and data handling. Furthermore, it provides a comprehensive parts reference list for models like the P-touch 65/60, breaking down the print mechanism, covers, and packing materials. Proper needle threading, a frequently referenced topic, ensures consistent label production.

Essentially, the manual serves as a foundational resource for maximizing the capabilities of your Brother P-Touch, enabling users to troubleshoot issues and maintain their device effectively.

Locating the Correct PDF Manual

Finding the precise Brother P-Touch manual PDF is paramount for effective troubleshooting and operation. Begin by identifying your specific device’s model number, typically found on the label maker itself or its original packaging. This number is critical for downloading the correct documentation.

Several online resources offer manuals. A direct search using the model number (e.g., “Brother PT-2700 manual PDF”) often yields results. The availability of manuals varies by model; some, like the PT-2700, have readily accessible 82-page PDFs (5.48MB in size, with 53 downloads as of today, February 15, 2026).

If direct downloads prove difficult, explore alternative support channels (detailed later). Ensure the downloaded PDF is legitimate and complete to access all necessary information regarding your Brother P-Touch label maker.

Popular Brother P-Touch Models & Manual Availability

Brother P-Touch label makers come in various models, each potentially requiring a specific manual PDF. The PT-2700 is a frequently sought-after model, with its 82-page manual readily available online (5.48MB file size, 53 downloads as of February 15, 2026).

The P-touch 65/60 series also has dedicated resources, including a parts reference list detailing the Print Mechanism, Covers, and Packing Materials. Availability for other models may vary, necessitating a targeted search using the precise model number.

Accessing these manuals is crucial for understanding features like threading the label maker (specifically the needle threading process) and deciphering Bit/Word Device Types & Ranges. Consistent access to these resources ensures optimal device performance and longevity.

Brother PT-2700 Manual PDF

The Brother PT-2700 Manual PDF is a comprehensive 82-page document, weighing in at 5.48MB, and has been downloaded 53 times as of February 15, 2026. This resource is invaluable for PT-2700 users seeking detailed operational guidance and troubleshooting assistance.

Within the manual, users will find instructions covering essential functions, including proper label threading techniques – specifically, how to thread both the left and right needles correctly, avoiding the thread guide for the left needle after threading. It also details the intricacies of Bit/Word Device Types, outlining ranges for M_Bit (0-1023f), Auxiliary Relays (0-511f), and Input Relays (0-511f).

This PDF serves as a primary reference for maximizing the PT-2700’s capabilities and maintaining its functionality.

Brother P-Touch 65/60 Model Parts Reference List

This document functions as a crucial parts reference list specifically designed for the Brother P-Touch 65/60 models. It’s meticulously organized into three distinct sections, providing a detailed breakdown of the label maker’s components for repair, maintenance, and identification purposes.

The three sections cover the Print Mechanism, detailing the inner workings of label creation; Covers, outlining the external casing and protective elements; and Packing Materials, listing components included with the original product. This structured approach allows users to quickly locate specific parts and understand their function within the overall system.

Understanding these components is vital for effective troubleshooting and ensuring the longevity of your P-touch 65/60 label maker. The list aids in accurate parts ordering and informed repairs.

Downloading and Viewing the PDF Manual

Accessing the Brother P-Touch manual in PDF format is straightforward, offering a convenient way to troubleshoot and understand your device. Typically, these manuals are available directly from the Brother support website or through various online resources. Once downloaded, viewing requires a PDF reader, such as Adobe Acrobat Reader, which is readily available for free.

The PDF format ensures the manual retains its original formatting, including diagrams and detailed instructions, regardless of your operating system. This allows for easy navigation and searching for specific information. Ensure a stable internet connection during the download process to prevent interruptions.

Having the manual digitally accessible means you can quickly reference it whenever needed, eliminating the need for a physical copy and promoting efficient problem-solving.

Key Features Explained in the Manual

The Brother P-Touch manual PDF comprehensively details crucial functionalities. It provides step-by-step guidance on threading the label maker, specifically addressing both left and right needle procedures, ensuring correct tape insertion for optimal print quality. Furthermore, the manual clarifies the intricacies of Bit/Word Device Types & Ranges, explaining formats like M_Bit, A, and E, alongside their respective ranges (0-1023f, 0-511f).

Understanding these device types is vital for advanced customization and utilizing the full potential of your label maker. The manual also breaks down the function of Memories and Auxiliary/Input Relays, offering insights into device memory management and input signal processing.

These explanations empower users to effectively configure and troubleshoot their P-Touch devices.

Threading the Label Maker (Needle Threading)

Proper needle threading is fundamental for successful label creation with your Brother P-Touch. The manual PDF provides detailed instructions, emphasizing a consistent approach for both the left and right needles. Begin by carefully guiding the thread through the designated entry points, ensuring it smoothly passes through all guides.

Crucially, the manual stresses that after threading the right needle, the left needle should be threaded in the same manner. However, a key distinction is to avoid passing the thread through the thread guide positioned above the needle.

This precise technique prevents jams and guarantees clean, reliable printing. Following these steps, as outlined in the P-Touch manual, will ensure optimal performance and longevity of your device.

Understanding Bit/Word Device Types & Ranges

The Brother P-Touch manual PDF details various Bit/Word device types crucial for advanced label customization. These types – including M_Bit, Auxiliary Relays, and Input Relays – are defined by specific formats and ranges, impacting how data is processed and displayed on your labels.

For instance, the ‘B’ type, representing M_Bit, utilizes a DDDDh format with a range of 0 to 1023f, designated for memories. Similarly, ‘B’ type ‘A’ employs a DDDh format, spanning 0 to 511f, for auxiliary relays. Input relays also utilize the ‘B’ type ‘E’ with the same DDDh format and range.

Understanding these distinctions, as clearly outlined in the manual, allows users to effectively utilize the device’s capabilities and tailor labels to specific application requirements. Proper configuration ensures accurate data representation.

Printer Driver Installation Instructions

The Brother P-Touch manual PDF provides a straightforward, seven-step process for installing the necessary printer driver. This ensures seamless communication between your computer and the label maker, enabling efficient label creation and printing.

The instructions begin with selecting the appropriate print monitor, followed by carefully entering the tab and company name. Subsequent steps involve selecting “Next” to proceed through the installation wizard. The manual emphasizes the importance of following each step precisely to avoid potential compatibility issues.

Detailed screenshots and clear explanations within the PDF guide users through each stage, even those with limited technical expertise. Successful driver installation is fundamental for unlocking the full functionality of your Brother P-Touch device.

Troubleshooting Common Issues (Referencing the Manual)

The Brother P-Touch manual PDF serves as an invaluable resource for resolving frequently encountered problems. It systematically addresses issues ranging from printing errors to connectivity challenges, offering clear, step-by-step solutions.

Common troubleshooting areas covered include label jams, poor print quality, and difficulties establishing a connection with your computer. The manual details how to correctly thread the label maker – specifically, the left needle mirroring the right – a frequent source of user error;

Furthermore, the PDF provides guidance on understanding and interpreting error messages displayed on the device. By referencing the manual, users can often diagnose and rectify issues independently, minimizing downtime and maximizing productivity with their Brother P-Touch.

Memory and Relay Information (Manual Details)

The Brother P-Touch manual PDF comprehensively details the device’s memory and relay functionalities, crucial for advanced users and customized label creation. It outlines specific device type formats, including Bit/Word configurations, and their corresponding ranges.

Specifically, the manual defines M_Bit (DDDdh) with a range of 0-1023f for memories, while Auxiliary Relays and Input Relays, both designated as ‘E’ and ‘A’ respectively (DDDdh), operate within a 0-511f range. These details are vital for programming and utilizing the label maker’s full potential.

Understanding these memory and relay parameters, as explained in the PDF, allows for precise control over label output and integration with other systems. The manual provides a technical foundation for optimizing label creation processes and troubleshooting complex configurations.

Using the Manual for Parts Identification

The Brother P-Touch manual PDF serves as an invaluable resource for identifying specific components within your label maker. Detailed parts reference lists are included, particularly for popular models like the P-touch 65/60. These lists are segmented into three key sections: the Print Mechanism, Covers, and Packing Materials.

This structured approach allows for quick and accurate identification of any part requiring replacement or maintenance. The manual provides visual aids and clear labeling, simplifying the process even for those unfamiliar with the internal workings of the device. Knowing how to pinpoint specific parts saves time and reduces the risk of ordering incorrect replacements.

Furthermore, the PDF’s detailed diagrams and descriptions ensure users can confidently disassemble and reassemble their Brother P-Touch, facilitating repairs and extending the device’s lifespan.

Manual Sections: Print Mechanism, Covers, Packing Materials

The Brother P-Touch manual PDF is logically organized to facilitate easy navigation and information retrieval. A significant portion details the Print Mechanism, offering in-depth explanations and diagrams of the core components responsible for label creation. This section is crucial for understanding the printing process and troubleshooting related issues.

Separate sections are dedicated to Covers, outlining the various external housings and protective elements of the device. Finally, the Packing Materials section, while seemingly minor, can be helpful for understanding original packaging and safe transportation of the label maker.

The P-touch 65/60 model’s parts reference list specifically highlights these three areas, providing a comprehensive breakdown of each component. This structured format ensures users can quickly locate information relevant to their specific needs, whether it’s repair, maintenance, or simply understanding the device’s construction.

Finding Your Device Model Number

Locating your Brother P-Touch device’s model number is the first, and most crucial, step in accessing the correct manual PDF and support resources; This unique identifier ensures you download documentation specifically tailored to your machine, preventing compatibility issues and inaccurate instructions.

The model number isn’t always immediately obvious. Typically, it’s printed directly on the device itself. Carefully inspect the base, back panel, or inside the battery compartment. Alternatively, the model number is prominently displayed on the original packaging – the box your P-Touch came in.

Without the correct model number, finding the appropriate manual PDF becomes significantly more difficult. Remember to note it down accurately, including any letters or numbers, to streamline the search process and guarantee access to the right information for your specific Brother P-Touch label maker.

Alternative Resources for Support

While the Brother P-Touch manual PDF is a primary resource, several alternative avenues offer support for your label maker. Marketto provides contact options, including access via Telegram and e-mail, offering a direct line to assistance when you encounter issues beyond the scope of the manual.

Online forums and communities dedicated to Brother P-Touch devices can be invaluable. These platforms allow you to connect with other users, share experiences, and find solutions to common problems. Searching online for specific error messages or issues often yields helpful results from fellow enthusiasts.

Brother’s official website also features a comprehensive support section, including FAQs, troubleshooting guides, and downloadable software updates. Don’t hesitate to explore these resources for additional assistance beyond the manual PDF.

Marketto & Contact Information

For supplementary support beyond the Brother P-Touch manual PDF, Marketto emerges as a valuable contact point. This resource facilitates direct communication, offering assistance when the manual’s details aren’t sufficient. Accessing Marketto is conveniently achieved through popular messaging platforms like Telegram, enabling quick queries and responses.

Furthermore, Marketto provides support via e-mail, allowing for more detailed explanations and the potential inclusion of supporting documentation, such as screenshots of error messages or device configurations; This multi-channel approach ensures users can choose the communication method that best suits their needs.

While the manual PDF remains a core resource, Marketto bridges the gap, offering personalized assistance and a direct connection to support personnel for a more tailored troubleshooting experience.

Manual Updates and Revisions

Brother P-Touch manual PDFs, while comprehensive, are subject to updates and revisions as models evolve and software is improved. It’s crucial to understand that the document accessed today, February 15, 2026, might not reflect the absolute latest changes implemented by Brother. Manufacturers frequently release revised manuals to address discovered errors, clarify ambiguous instructions, or incorporate new features.

Therefore, regularly checking the official Brother support website for the most current version of your specific P-Touch model’s manual is highly recommended. These updates often include critical information regarding firmware compatibility, driver installations, and troubleshooting steps for newly identified issues.

Staying informed about these revisions ensures optimal performance and prevents potential compatibility problems. Ignoring updates could lead to incorrect operation or missed opportunities to leverage the full capabilities of your P-Touch label maker.

voyager legend bluetooth headset user manual

The Plantronics Voyager Legend is a premium Bluetooth headset designed for mobile professionals‚ offering exceptional clarity and all-day comfort.

This user manual details pairing‚ controls‚ and features‚ ensuring optimal performance with your device‚ including A2DP media streaming capabilities.

What is the Voyager Legend?

The Plantronics Voyager Legend is a sophisticated wireless Bluetooth headset engineered for professionals demanding clear communication and all-day comfort. It’s renowned for its exceptional audio quality‚ utilizing noise-canceling technology to minimize distractions in busy environments.

This headset supports multipoint technology‚ allowing seamless connection to two mobile phones simultaneously. Beyond calls‚ the Voyager Legend offers A2DP support‚ enabling media streaming like music and podcasts. It’s a robust‚ reliable solution designed to enhance productivity and connectivity‚ as detailed within this comprehensive user manual.

Key Features and Benefits

The Voyager Legend boasts several key advantages. Its core strength lies in its superior noise-canceling technology‚ ensuring crystal-clear calls even in noisy surroundings. Multipoint technology allows connection to two phones concurrently‚ streamlining communication.

Furthermore‚ A2DP support enables wireless media streaming for music and podcasts. Wideband audio delivers rich‚ clear voice quality. The headset offers intuitive controls and long-lasting battery life. This manual will guide you through utilizing these features‚ maximizing your experience and productivity with this exceptional Bluetooth device.

Getting Started with Your Voyager Legend

Unboxing your Voyager Legend is simple! This section guides you through the contents of the box‚ charging procedures‚ and the initial power-on sequence.

What’s in the Box?

Upon opening your Plantronics Voyager Legend package‚ you should find several key components ensuring a seamless experience. These include the Voyager Legend Bluetooth headset itself‚ designed for all-day comfort and superior audio quality. A compact USB charging cable is provided for convenient power replenishment‚ allowing you to keep your headset ready for calls.

Additionally‚ you’ll receive a USB-C charging adapter for versatile charging options. The package also contains a quick start guide‚ offering essential instructions for initial setup and operation. Finally‚ a carrying case is included‚ protecting your investment during travel or storage‚ ensuring longevity and portability.

Charging the Headset

To charge your Voyager Legend‚ connect the provided USB charging cable to the headset’s charging port and a powered USB port or the USB-C power adapter. During charging‚ the indicator light will illuminate‚ typically displaying a red or amber color. A full charge typically takes approximately 2.3 hours‚ providing ample talk time and standby duration.

The indicator light will change to green when the headset is fully charged. It’s recommended to fully charge the headset before its initial use. Avoid using damaged charging cables or adapters‚ as they may affect charging efficiency or potentially damage the device.

Powering On and Off

To power on the Voyager Legend‚ press and hold the call control button located on the earpiece for approximately two seconds until the indicator light illuminates and you hear a power-on tone. To power off the headset‚ press and hold the same button for approximately five seconds until the indicator light flashes red and you hear a power-off tone.

The headset will also automatically power off after a period of inactivity to conserve battery life. Ensure the headset is powered on before attempting to pair or connect to a device.

Pairing and Connecting

Establishing a Bluetooth connection is simple with the Voyager Legend. It supports multipoint technology‚ allowing connections to two phones simultaneously for seamless use.

Pairing with a Mobile Phone (First Time)

To initially pair your Voyager Legend‚ ensure the headset is powered off. Press and hold the call control button for seven seconds until the indicator light flashes red and blue. This activates pairing mode.

Next‚ navigate to the Bluetooth settings on your mobile phone and search for available devices. The Voyager Legend should appear in the list. Select it to initiate the pairing process.

If prompted‚ enter the passcode “0000” or confirm the pairing request. Once successfully paired‚ the indicator light will turn solid blue‚ signifying a stable connection. You are now ready to enjoy hands-free calling!

Pairing with a Second Phone (Multipoint Technology)

The Voyager Legend boasts multipoint technology‚ allowing connection to two mobile phones simultaneously. With the headset already paired to one phone‚ power it off. Then‚ repeat the initial pairing process – hold the call button for seven seconds until the light flashes red and blue.

On your second phone‚ access Bluetooth settings and search for available devices. Select “Voyager Legend” when it appears‚ and complete the pairing process as before.

The headset will now be connected to both phones‚ seamlessly switching between calls.

Connecting to Previously Paired Devices

Once paired‚ the Voyager Legend will automatically attempt to connect to previously paired devices when powered on and within range. If automatic connection fails‚ ensure Bluetooth is enabled on the device. If still unsuccessful‚ manually initiate the connection.

On your phone or device‚ navigate to the Bluetooth settings menu. Locate “Voyager Legend” in the list of paired devices and select it to reconnect.

The headset will confirm a successful connection with an audible tone and a solid blue indicator light.

Understanding the Headset Controls

The Voyager Legend features intuitive controls for call management‚ volume adjustment‚ and voice assistant activation‚ providing seamless operation throughout your day.

Call Control Buttons

The Voyager Legend utilizes easily accessible buttons for managing your calls. A dedicated call answer/end button allows you to quickly accept incoming calls or terminate ongoing conversations with a single press. Holding this button typically activates your default voice assistant‚ offering hands-free control.

Furthermore‚ a multifunction button provides additional call control options‚ such as redialing the last number or switching between calls when using the multipoint technology. These buttons are strategically placed for convenient access‚ even while wearing gloves‚ ensuring effortless call management on the go.

Volume Control

Adjusting the volume on your Voyager Legend is straightforward. Dedicated volume control buttons‚ conveniently located on the earpiece‚ allow you to easily increase or decrease the audio level during calls or while streaming media. A simple press of the volume up button raises the sound‚ while pressing the volume down button lowers it.

These buttons offer tactile feedback‚ ensuring precise adjustments even without looking. The headset remembers your last volume setting‚ providing a consistent audio experience each time you use it. Maintaining comfortable listening levels is crucial for prolonged use.

Voice Assistant Activation

Activating your smartphone’s voice assistant – such as Siri‚ Google Assistant‚ or Cortana – is incredibly simple with the Voyager Legend. A dedicated button on the headset allows for one-touch access to these helpful tools. Just a quick press initiates the voice assistant‚ allowing you to make calls‚ send messages‚ or get information hands-free.

This feature enhances convenience and safety‚ especially while driving or multitasking. Ensure your voice assistant is enabled on your paired device for seamless functionality. Enjoy effortless control with just your voice!

Audio Quality and Features

The Voyager Legend delivers superior audio through noise cancellation‚ A2DP support for rich media‚ and wideband technology for crystal-clear call quality.

Noise Cancelling Technology

The Voyager Legend utilizes advanced noise-cancelling technology to minimize disruptive background noise‚ ensuring clear conversations even in challenging environments. This feature effectively reduces wind noise and commotion‚ allowing you to focus on the call at hand. Digital Signal Processing (DSP) actively filters out unwanted sounds‚ enhancing voice clarity for both you and the person on the other end.

This is particularly beneficial in busy offices‚ crowded streets‚ or while commuting. The noise cancellation isn’t just about blocking sound; it’s about prioritizing your voice for a professional and productive call experience.

A2DP Support for Media Streaming

The Voyager Legend supports A2DP (Advanced Audio Distribution Profile) Bluetooth technology‚ enabling you to wirelessly stream media from your smartphone or tablet. Enjoy music‚ podcasts‚ audiobooks‚ or navigation apps directly through your headset‚ providing a versatile audio experience beyond just phone calls.

This feature transforms your headset into a personal entertainment hub. Seamlessly switch between calls and media playback‚ offering convenience and flexibility throughout your day. Ensure A2DP is enabled on your paired device for optimal streaming quality and functionality.

Wideband Audio for Clear Calls

The Voyager Legend utilizes wideband audio technology‚ delivering exceptional voice clarity during your calls. This advanced feature expands the range of frequencies transmitted‚ resulting in richer‚ more natural-sounding conversations. Experience improved speech intelligibility‚ even in noisy environments‚ ensuring you hear and are heard with pristine clarity.

Wideband audio minimizes distortion and enhances vocal nuances‚ creating a more immersive and productive call experience. It’s a key component of the headset’s commitment to professional-grade communication quality.

Troubleshooting Common Issues

Encountering problems? This section provides solutions for frequent issues like power failures‚ pairing difficulties‚ and poor audio quality with your Voyager Legend.

Headset Won’t Power On

If your Voyager Legend fails to power on‚ first ensure it has sufficient charge by connecting it to the provided charging cable for at least 30 minutes. A depleted battery is the most common cause.

If charging doesn’t resolve the issue‚ try a hard reset: while connected to power‚ press and hold the Call/Answer button for 15 seconds. This can sometimes resolve software glitches preventing startup.

Inspect the charging port for any debris or damage. If the headset still doesn’t respond‚ contact Plantronics support for further assistance‚ as it may indicate a hardware malfunction requiring professional repair or replacement.

Unable to Pair the Headset

If you’re experiencing difficulty pairing your Voyager Legend‚ ensure the headset is in pairing mode – press and hold the Call/Answer button until the indicator light flashes red and blue. Confirm Bluetooth is enabled on your mobile device and that it’s in discovery mode.

Remove the Voyager Legend from any previously paired device lists. Sometimes‚ conflicting connections can hinder new pairings. Restart both the headset and your phone. If problems persist‚ try resetting the headset to factory defaults (consult the full manual for instructions).

Poor Audio Quality

Experiencing muffled or distorted audio? First‚ verify the headset is fully charged‚ as low battery can impact performance. Ensure a stable Bluetooth connection – move closer to your paired device and eliminate potential interference sources. Confirm the volume is appropriately adjusted on both the headset and your phone;

The Voyager Legend features noise cancellation; check that it isn’t inadvertently blocking desired audio. Clean the headset’s microphone port to remove any obstructions. If issues continue‚ try re-pairing the device or testing with another phone.

Advanced Features

Unlock the Voyager Legend’s full potential with voice commands‚ Plantronics Hub software for customization‚ and regular firmware updates for optimal performance and features.

Voice Commands

The Voyager Legend offers convenient hands-free control through voice commands. Activate your voice assistant – Siri‚ Google Assistant‚ or others – for tasks like making calls‚ checking battery life‚ or controlling music playback.

Simply press the designated button on the headset to initiate voice recognition. The specific commands supported will vary depending on your connected smartphone and its voice assistant capabilities. Explore your phone’s documentation for a complete list of available voice commands.

Utilizing voice control enhances safety and productivity while on the go‚ allowing you to stay connected without physically interacting with your device.

Plantronics Hub Software

Plantronics Hub is a free‚ downloadable software application designed to enhance your Voyager Legend experience. It provides centralized control over your headset settings‚ including firmware updates‚ audio preferences‚ and call controls.

Through the Hub‚ you can personalize your headset‚ monitor battery levels‚ and access helpful resources like user guides and troubleshooting tips. The software also enables seamless switching between devices when using multipoint technology.

Download Plantronics Hub from the Plantronics website to unlock the full potential of your Voyager Legend.

Firmware Updates

Keeping your Voyager Legend’s firmware up-to-date is crucial for optimal performance and access to the latest features. Plantronics regularly releases firmware updates that improve audio quality‚ enhance Bluetooth connectivity‚ and address potential issues.

You can easily update your headset’s firmware using the Plantronics Hub software. The Hub will automatically notify you when updates are available and guide you through the installation process.

Ensure your headset is sufficiently charged and connected to your computer during the update to prevent interruptions.

Maintaining Your Voyager Legend

Regular cleaning with a soft‚ dry cloth will keep your Voyager Legend in excellent condition. Proper storage protects it from damage and ensures longevity.

Cleaning the Headset

To maintain optimal hygiene and performance‚ regularly clean your Voyager Legend headset. Use a soft‚ dry microfiber cloth to gently wipe down the ear cushions‚ headband‚ and microphone boom. Avoid using abrasive cleaners‚ solvents‚ or excessive moisture‚ as these can damage the headset’s components.

For stubborn dirt or grime‚ lightly dampen the cloth with water and mild soap‚ ensuring it’s almost dry before wiping. Pay particular attention to the ear cushions‚ as they accumulate oils and debris. After cleaning‚ thoroughly dry the headset before use or storage to prevent bacterial growth and ensure clear audio quality.

Storage and Care

Proper storage extends the life of your Voyager Legend. When not in use‚ store the headset in a cool‚ dry place‚ away from direct sunlight and extreme temperatures. Avoid storing it in humid environments‚ which can damage internal components. Consider using the provided carrying pouch or a protective case to prevent scratches and dust accumulation.

Do not bend or twist the microphone boom excessively‚ as this can lead to damage. Handle the headset with care‚ avoiding drops or impacts. Regular cleaning‚ as described previously‚ also contributes to long-term care and optimal performance.

Safety Information

Prioritize safety when using the Voyager Legend. Review RF exposure and battery safety guidelines to ensure responsible operation and prevent potential hazards.

RF Exposure Information

To ensure safe usage‚ the Voyager Legend Bluetooth headset operates within established radio frequency (RF) exposure limits. It’s crucial to maintain a minimum distance between your body and the headset during operation.

While the headset’s RF output is low‚ prolonged exposure should be minimized. Avoid direct contact with the antenna during transmission.

Follow all applicable regulations regarding wireless device usage in specific environments‚ such as aircraft or medical facilities. Refer to your local health authorities for further guidance on RF exposure safety.

Battery Safety

The Voyager Legend utilizes a rechargeable lithium-ion battery. To maximize battery life and ensure safety‚ avoid extreme temperatures and direct sunlight exposure.

Only use the provided Plantronics charger to recharge the headset; using incompatible chargers may damage the battery or pose a safety risk.

Do not attempt to disassemble‚ modify‚ or puncture the battery. If the battery appears damaged or swollen‚ discontinue use immediately and contact Plantronics support for proper disposal instructions. Improper handling can lead to fire or injury.

Technical Specifications

The Voyager Legend features Bluetooth version compatibility‚ offering up to nine hours of talk time and a standby duration of ten days‚ weighing just 26 grams.

Bluetooth Version

The Plantronics Voyager Legend utilizes Bluetooth technology for a wireless connection to your smartphone or other compatible devices. Specifically‚ this headset supports Bluetooth versions that ensure a stable and reliable connection within a standard operating range. While the exact Bluetooth version isn’t explicitly detailed in readily available summaries‚ it’s designed for compatibility with a wide array of Bluetooth-enabled devices.

This allows for seamless pairing and connectivity‚ enabling features like multipoint technology – connecting to two phones simultaneously – and A2DP support for media streaming. The Bluetooth implementation prioritizes clear audio and a user-friendly experience.

Talk Time and Standby Time

The Voyager Legend is engineered for extended use‚ offering substantial talk time on a single charge. Users can anticipate up to 7 hours of talk time‚ facilitating all-day conversations without interruption. Furthermore‚ the headset boasts an impressive standby time‚ allowing it to remain connected and ready for calls for up to 600 hours.

These figures ensure the headset is consistently available when needed‚ minimizing the need for frequent charging. Actual performance may vary based on usage patterns‚ Bluetooth connection strength‚ and environmental factors‚ but these specifications represent typical performance.

Weight and Dimensions

The Voyager Legend is designed with user comfort in mind‚ achieving a balance between a lightweight feel and a secure fit. The headset weighs approximately 26 grams (0.92 ounces)‚ making it comfortable for prolonged wear without causing fatigue. Its dimensions are carefully considered for optimal ergonomics.

Specifically‚ the headset measures roughly 165 mm (H) x 150 mm (W) x 48.5 mm (D). These compact dimensions contribute to its portability and discreet appearance‚ ensuring it’s a practical accessory for professionals on the move.

Warranty Information

The Voyager Legend headset comes with a standard warranty covering defects in materials and workmanship. Details on coverage duration and claim procedures are provided below.

Standard Warranty Coverage

Plantronics offers a limited warranty for the Voyager Legend Bluetooth headset‚ protecting against defects in materials and workmanship for a period of one year from the date of purchase. This warranty covers normal use as intended by the manufacturer. Damage resulting from accident‚ misuse‚ abuse‚ or unauthorized modification is explicitly excluded.

The warranty ensures the headset functions correctly under specified operating conditions. Should a defect arise‚ Plantronics will‚ at its discretion‚ repair or replace the faulty product with a new or refurbished unit. This warranty does not cover cosmetic damage or normal wear and tear.

How to Claim Warranty

To initiate a warranty claim for your Voyager Legend headset‚ first contact Plantronics customer support through their official website or designated phone number. You will need to provide proof of purchase‚ including the original date and location of the purchase. A detailed description of the defect or issue experienced with the headset is also required;

Plantronics may request that you return the headset for inspection. If a valid claim is approved‚ Plantronics will either repair or replace the unit‚ at their discretion‚ and return it to you without charge. Shipping costs for returning the defective unit may be the responsibility of the customer.

1 2 3 4