oster air fryer oven instructions

Oster Air Fryer Oven Instructions: A Comprehensive Guide

Welcome! This guide provides detailed instructions for your Oster Air Fryer Oven, ensuring optimal performance and delicious results with every use.

Explore cooking modes, safety precautions, and maintenance tips to maximize your air frying experience, from crispy fries to perfectly baked goods.

Understanding Your Oster Air Fryer Oven

Congratulations on choosing the Oster Air Fryer Oven! This versatile appliance combines convection heating with rapid air circulation to cook food quickly and evenly, using little to no oil. Unlike traditional deep frying, air frying delivers crispy textures with significantly reduced fat content, promoting healthier meals.

Your Oster Air Fryer Oven isn’t just for “frying” – it’s a multi-functional kitchen tool capable of baking, roasting, reheating, and more. Understanding its capabilities unlocks a world of culinary possibilities. The appliance operates by circulating hot air around the food, creating a similar effect to an oven but in a fraction of the time.

This guide will walk you through each feature, ensuring you confidently utilize your oven for a wide range of recipes. Familiarize yourself with the control panel, cooking functions, and included accessories to begin your air frying journey. Proper understanding leads to consistently delicious outcomes!

Unboxing and Initial Setup

Carefully unpack your Oster Air Fryer Oven, ensuring all components are present. You should find the main unit, cooking basket/tray, rack (if included), and this instruction manual. Inspect for any visible damage incurred during shipping; contact customer support immediately if issues are detected.

Before first use, thoroughly wash the cooking basket and any included accessories with warm, soapy water. Rinse and dry completely. Wipe down the interior and exterior of the main unit with a damp cloth – never immerse the unit in water.

Place the air fryer oven on a stable, heat-resistant surface with adequate ventilation. Avoid placing it near flammable materials. A quick “burn-off” cycle (see operating instructions) is recommended to eliminate any manufacturing odors. This involves running the oven empty at a moderate temperature for approximately 15-20 minutes.

Key Components and Their Functions

Understanding the parts of your Oster Air Fryer Oven is crucial for safe and effective operation. The cooking basket (or tray) holds the food and allows for optimal air circulation. The heating element, typically located at the top, generates the heat for cooking. A control panel features buttons or a digital display for setting time and temperature, and selecting cooking modes.

Many models include a removable crumb tray for easy cleaning. Some also have a rotisserie spit or skewers for specialized cooking. The power cord connects the unit to a grounded electrical outlet. Familiarize yourself with the location of these components before use.

The temperature dial or buttons control the cooking heat, while the timer sets the duration. Proper use of these controls ensures perfectly cooked food every time.

Operating Instructions

Let’s begin! This section details how to power on, preheat, and operate your Oster Air Fryer Oven for consistently delicious and perfectly cooked meals.

Powering On and Initial Preheat

Getting Started: Begin by ensuring the air fryer oven is placed on a stable, heat-resistant surface with adequate ventilation around it. Plug the power cord securely into a grounded electrical outlet. The power button is typically located on the front control panel; press it to activate the oven.

Preheating is Key: For optimal cooking results, preheating is highly recommended. Select your desired cooking mode (Air Fry, Bake, Roast, etc.) and set the temperature. Most models have a dedicated preheat function, or you can simply set the timer for 3-5 minutes.

Indicator Lights: During preheating, the oven will display a preheat indicator light or message. Do not open the basket or drawer during this process. Once preheated, an audible tone or visual cue will signal readiness, and you can then proceed with adding your food.

Selecting Cooking Modes

Diverse Options: Your Oster Air Fryer Oven offers a variety of pre-set cooking modes designed for different food types and cooking styles. Common modes include Air Fry, Bake, Roast, Reheat, and sometimes specialized settings like Pizza or Dehydrate.

Air Fry Mode: This mode utilizes rapid air circulation for crispy, golden-brown results with minimal oil. Ideal for fries, chicken wings, and vegetables. Bake Mode: Functions similarly to a conventional oven, perfect for cakes, cookies, and casseroles.

Roast Mode: Designed for larger cuts of meat and vegetables, providing even cooking and browning. Reheat Mode: Gently warms leftovers without making them soggy. To select a mode, simply press the corresponding button on the control panel. Refer to your recipe for the recommended mode and settings.

Adjusting Time and Temperature

Precise Control: Your Oster Air Fryer Oven allows for precise adjustment of both cooking time and temperature, crucial for achieving perfect results. Use the control panel’s buttons – typically labeled “Time” and “Temperature” – to modify these settings.

Temperature Range: Most models offer a temperature range from 180°F to 400°F (82°C to 204°C). Always refer to your recipe for the recommended temperature. Time Settings: Cooking time can usually be adjusted in one-minute increments, with a maximum time limit varying by model.

Monitoring Progress: Regularly check your food during cooking, especially when trying a new recipe. You can pause the cooking process at any time to check for doneness or adjust settings. Remember, accurate time and temperature are key to successful air frying!

Cooking with Your Oster Air Fryer Oven

Delicious Possibilities! Explore a world of culinary creations – from crispy air-fried favorites to perfectly roasted meals and delightful baked treats, effortlessly.

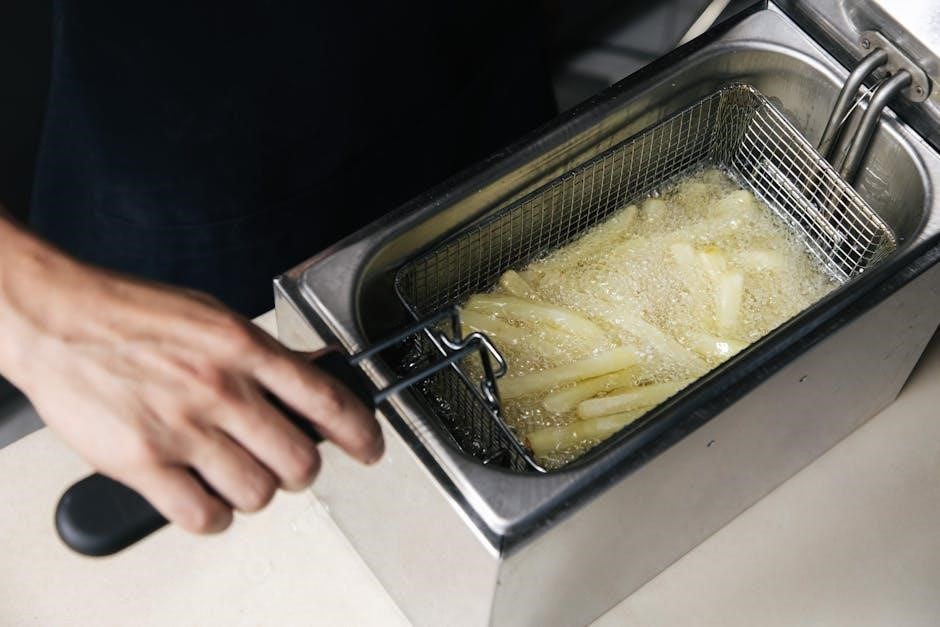
Air Frying: Achieving Crispy Results

Mastering the Crisp! Air frying utilizes rapid air circulation to cook foods with minimal oil, delivering incredibly crispy textures. For optimal results, ensure food is arranged in a single layer within the basket; overcrowding hinders proper air flow and leads to uneven cooking.

Lightly coat food with oil – a spray bottle works best for even distribution – to enhance crispness and browning. Experiment with different seasonings and marinades to customize flavors. Remember to shake the basket halfway through the cooking process to promote even cooking and prevent sticking.

Typical air frying temperatures range from 350°F to 400°F (175°C to 200°C), with cooking times generally shorter than traditional oven methods. Start with recommended recipes and adjust timings based on your desired level of crispness. Enjoy guilt-free indulgence with healthier, crispy delights!

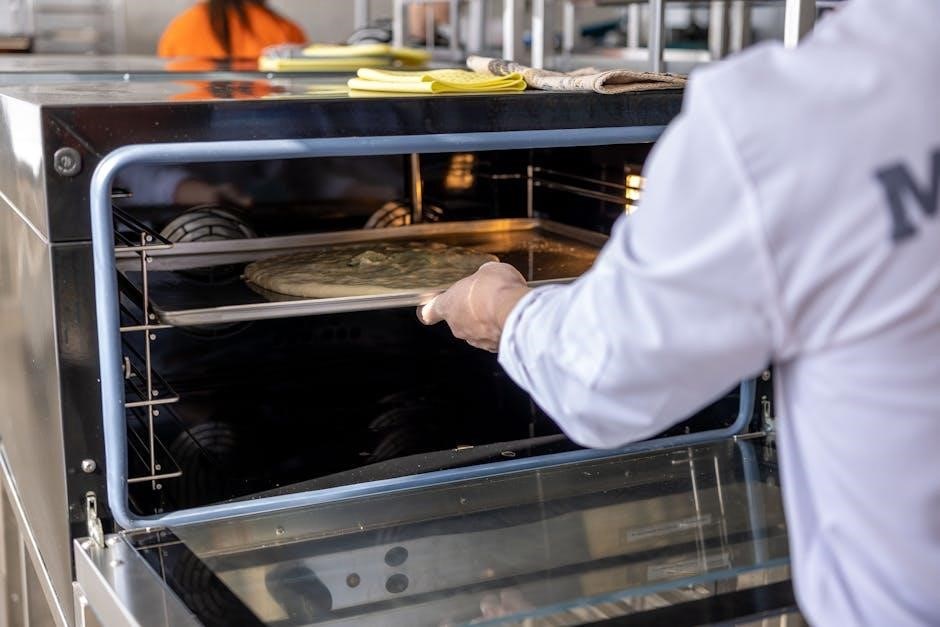
Baking: Cakes, Cookies, and More

Sweet Treats Made Easy! Your Oster Air Fryer Oven excels at baking smaller portions of cakes, cookies, muffins, and other delightful treats. Utilize oven-safe bakeware that fits comfortably within the air fryer basket, leaving sufficient space for air circulation.

Reduce baking temperatures by approximately 25°F (15°C) compared to conventional oven recipes, as air fryers heat up more quickly and efficiently. Monitor baking progress closely, checking for doneness with a toothpick or cake tester.

For even baking, rotate the bakeware halfway through the cooking time. Smaller baking pans are ideal for optimal results. Enjoy perfectly baked goods without heating up your entire kitchen – a convenient and energy-efficient solution for satisfying your sweet tooth!

Roasting: Perfecting Meats and Vegetables

Achieve Roasted Perfection! The Oster Air Fryer Oven is fantastic for roasting meats and vegetables to crispy, flavorful perfection. For meats, consider marinating beforehand to enhance tenderness and taste. Pat the meat dry before roasting to promote browning and a satisfyingly crisp exterior.

Vegetables roast beautifully, becoming tender-crisp with slightly caramelized edges. Toss vegetables with a light coating of oil and your favorite seasonings. Arrange in a single layer within the basket, avoiding overcrowding for even cooking.

Roasting temperatures are generally similar to conventional ovens, but check frequently. Use a meat thermometer to ensure meats reach a safe internal temperature. Enjoy healthier, quicker roasted meals with minimal effort!

Reheating: Reviving Leftovers

Bring Back the Flavor! The Oster Air Fryer Oven excels at reheating leftovers, restoring their original texture and taste far better than a microwave. It’s perfect for pizza, fried chicken, and even baked goods, eliminating sogginess and maintaining crispness.

For best results, preheat the air fryer oven briefly. Arrange food in a single layer in the basket, ensuring adequate space around each piece. Reheating times are typically shorter than initial cooking times – start with a few minutes and check frequently.

Lower temperatures (around 325°F ౼ 350°F) are generally recommended to prevent drying out. Enjoy restaurant-quality reheated meals quickly and easily with your Oster Air Fryer Oven!

Cleaning and Maintenance

Keep it Sparkling! Regular cleaning ensures optimal performance and longevity of your Oster Air Fryer Oven; follow these simple steps for a pristine appliance.

Daily Cleaning Procedures

Essential After Every Use: After each cooking session, always unplug your Oster Air Fryer Oven and allow it to cool completely before beginning any cleaning process. This is crucial for safety and prevents potential damage to the appliance.

Remove the cooking basket, drip pan, and any accessories used during cooking. These components are typically dishwasher-safe, offering a convenient cleaning solution. However, hand washing with warm, soapy water is also effective, especially for delicate items or stubborn food residue.

For the interior of the oven, wipe down the heating element and walls with a soft, damp cloth. Avoid abrasive cleaners or scouring pads, as these can scratch the surface. If there’s baked-on grease, a paste of baking soda and water can gently loosen it. Ensure all surfaces are dry before reassembling and storing your Oster Air Fryer Oven.

Deep Cleaning Your Air Fryer Oven

Monthly Maintenance for Peak Performance: A thorough deep clean should be performed monthly, or more frequently with heavy use, to maintain optimal performance and hygiene. Begin by disassembling all removable parts – the basket, drip pan, racks, and skewers.

Soak these components in warm, soapy water for at least 30 minutes to loosen stubborn grease and food particles. For heavily soiled areas, create a paste of baking soda and water, applying it directly and letting it sit before scrubbing gently.

The oven interior requires careful attention. Use a soft cloth dampened with a mild cleaning solution to wipe down all surfaces, paying close attention to the heating element. Avoid getting water into any vents or electrical components. Ensure everything is completely dry before reassembling.

Troubleshooting Common Issues

Addressing Operational Hiccups: If your Oster Air Fryer Oven isn’t heating, first verify it’s properly plugged in and the outlet is functioning. If the issue persists, check the temperature settings and ensure they’re appropriately adjusted for your desired cooking outcome.

Food not cooking evenly? Avoid overcrowding the basket; work in batches for best results. Ensure food is arranged in a single layer for optimal air circulation. Smoke during operation often indicates excessive grease; reduce oil usage or clean the drip pan more frequently.

If the oven shuts off mid-cycle, it may be due to overheating; allow it to cool completely before restarting. For persistent problems, consult the warranty information or contact customer support.

Safety Precautions

Prioritize safety! Always unplug the Oster Air Fryer Oven before cleaning. Never immerse the appliance in water, and ensure proper ventilation during operation.

Important Safety Warnings

Read carefully before use! This Oster Air Fryer Oven gets extremely hot during operation; avoid touching interior surfaces to prevent burns. Always use oven mitts or heat-resistant gloves when handling hot components, like the basket and racks.

Never operate the appliance if the power cord or plug is damaged. Do not use extension cords; plug directly into a grounded outlet. Ensure the air fryer is placed on a stable, heat-resistant surface away from flammable materials.

Supervise children closely when the air fryer is in use. Do not allow them to operate the appliance unsupervised. Never leave the air fryer unattended while it’s running. Unplug the unit when not in use and before cleaning. Avoid using abrasive cleaners or scouring pads, as they can damage the non-stick coating.

Proper Ventilation Guidelines

Ensure adequate airflow! Your Oster Air Fryer Oven requires sufficient ventilation to operate safely and efficiently. Maintain at least 6 inches of clear space around the back and sides of the unit, and 8 inches above. This allows for proper heat dissipation and prevents overheating.

Do not place the air fryer directly against a wall or near other appliances that generate heat. Avoid obstructing the air intake and exhaust vents, as this can affect performance and potentially cause a fire hazard.

Operate the air fryer on a stable, heat-resistant surface. Never use it on a carpeted floor or soft surface that could block airflow. Proper ventilation is crucial for optimal cooking results and the longevity of your appliance. Always prioritize safety when positioning your air fryer.

Avoiding Overcrowding the Basket

Maximize crisping power! Overcrowding the basket of your Oster Air Fryer Oven hinders proper air circulation, resulting in unevenly cooked food and reduced crispiness. Food needs space around it for the hot air to circulate effectively.

Work in batches if necessary, especially when cooking larger quantities. A single layer is generally best for achieving optimal results. Don’t exceed the maximum fill line indicated in your user manual.

For best results, leave some space between each food item. Shaking the basket halfway through cooking helps ensure even browning. Remember, proper air circulation is key to achieving the signature crispy texture of air frying. Avoid overcrowding for consistently delicious outcomes!

Advanced Features & Tips

Unlock full potential! Explore accessories, preheating techniques, and time adjustments for diverse foods, elevating your Oster Air Fryer Oven experience significantly.

Using Accessories (Racks, Skewers, etc.)

Maximize versatility! Your Oster Air Fryer Oven often includes helpful accessories like racks and skewers, expanding your cooking possibilities beyond basic air frying. The rack is ideal for baking or roasting, allowing for even heat circulation around food on multiple levels – perfect for larger batches of vegetables or cookies.

Skewers are fantastic for creating kebabs with meat, poultry, or vegetables, ensuring they cook thoroughly and develop a delightful crispness. When using skewers, ensure food pieces are evenly sized for uniform cooking. Always check your model’s manual for specific accessory temperature limits and placement guidelines.

Proper accessory placement is crucial for optimal airflow and preventing food from touching the heating element. Experiment with different arrangements to find what works best for your recipes. Remember to clean accessories thoroughly after each use to maintain hygiene and performance.

Preheating for Optimal Results

Achieve superior cooking! Preheating your Oster Air Fryer Oven is a vital step for consistently excellent results, particularly when aiming for crispy textures or even baking. Preheating ensures the air inside reaches the desired temperature before food is introduced, minimizing temperature fluctuations during the cooking process.

Most recipes will specify a preheating time, typically around 3-5 minutes. Utilize the preheat function if your model has one, or simply set the timer and temperature and allow the oven to run empty. Proper preheating is especially important for recipes requiring a quick initial sear, like chicken wings or french fries.

Skipping preheating can lead to unevenly cooked food and a less crispy finish. Experiment with preheating times to find what works best for your specific recipes and desired outcomes. Consistent preheating is key to mastering your Oster Air Fryer Oven!

Adjusting Cooking Times for Different Foods

Mastering timing is crucial! Air frying isn’t a one-size-fits-all process; cooking times vary significantly based on food type, thickness, and density. Recipes provide a starting point, but adjustments are often necessary for perfect results with your Oster Air Fryer Oven.

Denser foods like potatoes and thicker cuts of meat require longer cooking times than delicate items like fish or vegetables. Reduce cooking times by approximately 20-25% compared to conventional oven recipes. Regularly check food for doneness, shaking the basket or flipping items halfway through for even cooking.

Smaller pieces cook faster, so monitor closely. Utilize a food thermometer to ensure internal temperatures reach safe levels. Keep detailed notes on adjustments for frequently cooked items to build a personalized cooking guide for your Oster Air Fryer Oven!

Warranty Information

Protect your investment! Oster provides a limited warranty covering defects in materials and workmanship for a specified period.

Review the warranty details for coverage length and claim procedures, ensuring peace of mind with your new appliance.

Oster Warranty Details

Your Oster Air Fryer Oven is covered by a one-year limited warranty, commencing from the date of original purchase. This warranty safeguards against defects in materials and workmanship under normal household use, as outlined in the warranty documentation included with your product.

During the warranty period, Oster will, at its discretion, repair or replace the defective product without charge. This remedy is exclusive and constitutes your sole recourse. The warranty does not cover damage resulting from misuse, abuse, accidents, alterations, or commercial use.

To initiate a warranty claim, retain your proof of purchase and contact Oster Customer Support (details provided below). Shipping costs to and from the repair facility are the responsibility of the consumer. Oster reserves the right to inspect any returned product to verify the defect. This warranty gives you specific legal rights, and you may have other rights which vary by location.

Contacting Customer Support

For assistance with your Oster Air Fryer Oven, our dedicated Customer Support team is readily available to address your questions and concerns. You can reach us through several convenient channels, ensuring a seamless support experience.

Phone Support: Call our toll-free number at 1-800-334-0751, available Monday through Friday, 9:00 AM to 5:00 PM EST. Expect potential wait times during peak hours. Online Support: Visit our comprehensive support website at [insert Oster support website address here] for FAQs, troubleshooting guides, and downloadable manuals.

Email Support: Submit your inquiry via email to [insert Oster support email address here], and a representative will respond within 24-48 business hours. Please include your model number and a detailed description of your issue. We are committed to providing prompt and helpful assistance to ensure your satisfaction.

nuwave 2 induction cooktop manual

NuWave 2 Induction Cooktop Manual: A Comprehensive Guide

This guide provides detailed instructions for the NuWave 2 Induction Cooktop, covering setup, operation, safety, and troubleshooting. Explore features like precision temperature control and probe functionality.

Welcome to the world of precision cooking! The NuWave 2 Induction Cooktop represents a leap forward in kitchen technology, offering unparalleled control and efficiency. This cooktop utilizes induction heating, a method that directly heats cookware, resulting in faster cooking times and reduced energy consumption.

This manual serves as your comprehensive guide to unlocking the full potential of your NuWave 2. Whether you’re a seasoned chef or new to induction cooking, this resource will walk you through every step, from initial setup and registration – easily accessible via a QR code at www.nuwavenow.com/QR – to mastering advanced techniques like probe-based temperature control.

Discover how to leverage features like the LED display and heat-resistant glass surface for a seamless and safe cooking experience. We’ll also cover essential safety precautions and maintenance tips to ensure your NuWave 2 remains a reliable kitchen companion for years to come.

Understanding Induction Cooking Technology

Unlike traditional cooktops, induction cooking doesn’t heat the surface directly. Instead, it uses electromagnetic energy to excite the molecules within ferrous cookware, generating heat directly within the pot or pan. This process is remarkably efficient, minimizing wasted energy and providing incredibly responsive temperature control.

The NuWave 2 leverages this technology to offer precise heating, allowing you to quickly boil water, simmer delicate sauces, or sear meats with exceptional accuracy. Because the cooktop surface remains relatively cool – though residual heat is present after use – it’s safer than conventional methods.

Key to success is using compatible cookware; pots and pans must contain a magnetic base. This direct heating method translates to faster cooking and enhanced energy savings, making induction a modern and efficient choice.

Key Features of the NuWave 2

The NuWave 2 boasts precision temperature control, an intuitive LED display, a durable heat-resistant glass surface, and convenient probe functionality for perfect cooking results.

Precision Temperature Control

The NuWave 2 excels in providing exceptionally precise temperature control, a cornerstone of successful induction cooking. Unlike traditional cooktops, induction heats cookware directly, allowing for rapid and accurate temperature adjustments. Users can select desired temperatures in both Fahrenheit and Celsius, catering to diverse recipe requirements and preferences.

This feature ensures consistent cooking results, preventing undercooked or overcooked dishes. The cooktop’s responsiveness allows for immediate adjustments, crucial for delicate sauces or searing meats. Furthermore, the probe functionality, when utilized, works in tandem with precision temperature control, guaranteeing food reaches the ideal internal temperature. Achieving culinary perfection is simplified with this level of control.

LED Display and Control Panel

The NuWave 2 features a user-friendly control panel integrated with a clear, bright LED display. This intuitive interface allows for effortless navigation through various cooking modes and temperature settings. The LED display prominently showcases the selected temperature, timer duration, and any active cooking mode, providing real-time feedback.

Control buttons are logically arranged for easy operation, even for first-time users. Adjustments are made with a simple touch, ensuring precise control over the cooking process. The display also indicates when the cooktop is preheated or when residual heat is present, enhancing safety. Its modern design complements any kitchen aesthetic.

Heat-Resistant Glass Surface

The NuWave 2 boasts a sleek and durable heat-resistant glass surface, designed for both performance and easy maintenance. This smooth, flat surface not only provides an elegant look but also ensures efficient heat transfer for rapid and even cooking. The glass is specifically engineered to withstand high temperatures without cracking or warping during operation.

Spills and splatters are easily wiped away, simplifying cleanup after each use. The surface remains relatively cool to the touch around the cooking area, enhancing safety. However, it’s crucial to remember the cooktop retains residual heat after use, requiring caution.

Probe Functionality and Usage

The NuWave 2’s integrated probe is a key feature for achieving perfectly cooked results, especially with meats and poultry. This probe allows you to monitor the internal temperature of your food in real-time, ensuring it reaches your desired level of doneness. Insert the probe into the thickest part of the food, avoiding bone.

Connect the probe to the cooktop, and set your target internal temperature. The cooktop will automatically adjust the cooking power to maintain that temperature, or hold it once reached. Precise temperature control eliminates guesswork, delivering consistently delicious meals.

Setting Up Your NuWave 2

Initial setup involves registration via the QR code or website, ensuring access to support and resources. Power on and familiarize yourself with basic operations for optimal use.

Initial Setup and Registration

Before first use, it’s crucial to register your NuWave 2 Induction Cooktop. This process unlocks access to valuable resources, including the complete cookbook and dedicated customer support. Registration is simple: scan the QR code conveniently located on the cooktop or visit www.nuwavenow.com/QR directly through your web browser.

Completing the registration ensures you receive updates on features, exclusive deals, and important safety information. Keep your model number (30211 Rev.1) handy during the registration process. This step also validates your warranty, providing peace of mind. Proper registration guarantees a seamless and supported cooking experience with your new NuWave 2.

Powering On and Basic Operation

To begin, locate the power switch on the rear of the NuWave 2 Induction Cooktop and ensure it’s switched to the ‘on’ position. The cooktop will then be ready for operation. Temperature control is managed via the control panel with its integrated LED display. Adjust the desired temperature using the control buttons, observing the displayed value.

The cooktop responds quickly to temperature adjustments, offering precise cooking control. Remember to use compatible cookware for optimal performance. Familiarize yourself with the various cooking modes available. Basic operation involves selecting a temperature and placing compatible cookware on the heat-resistant glass surface.

Fahrenheit to Celsius Conversion

The NuWave 2 Induction Cooktop offers the convenience of displaying temperatures in either Fahrenheit or Celsius. To switch between these units, locate the designated button on the control panel – often indicated by °F and °C symbols. Pressing this button will toggle the display between the two scales.

Ensure you are comfortable with the selected unit before commencing cooking. Recipes often specify temperatures in either Fahrenheit or Celsius, so accurate conversion is crucial for successful results. The cooktop retains your selected unit until changed again, providing a personalized cooking experience. Refer to online resources for precise conversion if needed.

Cooking with the NuWave 2

Discover optimal cooking with your NuWave 2! Utilize compatible cookware and explore various temperature settings and cooking modes for precise, delicious results.

Compatible Cookware

Understanding cookware compatibility is crucial for efficient induction cooking with your NuWave 2. This cooktop utilizes electromagnetic energy, requiring cookware with a magnetic base. Ideal materials include cast iron and many stainless steel pots and pans – test with a magnet to confirm! If a magnet strongly adheres, the cookware will work effectively.

Avoid using aluminum, copper, or glass cookware unless they have a magnetic base layer. Ensure the bottom of your cookware is flat for optimal contact with the glass surface, maximizing heat transfer and cooking performance. Uneven surfaces can reduce efficiency and potentially lead to inconsistent cooking. Proper cookware selection ensures the best results from your NuWave 2 Induction Cooktop.

Temperature Settings and Cooking Modes

The NuWave 2 offers precise temperature control, ranging from 100°F to 400°F, allowing for versatile cooking. Utilize the control panel to select desired temperatures for simmering, frying, sautéing, and more. Explore pre-programmed cooking modes for specific tasks, simplifying meal preparation.

Experiment with different temperature settings to achieve optimal results for various foods. Lower temperatures are ideal for delicate sauces, while higher temperatures are perfect for searing meats. The cooktop also features a “keep warm” function, maintaining food temperature until serving. Mastering these settings unlocks the full potential of your induction cooktop.

Using the Probe for Precise Cooking

The NuWave 2’s probe functionality ensures perfectly cooked meals by monitoring internal food temperature. Insert the probe into the thickest part of the food, avoiding bone or fat. Set your desired internal temperature on the cooktop’s control panel. The cooktop will automatically adjust cooking power to maintain or reach the target temperature.

This feature is ideal for meats, poultry, and fish, guaranteeing safe and delicious results. The cooktop will alert you when the food reaches the set temperature, preventing overcooking. Regularly clean and maintain the probe for accurate readings and optimal performance. Enjoy consistently perfect meals with this innovative feature!

Cooking Specific Foods (Examples)

For steak, use the probe to set the desired internal temperature (e.g., 135°F for medium-rare). Select an appropriate temperature setting, often starting with a higher heat for searing, then reducing it for even cooking. Poultry benefits from probe use, ensuring it reaches 165°F for safety. Fish cooks quickly; use a lower temperature and monitor closely.

Vegetables can be steamed or sautéed using varying temperature settings. Experiment with different modes to achieve desired textures. Remember to consult the complete cookbook for detailed recipes and recommended settings. The NuWave 2 offers versatility for diverse culinary creations, delivering consistent results every time.

Safety Precautions

Always be mindful of residual heat after use. Ensure proper ventilation during operation and follow electrical safety guidelines to prevent hazards.

Residual Heat Warnings

The NuWave 2 Induction Cooktop retains significant heat even after being turned off, presenting a potential burn risk. The glass surface remains hot for a considerable period, so avoid touching it until it has completely cooled. Exercise extreme caution when removing cookware, utilizing pot holders or oven mitts to protect your hands.

Be aware that the cooktop may appear cool to the touch, but still possess enough residual heat to cause injury. Never place flammable materials near the cooktop while it is in use or immediately after it has been turned off. Always supervise children and pets around the appliance, ensuring they understand the dangers of residual heat. Prioritize safety by allowing sufficient cooling time before handling or storing the cooktop.

Proper Ventilation

Ensure adequate ventilation when operating the NuWave 2 Induction Cooktop to prevent the buildup of heat and moisture. Maintain sufficient space around the unit, avoiding placement directly under cabinets or near flammable materials. Proper airflow is crucial for optimal performance and longevity of the appliance.

Avoid obstructing the ventilation openings on the cooktop’s sides or rear. Using a range hood or opening a window can further enhance ventilation during cooking. This practice helps dissipate heat and reduces the risk of overheating. Always prioritize a well-ventilated kitchen environment for safe and efficient operation of your induction cooktop. Regularly check for any obstructions to airflow.

Electrical Safety Guidelines

Always ensure the NuWave 2 Induction Cooktop is properly grounded to prevent electrical shock. Never operate the appliance with a damaged cord or plug; replace immediately. Avoid using extension cords, as they can overheat and pose a fire hazard. Plug the cooktop directly into a dedicated 120V AC outlet.

Do not immerse the cooktop, cord, or plug in water or other liquids. Keep the appliance away from sources of moisture. Unplug the cooktop when not in use and before cleaning. If the cooktop malfunctions, disconnect it from the power source and contact customer support. Prioritize electrical safety for worry-free cooking.

Maintenance and Cleaning

Regular cleaning maintains optimal performance. Use a soft cloth for the glass surface and ensure the probe is clean for accurate temperature readings.

Cleaning the Glass Surface

Maintaining the glass surface of your NuWave 2 Induction Cooktop is crucial for both its appearance and functionality. Always ensure the cooktop is completely cool before attempting any cleaning. Avoid abrasive cleaners, scouring pads, or harsh chemicals, as these can cause scratches and damage the surface.

For everyday cleaning, a damp, soft cloth is usually sufficient to wipe away spills and food residue. For stubborn stains, a specialized glass cooktop cleaner can be used, following the manufacturer’s instructions carefully. Apply the cleaner sparingly and wipe in a circular motion.

After cleaning, wipe the surface with a clean, dry cloth to prevent streaks and ensure a spotless finish. Regular cleaning will help prolong the life of your cooktop and keep it looking its best.

Probe Care and Maintenance

Proper care of the probe is essential for accurate temperature readings and extending its lifespan. After each use, thoroughly clean the probe with a damp cloth and mild soap. Avoid immersing the probe’s handle or cable in water, as this can cause damage.

Ensure the probe is completely dry before storing it. Do not bend or kink the probe’s cable, as this can affect its functionality. Inspect the probe regularly for any signs of damage, such as cracks or frayed wires.

If the probe is damaged, discontinue use and contact NuWave customer support for assistance. Correct storage will prevent damage and ensure accurate readings for years to come.

Storage Instructions

When storing your NuWave 2 Induction Cooktop, ensure it is completely cool and dry. Disconnect the power cord from the outlet and coil it loosely for storage. Avoid storing the cooktop in a damp or humid environment, as this can cause damage to the internal components.

Protect the glass surface from scratches by storing it in its original packaging or covering it with a soft cloth. Keep the probe separate to prevent damage to the cooktop or the probe itself. Store in a safe, stable location where it won’t be accidentally knocked over.

Regularly check the storage area to ensure it remains clean and dry, preserving the cooktop’s condition.

Troubleshooting Common Issues

This section addresses frequent problems like the cooktop failing to power on, error codes, and probe malfunctions. Find solutions for a seamless cooking experience.

Cooktop Not Turning On

If your NuWave 2 isn’t powering on, first verify the power cord is securely connected to both the cooktop and a functioning electrical outlet. Ensure the outlet is receiving power by testing it with another device. Check the switch located on the back of the unit; it must be in the ‘on’ position.

Sometimes, a tripped circuit breaker or blown fuse can be the culprit. Reset the breaker or replace the fuse if necessary. If the issue persists, inspect the power cord for any visible damage. A damaged cord should be replaced immediately. Contact NuWave customer support if these steps don’t resolve the problem, as it could indicate an internal malfunction requiring professional attention.

Error Codes and Their Meanings

The NuWave 2 utilizes error codes to signal specific issues. While a comprehensive list isn’t readily available without the full manual, understanding potential causes is helpful. Error messages often relate to incompatible cookware, probe malfunctions, or internal temperature sensor problems.

If an error code appears, immediately stop using the cooktop and consult the complete NuWave cookbook or the official website (nuwavenow.com) for detailed explanations. Attempting to bypass error codes could damage the unit or pose a safety risk. Contacting NuWave customer support with the specific error code will expedite troubleshooting and ensure proper resolution.

Probe Not Reading Temperature

If the NuWave 2 probe isn’t displaying a temperature, several factors could be at play. First, ensure the probe is correctly inserted into the thickest part of the food, avoiding bone or fat. Verify the probe cable is securely connected to the cooktop’s control panel. A damaged probe or cable can also cause inaccurate readings or a complete failure to register temperature.

Try cleaning the probe tip with a damp cloth; residue can interfere with sensor accuracy. If the issue persists, test with a different probe if available. Contacting NuWave support is recommended for further diagnostics and potential replacement options.

Resources and Support

For assistance, visit the NuWave official website at nuwavenow.com. Access the complete cookbook and contact customer support for any questions or concerns.

NuWave Official Website

The official NuWave website, nuwavenow.com, serves as a central hub for all things NuWave, including comprehensive support for your PIC2 Induction Cooktop. Here, you’ll find exclusive deals, ensuring you receive the best possible price on authentic products and the latest innovations. Beyond purchasing, the website provides direct access to the complete NuWave cookbook, expanding your culinary possibilities with tailored recipes designed for induction cooking.

Registration of your cooktop is easily accomplished through a QR code or direct website visit, guaranteeing access to updates and enhanced customer service. NuWave prioritizes secure transactions and offers a wealth of information, from detailed product specifications to frequently asked questions. This online resource is your first stop for maximizing your NuWave cooking experience.

Customer Support Contact Information

For any questions or concerns regarding your NuWave 2 Induction Cooktop, dedicated customer support is readily available. The primary contact method is through email at helpnuwavenow.com, ensuring a prompt and detailed response to your inquiries. NuWave emphasizes a commitment to customer satisfaction, offering assistance with everything from initial setup and operation to troubleshooting error codes and understanding probe functionality.

While a direct phone number isn’t prominently displayed, utilizing the email support channel guarantees a documented record of your communication. The official website, nuwavenow.com, also features a comprehensive FAQ section and access to downloadable manuals, potentially resolving your issue independently. Expect knowledgeable and helpful assistance from the NuWave support team.

Accessing the Complete Cookbook

Enhance your NuWave 2 Induction Cooktop experience with the complete cookbook, offering a diverse range of recipes tailored for precision induction cooking. The cookbook, spanning 47 pages, provides detailed instructions and culinary inspiration, maximizing the cooktop’s capabilities. Currently, the cookbook is available as a PDF download, accessible through various online resources and potentially directly from the NuWave official website.

Vision Induction & Infrared Cookers Guide also contains valuable recipes and tips. Explore online platforms for downloadable versions, ensuring you have a comprehensive guide to unlock the full potential of your NuWave 2. Utilize the cookbook to master temperature settings, probe usage, and cooking specific foods with ease.

NuWave PIC Gold vs. PIC2: Key Differences

Comparing the PIC Gold and PIC2 reveals variations in features and model numbers. Understanding these distinctions helps users choose the best NuWave induction cooktop for their needs.

Feature Comparison

The NuWave PIC Gold and PIC2 models showcase notable differences in functionality. Both utilize induction cooking technology, offering precise temperature control and rapid heating. However, the PIC2 often includes an upgraded LED display for enhanced visibility and user interaction. Probe functionality, crucial for achieving desired internal temperatures, is a standard feature in both, though the PIC2 may offer improved probe accuracy.

Surface material, typically heat-resistant glass, remains consistent across models. Key distinctions lie in the control panel design and potentially, the range of available temperature settings. Model revisions, indicated by “Rev.1” or higher, often incorporate software updates and minor hardware improvements. Ultimately, the choice depends on individual cooking preferences and desired features.

Model Numbers and Revisions

NuWave induction cooktops are identified by specific model numbers, such as 30211 for the PIC2, aiding in accurate part identification and support requests. Revision numbers, denoted as “Rev.1” or higher, signify updates to the product’s software or hardware. These revisions often address user feedback, improve performance, or incorporate new features.

Checking the revision number is crucial when accessing support resources or downloading updated manuals. Earlier models, like the PIC Gold, may have different revision histories. NuWave’s website provides access to the latest documentation for each model and revision. Understanding these identifiers ensures compatibility and access to the most current information for your specific cooktop.

daily behavior report.pdf

Daily Behavior Reports (DRCs) are a focused intervention strategy gaining traction in educational settings, offering a structured approach to monitoring student conduct.

These reports, as evidenced by research from Volpe at Northeastern University, provide a concise method for teachers to document and communicate specific behavioral observations.

Early studies, like those by Atkins, Pelham, & White (1989), highlight the potential of DRCs, particularly when integrated with broader school-wide support systems and interventions.

What is a Daily Behavior Report?

A Daily Behavior Report (DRC), fundamentally, is a brief, standardized form utilized by educators to record and convey a student’s behavioral performance throughout the school day. These reports, as demonstrated in examples from Robert J. Volpe’s research, aren’t exhaustive narratives, but rather focused snapshots of pre-defined target behaviors.

Typically, a DRC includes sections for student and teacher identification, the date, and a clear description of the behavior being monitored. Crucially, it also incorporates space to document the occurrence of a specified replacement behavior – a positive alternative to the problematic conduct.

The format often involves a simple rating scale or checklist, allowing for quick and consistent data collection. The core function is to facilitate frequent communication between school and home, providing parents with timely insights into their child’s daily conduct and progress towards behavioral goals.

The Purpose of Daily Behavior Reporting

The primary purpose of implementing Daily Behavior Reporting is to enhance communication and collaboration between educators and families regarding a student’s behavioral progress. These reports, as highlighted by Volpe’s work, serve as a concrete bridge, moving beyond infrequent parent-teacher conferences to provide daily feedback.

DRCs aim to increase parental awareness of both positive and challenging behaviors, fostering a more consistent approach to behavior management across home and school environments. Furthermore, they provide valuable data for teachers to monitor the effectiveness of interventions.

Research, including the Atkins, Pelham, & White (1989) study, suggests DRCs are most impactful when coupled with other strategies like school-wide reward systems or response cost. Ultimately, the goal is to proactively address behavioral concerns and promote positive behavioral changes in students.

Historical Context of Behavior Reporting in Schools

The concept of systematically tracking student behavior isn’t entirely new; however, the formalized Daily Behavior Report as a specific intervention emerged from behavioral psychology research in the late 20th century. Early work by researchers like Atkins, Pelham, and White (1989) laid the groundwork, focusing on single-subject designs to evaluate the impact of frequent feedback.

Prior to DRCs, behavior reporting often relied on more subjective narratives or infrequent office referrals. The shift towards daily, focused reports represented a move towards data-driven decision-making in behavior management.

Fabiano & Pelham (2003) further refined these approaches, demonstrating improved behavior with consistent reporting. This evolution reflects a growing understanding of the importance of proactive, preventative strategies in supporting student success.

Components of a Daily Behavior Report

Daily Behavior Reports fundamentally include sections for student details, teacher observations, precise date/time stamps, clearly defined target behaviors, and suggested replacement actions.

Student Information Section

The Student Information Section of a Daily Behavior Report is crucial for accurate identification and tracking. This section typically includes the student’s full legal name, ensuring clarity and avoiding confusion, especially in schools with students sharing similar names.

Additionally, a unique student identifier, such as a student ID number, is often included for administrative purposes and data management. Some reports may also incorporate the student’s grade level and the specific classroom or educational setting they are participating in.

This foundational information allows educators and support staff to quickly and correctly associate the behavioral data with the appropriate student, facilitating effective intervention planning and progress monitoring. Accurate student identification is paramount for maintaining data integrity and ensuring targeted support.

Teacher/Observer Information

The Teacher/Observer Information section is vital for establishing accountability and understanding the source of behavioral observations within a Daily Behavior Report. This section clearly identifies the individual completing the report, typically including their full name and professional role – for example, “Ms. Emily Carter, General Education Teacher.”

Including the teacher’s signature or initials provides a verifiable record of the observation. In cases where multiple observers contribute to the report, space should be allocated to document each individual’s input.

This transparency is essential for ensuring the reliability and validity of the data, as well as facilitating communication and collaboration among school staff regarding student behavior. Knowing who recorded the information allows for follow-up questions and clarification if needed.

Date and Time Recording

Accurate Date and Time Recording is a cornerstone of effective Daily Behavior Reporting, providing crucial context for understanding behavioral patterns. Each report must clearly indicate the date the observations were made, utilizing a standardized format – for instance, MM/DD/YYYY, as seen in current date references (02/15/2026).

Furthermore, recording the specific time of each observed behavior is essential. This granularity allows for identifying potential triggers or times of day when certain behaviors are more likely to occur.

Detailed time-stamping supports data analysis and helps determine if interventions are most effective at particular moments. Consistent and precise date/time documentation ensures the report’s reliability and usefulness for tracking progress over time.

Target Behavior Identification

Clearly identifying the target behavior is paramount for a successful Daily Behavior Report. The focus should be on specific, observable actions that are causing concern or hindering the student’s progress. A vague description like “disruptive” is insufficient; instead, detail what the disruption looks like – for example, “talking out of turn without raising hand.”

This process requires defining observable behaviors, moving away from subjective interpretations. The report card example illustrates a space to document the target behavior, emphasizing the need for concise and actionable descriptions.

Specificity is key; a well-defined target behavior allows for accurate data collection and effective intervention planning, ultimately leading to improved student outcomes.

Defining Observable Behaviors

Observable behaviors are those that can be directly seen or heard, avoiding inferences about internal states. Instead of noting a student is “unmotivated,” describe the observable actions – “does not begin assigned work within five minutes of instruction” or “avoids eye contact when spoken to.”

This approach is crucial for consistent and objective data collection. Multiple observers should be able to independently witness and record the same behavior based on a clear definition.

Focusing on concrete actions ensures the Daily Behavior Report reflects factual information, rather than subjective judgments. This clarity is essential for effective intervention planning and monitoring progress, as highlighted by the need for specificity in target behavior descriptions.

Specificity in Target Behavior Descriptions

Detailed descriptions are paramount when identifying target behaviors for a Daily Behavior Report. Vague terms like “disruptive” or “attention-seeking” lack the precision needed for reliable monitoring and intervention. Instead, specify what the behavior looks like – “calls out answers without raising hand three or more times during a 15-minute period.”

This level of detail ensures all observers understand exactly what to record, minimizing inconsistencies. A specific description also facilitates data analysis, allowing for a clearer understanding of behavioral patterns.

The more precisely a behavior is defined, the easier it becomes to track its frequency, duration, and context, ultimately leading to more effective support for the student.

Replacement Behavior Suggestions

Daily Behavior Reports aren’t solely about documenting problem behaviors; they crucially include suggestions for appropriate replacement behaviors. Simply identifying what a student shouldn’t do isn’t enough – we must actively teach and reinforce positive alternatives.

For example, if the target behavior is “out-of-seat,” a replacement behavior could be “raising hand to request a break” or “asking permission to sharpen pencil.” These suggestions should be individualized, considering the student’s needs and abilities.

The report card format, as exemplified by the student/teacher templates, provides a dedicated space to clearly outline these desired behaviors, fostering proactive support and positive reinforcement strategies within the classroom environment.

Methods for Implementing Daily Behavior Reports

Implementation strategies vary, with approaches from Atkins, Pelham, & White (1989) and Fabiano & Pelham (2003) demonstrating effectiveness, often enhanced by combined interventions.

Single-subject designs are frequently utilized to assess impact.

The Atkins, Pelham, & White (1989) Approach

Atkins, Pelham, & White’s (1989) pioneering work, documented in their study (ABCDAEF – designated ‘N=1’), established a foundational method for utilizing Daily Report Cards (DRCs). Their research indicated that the DRC itself wasn’t consistently effective as a standalone intervention.

Instead, the greatest gains in student behavior were observed when the DRC was strategically combined with other supportive measures within the school environment. These complementary interventions included positive reinforcement systems, such as school-wide rewards, and targeted consequences like response cost strategies – potentially involving a change of seating arrangements.

The study emphasized the importance of a multi-faceted approach, where the DRC serves as a communication tool to facilitate consistent implementation of these broader behavioral supports. While the study didn’t meet WWC standards for efficacy on its own, it highlighted the DRC’s value as a component within a comprehensive behavior management system.

Fabiano & Pelham (2003) Single-Subject Design

Fabiano & Pelham’s (2003) research, conducted as a single-subject design study (identified as ‘MBD’ with ‘N=1’), further explored the efficacy of Daily Behavior Reports (DRCs). Their investigation demonstrated a notable improvement in the target child’s behavior when a DRC was consistently implemented.

This study, while showcasing positive outcomes for the individual participant, also did not meet the stringent standards established by the What Works Clearinghouse (WWC) for broader generalization. However, the findings reinforced the potential of DRCs to positively influence individual student conduct.

The success observed in this single-subject study underscores the importance of individualized application and careful monitoring when utilizing DRCs. It suggests that, with appropriate implementation, DRCs can be a valuable tool for addressing specific behavioral challenges in students.

Combining Interventions with Daily Reports

Research consistently indicates that Daily Behavior Reports (DRCs) are most effective when integrated with other supportive interventions. The work of Atkins, Pelham, & White (1989) specifically highlighted this synergy, noting the greatest impact when DRCs were paired with school-wide reward systems, strategic seating adjustments, and response cost strategies.

Implementing a school-wide rewards system alongside DRCs provides positive reinforcement for desired behaviors, while response cost strategies offer a consequence for undesirable actions, clearly documented in the daily reports.

This multi-faceted approach maximizes the potential for behavioral change, addressing both positive and negative behaviors. Combining interventions ensures a comprehensive and supportive environment for students utilizing DRCs.

School-Wide Rewards Systems

Integrating Daily Behavior Reports (DRCs) with school-wide rewards systems amplifies their effectiveness, fostering a positive behavioral climate. These systems provide consistent reinforcement for students demonstrating improved conduct, as documented within the DRCs.

Rewards can range from verbal praise and small privileges to tangible incentives, tailored to the age and needs of the student population. The key is to clearly define the behaviors that earn rewards, aligning them directly with the target behaviors identified in the DRCs.

Atkins, Pelham, & White (1989) emphasized the crucial role of such systems, finding DRCs most impactful when combined with broader school-level supports. This collaborative approach creates a unified message, encouraging positive behavior change.

Response Cost Strategies

Response cost, a behavioral intervention often paired with Daily Behavior Reports (DRCs), involves the removal of a predetermined reinforcer following the display of a target behavior. This strategy aims to decrease undesirable actions by making them associated with a loss.

Effectively implementing response cost requires careful consideration of the reinforcer being removed – it must be valued by the student. The amount of the loss should be proportionate to the severity of the behavior, and clearly communicated alongside the DRC documentation.

Research, notably Atkins, Pelham, & White (1989), suggests DRCs are particularly potent when combined with response cost, alongside school-wide reward systems. This multi-faceted approach addresses both reinforcing positive behaviors and discouraging negative ones, maximizing impact.

Evaluating the Effectiveness of Daily Behavior Reports

Assessing DRC efficacy involves analyzing data collected from the reports, utilizing behavior rating scales, and determining if results align with WWC standards for proven impact.

Using Behavior Rating Scales

Behavior rating scales serve as a valuable complement to the objective data gathered through Daily Behavior Reports, offering a broader perspective on a student’s overall conduct. These scales, often standardized questionnaires, allow teachers and potentially parents to quantify behavioral observations using pre-defined criteria.

This quantitative approach can help identify patterns and trends that might not be immediately apparent from individual daily reports. Comparing ratings over time can reveal whether interventions are having a sustained positive effect, or if adjustments are needed.

Furthermore, utilizing rating scales can contribute to a more comprehensive evaluation of the DRC’s effectiveness, particularly when aiming to meet the rigorous standards set by organizations like the What Works Clearinghouse (WWC). The scales provide additional evidence beyond single-subject design results, strengthening the overall case for the intervention’s efficacy.

Analyzing Data from Daily Reports

Effective data analysis is crucial for determining the impact of Daily Behavior Reports. Simply collecting the reports isn’t enough; the information must be systematically reviewed to identify trends and evaluate intervention success. This involves tracking the frequency of target behaviors, noting any changes over time, and correlating these changes with implemented interventions.

Analyzing data from reports, like those studied by Fabiano & Pelham (2003), can reveal whether a student is demonstrating improved behavior. Visual representations, such as graphs charting behavior frequency, can be particularly helpful in illustrating progress or lack thereof.

Furthermore, careful analysis informs adjustments to the intervention plan, ensuring it remains tailored to the student’s needs. This iterative process is key to maximizing the DRC’s effectiveness and achieving positive behavioral outcomes.

Meeting WWC Standards for Efficacy

Establishing efficacy according to the What Works Clearinghouse (WWC) standards is a significant hurdle for interventions like Daily Behavior Reports. Currently, research – specifically the studies by Atkins, Pelham, & White (1989) and Fabiano & Pelham (2003) – does not meet WWC criteria.

This is often due to limitations in study design, such as small sample sizes (N=1 in both cited studies) and a lack of rigorous control groups. To meet WWC standards, future research must employ more robust methodologies, including randomized controlled trials with larger, diverse samples.

Demonstrating a statistically significant and practically meaningful effect size is also essential. While DRCs show promise, particularly when combined with other supports, further investigation is needed to definitively establish their efficacy according to WWC guidelines.

Tools and Resources for Daily Behavior Reporting

Numerous resources aid implementation, including Behavior Report Card Makers and comprehensive teacher support materials readily available online.

Intervention Central offers valuable tools, with a website update planned for December 2023, eliminating user login accounts.

Behavior Report Card Makers

Behavior Report Card Makers represent a practical solution for educators seeking to streamline the creation and consistent application of Daily Behavior Reports. These tools, often available as downloadable templates or online applications, facilitate the standardized documentation of student behavior throughout the school day.

They typically include pre-defined sections for student and teacher identification, date and time recording, and, crucially, the specific target behaviors being monitored. The format allows for clear indication of observed behaviors, often utilizing a rating scale or checklist system.

Furthermore, many report card makers incorporate space for documenting replacement behaviors suggested to the student, and a section to record rewards or consequences associated with demonstrated conduct. This structured approach ensures that reports are comprehensive, objective, and readily shareable with parents or other relevant stakeholders, fostering collaborative support for student behavioral improvement.

Teacher Resources and Support

Effective implementation of Daily Behavior Reports necessitates readily available resources and ongoing support for educators. Recognizing this, several avenues exist to assist teachers in utilizing DRCs effectively. These resources often focus on training regarding observable behavior definition, consistent data collection, and appropriate intervention strategies.

Crucially, platforms like Intervention Central serve as valuable hubs, offering downloadable templates, guidance on behavior management techniques, and updates on best practices. However, it’s important to note a significant change: Intervention Central is undergoing a revision in December 2023, eliminating user login accounts.

Therefore, teachers currently utilizing the site are strongly advised to download and save any essential documents before the update. Continued professional development and collaborative planning with school psychologists or behavior specialists are also vital components of successful DRC implementation.

Intervention Central and Website Updates (December 2023)

Intervention Central has long been a cornerstone resource for educators seeking practical tools and strategies for addressing student behavior, including support for implementing Daily Behavior Reports. However, a significant update is scheduled for December 2023 that will fundamentally change how users access the site’s materials.

The upcoming revision will eliminate user login accounts entirely, streamlining access but requiring current users to proactively safeguard important documents. Any files saved within individual accounts on Intervention Central will be erased when the website is revised, necessitating immediate download and local storage.

This change underscores the importance of teachers being prepared to transition to the new, account-free system and ensuring continued access to valuable resources for behavior management and Daily Behavior Report implementation.

Challenges and Considerations

Consistent reporting, data privacy, and potential observer biases are crucial considerations when utilizing Daily Behavior Reports effectively within a school environment.

Maintaining Consistency in Reporting

Ensuring consistent application of the Daily Behavior Report system across all teachers and observers is paramount for reliable data collection and intervention effectiveness. Variations in how behaviors are defined, recorded, or interpreted can significantly compromise the validity of the reports.

Regular training sessions and clearly defined operational definitions for target behaviors are essential. These definitions should be observable and measurable, minimizing subjective interpretations. Furthermore, establishing standardized reporting procedures – including specific timeframes for completion and designated data submission methods – will contribute to greater consistency.

Periodic inter-rater reliability checks, where multiple observers independently assess the same behavior, can identify discrepancies and provide opportunities for calibration. Addressing these inconsistencies proactively strengthens the integrity of the data and supports informed decision-making regarding student interventions.

Ensuring Data Privacy and Confidentiality

Protecting student privacy is a critical ethical and legal consideration when implementing Daily Behavior Reports. These reports contain sensitive information about individual student behavior, necessitating strict adherence to confidentiality protocols.

Access to DRCs should be limited to authorized personnel directly involved in the student’s intervention plan – teachers, administrators, and, with appropriate consent, parents or guardians. Secure storage of both paper and electronic reports is essential, complying with relevant data protection regulations like FERPA.

Reports should be de-identified whenever possible for data analysis or presentations, focusing on aggregate trends rather than individual student details. Clear policies outlining data handling procedures and consequences for breaches of confidentiality must be established and consistently enforced, fostering a culture of responsible data management.

Addressing Potential Biases in Observation

Observer bias represents a significant challenge in the accurate implementation of Daily Behavior Reports. Teachers’ pre-existing perceptions of students can unintentionally influence their observations and recordings of behavior, leading to skewed data.

To mitigate this, clear, objective definitions of target behaviors are paramount – focusing on observable actions rather than subjective interpretations. Regular inter-rater reliability checks, where multiple observers independently record the same behavior, can identify and address discrepancies.

Ongoing professional development for teachers should emphasize self-awareness of potential biases and strategies for maintaining objectivity. Consistent application of the reporting system across all students, coupled with periodic review of data for patterns suggesting bias, is crucial for ensuring fairness and validity.

atv repair manual

ATV Repair Manuals: A Comprehensive Guide

ATV repair manuals are essential resources for both seasoned mechanics and enthusiastic owners‚ providing detailed guidance for maintaining and fixing these versatile machines.

These manuals cover a broad spectrum of information‚ from routine maintenance procedures to complex engine overhauls‚ ensuring your ATV remains in peak condition.

Accessing the right ATV repair manual empowers you to tackle repairs confidently‚ saving both time and money while extending the lifespan of your vehicle.

Understanding the intricacies of your ATV’s systems becomes significantly easier with a dedicated‚ comprehensive repair guide at your fingertips.

Understanding the Need for ATV Repair Manuals

ATV repair manuals are fundamentally crucial because they bridge the gap between complex machinery and the owner’s ability to maintain it effectively. Without a dedicated manual‚ diagnosing issues and performing repairs can quickly become overwhelming‚ potentially leading to further damage or unsafe operating conditions.

These manuals offer a structured approach to troubleshooting‚ providing step-by-step instructions‚ detailed diagrams‚ and crucial specifications. They empower owners to perform routine maintenance – oil changes‚ filter replacements‚ brake adjustments – independently‚ saving on costly mechanic fees.

More importantly‚ ATV repair manuals are indispensable when tackling more significant repairs‚ such as engine rebuilds or transmission servicing. They ensure the correct procedures are followed‚ minimizing the risk of errors and maximizing the longevity of the ATV. Ignoring proper repair protocols can compromise safety and performance‚ making a manual an invaluable investment for any ATV enthusiast.

Ultimately‚ a manual fosters self-reliance and a deeper understanding of your machine.

Why Use a Dedicated ATV Repair Manual?

Dedicated ATV repair manuals surpass generic repair guides by offering specificity tailored to your exact model and year. This precision is vital‚ as even slight variations between ATV models can necessitate different repair procedures and component specifications.

Unlike online forums or generalized advice‚ a manual provides verified‚ manufacturer-approved information‚ ensuring accuracy and reliability. They detail torque specifications‚ wiring diagrams‚ and parts identification – critical elements often missing from less formal sources.

Using a dedicated manual minimizes the risk of misdiagnosis and incorrect repairs‚ potentially preventing further damage and costly mistakes. They also enhance safety by outlining proper procedures and warning against potential hazards. Investing in a manual isn’t just about fixing your ATV; it’s about doing it correctly‚ safely‚ and efficiently‚ preserving its value and performance.

A manual is a long-term investment in your ATV’s wellbeing.

Where to Find ATV Repair Manuals

ATV repair manuals are readily available through various online platforms‚ forums‚ and manufacturer websites‚ offering both free and paid options for enthusiasts.

Resources like ATVConnection.com‚ ManualsLib.com‚ and QuadCrazy provide extensive collections‚ while CAT Net Explorer serves Arctic Cat owners.

Yamaha ATV Repair Manuals: Specific Resources

Yamaha ATV repair manuals benefit from several dedicated online resources catering specifically to this popular brand. ATVConnection.com boasts an impressive library‚ offering over 400 manuals spanning approximately ten different manufacturers‚ including a substantial collection for Yamaha ATVs.

QuadCrazy ATV Forum is another valuable destination‚ featuring a dedicated downloads section where users can access free Yamaha ATV repair manuals directly. This forum provides a community-driven approach to finding the information you need.

Furthermore‚ general repair manual websites‚ such as those offering manuals for Honda‚ Kawasaki‚ Suzuki‚ and Yamaha‚ also carry Yamaha-specific documentation‚ though these may not always be instant downloads.

These resources collectively provide a comprehensive range of options for Yamaha ATV owners seeking to perform maintenance and repairs independently.

Arctic Cat ATV Repair Manuals: Utilizing CAT Net Explorer

Arctic Cat ATV repair manuals are readily accessible through the official CAT Net Explorer platform‚ a comprehensive resource for owners and technicians alike. This system provides access to a wealth of information‚ including detailed users manuals‚ parts manuals‚ and crucial service manuals.

Beyond the core manuals‚ CAT Net Explorer also offers service bulletins‚ informative brochures‚ detailed wiring diagrams‚ and even kit instructions‚ ensuring a complete understanding of your machine.

The platform extends its utility with access to special tool information and helpful service videos‚ further simplifying complex repair procedures.

For Arctic Cat enthusiasts‚ CAT Net Explorer represents a centralized hub for all documentation needs‚ streamlining the maintenance and repair process.

Honda‚ Kawasaki‚ Suzuki‚ and Other Brands: Manual Availability

ATV repair manuals for brands like Honda‚ Kawasaki‚ and Suzuki‚ alongside numerous others‚ are widely available through various online and offline channels. While dedicated brand-specific platforms like CAT Net Explorer exist for Arctic Cat‚ owners of these other ATVs often rely on broader manual databases and specialized websites.

Several online retailers offer a substantial range of manuals‚ though these are frequently not available for instant download‚ requiring a processing and delivery timeframe.

Furthermore‚ comprehensive services provide manuals for a diverse array of manufacturers‚ including BMW‚ Ducati‚ and Yamaha‚ catering to a broad spectrum of ATV and motorcycle owners.

Finding the correct manual often involves searching through these extensive catalogs‚ ensuring compatibility with your specific ATV model and year.

Free Download Services for Motorcycle and ATV Manuals

Numerous online platforms offer free download services for motorcycle and ATV repair manuals‚ providing accessible resources for enthusiasts and DIY mechanics. These services typically host manuals for a wide range of manufacturers‚ including Yamaha‚ Suzuki‚ BMW‚ Ducati‚ Kawasaki‚ and Honda‚ among others.

Websites like ManualsLib.com boast extensive databases with over two million manuals for 40‚000 brands‚ offering free access and download options.

These platforms often include repair‚ owner’s‚ and maintenance manuals‚ alongside tutorials and microfiches‚ catering to diverse user needs.

However‚ users should exercise caution and verify the manual’s accuracy and completeness before relying on it for repairs.

ManualsLib.com: A Broad Database of Manuals

ManualsLib.com stands out as a comprehensive online resource‚ offering a vast database of over two million manuals for approximately 40‚000 different brands‚ including a substantial collection of ATV repair manuals.

This platform provides free access to instruction books and manuals‚ enabling users to search for specific models and download relevant documentation without cost.

The site’s user-friendly interface facilitates easy navigation and efficient searching‚ making it a popular choice for ATV owners seeking repair information.

While the availability of specific manuals can vary‚ ManualsLib.com consistently proves to be a valuable starting point for locating ATV repair resources.

QuadCrazy ATV Forum: Yamaha Manuals Download Section

QuadCrazy ATV Forum provides a dedicated space for Yamaha ATV enthusiasts‚ notably featuring a downloads section specifically for Yamaha ATV repair manuals.

This forum acts as a community-driven resource‚ where users can access and share valuable repair information‚ including service manuals‚ owner’s manuals‚ and parts lists.

The availability of these manuals is often facilitated by forum members who contribute to the collective knowledge base‚ making it a practical resource.

Users report finding free Yamaha ATV manuals readily available within this section‚ offering a convenient and accessible solution for repair needs.

It’s a great place to connect with other Yamaha ATV owners and find specific documentation.

ATVConnection.com: Extensive Manual Collection

ATVConnection.com stands out as a comprehensive online resource for ATV enthusiasts‚ boasting an extensive collection of ATV repair manuals for numerous brands.

The site reportedly hosts over 400 manuals‚ covering approximately ten different ATV manufacturers‚ making it a valuable hub for finding specific repair documentation.

Users appreciate the availability of these resources‚ emphasizing that while access may require some time investment‚ the manuals are ultimately free to download.

This platform caters to a wide range of ATV models and repair needs‚ offering a convenient solution for both basic maintenance and complex troubleshooting.

It’s a popular destination for those seeking readily available ATV repair manuals online.

Types of ATV Repair Manuals

ATV repair manuals come in diverse formats‚ including service‚ owner’s‚ and parts manuals‚ each serving unique purposes for maintenance and repair procedures.

Wiring diagrams are also crucial for electrical system diagnostics and troubleshooting.

Service Manuals: In-Depth Repair Procedures

Service manuals represent the most comprehensive type of ATV repair manual available‚ offering detailed‚ step-by-step instructions for virtually every repair and maintenance task imaginable.

These manuals are geared towards experienced mechanics or those comfortable with complex mechanical work‚ providing exploded views of components‚ precise torque specifications‚ and detailed troubleshooting guides.

They delve into intricate procedures like engine rebuilds‚ transmission overhauls‚ and complete suspension servicing‚ often including diagnostic flowcharts to pinpoint issues efficiently.

Service manuals typically cover topics such as removing and installing components‚ disassembling and reassembling systems‚ and performing adjustments to ensure optimal performance.

Essentially‚ a service manual is the definitive guide for anyone undertaking significant repairs on their ATV‚ ensuring the job is done correctly and safely.

They are invaluable for professional technicians and dedicated DIY enthusiasts alike.

Owner’s Manuals: Basic Maintenance and Operation

Owner’s manuals are the first point of reference for any ATV owner‚ providing essential information on safe operation‚ routine maintenance‚ and basic troubleshooting.

Unlike detailed service manuals‚ owner’s manuals focus on tasks that can be performed by the average user with minimal mechanical experience.

These guides typically cover topics like checking fluid levels‚ inspecting tires‚ lubricating moving parts‚ and performing simple adjustments.

They also include crucial safety information‚ operating instructions‚ and a basic understanding of the ATV’s controls and features.

Owner’s manuals are designed to help owners keep their ATVs in good working order and prevent minor issues from escalating into major repairs.

While not a substitute for a service manual‚ they are an indispensable resource for responsible ATV ownership and maintenance.

Parts Manuals: Identifying Components

Parts manuals are invaluable resources when undertaking ATV repairs‚ specifically designed to aid in identifying and locating individual components.

These manuals feature detailed exploded diagrams illustrating how all the parts of an ATV fit together‚ making disassembly and reassembly much easier.

Each part is typically labeled with a unique part number‚ allowing for accurate ordering of replacements from dealerships or online retailers.

ATV repair often requires sourcing specific parts‚ and a parts manual eliminates guesswork and ensures compatibility.

They are particularly useful when dealing with older ATVs where parts availability might be limited or documentation is scarce.

Combined with service manuals‚ parts manuals streamline the repair process‚ reducing downtime and ensuring accurate component replacement.

Wiring Diagrams: Electrical System Troubleshooting

Wiring diagrams are crucial components within an ATV repair manual‚ specifically when diagnosing and resolving electrical issues.

These diagrams visually represent the entire electrical system‚ showcasing the connections between various components like the battery‚ starter‚ lights‚ and sensors.

Understanding these diagrams allows you to trace circuits‚ identify shorts‚ and pinpoint faulty wiring or connectors.

ATV electrical systems can be complex‚ and a clear wiring diagram is essential for effective troubleshooting.

They often include color-coding information‚ making it easier to identify individual wires and their functions.

Using a multimeter in conjunction with the wiring diagram helps verify continuity and voltage‚ leading to accurate repairs and preventing further damage.

Navigating an ATV Repair Manual

ATV repair manuals are logically structured for efficient use‚ containing safety warnings‚ tool lists‚ and detailed procedures for successful repairs and maintenance.

Understanding Manual Organization

ATV repair manuals typically follow a standardized organizational structure designed for ease of use. Most begin with a preface outlining the manual’s scope and intended audience‚ followed by detailed safety precautions and warnings – always prioritize these. Subsequent sections are usually divided by system‚ such as engine‚ transmission‚ brakes‚ suspension‚ and electrical.

Within each system‚ you’ll find exploded diagrams‚ parts lists‚ and step-by-step repair procedures. Torque specifications are often presented in tables for quick reference. Wiring diagrams‚ crucial for electrical troubleshooting‚ are usually grouped together in a dedicated section. Many manuals also include a troubleshooting guide to help diagnose common issues.

Familiarizing yourself with this layout will significantly reduce the time spent searching for specific information‚ allowing for more efficient and effective repairs. Understanding the manual’s index is also vital for quickly locating specific components or procedures.

Safety Precautions and Warnings

ATV repair manuals consistently emphasize safety as paramount. Before commencing any repair‚ always disconnect the battery to prevent accidental electrical shock or system damage. Wear appropriate personal protective equipment (PPE)‚ including safety glasses‚ gloves‚ and sturdy footwear.

Be mindful of hot engine components and exhaust systems‚ allowing them to cool completely before handling. When working with fuels or flammable liquids‚ ensure adequate ventilation and eliminate all ignition sources. Support the ATV securely on jack stands – never work under an unsupported machine.

Pay close attention to warnings regarding specific procedures‚ such as handling hazardous materials or disassembling pressurized systems. Ignoring these warnings can result in serious injury or damage. Always consult the manual for specific safety guidelines related to your ATV model.

Tool Requirements and Specifications

ATV repair manuals meticulously detail the necessary tools for each procedure. Basic requirements typically include a socket set‚ wrench set (metric and standard)‚ screwdrivers (Phillips and flathead)‚ pliers‚ and a torque wrench. Specialized tools‚ like a chain breaker‚ carburetor synchronizer‚ or compression tester‚ may be needed for specific repairs.

The manual will also specify the correct size and type of tools to avoid damaging components. Using the wrong tool can strip bolts‚ round off nuts‚ or cause other issues. Furthermore‚ ATV repair manuals outline precise torque specifications for fasteners.

Adhering to these specifications is crucial for ensuring proper assembly and preventing component failure. Always verify tool compatibility and calibration before use‚ prioritizing quality and accuracy for successful repairs.

Torque Specifications: Ensuring Proper Fastening

ATV repair manuals consistently emphasize the critical importance of torque specifications. Applying the correct torque to fasteners—bolts‚ nuts‚ and screws—is paramount for safe and reliable ATV operation. Under-torquing can lead to components loosening and potential failure‚ while over-torquing risks stripping threads or damaging parts.

Manuals provide detailed charts listing the precise torque values (typically in foot-pounds or Newton-meters) for each fastener on the ATV. A calibrated torque wrench is essential for achieving these values accurately.

Always refer to the manual for the specific torque specification for each bolt‚ considering factors like bolt size‚ material‚ and application. Following these guidelines ensures proper clamping force‚ preventing vibrations and maintaining structural integrity.

Common ATV Repair Topics Covered in Manuals

ATV repair manuals thoroughly address engine repair‚ transmission service‚ brake maintenance‚ suspension adjustments‚ and electrical diagnostics‚ offering detailed guidance for all systems.

Engine Repair and Overhaul

ATV repair manuals dedicate significant sections to engine repair and overhaul procedures‚ recognizing the engine as the heart of the machine. These manuals provide step-by-step instructions for diagnosing engine problems‚ from simple issues like spark plug replacement to complex tasks such as piston replacement and cylinder honing.

Detailed exploded views illustrate engine components‚ aiding in proper assembly and disassembly. Manuals often include specifications for valve clearances‚ compression ratios‚ and other critical engine parameters. Troubleshooting guides help pinpoint the root cause of engine malfunctions‚ while torque specifications ensure proper fastener tightening‚ preventing damage and maintaining engine integrity.

Overhaul procedures are meticulously outlined‚ covering tasks like cylinder head rebuilding‚ crankshaft inspection‚ and carburetor cleaning or fuel injection system servicing. Safety precautions are emphasized throughout‚ highlighting potential hazards and necessary protective measures. Ultimately‚ these sections empower owners and mechanics to confidently address engine issues and restore optimal performance.

Transmission and Drivetrain Service

ATV repair manuals offer comprehensive guidance on servicing the transmission and drivetrain‚ crucial for power delivery and overall vehicle functionality. These sections detail procedures for inspecting‚ adjusting‚ and repairing components like the clutch‚ gearbox‚ differential‚ and drive chain or shaft.

Manuals provide clear instructions for troubleshooting common issues such as slipping clutches‚ gear shifting problems‚ and differential noise. Detailed diagrams illustrate the internal workings of the transmission‚ aiding in disassembly and reassembly. Specific torque specifications are included for all drivetrain fasteners‚ ensuring proper tightening and preventing component failure.

Furthermore‚ repair manuals cover maintenance tasks like fluid changes‚ chain adjustments‚ and bearing inspections. They also address more complex repairs‚ such as replacing gears‚ rebuilding the transmission‚ or servicing the differential. Safety warnings are prominently displayed‚ emphasizing the importance of proper procedures.

Brake System Maintenance and Repair

ATV repair manuals dedicate significant attention to brake system maintenance and repair‚ vital for rider safety and control. These sections provide detailed instructions for inspecting brake pads‚ rotors‚ calipers‚ and brake lines for wear and damage. Procedures for bleeding the brake system to remove air bubbles and restore optimal braking performance are clearly outlined.

Manuals offer step-by-step guidance on replacing brake pads‚ rotors‚ and calipers‚ including torque specifications for all fasteners. Troubleshooting sections address common brake issues like spongy brake feel‚ uneven braking‚ and brake fade. Diagrams illustrate the brake system’s components and their proper assembly.

Repair manuals also cover maintenance tasks such as cleaning and lubricating brake components. Safety precautions are emphasized throughout‚ highlighting the critical importance of a properly functioning brake system.

Suspension and Steering Adjustments

ATV repair manuals provide comprehensive guidance on suspension and steering adjustments‚ crucial for optimizing handling and rider comfort. These sections detail how to inspect shocks‚ springs‚ A-arms‚ and steering components for wear or damage. Instructions cover adjusting preload‚ compression damping‚ and rebound damping to fine-tune the suspension for different terrains and riding styles.

Manuals explain how to check and adjust wheel alignment‚ ensuring proper steering response and tire wear. Procedures for inspecting and replacing ball joints‚ tie rod ends‚ and steering bearings are included‚ along with torque specifications. Troubleshooting guides address common issues like excessive body roll‚ wandering steering‚ and harsh ride quality.

Repair manuals emphasize safety precautions when working on the suspension and steering systems‚ highlighting the importance of proper alignment and component integrity.

Electrical System Diagnostics and Repair

ATV repair manuals dedicate significant sections to electrical system diagnostics and repair‚ vital for addressing issues with starting‚ charging‚ lighting‚ and other electrical components; These manuals include detailed wiring diagrams‚ essential for tracing circuits and identifying faults. Procedures cover testing the battery‚ stator‚ regulator/rectifier‚ and ignition system using a multimeter and other diagnostic tools.

Manuals guide users through troubleshooting common electrical problems like blown fuses‚ faulty relays‚ and damaged wiring harnesses. Instructions detail how to inspect and repair connectors‚ switches‚ and sensors. Specific guidance is provided for diagnosing and resolving issues with the ATV’s electronic fuel injection (EFI) system‚ if equipped.

Repair manuals stress safety precautions when working with electrical systems‚ emphasizing the importance of disconnecting the battery before performing any repairs.

Cost Considerations for ATV Repair Manuals

ATV repair manual costs vary greatly‚ ranging from free online downloads to paid subscriptions and per-download options‚ impacting accessibility.

Evaluating value requires weighing the convenience of instant access against the potential expense of purchasing dedicated manuals.

Free vs. Paid Manuals: Weighing the Options

Choosing between free and paid ATV repair manuals involves considering several factors. Free manuals‚ readily available on sites like ManualsLib.com‚ QuadCrazy ATV Forum‚ and through Arctic Cat’s CAT Net Explorer‚ offer a cost-effective starting point for basic repairs and maintenance.

However‚ these free resources may lack the depth‚ clarity‚ or completeness found in professionally published‚ paid manuals.

Paid manuals often provide more detailed diagrams‚ step-by-step instructions‚ and comprehensive troubleshooting guides‚ proving invaluable for complex repairs.

Sites like RepairManualClub offer manuals for a per-download fee (around $5)‚ while others provide subscription services granting access to a wider range of models.

Ultimately‚ the best choice depends on your mechanical skill level‚ the complexity of the repairs you anticipate‚ and your budget.

For simple tasks‚ free manuals may suffice‚ but for extensive overhauls‚ investing in a paid manual is often a worthwhile expenditure.

Subscription Services: Access to Multiple Manuals

ATV repair manual subscription services present a compelling alternative to purchasing individual manuals‚ particularly for those working on diverse ATV models or frequently undertaking repairs.

These services grant access to a vast library of manuals‚ covering numerous makes and years‚ often for a fixed monthly or annual fee.

While initial costs may exceed a single manual purchase‚ the long-term value can be substantial‚ especially for professional mechanics or avid ATV enthusiasts.

Subscription models eliminate the need to repeatedly pay per download‚ as seen on platforms like RepairManualClub‚ offering unlimited access within the subscription period.

Consider the breadth of models supported and the frequency of updates when evaluating different subscription options.

Ensure the service covers your specific ATV’s make‚ model‚ and year to maximize its utility and avoid unnecessary expenses.

Per-Download Costs: Evaluating Value

ATV repair manuals available through per-download services offer a straightforward purchasing model‚ allowing users to acquire specific manuals as needed.

Sites like RepairManualClub exemplify this approach‚ charging a fee – often around $5 – for each manual downloaded.

While seemingly affordable for a single repair‚ these costs can accumulate quickly when addressing multiple issues or working on various ATV models.

Carefully assess your repair needs before opting for per-download services; if you anticipate frequent repairs‚ a subscription might prove more economical.

Consider the manual’s completeness and quality before purchasing; ensure it covers your ATV’s specific year and model.

Compare prices across different platforms to secure the best possible deal and avoid overspending on essential repair information.

luther’s catechism pdf

Luther’s Catechism PDF: A Comprehensive Guide

Discover readily available PDF versions of Luther’s Catechisms via the Internet Archive, Concordia Publishing House, and other sources, offering accessible theological study.

Historical Context of Luther’s Catechisms

The 16th-century Reformation, sparked by Martin Luther’s Ninety-Five Theses in 1517, dramatically reshaped Christian belief and practice. A significant concern arose from widespread theological illiteracy among the common people. Existing methods of religious instruction proved inadequate, prompting Luther to address this critical need.

Luther observed a concerning lack of understanding of core Christian doctrines – the Ten Commandments, the Apostles’ Creed, the Lord’s Prayer, Baptism, and the Eucharist. This deficiency fueled spiritual apathy and susceptibility to false teachings. Consequently, he felt compelled to create accessible resources for systematic religious education.

The political and social upheaval of the time further underscored the urgency. Luther’s Catechisms were intended not only for individual piety but also for strengthening the faith of families and communities amidst religious and political turmoil. This historical backdrop profoundly shaped the content and purpose of his enduring work.

Martin Luther’s Motivation for Writing the Catechisms

Driven by pastoral concern, Martin Luther aimed to rectify the alarming lack of Christian knowledge among his parishioners. Reports from visiting pastors revealed a shocking ignorance of basic tenets of faith, prompting Luther to act decisively; He believed effective discipleship required a clear, concise articulation of core beliefs.

Luther wasn’t satisfied with complex theological treatises inaccessible to the average person. He envisioned a tool for systematic instruction, enabling individuals and families to grasp essential doctrines. This motivation stemmed from his conviction that faith wasn’t merely intellectual assent, but a lived reality.

Furthermore, Luther sought to counter the spread of Anabaptist and other radical theological ideas gaining traction. Providing a solid foundation in orthodox Lutheran teaching was crucial for safeguarding the faithful and preserving the integrity of the Reformation.

The Two Main Catechisms: Large and Small

Luther produced two primary catechisms in 1529: the Large Catechism and the Small Catechism. The Large Catechism, a more extensive work, provided a detailed explanation of each doctrine, intended for pastors and teachers. It delved into the meaning and significance of core beliefs with greater depth and nuance.

Conversely, the Small Catechism offered a concise summary of these same doctrines, designed for laypeople – particularly heads of households – to teach their families. Presented in a question-and-answer format, it prioritized accessibility and memorization.

Both catechisms covered the Ten Commandments, the Apostles’ Creed, the Lord’s Prayer, Baptism, and the Eucharist. While differing in length and complexity, they shared a common theological foundation, ensuring doctrinal consistency across all levels of instruction.

Origins and Publication Dates

The impetus for Luther’s Catechisms arose from a pastoral crisis in 1529. Observing widespread ignorance of Christian doctrine among the populace, he felt compelled to address this deficiency. Reports indicated a lack of basic religious understanding, even among those who could read.

Consequently, Luther drafted both the Large and Small Catechisms that same year. The Large Catechism appeared in April 1529, followed shortly by the Small Catechism in May 1529. Both were initially published in German, reflecting Luther’s commitment to vernacular theology.

These publications coincided with a period of significant religious and political upheaval during the Protestant Reformation. The catechisms quickly became foundational texts for Lutheran education and devotional life, and PDF versions continue to be widely distributed today.

Understanding the Large Catechism

Explore Luther’s detailed exposition of core doctrines in the Large Catechism, available in PDF format, offering in-depth explanations for pastors and theological students.

Structure of the Large Catechism

The Large Catechism, accessible in PDF format, is meticulously organized into distinct sections, each addressing fundamental aspects of the Christian faith. It begins with a comprehensive treatment of the Ten Commandments, delving into their meaning and application. Following this, Luther systematically explains the Apostles’ Creed, offering a detailed exploration of core Christian beliefs about God, Jesus Christ, and the Holy Spirit.

Further sections are dedicated to the Lord’s Prayer, providing insightful commentary on each petition. The Sacraments of Baptism and the Eucharist receive extensive treatment, clarifying their significance and proper understanding. Finally, the Catechism addresses Confession and Absolution, outlining the process and benefits of receiving God’s forgiveness. This structured approach, readily available in downloadable PDFs, ensures a thorough and logical presentation of essential doctrines.

Detailed Explanation of the Ten Commandments

Within the Large Catechism, readily found as a PDF download, Luther provides an in-depth examination of each of the Ten Commandments. He moves beyond a simple listing of rules, exploring the underlying spiritual principles and motivations. Luther addresses not only outward actions but also the inward thoughts and desires that give rise to sin, offering a profound psychological and theological analysis.

He clarifies common misunderstandings and provides practical guidance for living a life that honors God’s law. The PDF versions allow for easy study and referencing of his detailed explanations. Luther emphasizes that keeping the Commandments isn’t about earning salvation, but about expressing gratitude for God’s grace and love, a core tenet accessible through these texts.

The Apostles’ Creed in the Large Catechism

Luther’s Large Catechism, available in accessible PDF format, dedicates significant attention to the Apostles’ Creed. He doesn’t simply reiterate the Creed’s statements but meticulously unpacks each phrase, clarifying its meaning and significance for Christian belief. This section serves as a robust defense of core doctrines like the Trinity, the incarnation, and the resurrection.

The PDF allows for focused study of Luther’s explanations, revealing his concern to combat false teachings and strengthen the faith of believers. He emphasizes the comfort and assurance found in understanding these foundational truths. Luther connects each article of the Creed to personal experience and daily life, making abstract theological concepts relatable and impactful.

The Sacrament of Baptism – Large Catechism Perspective

Within the readily available Large Catechism PDF, Luther provides an extensive treatment of Baptism, emphasizing its profound significance as God’s act, not merely a human ritual. He clarifies that Baptism isn’t simply water but water empowered by God’s Word and promise. This section directly addresses common misconceptions and anxieties surrounding infant baptism, affirming its biblical basis and efficacy.

Luther meticulously explains how Baptism signifies the washing away of sin, death to the old self, and resurrection to new life in Christ. The PDF format allows for careful examination of his arguments against Anabaptist views, highlighting the necessity of Baptism for salvation. He stresses the ongoing benefits of Baptism, providing comfort and strength throughout the Christian life.

The Sacrament of the Eucharist – Large Catechism Perspective

Examining the Large Catechism PDF reveals Luther’s robust defense of the real presence of Christ in the Eucharist. He vehemently rejects any notion that the Eucharist is merely a symbolic remembrance, asserting that the body and blood of Christ are truly present “in, with, and under” the bread and wine. This section meticulously dismantles opposing views, grounding his explanation firmly in Scripture.

Luther addresses the anxieties surrounding the Eucharist, assuring believers that receiving this sacrament is a powerful means of grace, strengthening faith and offering forgiveness. The PDF’s accessibility allows for detailed study of his arguments against transubstantiation and other erroneous interpretations. He emphasizes the importance of approaching the Eucharist with reverence and faith, recognizing it as a vital source of spiritual nourishment.

Confession and Absolution in the Large Catechism

The Large Catechism PDF dedicates significant attention to Confession and Absolution, presenting it not as a mere human invention, but as a divinely instituted means of grace. Luther stresses the profound comfort and assurance believers receive through confessing their sins to a called pastor and receiving absolution. He clarifies that absolution isn’t the pastor’s own power, but God’s forgiveness proclaimed through him.

Luther addresses common misunderstandings, emphasizing the necessity of genuine repentance and a contrite heart. The PDF format allows for careful examination of his detailed explanation of the pastor’s role as a “voice of Christ,” delivering God’s pardon. He underscores that confession isn’t about listing sins, but about acknowledging our helplessness and relying solely on God’s mercy.

Exploring the Small Catechism

The Small Catechism PDF provides a concise, accessible summary of core Christian beliefs, designed for laypeople and families, simplifying complex doctrines effectively.

Concise Format and Accessibility

Luther’s Small Catechism distinguishes itself through its remarkably concise format, intentionally crafted for ease of understanding and memorization. Unlike the expansive Large Catechism, the Small Catechism presents essential doctrines in a question-and-answer structure, making it exceptionally accessible to individuals of all ages and levels of theological knowledge.

This streamlined approach was deliberate; Luther aimed to equip families, particularly fathers, to instruct their children in the fundamentals of the Christian faith.

PDF versions further enhance accessibility, allowing for convenient download, printing, and online viewing on various devices. Concordia Publishing House offers translated PDF options, broadening its reach globally. The readily available digital format ensures the enduring relevance of Luther’s teachings in the modern era.

The Ten Commandments – Small Catechism Summary

Within Luther’s Small Catechism, the Ten Commandments are presented not merely as a list of prohibitions, but as a guide to recognizing sin and understanding our need for God’s grace. Each commandment is followed by a clear explanation of what it means in practical terms, addressing both outward actions and inward thoughts.

PDF versions of the Catechism, easily accessible online through resources like CTKELC;org, showcase this structure. The summary format emphasizes that we are all sinners in need of redemption.

Luther’s intent wasn’t to instill fear, but to lead individuals to Christ, whose sacrifice covers our transgressions. Studying the Ten Commandments within the Catechism fosters self-examination and a deeper appreciation for God’s law and love.

The Apostles’ Creed – Small Catechism Overview

The Small Catechism’s presentation of the Apostles’ Creed offers a concise yet comprehensive summary of core Christian beliefs. Luther breaks down each article of the Creed into simple questions and answers, making complex theological concepts accessible to all, including children.

PDF downloads readily available from Concordia Publishing House and other sources reveal this structure. The Creed covers fundamental doctrines like God’s creation, the incarnation of Jesus Christ, and the hope of resurrection.

Luther’s approach emphasizes that faith isn’t blind acceptance, but a confident trust based on a clear understanding of God’s revealed truth. This section of the Catechism serves as a foundational statement of Christian orthodoxy.

The Lord’s Prayer – Small Catechism Explanation

Luther’s Small Catechism meticulously dissects the Lord’s Prayer, presenting each petition with a detailed explanation of its meaning. Available in numerous PDF formats online, the Catechism doesn’t simply offer the prayer’s words, but unpacks the profound requests contained within.

Each phrase – “Hallowed be thy name,” “Thy kingdom come,” – is explored, connecting it to core theological truths. Luther emphasizes that prayer isn’t merely reciting words, but actively seeking God’s will and trusting in His provision.

This section clarifies that we ask for God’s name to be honored, His kingdom to advance, and our daily needs to be met, all while seeking forgiveness and protection from evil.

Baptism and the Eucharist in the Small Catechism

The Small Catechism’s treatment of Baptism and the Eucharist, easily found in PDF versions, centers on their significance as Sacraments – God’s means of grace. Baptism isn’t merely water, but a washing of regeneration, offering forgiveness of sins and new life in Christ, as Luther explains.

Similarly, the Eucharist isn’t simply bread and wine; it’s the true body and blood of Christ, offered for forgiveness. Luther stresses that through these sacraments, believers receive God’s grace and strengthen their faith.

These sections emphasize the real presence of Christ in the Eucharist, rejecting symbolic interpretations. Accessible PDF resources provide a clear understanding of these central tenets of Lutheran theology.

Accessing Luther’s Catechism in PDF Format

Numerous online platforms, including the Internet Archive and Concordia Publishing House, offer free PDF downloads and viewing options for Luther’s Catechisms.

Internet Archive Resources for PDF Downloads

The Internet Archive serves as a valuable repository for digitized versions of historical texts, including Martin Luther’s Catechisms. Users can access “Luther’s Large Catechism; God’s call to repentance, faith and prayer” directly through their platform, with options for PDF download.

Multiple download formats are available, catering to different user needs – from single-page PDFs to processed JP2 files and even torrent options for larger collections. The archive currently lists 27 files related to the Large Catechism and 11 original versions.

Researchers and students will find this resource particularly useful, offering access to scans of original publications alongside more modern digital reproductions. It’s a fantastic starting point for anyone seeking to study Luther’s work in its original context.

Concordia Publishing House Online Catechism

Concordia Publishing House provides a readily accessible online version of Luther’s Small Catechism, thoughtfully translated for contemporary readers worldwide. This resource goes beyond a simple PDF, offering interactive features and a user-friendly experience.

Users can explore the core tenets of Christian doctrine at their convenience, with the option to read the Catechism directly on their website or download a dedicated iOS/Android app for offline access. This digital format enhances study and personal devotion.

The translated version ensures clarity and understanding for a broader audience, making Luther’s essential teachings available to a new generation of learners. Concordia’s offering is a modern and convenient way to engage with this foundational text.

Availability of Translated PDF Versions

Numerous translated PDF versions of Luther’s Catechisms are available online, extending their reach beyond German-speaking audiences. These translations facilitate study and understanding for Christians globally, breaking down language barriers to access core theological teachings.

Researchers and students can find versions in various languages, catering to diverse linguistic communities. Concordia Publishing House notably offers translated editions alongside their original text resources. The Internet Archive also hosts a collection of translated PDFs, expanding accessibility.

These translated PDFs ensure Luther’s message of faith and repentance resonates with a wider audience, fostering deeper engagement with his influential work. Finding a version in your native language simplifies comprehension and promotes personal devotion.

Free PDF Downloads and Online Viewing Options

Accessing Luther’s Catechisms doesn’t require financial investment, as numerous platforms offer free PDF downloads. The Internet Archive stands out, providing downloadable PDFs in various formats – including single-page and torrent options – for both the Large and Small Catechisms.

Alternatively, online viewing is readily available through Concordia Publishing House, allowing immediate access without downloading. This is ideal for quick reference or studying on devices with limited storage. Many websites also host the Small Catechism online, like CTKELC.org, offering convenient access.

These free resources democratize theological study, making Luther’s foundational work accessible to anyone with an internet connection, fostering wider engagement with Reformation theology.

Practical Applications and Study Resources

Enhance your faith through personal devotion, Bible studies, and teaching resources centered around Luther’s Catechism, bridging historical theology with contemporary Christian living.

Using the Catechism for Personal Devotion

Engage with Luther’s Catechism as a daily devotional tool, fostering a deeper understanding of core Christian beliefs. Utilize the concise questions and answers of the Small Catechism for focused meditation and prayer; Consider working through each section – Ten Commandments, Creed, Lord’s Prayer, Baptism, and Eucharist – over a set period, reflecting on their meaning in your life.

Download a PDF version for convenient access on various devices, allowing for study anytime, anywhere. Supplement your reading with hymnody connected to the Catechism’s themes, enriching your devotional experience. Explore online resources and apps offering daily readings and reflections based on Luther’s teachings. Embrace the Catechism as a guide for spiritual growth and a foundation for a stronger faith.

Catechism-Based Bible Study Plans

Develop structured Bible study plans centered around Luther’s Catechism, utilizing its questions as prompts for scriptural exploration. Download a PDF of the Small Catechism and correlate each section with relevant Bible passages, deepening comprehension. Focus on the Ten Commandments, examining biblical examples of obedience and disobedience. Investigate the Apostles’ Creed through studies of key theological texts in the New Testament.

Explore the Lord’s Prayer by analyzing Jesus’ teachings on prayer and discipleship. Delve into the sacraments of Baptism and Eucharist, tracing their biblical roots and significance. Utilize online resources offering pre-designed study guides or create your own, tailoring the plan to your group’s needs. Enhance learning with discussion questions and application exercises, fostering a vibrant study environment.

Resources for Teaching Luther’s Catechism

Access downloadable PDF resources from Concordia Publishing House, offering comprehensive teaching aids for Luther’s Small Catechism. Utilize online platforms providing lesson plans, activities, and visual aids tailored for various age groups. Explore workbooks and student materials designed to reinforce key concepts and encourage engagement. Consider incorporating multimedia resources, such as videos and interactive presentations, to enhance learning.

Employ the Catechism’s question-and-answer format as a foundation for interactive discussions and group activities. Adapt materials to suit the specific needs and learning styles of your students. Supplement the Catechism with relevant Bible passages and real-life examples. Seek out training workshops or online courses for catechists to refine teaching skills and deepen understanding.

The Catechism and Contemporary Christian Life

Discover how Luther’s Catechism, available in accessible PDF formats, remains remarkably relevant for modern Christians. Understand its core teachings provide a solid foundation for navigating complex ethical dilemmas and societal challenges. Apply the Catechism’s principles to daily life, fostering a deeper understanding of faith and its practical implications. Utilize its framework for personal devotion, strengthening one’s relationship with God.

Explore how the Catechism addresses fundamental questions about salvation, faith, and the sacraments, offering timeless wisdom. Consider its emphasis on repentance and forgiveness as essential components of Christian growth. Integrate its teachings into family life, nurturing faith in future generations. Recognize the Catechism’s enduring power to shape discipleship and inspire a life of service.

Luther’s Hymns and Their Connection to the Catechism

Explore how Luther’s hymns, often found in PDF collections online, were deeply influenced by the theological principles articulated within his Catechisms.

Influence of Catechism on Luther’s Hymnody

Martin Luther’s hymns weren’t simply musical additions to worship; they were carefully crafted theological statements, profoundly shaped by the core doctrines presented in his Catechisms. The Catechisms provided a structured framework for understanding essential Christian beliefs – the Ten Commandments, the Apostles’ Creed, the Lord’s Prayer, Baptism, and the Eucharist.

Luther intentionally wove these foundational teachings into his hymn lyrics, making complex theological concepts accessible to the common people. His hymns served as a memorable and engaging way to reinforce the lessons of the Catechism, embedding them deeply within the hearts and minds of his congregation.

Many hymns directly address themes from the Catechism, offering poetic expressions of repentance, faith, and the grace of God. Online PDF collections of Luther’s hymns demonstrate this connection, revealing a consistent theological thread running through his musical and catechetical work.

Availability of Hymn PDFs Online

Numerous online resources offer free PDF downloads of Martin Luther’s hymns, facilitating study and musical enrichment. The Internet Archive hosts digitized collections, providing access to historical hymnbooks and individual hymn sheets. These resources often include original German texts alongside English translations, allowing for comparative analysis.

Additionally, websites dedicated to Lutheran hymnody frequently compile and share PDF versions of Luther’s compositions. These collections are often categorized by liturgical season or theological theme, making it easier to find specific hymns.

Researchers and musicians can also find hymn PDFs through academic databases and online libraries. These digital resources ensure Luther’s musical legacy remains accessible to a global audience, supporting both scholarly research and devotional practice.

hugo boss size guide uk

Hugo Boss Size Guide UK: A Comprehensive Overview (Updated February 15, 2026)

Navigating Hugo Boss sizing in the UK requires understanding their fit types, checking specific product guides, and considering material composition for optimal comfort and style.

Hugo Boss offers a sophisticated aesthetic, and achieving the perfect fit is crucial to embodying that style. This guide provides a detailed overview of Hugo Boss sizing specifically for the UK market, acknowledging potential variations between international standards. Understanding that Hugo Boss operates as an Asian size, generally two sizes larger than European counterparts, is a key starting point.

The brand caters to a diverse clientele with varying body types, offering a range of fits – from slim and tailored to regular and comfortable – across their collections. Accurate measurements are paramount; relying solely on your usual size can be misleading.

Furthermore, material plays a significant role. A premium cotton three-thread fleece garment, for example, will behave differently than a structured wool coat. Always consult the individual product’s size guide, as these can deviate slightly from general charts. This ensures a purchase that reflects the brand’s quality and enhances your personal style.

Understanding UK vs. International Sizes

Hugo Boss sizing can present complexities when comparing UK measurements to international standards, particularly US and EU sizes. Generally, UK sizes tend to be smaller than their US equivalents, and often differ from EU numbering. However, Hugo Boss, being an Asian-based size, adds another layer to this conversion. It’s commonly noted that their sizing runs approximately two sizes larger than European sizes.

Therefore, a UK size Large might correspond to a US size Medium or a European size 50, but with Hugo Boss, you might need an EU size 52 or 54 to achieve a similar fit.

Conversion charts are helpful starting points, but individual garments can vary. Always prioritize checking the specific product’s size guide on the Hugo Boss website or retailer’s page. Considering the garment’s cut – slim, regular, or comfort – is also vital, as this impacts how the size translates to your body shape. Accurate self-measurement is crucial for a successful purchase.

Men’s Hugo Boss Size Guide

For men, Hugo Boss offers a range of sizes in suits, shirts, trousers, polos, and t-shirts, requiring precise chest, waist, and sleeve measurements for a perfect fit.

Suit Jacket & Blazer Sizing

Achieving the correct fit in a Hugo Boss suit jacket or blazer begins with accurately measuring your chest size. This is the most crucial measurement, determining the overall body of the jacket. Hugo Boss typically offers suit jackets in chest sizes ranging from 38R to 48R, with ‘R’ denoting a regular fit.

Beyond chest size, consider the fit – Slim Fit, Regular Fit, or Comfort Fit – as this significantly impacts the jacket’s silhouette. Slim fit jackets are tailored closer to the body, while regular fit provides more room for movement, and comfort fit offers the most relaxed style.

Sleeve length is also paramount. Ideally, approximately half an inch of your shirt cuff should be visible beyond the jacket sleeve. Hugo Boss provides varying sleeve lengths within each chest size, but it’s always best to confirm with their specific size chart or, ideally, have a professional tailor adjust the sleeves for a truly bespoke fit.

Remember to account for the layers you’ll typically wear underneath the jacket when taking your chest measurement.

Chest Size & Fit

Determining your accurate chest size is foundational for selecting the correct Hugo Boss suit or blazer. Measure around the fullest part of your chest, keeping the tape measure level and comfortably snug – not tight. This measurement, in inches, directly corresponds to the jacket size you’ll need.

Hugo Boss offers a range of fits impacting how the jacket feels and looks. ‘Slim Fit’ jackets are cut closer to the body, ideal for a modern, streamlined silhouette. ‘Regular Fit’ provides a classic, balanced look with more room for comfort and movement.

Consider your body type when choosing. Broader shoulders or a larger build may benefit from a Regular Fit, while a leaner physique suits a Slim Fit. Don’t assume your usual size; always refer to the Hugo Boss size chart, as variations can occur.

A well-fitted jacket should allow for comfortable arm movement without feeling restrictive or pulling across the back.

Sleeve Length Considerations

Achieving the perfect sleeve length is crucial for a polished Hugo Boss jacket appearance. Ideally, approximately ¼ to ½ inch (0.6 ⎼ 1.3 cm) of your shirt cuff should be visible beyond the jacket sleeve. This subtle detail elevates the overall look and demonstrates attention to detail.

To measure your sleeve length, stand with your arms relaxed at your sides and measure from the center back of your neck, over your shoulder, and down to your wrist bone.

Hugo Boss often provides sleeve length information based on jacket size. However, if you fall between sizes, consider your build. Those with longer arms may need to size up and have the sleeves tailored for a precise fit.

Remember that tailoring is often necessary, even with accurate measurements, to achieve a truly bespoke fit. A skilled tailor can adjust sleeve length for optimal comfort and style.

Shirt Sizing

Hugo Boss shirts are renowned for their sophisticated fit and quality. Accurate shirt sizing ensures both comfort and a refined aesthetic. Understanding collar and sleeve measurements is paramount for selecting the correct size.

Hugo Boss typically offers shirts in neck sizes ranging from 15 to 18.5 inches, and sleeve lengths vary depending on the neck size. It’s crucial to measure your neck accurately using a flexible measuring tape.

For a comfortable fit, the collar should allow enough room for two fingers to fit between your neck and the collar when buttoned. Sleeve length should be measured from the center back of your neck to your wrist bone.

Consider the shirt’s intended style – slim fit shirts will be more tailored, while regular fit shirts offer more room. Always consult the specific product’s size guide for the most accurate information.

Collar Size Measurement

Accurately determining your collar size is fundamental to achieving a well-fitted Hugo Boss shirt. This measurement dictates comfort and the overall appearance of the garment. Use a flexible measuring tape for the most precise results.

Wrap the measuring tape around the base of your neck, ensuring it sits comfortably but not tightly. The tape should be level and not angled. Record the measurement in inches.

If your measurement falls between sizes, it’s generally recommended to round up to the next half-inch. A slightly larger collar is preferable to one that feels restrictive.

Hugo Boss often provides collar sizes in both inches and centimeters on their size charts. Double-check the specific chart for the shirt you are considering.

Remember that a properly fitted collar allows enough space for two fingers to comfortably fit between your neck and the collar when buttoned;

Sleeve Length for Shirts

Determining the correct sleeve length for a Hugo Boss shirt ensures a polished and proportionate look. Incorrect sleeve length can significantly impact the overall fit and style of the shirt.

Measure from the center back of your neck, over your shoulder, and down to your wrist bone. Keep your arm slightly bent during measurement. This provides a natural and accurate length.

Hugo Boss typically lists sleeve lengths in inches. Common sleeve lengths include regular, long, and sometimes short sleeve options.

When trying on a shirt, the cuff should fall approximately half an inch beyond your wrist bone, allowing a small portion of your shirt cuff to be visible beyond your jacket sleeve.

If you frequently wear suits, consider the jacket sleeve length when choosing your shirt sleeve length to ensure a harmonious appearance.

Trouser Sizing

Accurate trouser sizing is crucial for both comfort and a refined silhouette when choosing Hugo Boss trousers. Understanding waist and leg length measurements is paramount for a perfect fit.

Measure your waist at the natural waistline, ensuring the tape measure is comfortably snug but not tight. For leg length, measure from your natural waistline, down the inside of your leg, to where you want the trousers to fall on your shoe.

Hugo Boss trousers are typically sized numerically (e.g., 32, 34, 36) representing waist size in inches. Leg length is also indicated in inches (e.g., 30, 32, 34).

Consider the desired trouser fit – Slim, Regular, or Comfort – as this influences the overall cut and feel. Slim fit trousers are more tapered, while comfort fit offers more room.

Always consult the specific product size guide on the Hugo Boss website, as variations can occur between different styles and collections.

Waist & Leg Length Measurements

Precise waist and leg length measurements are fundamental to achieving the correct Hugo Boss trouser size. Begin with the waist: use a flexible measuring tape and measure around your natural waistline – typically, this is the narrowest part of your torso. Ensure the tape is level and comfortably snug, avoiding constriction.

For leg length, measure from your natural waistline, down the inside of your leg, to the desired point where the trouser hem will fall on your shoe. Consider your preferred footwear when taking this measurement.

Hugo Boss generally uses inches for both waist and leg length. Common waist sizes range from 30 to 40 inches, while leg lengths typically fall between 30 and 34 inches.

It’s advisable to have someone assist you with these measurements for greater accuracy. Double-check your measurements before comparing them to the Hugo Boss size chart.

Trouser Fit Styles (Slim, Regular, Comfort)

Hugo Boss offers a variety of trouser fit styles, each designed to provide a distinct silhouette and level of comfort. The ‘Slim Fit’ is tailored closely to the body, creating a modern and streamlined look, ideal for a sophisticated aesthetic. It typically features a narrower leg opening.

‘Regular Fit’ trousers provide a classic and versatile style, offering a comfortable fit without being overly tight or loose. This is a popular choice for everyday wear, balancing style and practicality.

‘Comfort Fit’ trousers prioritize ease of movement and a relaxed feel. They feature a looser cut through the seat and thigh, providing maximum comfort, and are often preferred for casual occasions.

When selecting a Hugo Boss trouser, consider your body type and personal preference. Understanding these fit styles will help you choose the perfect pair for your desired look and comfort level.

Hugo Boss Polo Shirt Sizing

Hugo Boss polo shirts generally adhere to standard UK sizing, but slight variations can occur depending on the specific style and collection. To ensure the best fit, it’s crucial to consult the individual product’s size guide, often found on the Hugo Boss website or retailer pages.

Typically, sizes range from S (Small) to XXL (Extra Extra Large). Chest measurement is the primary factor; measure around the fullest part of your chest, keeping the tape measure level. Compare this measurement to the size chart provided.

Consider the fit – Slim Fit polos will be more fitted, while Regular Fit offers a more relaxed feel. Hugo Boss often uses high-quality cotton, which may have minimal shrinkage after washing, so account for this when choosing your size.

Don’t hesitate to size up if you are between sizes or prefer a looser fit.

Hugo Boss T-Shirt Sizing

Hugo Boss t-shirts, like their polo shirts, typically follow standard UK sizing conventions, though variations exist between styles. Always prioritize checking the specific size guide accompanying the t-shirt you intend to purchase, available on the official Hugo Boss website or through authorized retailers.

Sizes generally span from S (Small) to XXL (Extra Extra Large). The most important measurement is your chest circumference; measure around the fullest part, ensuring the tape measure remains horizontal. Cross-reference this measurement with the provided size chart.

Pay attention to the fit description – Slim Fit t-shirts offer a closer, more tailored silhouette, while Regular Fit provides a more comfortable, relaxed style. Hugo Boss t-shirts are frequently crafted from premium cotton blends, potentially experiencing slight shrinkage after washing.

If you fall between sizes, consider opting for the larger size for enhanced comfort.

Women’s Hugo Boss Size Guide

For Hugo Boss women’s wear, accurate bust, waist, and hip measurements are crucial; consult detailed size charts for dresses, tops, trousers, skirts, and outerwear.

Dress Sizing

Hugo Boss dress sizing necessitates precise body measurements to ensure a flattering fit. Begin by accurately measuring your bust, waist, and hip circumference using a flexible measuring tape. The bust measurement should be taken at the fullest part of your chest, keeping the tape level.

For the waist, measure around your natural waistline – typically the narrowest part of your torso. Hip measurement is taken at the fullest part of your hips, again ensuring the tape is horizontal.

Compare these measurements against the official Hugo Boss dress size chart, available on their website or specific product pages. Note that sizing can vary slightly between different dress styles and collections.

Pay attention to dress length specifications, particularly if you have a preference for mini, midi, or maxi lengths. Consider the dress’s silhouette – A-line, sheath, or wrap – as this can influence the fit. When in doubt, it’s often advisable to size up, as alterations are generally easier than trying to expand a garment.

Bust, Waist & Hip Measurements

Accurate bust, waist, and hip measurements are fundamental to finding your perfect Hugo Boss dress size. For the bust, measure around the fullest part of your chest, keeping the tape measure level and comfortably snug – do not pull it too tight.

To determine your waist size, locate your natural waistline, usually the narrowest point of your torso. Measure around this area, ensuring the tape is parallel to the floor. For hip measurement, stand with your feet together and measure around the fullest part of your hips and buttocks.

Record these three measurements in centimeters or inches, depending on the Hugo Boss size chart you are referencing. Remember to wear minimal clothing during measurement for accuracy. Compare your measurements carefully to the size guide, noting any variations between styles.

If your measurements fall between sizes, consider your body shape and preferred fit – a slightly larger size may offer more comfort, while a smaller size might provide a more fitted look.

Top & Blouse Sizing

Hugo Boss tops and blouses offer a range of fits, so understanding your measurements is crucial. Begin by accurately measuring your bust, waist, and shoulder width. For the bust, measure around the fullest part, ensuring the tape measure is level. Your waist measurement should be taken at your natural waistline.

Shoulder width is measured from the edge of one shoulder to the other, across the back. These three measurements, combined with your preferred fit (slim, regular, or relaxed), will guide you to the correct size.

Refer to the specific product’s size chart, as variations can occur between styles. Pay attention to the length of the top or blouse, especially if you prefer a cropped or longer fit.

Consider the fabric composition; some materials may have less stretch, requiring a slightly larger size for comfort. Don’t hesitate to consult Hugo Boss’s official size guide for detailed instructions and conversions.

Trouser & Jean Sizing

Accurate waist and inseam measurements are paramount when selecting Hugo Boss trousers or jeans. Measure your waist at your natural waistline, keeping the tape measure comfortably loose. For inseam, measure from your crotch to the bottom of where you’d like the trousers to fall, wearing shoes similar to those you’ll pair with them.

Hugo Boss offers various fits – slim, regular, and comfort – each impacting the overall silhouette. Slim fit trousers are closer to the body, while comfort fits provide more room. Consider your body type and preference when choosing a fit.

Always consult the specific product’s size guide, as sizing can vary between styles and collections. Pay attention to whether the waist measurement is taken in inches or centimeters.

Remember that denim may shrink slightly after washing, so consider this when selecting your size.

Waist & Inseam Measurements

To determine your Hugo Boss trouser size, begin with an accurate waist measurement. Use a flexible measuring tape and measure around your natural waistline – typically, this is the narrowest part of your torso. Ensure the tape is comfortably snug, not too tight or loose. Record this measurement in inches or centimeters, depending on the size chart used.

Next, measure your inseam. Stand with your feet shoulder-width apart and measure from your crotch down to where you want the trousers to end, usually at the top of your shoe. Wearing shoes similar to those you intend to wear with the trousers is crucial for an accurate inseam measurement.

Compare your measurements to the Hugo Boss size chart for the specific style you are considering, as variations can occur.

Skirt Sizing

Hugo Boss skirt sizing, like other garments, relies on accurate body measurements for a flattering fit. Begin by measuring your bust, waist, and hip circumference. For the bust, measure around the fullest part of your chest, keeping the tape measure level. The waist measurement should be taken at the narrowest point of your natural waistline.

For hips, stand with your feet together and measure around the fullest part of your hips, ensuring the tape measure is parallel to the floor. These three measurements are critical when consulting the Hugo Boss size chart for skirts.

Pay close attention to the skirt’s style – A-line, pencil, or flared – as the fit will vary. Always check the specific product’s size guide, as sizing can differ between styles and collections.

Coat & Jacket Sizing

Determining the correct Hugo Boss coat and jacket size necessitates measuring your chest, waist, and sleeve length accurately. Measure your chest at the fullest part, keeping the tape measure level. Your waist measurement should be taken at your natural waistline. For sleeve length, measure from the center back of your neck, over your shoulder, and down to your wrist.

Crucially, consider whether you intend to layer clothing underneath the coat or jacket. If so, allow for extra room when selecting your size. Hugo Boss offers various fits – slim, regular, and relaxed – each impacting the overall silhouette.

Always consult the specific product’s size guide, as variations exist between styles and collections. A 34-length coat (size Medium) is often lined with polyester fill, influencing the fit.

General Hugo Boss Sizing Tips

Prioritize checking individual product size charts, understanding fit types (slim or regular), and considering fabric composition for the best Hugo Boss experience.

Checking Specific Product Size Guides

While Hugo Boss offers general sizing guidelines, discrepancies can occur due to variations in design and materials. Therefore, always consult the specific size guide provided on the product page before making a purchase. These guides offer the most accurate measurements for that particular item, ensuring a better fit.

Look for detailed charts outlining key measurements like chest, waist, inseam, and sleeve length. Pay close attention to whether the guide uses body measurements or garment measurements – understanding this distinction is crucial. Hugo Boss frequently updates these guides, so ensure you’re referencing the most current version available at the time of your order. Don’t assume consistency across all styles; a jacket’s size guide will differ from a t-shirt’s.

Furthermore, some online retailers, like DONLY.GROUP, emphasize the importance of size guides to ensure a perfect fit. Utilizing these resources minimizes the risk of incorrect sizing and potential returns.

Considering Material & Style

The fabric composition significantly impacts how a Hugo Boss garment fits. For instance, items crafted from premium, non-stretch cotton, like the three-thread fleece Hugo Boss uses, may require a slightly looser fit compared to those with elastane for added flexibility. Consider the garment’s intended style – slim fit pieces will naturally have a more tailored, close-to-the-body silhouette.

Heavier materials, such as wool in coats, might feel more substantial and require room for layering underneath. Conversely, lighter fabrics like linen will drape differently. Pay attention to the garment’s construction; structured pieces often have less give than more relaxed styles.

Remember that sizing can also vary based on the season and collection. Always review product details and, when available, customer reviews for insights into how a particular style runs – true to size, large, or small.

Understanding Hugo Boss Fit Types (Slim Fit, Regular Fit)

Hugo Boss offers distinct fit types to cater to diverse preferences. Slim Fit garments are designed with a close-to-body silhouette, emphasizing a modern, tailored look. These are ideal for those who prefer a more streamlined appearance and typically feature a narrower cut through the chest, waist, and sleeves;

Regular Fit, conversely, provides a more classic and comfortable fit. It offers greater freedom of movement and a relaxed silhouette, with a straighter cut through the body. This style is versatile and suitable for various body types.

Understanding these core fits is crucial when selecting your size. If you’re between sizes, consider your build and desired aesthetic – opting for the larger size in Slim Fit or sticking with your usual size in Regular Fit.

Return & Exchange Policies (UK)

Hugo Boss UK generally offers a 30-day return window for online purchases, provided items are unworn, unwashed, and with original tags attached. Returns are typically free when utilizing their designated return portal, generating a prepaid shipping label. Exchanges are often facilitated as returns followed by a new purchase, ensuring you secure the correct size.

However, policies can vary depending on where you purchased the item – directly from Hugo Boss, a department store, or an authorized retailer. Always review the specific return instructions accompanying your order or on the retailer’s website. Certain items, like personalized or final sale products, may be non-returnable.

Keep your proof of purchase readily available, as it’s essential for processing any returns or exchanges efficiently. Familiarize yourself with these details before buying!

Where to Find Official Hugo Boss Size Charts

The most reliable source for Hugo Boss sizing information is the official Hugo Boss website (hugoboss.com/uk). Navigate to the “Help” or “Customer Service” section, then look for “Size Guide.” Here, you’ll find detailed charts for men’s and women’s apparel, including suits, shirts, trousers, dresses, and outerwear.

Each product page often features a specific size guide tailored to that item, accounting for variations in fit and material. Don’t rely solely on general charts; always check the individual product’s guide. Authorized retailers like department stores (e.g., Selfridges, John Lewis) may also provide size charts on their websites.

However, prioritize the official Hugo Boss resources for the most accurate and up-to-date information, ensuring a perfect fit and a satisfying shopping experience.

Hugo Boss Size Conversion Charts (UK to US/EU)

While Hugo Boss primarily operates on UK sizing, understanding conversions to US and EU standards is crucial for international shoppers. Generally, UK sizes are equivalent to US sizes, meaning a UK 40 is typically a US 40. However, slight variations can occur, particularly with trousers and suits.

For EU conversions, a UK 40 often corresponds to an EU 50. It’s essential to consult a detailed conversion chart, readily available on the official Hugo Boss website (hugoboss.com/uk) within their size guide section. These charts provide precise measurements for chest, waist, and inseam, facilitating accurate conversions.

Remember that these are general guidelines; always prioritize checking the specific product’s size chart for the most reliable conversion, as fit can vary between styles and collections.

yamaha tf5 user manual

Yamaha TF5 User Manual: A Comprehensive Guide

This comprehensive guide details the Yamaha TF5 digital mixing console, covering setup, operation, firmware, troubleshooting, and resources for professional audio engineers.

The Yamaha TF5 represents a significant advancement in live sound reinforcement, offering a refined experience through its innovative TouchFlow Operation. This console boasts recallable D-PRE preamplifiers, delivering exceptional audio quality and clarity.

Designed for both seasoned professionals and those new to digital mixing, the TF5 provides a user-friendly interface alongside powerful processing capabilities. It’s a versatile solution for a wide range of applications, from live performances to corporate events.

This manual will guide you through every aspect of the TF5, ensuring you unlock its full potential.

Unboxing and Initial Setup

Upon receiving your Yamaha TF5, carefully inspect the packaging for any signs of damage during transit. The box should contain the TF5 console itself, a power cable, and potentially documentation like quick start guides.

Before powering on, ensure the correct voltage is selected. Connect the power cable and then connect the TF5 to your audio system. Initial setup involves navigating the console’s menu to configure basic settings like audio input and output assignments.

Refer to the full 118-page manual for detailed instructions.

Understanding the TF5 Control Surface

The Yamaha TF5 boasts a streamlined control surface designed for intuitive operation. Key features include the TouchFlow Operation, providing a responsive and efficient workflow. Physical controls encompass dedicated channel faders, EQ knobs, and auxiliary send controls.

The console’s layout prioritizes quick access to essential parameters. Understanding the arrangement of these controls is crucial for effective mixing. The TF series consoles aim to deliver professional results without extensive manual study.

Physical Controls and Layout

The TF5’s physical layout centers around dedicated faders for each channel, offering precise level control. Rotary encoders provide access to EQ, dynamics, and auxiliary sends. A prominent section is dedicated to input gain staging.

The console’s design emphasizes a clear signal flow, with controls logically grouped for efficient operation. This intuitive arrangement minimizes learning time and maximizes workflow speed, allowing engineers to focus on the mix itself.

TouchFlow Operation – An Overview

TouchFlow Operation is a core feature of the TF series, providing an intuitive and streamlined mixing experience. This interface allows quick access to essential parameters directly from the console’s surface.

Users can seamlessly navigate channels, adjust levels, and modify processing with a simple touch. It minimizes menu diving and maximizes hands-on control, resulting in a faster, more responsive workflow for live sound reinforcement and studio applications.

Digital Preamp (D-PRE) Section

The Yamaha TF5 boasts recallable D-PRE preamplifiers, a significant feature elevating its sound quality. These preamps are designed to deliver a natural, transparent sound with low noise and distortion.

D-PREs faithfully reproduce every nuance of the input signal, ensuring clarity and detail. Their recallable nature allows for consistent sound across different scenes and setups, streamlining workflow and guaranteeing reliable performance.

D-PRE Technology Explained

Yamaha’s D-PRE technology utilizes an inverted Darlington circuit, meticulously crafted to deliver exceptionally clean and transparent amplification. This design minimizes distortion and noise, faithfully capturing the original sound source.

The D-PRE’s low impedance input stage further enhances clarity, while a carefully tuned gain stage ensures optimal signal-to-noise ratio. This results in a preamp that provides a natural, detailed sound, ideal for a wide range of applications.

Gain Staging with D-PRE

Proper gain staging with the TF5’s D-PRE preamps is crucial for optimal performance. Begin by setting the gain to achieve a healthy input level, avoiding clipping while maximizing the signal-to-noise ratio.

Monitor the input level meters closely, aiming for a strong signal without exceeding 0dBFS. Utilize the TF5’s intuitive interface to fine-tune gain for each channel, ensuring a balanced and dynamic mix. Careful gain staging unlocks the full potential of D-PRE.

Channel Processing

The Yamaha TF5 offers extensive channel processing capabilities for shaping your sound. Each channel features a 4-band EQ, allowing precise tonal control. Dynamics processing includes compression, limiting, and gating, providing polish and control over your audio signals.

Explore the built-in effects, such as reverb, delay, and chorus, to add depth and character. Utilize aux sends to create monitor mixes or feed external effects units, enhancing your overall mix.

EQ and Dynamics Control

The TF5’s EQ section provides four bands of parametric equalization per channel, offering detailed frequency shaping. Dynamics control includes compression, limiter, gate, and expander functions, allowing for precise signal management. Adjust attack, release, ratio, and threshold parameters to sculpt your audio.

Sidechaining options are available for creative dynamic effects. These tools enable you to refine individual channel sounds and achieve a polished, professional mix.

Effects and Aux Sends

The Yamaha TF5 features a versatile selection of onboard effects, including reverbs, delays, chorus, and flangers, enhancing your mixes with depth and character. Utilize the aux sends to create monitor mixes or feed external effects processors.

The TF5 offers flexible routing options for aux sends, pre- or post-fader, allowing for customized signal flow. Control effect parameters directly from the control surface for real-time adjustments.

Routing and Mixing

The Yamaha TF5 excels in routing and mixing capabilities, offering a clear signal flow from inputs to outputs. Utilize the intuitive TouchFlow operation to quickly configure signal paths and create complex mixes.

Explore the console’s matrix mixing features for advanced control over output levels and equalization. This allows for precise tailoring of sound to different zones or speaker systems, ensuring optimal audio delivery in any venue.

Signal Flow within the TF5

Understanding the TF5’s signal flow is crucial for effective mixing. Inputs pass through the D-PRE preamplifiers, then to channel processing including EQ and dynamics. Signals are then routed via aux sends and matrix mixing to outputs.

The console’s architecture allows for flexible routing options, enabling users to create customized mixes for monitors, main outputs, and other destinations. Careful attention to gain staging throughout the signal path ensures optimal audio quality.

Matrix Mixing Capabilities

The Yamaha TF5 boasts powerful matrix mixing capabilities, offering extensive control over signal routing. This feature allows sending any input signal to any combination of outputs, independent of the main mix buses.

Users can create complex monitor mixes, fill systems, or customized signal distributions with precision. Matrix mixing enhances flexibility for diverse live sound scenarios, providing a sophisticated solution for advanced audio routing needs within the TF5 console.

Scene Management and Recall

The Yamaha TF5 excels in scene management, allowing users to save and recall entire console setups instantly. Scenes store all critical parameters – EQ, dynamics, effects, routing, and more – for quick transitions between songs or performance sections.

Creating scenes streamlines workflow, ensuring consistent sound quality. Recall options offer flexibility, with features to selectively load specific parameters. This capability is vital for complex live events and repeatable performances.

Creating and Saving Scenes

To create a scene on the Yamaha TF5, adjust all desired parameters – levels, EQ, effects, routing – to your preferred settings. Then, navigate to the ‘Scene’ menu and select ‘Save’. Assign a descriptive name to the scene for easy identification during live performance or rehearsal.

The TF5 allows storing numerous scenes internally. Regularly saving scenes throughout setup and soundcheck ensures you can quickly revert to known good configurations, minimizing downtime and maximizing performance reliability.

Recall Options and Considerations

When recalling scenes on the Yamaha TF5, understand that certain parameters may be excluded from recall to prevent unwanted changes – typically those actively in use. Consider utilizing the ‘Recall Filter’ function to selectively include or exclude specific parameters during scene recall.

Always verify critical settings after recalling a scene, especially levels and monitoring paths. Careful scene management and awareness of recall behavior are crucial for seamless transitions and a consistent audio experience.

Firmware Updates

Keeping your Yamaha TF5 firmware current is vital for optimal performance and access to the latest features. Download the newest firmware version (currently V3.11, with a history including V3.10, V3.01, and V2.50-2) from the official Yamaha website.

Follow the provided installation instructions carefully to avoid any issues. Regularly checking for updates ensures stability and compatibility, enhancing the overall user experience of your TF5 console.

Downloading and Installing Firmware

To download TF5 firmware, visit the Yamaha USA website’s dedicated downloads section for the TF series mixers. Ensure you select the correct firmware version for your specific TF5 model (or TF3/1, TF-RACK).

Follow Yamaha’s detailed instructions for installation, typically involving a USB drive. Back up your current scene data before updating! A failed update can render the console unusable, so proceed cautiously and follow each step precisely.

Firmware Version History (V3.11, V3.10, V3.01, V3.00, V2.50-2, V2.01, V2.00, V1.12, V1.10)

Yamaha regularly releases firmware updates for the TF5, addressing bugs and adding features. V3.11 and V3.10 represent the latest improvements. Earlier versions like V3.01 and V3.00 introduced significant enhancements. V2.50-2, V2.01, and V2.00 provided stability and compatibility fixes.

V1.12 and V1.10 were foundational releases. Consult Yamaha’s website for detailed change logs for each version to understand the specific improvements implemented.

Troubleshooting Common Issues

Addressing issues with the Yamaha TF5 is often straightforward. Audio dropouts and noise can stem from cable connections or gain staging. Verify all cables are secure and adjust input gains appropriately. Connectivity problems might involve USB or network configurations; ensure correct driver installation and network settings.

Consult the official Yamaha documentation for detailed troubleshooting steps and consider factory resets as a last resort.

Audio Dropouts and Noise

Intermittent audio dropouts with the TF5 often indicate a problem with the digital signal chain. Check USB cable integrity if using a computer interface, and ensure proper network configuration for audio over IP. Noise issues can arise from improper gain staging – avoid clipping at any stage.

Verify grounding and eliminate potential interference sources. Inspect all connections and consider a factory reset if problems persist.

Connectivity Problems

If experiencing connectivity issues with your Yamaha TF5, first confirm physical cable connections – USB, Ethernet, and audio cables. Check network settings if utilizing audio networking protocols. Ensure the TF5’s IP address doesn’t conflict with other devices on the network.

Verify driver installations on connected computers. A factory reset can resolve software glitches, but back up scenes first!

Yamaha TF5 Resources and Support

Yamaha provides extensive resources for TF5 users. Access official downloads, including firmware updates (V3.11, V3.10, etc.), from the Yamaha USA website. Explore the TF Series downloads section for the latest versions.

Benefit from the Andy Cooper tutorial video series, offering practical guidance on achieving professional results without extensive manual reading. These videos simplify complex features and workflows.

Official Yamaha Downloads

Yamaha’s official website hosts crucial TF5 downloads. Users can access firmware updates, including versions V3.11, V3.10, V3.01, V3.00, V2.50-2, V2.01, V2.00, and V1.12, alongside V1.10. These updates enhance console functionality and stability.

Regularly checking for new releases is recommended to ensure optimal performance. Downloadable resources are available for TF5, TF3, and TF-RACK models, providing comprehensive support for all TF Series consoles.

Tutorial Videos (Andy Cooper Series)

Andy Cooper’s tutorial videos offer a practical approach to mastering the Yamaha TF series. These videos guide users through the console’s features, helping achieve polished, professional results without extensive manual reading. Cooper demonstrates key functionalities, simplifying complex operations.

The series is an excellent resource for both beginners and experienced engineers seeking to maximize their TF5’s potential. These tutorials provide valuable insights and practical techniques for live sound reinforcement.

Service Manual Information

For electronics experts, the Yamaha TF5 service manual provides detailed schematics and repair information. This resource is crucial for diagnosing and resolving complex technical issues within the digital mixing console. Access to the service manual enables in-depth troubleshooting and component-level repairs.

The manual assists qualified technicians in maintaining optimal performance and extending the lifespan of the TF5, TF3, and TF1 models.

Accessing Schematics and Repair Info

Qualified electronics technicians can download the YAMAHA TF5, TF3, and TF1 digital mixing console service manual for comprehensive repair information; This includes detailed schematics, eeprom data, and crucial repair instructions. Accessing these resources allows for effective diagnosis and component-level repairs, ensuring optimal console functionality.

The service manual is specifically designed for experienced professionals and provides the necessary tools for advanced troubleshooting.

Physical Manual Details

The Yamaha TF5 user manual is a full-color, 118-page printed resource, offering a detailed guide to the console’s operation. It features clear protective covers to safeguard against stains and spills, ensuring longevity. Reprinted from the original, the manual utilizes high-gloss, 28lb acid-free paper.

This premium paper quality prevents yellowing over time, maintaining readability for years of reference.

Full Color 118-Page Manual Availability

A fully-detailed, 118-page printed Yamaha TF5 reference manual is readily available. This resource provides comprehensive guidance for users, covering all aspects of the digital mixing console. It’s a valuable asset for both novice and experienced sound engineers seeking in-depth understanding.

The manual is currently offered through platforms like eBay, ensuring accessibility for those preferring a physical copy over digital documentation.

Protective Covers and Paper Quality

The reprinted Yamaha TF5 manual prioritizes durability and longevity. It features clear, protective covers designed to shield the pages from potential stains and spills, ensuring its usability over time. High-quality materials are utilized in its construction, employing hi-gloss, 28lb acid-free paper.

This paper stock resists yellowing, preserving the manual’s clarity and readability for years to come, making it a lasting resource.

TF Series Overview and Features

The Yamaha TF series represents a significant advancement in live sound reinforcement. These consoles, including the TF5, deliver refined audio quality through innovative TouchFlow Operation and recallable D-PRE preamplifiers. Advanced processing capabilities are integrated, offering powerful control over your sound;

The TF series aims to help users achieve polished, professional results efficiently, without extensive manual study.

gollum scheming guide

Gollum’s Scheming Guide: A Comprehensive Analysis

Delve into Gollum’s intricate deceptions‚ examining his manipulative tactics‚ treacherous routes‚ and the duality of his nature as revealed in recent projects and games.

Gollum‚ a creature defined by internal conflict‚ embodies the tragic consequences of the Ring’s corrupting influence. Once the hobbit Sméagol‚ his descent into Gollum showcases a fractured psyche‚ perpetually battling between remnants of his former self and the obsessive craving for “Precious.” This duality is central to understanding his schemes.

Recent explorations‚ like The Lord of the Rings: Gollum and The Hunt for Gollum‚ highlight this struggle. He promises guidance‚ yet harbors betrayal‚ making him a uniquely dangerous companion. His motivations aren’t simply malice‚ but a desperate‚ consuming need‚ fueling his manipulative behaviors and treacherous pathfinding through Mordor.

II. Understanding Gollum’s Motivations

Gollum’s actions stem from a singular‚ all-consuming desire: the One Ring. This obsession eclipses all other considerations‚ driving his deceptive tactics and broken promises to Frodo and Sam. The split personality – Sméagol‚ a flicker of his past‚ and Gollum‚ the Ring’s thrall – further complicates his motivations.

He isn’t purely evil‚ but utterly enslaved. The Hunt for Gollum and related projects emphasize this internal war. His scheming isn’t strategic brilliance‚ but desperate attempts to reclaim “Precious‚” justifying any betrayal. Understanding this core drive is crucial to anticipating his actions and navigating his treacherous guidance.

A. The All-Consuming Desire for the One Ring

The Ring isn’t merely a possession for Gollum; it’s an extension of his very being‚ a source of power and identity; This craving dictates every thought and action‚ overriding any semblance of morality or loyalty. He’ll offer guidance‚ as promised to Frodo and Sam‚ but only if it serves his ultimate goal: regaining “Precious.”

Recent walkthroughs and game expansions‚ like The Treachery of Gollum‚ showcase this obsession. His promises are hollow‚ his assistance conditional. The Hunt for Gollum likely explores this dynamic further‚ highlighting how this singular desire corrupts and controls him‚ making him a profoundly dangerous companion.

B. The Split Personality: Sméagol vs. Gollum

Gollum’s fractured psyche‚ embodied by the conflict between Sméagol and Gollum‚ is central to understanding his schemes. Sméagol represents a flicker of his former self‚ capable of fleeting moments of compassion‚ while Gollum embodies pure‚ possessive malice. This internal struggle manifests in shifting speech patterns and unpredictable behavior.

Analyzing this duality is crucial when navigating his guidance. One moment he might offer assistance‚ the next‚ plot betrayal. The Hunt for Gollum will likely delve into these shifts‚ forcing players to discern which personality dominates at any given time‚ impacting trust and strategic decisions.

III. Gollum’s Deceptive Tactics

Gollum’s schemes hinge on masterful deception. He employs manipulation‚ offering false promises of guidance while secretly plotting to reclaim the One Ring; Utilizing guilt and pity‚ he preys on the vulnerabilities of others‚ particularly Frodo and Sam‚ twisting their compassion against them.

His tactics aren’t overt lies‚ but subtle distortions and half-truths. The Lord of the Rings: Gollum game showcases this‚ demanding players decipher his intentions. Recognizing these patterns is vital; a seemingly helpful suggestion could be a calculated maneuver to lead his companions into danger‚ or a carefully laid ambush.

A. Manipulation and False Promises

Gollum’s core tactic is manipulation‚ cloaked in promises of safe passage to Mordor. He pledges loyalty‚ offering to guide Frodo and Sam‚ yet his true desire – “Precious” – remains paramount. These assurances are consistently undermined by his obsessive behavior and shifting allegiances.

Recent walkthroughs of The Lord of the Rings: Gollum highlight how these false promises are integral to gameplay. He’ll suggest routes‚ seemingly beneficial‚ but designed to isolate or endanger his companions. Recognizing this pattern – the disparity between words and actions – is crucial to navigating his treachery.

B. Utilizing Guilt and Pity

Gollum masterfully exploits emotional vulnerabilities‚ weaving tales of his past suffering as Sméagol to evoke pity. He presents himself as a wretched creature‚ deserving of compassion‚ subtly shifting blame for his actions. This tactic disarms his companions‚ making them question their judgment and potentially lowering their guard.

The upcoming The Hunt for Gollum‚ and expansions like The Treachery of Gollum for the Middle-earth Strategy Battle Game‚ likely explore this manipulation further. Players must anticipate how Gollum leverages guilt to influence decisions‚ mirroring his interactions with Frodo and Sam‚ and understand his deceptive nature.

IV. Navigating the Treacherous Paths with Gollum

Gollum’s knowledge of Mordor’s routes is invaluable‚ yet fraught with peril. He promises guidance‚ as seen in The Lord of the Rings: Gollum game walkthroughs‚ but his true intentions remain suspect. Understanding his preferred paths – detailed in recent game chapters – is crucial‚ but anticipating potential ambushes is paramount.

His familiarity with the terrain doesn’t guarantee safety; it merely highlights opportunities for betrayal. The Hunt for Gollum will likely emphasize this treacherous dynamic‚ forcing players to weigh the benefits of his guidance against the constant threat of his deception.

A. The Routes to Mordor: A Guide to His Knowledge

Gollum’s intimate understanding of the paths to Mordor stems from decades of wandering‚ a desperate pursuit of his “Precious.” Game walkthroughs‚ like those for The Lord of the Rings: Gollum‚ showcase his ability to navigate treacherous landscapes. He knows hidden passages and forgotten trails‚ offering a seemingly efficient route.

However‚ this knowledge isn’t freely given. He leverages it as a bargaining chip‚ constantly testing Frodo and Sam’s resolve. The Hunt for Gollum promises to explore these routes further‚ revealing the strategic advantages – and inherent dangers – of relying on his guidance.

B. Identifying Potential Ambush Locations

Gollum’s knowledge extends beyond safe passage; he’s acutely aware of locations ripe for ambush. His long years spent evading capture have honed his instincts for identifying vulnerable terrain and potential enemy strongholds. This is particularly relevant within the context of The Treachery of Gollum‚ a Middle-earth Strategy Battle Game expansion.

Players must anticipate his deceptive nature‚ recognizing that seemingly helpful suggestions could lead directly into danger. He’ll exploit weaknesses in the environment‚ favoring areas where he can utilize stealth and misdirection to his advantage‚ constantly testing the fellowship’s defenses.

V. Recognizing Gollum’s Betrayal Signals

Detecting Gollum’s impending treachery is crucial for survival. Shifts in his personality‚ oscillating between the subservient Sméagol and the scheming Gollum‚ are key indicators. Pay close attention to his speech patterns; increased references to “precious” signify a growing obsession and diminishing loyalty.

Furthermore‚ observe any attempts to isolate members of the group or steer them towards perilous routes. His promises should be viewed with extreme skepticism‚ as he consistently prioritizes reclaiming the Ring above all else‚ as evidenced by ongoing discussions surrounding The Hunt for Gollum.

A. Shifts in Personality and Speech Patterns

Gollum’s fractured psyche manifests in dramatic personality shifts. The emergence of “Sméagol‚” seemingly helpful and contrite‚ is often a deceptive prelude to Gollum’s manipulative schemes. Monitor his vocalizations; a surge in possessive language surrounding “precious” signals escalating obsession and untrustworthiness.

Notice alterations in tone – from pleading to threatening – as indicators of his internal conflict and potential betrayal. These fluctuations‚ highlighted in analyses of The Lord of the Rings: Gollum‚ are vital clues for anticipating his treacherous actions and protecting the Fellowship.

B. Increased Obsession with “Precious”

A heightened focus on “precious” is a critical warning sign. Gollum’s fixation intensifies when the Ring’s proximity triggers his darker impulses‚ overriding any semblance of loyalty. Observe a compulsive need to touch‚ smell‚ or even speak to the Ring‚ indicating a loss of control.

This escalating obsession‚ evident in gameplay scenarios like The Treachery of Gollum‚ foreshadows inevitable betrayal. Any deviation from his assigned task‚ coupled with fervent references to “precious‚” demands immediate caution and a reassessment of his trustworthiness.

VI. The Hunt for Gollum: Fan Reactions and Project Details

“The Hunt for Gollum”‚ a forthcoming narrative installment within the Shadow of Mirkwood cooperative card game‚ has ignited passionate debate amongst Lord of the Rings enthusiasts. Initial fan castings have sparked online discussion‚ highlighting the challenge of portraying Gollum’s complex duality.

The project promises a new scenario‚ expanding the lore and offering deeper insights into Gollum’s character. Anticipation builds as Ian McKellen hints at plot developments‚ fueling speculation about the narrative’s focus and the unfolding treachery.

VII. Assessing Internet Connection Speed (Fast.com Relevance)

Maintaining reliable communication is crucial when navigating the treacherous paths alongside Gollum – or even discussing his schemes online! Fast.com‚ powered by Netflix‚ provides a streamlined‚ ad-free method for assessing internet download speeds‚ vital for accessing guides‚ walkthroughs‚ and coordinating with fellow adventurers.

Whether on mobile or broadband‚ ensuring a stable connection allows for seamless access to online resources‚ enhancing the experience of unraveling Gollum’s deceptions and strategizing against his betrayals. A swift connection is key!

A. Maintaining Communication During the Journey

Staying connected mirrors the fellowship’s reliance on each other‚ even when shadowed by Gollum’s deceit. Sharing discoveries about his shifting personality and potential ambush locations requires consistent communication. Utilizing modern tools‚ like those assessed by Fast.com‚ ensures access to vital information.

Discussing strategies‚ analyzing his speech patterns‚ and warning others of his obsession with “Precious” demands a stable connection. Reliable communication is paramount when dealing with a character as unpredictable and treacherous as Gollum.

B. Utilizing Online Resources for Information

Navigating Gollum’s treachery demands comprehensive knowledge‚ readily available through online guides and walkthroughs – like those detailing The Lord of the Rings: Gollum chapters. Examining The Hunt for Gollum’s narrative focus‚ as discussed by Ian McKellen‚ provides crucial insights.

Resources detailing The Treachery of Gollum supplement for the Middle-earth Strategy Battle Game reveal his combat strengths and weaknesses. Fast.com helps ensure access to these resources‚ maintaining a stable connection for collaborative analysis and strategic planning against his schemes.

VIII. Gollum’s Role in Mafia Clan Leadership (Prohibition Era Project Analogy)

Applying Gollum’s manipulative nature to a Prohibition-era mafia clan reveals a chillingly effective leader. His obsession with “precious” resources mirrors a clan’s control over illicit goods. Deception and false promises‚ hallmarks of Gollum’s tactics‚ become strategic advantages in navigating rival factions.

Like Gollum guiding Frodo‚ he could offer alliances while secretly plotting betrayal. This project allows participants to embody such scheming‚ utilizing resource control and exploiting vulnerabilities – a dark reflection of his journey to Mordor.

A. Applying Gollum’s Scheming to Strategic Gameplay

Gollum’s core strength lies in deception‚ a potent asset in strategic gameplay scenarios. His manipulative tactics translate into feints‚ diversions‚ and exploiting opponent weaknesses. Players can emulate his approach by forging temporary alliances‚ only to betray them at opportune moments‚ mirroring his journey with Frodo and Sam.

Resource control‚ akin to Gollum’s obsession with the Ring‚ becomes paramount. Prioritizing key assets and denying them to rivals reflects his covetous nature. Successfully implementing these schemes demands careful planning and a willingness to embrace ruthlessness.

B. Resource Control and Deception in a Clan Setting

Within a mafia clan‚ mirroring Gollum’s behavior means dominating vital resources – information‚ territory‚ and influence. Deception becomes the currency of power‚ fostering distrust among rival factions. Leaders must cultivate a network of informants‚ exploiting vulnerabilities and manipulating clan members through false promises‚ much like Gollum’s tactics.

Controlling the flow of information‚ spreading misinformation‚ and creating internal conflicts are crucial. A successful clan leader‚ channeling Gollum’s cunning‚ prioritizes self-preservation and advancement above all else‚ ensuring absolute control.

IX. Ian McKellen’s Insights into “The Hunt for Gollum”

Ian McKellen’s recent revelations regarding “The Hunt for Gollum” suggest a narrative focused on unraveling the character’s complex motivations and anticipating unforeseen plot twists. His insights hint at a deeper exploration of Gollum’s internal conflict and the manipulative schemes driving his actions.

McKellen’s commentary implies a storyline where Gollum’s treachery is central‚ potentially revealing hidden agendas and betrayals. Fans eagerly await further details‚ anticipating a nuanced portrayal of Gollum’s scheming and the impact on the unfolding narrative within the project.

A. Anticipating Plot Developments

Given Gollum’s inherent duplicity‚ plot developments in “The Hunt for Gollum” are likely to center around unexpected betrayals and shifting allegiances. Expect twists fueled by his obsession with the One Ring and his fractured personality. Recent fan reactions highlight concerns about potential missteps in portraying his complex nature.

The narrative will likely explore how Gollum exploits vulnerabilities‚ mirroring his tactics in guiding Frodo and Sam towards Mordor. Anticipate scenarios where his promises prove false‚ and his scheming unravels‚ creating obstacles and escalating tension for the protagonists.

B. Understanding the Narrative Focus

“The Hunt for Gollum” appears to center on unraveling the complexities of his character and motivations‚ going beyond a simple pursuit. The narrative will likely delve into the psychological impact of the Ring on Sméagol‚ showcasing the constant struggle between his former self and the corrupted Gollum.

Expect a focus on strategic gameplay‚ mirroring Gollum’s own deceptive tactics‚ as seen in the Middle-earth Strategy Battle Game supplement‚ “The Treachery of Gollum.” The story will probably explore themes of manipulation‚ obsession‚ and the corrupting influence of power‚ offering a nuanced portrayal of this iconic character.

X. The Treachery of Gollum: Middle-earth Strategy Battle Game Implications

“The Treachery of Gollum” supplement for the Middle-earth Strategy Battle Game introduces a fascinating dynamic. Gollum isn’t simply a combatant; he’s a strategic unit demanding careful consideration. Players must leverage his unique strengths – stealth‚ cunning‚ and knowledge of treacherous terrain – while mitigating his inherent weaknesses: fragility and unpredictable betrayal.

Successfully utilizing Gollum requires exploiting enemy vulnerabilities and employing deceptive maneuvers‚ mirroring his in-universe scheming. Understanding his obsession with “Precious” is key‚ as it dictates his actions and potential for turning against allies.

A. Utilizing Gollum as a Strategic Unit

In the Middle-earth Strategy Battle Game‚ Gollum excels at infiltration and disruption. His low profile allows for bypassing enemy lines‚ targeting vulnerable support characters‚ or securing key objectives. Employ him to scout ahead‚ revealing ambush locations and enemy formations – mirroring his guidance of Frodo and Sam towards Mordor.

However‚ Gollum’s fragility demands protection. Utilize terrain and supporting units to shield him from direct combat. His unpredictable nature can be exploited; strategically position him to sow discord amongst enemy ranks‚ capitalizing on his inherent treachery.

B. Understanding His Strengths and Weaknesses in Combat

Gollum’s primary strength lies in stealth and agility‚ allowing him to evade direct confrontation. He excels at hit-and-run tactics‚ exploiting vulnerabilities and disrupting enemy formations. However‚ his physical frailty renders him exceptionally vulnerable in prolonged engagements. A single‚ well-placed blow can incapacitate him.

His obsession with “Precious” can also be a detriment‚ potentially diverting his focus during critical moments. While capable of surprising bursts of ferocity‚ relying on Gollum as a frontline combatant is ill-advised; utilize him strategically‚ capitalizing on his unique skillset.

risa 3d tutorial

RISA 3D is a powerful software, assisting engineers in modeling and analyzing structures of all complexities.
It’s a versatile environment, from skyscrapers to residential buildings, offering comprehensive structural engineering solutions.

Tutorials, guides, and online resources are readily available, making it accessible for both beginners and experienced professionals;

Learning RISA 3D involves understanding its interface, modeling techniques, and analysis capabilities, all well-documented and supported.

What is RISA 3D?

RISA 3D is a globally recognized, comprehensive structural analysis and design software. It empowers structural engineers to model, analyze, and optimize a diverse range of structures – from intricate skyscrapers and long-span bridges to industrial facilities and everyday residential buildings.

Essentially, RISA 3D provides a virtual environment where engineers can simulate real-world structural behavior under various loads, ensuring safety and efficiency. The software utilizes finite element analysis (FEA) to predict stresses, strains, and deflections within a structure.

Tutorials and extensive documentation, including the 158-page User’s Guide (Version 11), are available to guide users through the software’s functionalities. These resources, alongside the RISA-3D YouTube channel, facilitate a smooth learning curve for both novice and experienced engineers, enabling them to harness the full potential of this powerful tool.

RISA 3D Applications

RISA 3D’s versatility allows its application across a broad spectrum of engineering projects. It’s commonly used in building design, encompassing residential, commercial, and industrial structures, ensuring structural integrity and compliance with building codes.

Beyond buildings, RISA 3D excels in infrastructure projects like bridge analysis and design, evaluating load-bearing capacity and stability. It’s also valuable in the telecommunications sector, specifically for modeling telecom structures, as demonstrated by dedicated tutorials.

Furthermore, the software supports complex geometries and shell elements, extending its use to specialized structures. Tutorials and quick start courses provide practical examples, covering beams, columns, braced frames, and complete building models. CAD drawing import capabilities broaden its applicability, streamlining workflows and enhancing design efficiency.

System Requirements & Installation

RISA 3D installation begins with verifying system compatibility; Generally, a modern Windows operating system is required, alongside sufficient RAM – typically 8GB or more – for optimal performance. A dedicated graphics card is also recommended for smooth 3D visualization.

The installation process itself is straightforward, involving downloading the software from the official RISA website and following the on-screen prompts. Tutorials often don’t cover installation directly, assuming basic software installation knowledge.

Post-installation, activating the license is crucial. This usually involves an online activation process linked to your RISA account. Accessing the online help file and documentation is recommended for troubleshooting any installation issues. Ensure your system meets the specified requirements for a seamless experience.

Basic Modeling in RISA 3D

Modeling begins with defining units and grid lines, then creating structural members like beams and columns. Tutorials demonstrate building basic structures,
including braced frames and simple buildings.

Defining Units and Grid Lines

Establishing the correct units is the foundational first step in any RISA 3D model. Consistent units – such as feet, inches, meters, or millimeters – ensure accurate analysis and prevent errors. The software allows for flexible unit selection, accommodating diverse project requirements.

Grid lines serve as the structural skeleton of your model, providing a framework for precise member placement. Defining a logical grid, aligned with architectural drawings, streamlines the modeling process. You can create rectangular, radial, or custom grid patterns, adjusting spacing to match the building’s geometry.

Tutorials emphasize the importance of a well-defined grid. Properly spaced grid lines facilitate efficient member creation and modification, significantly reducing modeling time. Mastering this initial step is crucial for building accurate and manageable RISA 3D models.

Creating Structural Members (Beams, Columns)

Once the grid is established, creating beams and columns is the next logical step. RISA 3D offers multiple methods for member creation, including drawing directly on the screen, inputting coordinates, or utilizing the grid lines as references.

Beams represent horizontal structural elements, while columns are vertical load-bearing components. The software allows you to define member properties such as material, section shape (e.g., W-shape, rectangular), and dimensions. Accurate property assignment is vital for realistic analysis.

Tutorials demonstrate efficient techniques for member creation, including using array features to quickly replicate identical elements. Understanding these tools significantly speeds up the modeling process, especially for repetitive structures. Proper member definition is key to a successful structural analysis.

Modeling Braced Frames

Braced frames are essential for resisting lateral loads like wind and seismic forces. In RISA 3D, modeling these involves creating diagonal members connecting columns and beams, forming a triangulated system. These diagonal members, often designated as braces, provide significant stiffness and stability.

Tutorials highlight the importance of correctly assigning brace properties, including material and section size. Different brace configurations, such as X-bracing or V-bracing, can be easily implemented. Accurate modeling of brace connections is also crucial for realistic behavior.

RISA 3D allows for defining brace releases, simulating pinned or fixed connections. Understanding these options is vital for accurately representing the frame’s response to lateral loads. Properly modeled braced frames enhance structural integrity and safety.

Modeling Buildings – Basic Structure

Modeling a building’s basic structure in RISA 3D begins with defining the building’s geometry using grid lines. These grids establish the layout for columns and beams. Columns are modeled as vertical members, while beams represent horizontal structural elements. Tutorials demonstrate how to assign appropriate material properties and cross-sections to each member.

RISA 3D facilitates the creation of multiple stories, replicating the building’s height. Copying and pasting elements between stories streamlines the modeling process. Accurate representation of floor diaphragms is crucial for load distribution. The quick start course materials provide examples of modeling simple building structures.

Essential steps include defining supports and ensuring proper connectivity between members. A well-defined basic structure forms the foundation for subsequent loading and analysis.

Loading and Analysis Fundamentals

RISA 3D allows defining various load cases – dead, live, wind, and seismic – for comprehensive structural assessment. Tutorials guide applying these loads to members.

Static analysis reveals displacements and stresses, crucial for design verification, as detailed in the user’s guide.

Defining Load Cases (Dead, Live, Wind, Seismic)

RISA 3D facilitates a precise definition of load cases, essential for accurate structural analysis. These cases represent different loading scenarios a structure might encounter during its lifespan.

Dead loads, representing the weight of the structure itself – beams, columns, flooring – are defined first, providing a constant gravitational force. Live loads, accounting for variable occupancy and usage, such as people, furniture, or equipment, are then added.

Wind loads are crucial, especially for taller structures, and RISA 3D allows specifying wind speeds and directions according to relevant building codes. Seismic loads, representing earthquake forces, require defining seismic zones, soil types, and structural properties;

Tutorials demonstrate how to combine these load cases, applying appropriate load factors to ensure structural safety and compliance with design standards. Understanding these fundamentals is key to reliable analysis.

Properly defining these load cases is paramount for accurate results.

Applying Loads to Structural Members

RISA 3D offers versatile methods for applying loads to structural members – beams, columns, and more. Once load cases are defined, these forces must be distributed accurately across the model.

Loads can be applied as point loads, concentrated at specific locations, or distributed loads, spread uniformly along member lengths. RISA 3D supports various load types, including forces, moments, and pressures.

Tutorials guide users through applying loads to different member types, demonstrating how to define load patterns and orientations. Area loads, representing distributed forces over surfaces, are also easily implemented.

The software allows for load combinations, applying multiple load cases simultaneously with specified scaling factors, simulating realistic scenarios. Precise load application is crucial for accurate stress and deflection calculations.

Mastering this process ensures reliable structural analysis and design.

Running a Static Analysis

RISA 3D’s static analysis feature is fundamental to structural engineering, determining member forces, stresses, and deflections under applied loads. Before initiating, ensure the model is accurately defined with members, supports, and loads.

The process involves selecting the desired load cases and running the analysis solver. RISA 3D employs finite element methods to solve complex structural problems efficiently.

Tutorials demonstrate how to initiate and monitor the analysis, interpreting solver messages and troubleshooting potential errors. Understanding analysis settings, like solver type and convergence criteria, is vital.

Post-processing allows visualization of results – deformed shapes, stress contours, and reaction forces. Accurate interpretation of these results is key to verifying structural integrity and safety.

Static analysis forms the basis for many design decisions in structural engineering.

Understanding Analysis Results (Displacements, Stresses)

RISA 3D presents analysis results visually and numerically, requiring careful interpretation. Displacements reveal how the structure deforms under load, crucial for serviceability checks. Excessive deflection can indicate design flaws.

Stresses, displayed as contours, show internal forces within members. Comparing these to material allowable stresses determines structural safety. Tutorials guide users through interpreting stress concentrations and identifying potential failure points.

Reaction forces at supports indicate load transfer mechanisms. These values are vital for foundation design. RISA 3D allows animation of deformed shapes, enhancing understanding of structural behavior.

Understanding these results requires knowledge of structural mechanics and material properties. Proper interpretation ensures a safe and efficient design.

Accurate analysis result interpretation is paramount for responsible structural engineering practice.

Advanced Modeling Techniques

RISA 3D facilitates complex geometry modeling, shell element usage, and connection detailing. CAD drawing imports streamline workflows, enhancing design precision and efficiency.

Tutorials demonstrate these advanced features, empowering engineers to tackle intricate structural challenges effectively.

Modeling Complex Geometry

RISA 3D excels in handling intricate structural designs, moving beyond simple rectangular forms. The software allows engineers to accurately represent complex geometries through various modeling techniques. This includes utilizing splines, arcs, and custom shapes to define structural members with precision.

Importing CAD drawings is a crucial aspect of this process, enabling seamless integration of architectural designs directly into the RISA model. This minimizes manual input and reduces the potential for errors. Tutorials demonstrate how to effectively import and modify CAD data within RISA 3D, ensuring accurate representation of the intended design.

Furthermore, RISA 3D supports the creation of complex surfaces and solids, allowing for the modeling of non-standard structural elements. Mastering these techniques is essential for analyzing structures with unique architectural features or unconventional loading conditions. The software’s flexibility empowers engineers to tackle even the most challenging geometric configurations with confidence.

Using Shell Elements

RISA 3D provides robust capabilities for modeling structures using shell elements, crucial for representing thin-walled components like plates, slabs, and curved surfaces. These elements are significantly more efficient than solid elements for analyzing such structures, reducing computational time and resource demands.

Tutorials guide users through defining shell properties, including material characteristics, thickness, and orientation. Properly defining these properties is vital for accurate analysis results. RISA 3D allows for the creation of complex shell meshes, adapting to the geometry of the structure.

Understanding how to apply loads and boundary conditions to shell elements is also key. The software offers various options for load application, ensuring realistic representation of external forces. Mastering shell element modeling expands the range of structures that can be effectively analyzed within RISA 3D, from roofs to tanks.

Modeling Connections

RISA 3D offers several methods for modeling connections between structural members, ranging from simple fixed or pinned supports to complex moment connections. Accurate connection modeling is critical for realistic structural behavior prediction, influencing stress distribution and overall stability.

Tutorials demonstrate how to utilize the software’s connection tools, including pre-defined connection types and the ability to create custom connections. Users learn to define connection properties like stiffness, strength, and release constraints. Understanding the different connection options allows engineers to accurately represent real-world construction details.

Properly modeled connections ensure that forces are transferred correctly between members, preventing unrealistic stress concentrations. RISA 3D’s connection features enhance the accuracy and reliability of structural analysis, leading to safer and more efficient designs.

Importing CAD Drawings

RISA 3D facilitates importing CAD drawings, streamlining the modeling process by leveraging existing design data. This feature reduces manual input and minimizes potential errors, accelerating project timelines. Supported file formats typically include DWG and DXF, common standards in architectural and engineering design.

Tutorials guide users through the import process, covering options for scaling, layering, and converting CAD entities into RISA 3D structural elements. Understanding how to clean and prepare CAD drawings before import is crucial for optimal results. Proper import settings ensure accurate geometry representation within the software.

Successfully importing CAD drawings allows engineers to quickly establish the building’s layout and begin structural analysis. RISA 3D’s interoperability with CAD software enhances efficiency and collaboration throughout the design workflow.

Advanced Analysis Features

RISA 3D offers dynamic, buckling, and response spectrum analyses for complex scenarios. Tutorials demonstrate finite element details, enabling precise and robust structural evaluations.

Mastering these features unlocks deeper insights into structural behavior under various loading conditions.

Dynamic Analysis (Modal, Time History)

Dynamic analysis within RISA 3D extends beyond static loads, allowing engineers to assess structural response to time-varying forces. Modal analysis identifies natural frequencies and mode shapes, crucial for understanding a structure’s susceptibility to vibration. This is often the first step in dynamic design.

Time history analysis, a more advanced technique, applies actual or simulated dynamic loads over time, providing a detailed response history. Tutorials guide users through defining dynamic load cases, specifying damping properties, and interpreting results like displacements and stresses over time.

RISA 3D’s capabilities include direct integration methods and response spectrum analysis, offering flexibility for various dynamic scenarios. Understanding these features is vital for designing structures resilient to earthquakes, wind gusts, and other dynamic events. Proper application requires a solid grasp of structural dynamics principles.

Buckling Analysis

Buckling analysis in RISA 3D determines the critical loads at which structural members become unstable under compressive stress. This is essential for slender columns and frames susceptible to buckling failure. Tutorials demonstrate how to define material properties, geometric imperfections, and load combinations for accurate buckling predictions.

RISA 3D employs eigenvalue buckling analysis, solving for the buckling load factors and corresponding mode shapes. These mode shapes visually represent the buckling pattern, aiding in understanding the failure mechanism. Understanding the critical buckling load ensures a safe and stable structural design.

Users can refine models based on buckling analysis results, adding bracing or increasing member sizes to enhance stability. The software’s detailed reporting features provide comprehensive buckling analysis data for design verification and documentation. Mastering this feature is crucial for robust structural integrity.

Response Spectrum Analysis

Response Spectrum Analysis within RISA 3D is a dynamic analysis method used to estimate the peak response of a structure to earthquake loading. Tutorials guide users through defining response spectra based on seismic design codes and site-specific ground motion data. This method efficiently assesses structural performance under a range of earthquake frequencies.

RISA 3D allows importing or creating custom response spectra, considering factors like soil type and damping ratios. The software then calculates the maximum structural responses – displacements, forces, and moments – for each mode of vibration. This provides a comprehensive understanding of seismic vulnerability.

Engineers can utilize the results to identify critical areas requiring strengthening and ensure compliance with seismic design standards. Mastering response spectrum analysis is vital for designing earthquake-resistant structures, safeguarding lives and property.

Finite Element Analysis Details

RISA 3D employs Finite Element Analysis (FEA), a numerical technique dividing a structure into smaller elements for analysis. Tutorials demonstrate how RISA 3D automatically generates these elements, solving for displacements, stresses, and strains within each. Understanding FEA principles enhances interpretation of results.

The software supports various element types – beams, columns, shells, and solids – catering to diverse structural geometries. RISA 3D’s FEA engine considers material properties, boundary conditions, and applied loads to accurately simulate structural behavior. Users can refine mesh density for increased precision.

Detailed analysis reports provide comprehensive data, enabling engineers to assess structural integrity and identify potential failure points. Mastering FEA within RISA 3D is crucial for advanced structural design and optimization.

RISA 3D Interface and Workflow

RISA 3D’s interface is designed for efficient modeling and analysis, with tutorials guiding users through navigation. Optimizing workflow involves mastering shortcuts and settings.

Complex designs are managed through organization and utilizing the software’s features, enhancing productivity and accuracy.

Navigating the RISA 3D Interface

The RISA 3D interface is logically organized, though initially it can appear complex to new users. The main window is divided into several key areas, each serving a specific purpose. The Modeling tab is where you’ll define your structure – adding grid lines, members, and loads. The Analysis tab controls the running of analyses and viewing results.

Understanding the ribbon toolbar is crucial; it houses commands categorized by function. Utilize the Quick Access Toolbar for frequently used actions. The View Control panel allows manipulation of the 3D model – zooming, panning, and rotating. Tutorials emphasize exploring the different views (plan, elevation, section) to fully comprehend the model’s geometry.

Effective navigation relies on mastering keyboard shortcuts and customizing the interface to suit your workflow. The Status Bar provides helpful information about the current operation. Don’t hesitate to consult the online help file for detailed explanations of each interface element.

Managing Complex Designs

Complex designs in RISA 3D require a structured approach to maintain organization and efficiency. Utilize the Layer functionality to categorize elements – beams, columns, bracing – for selective visibility and modification. Grouping similar members simplifies editing and applying loads. Employ Named Views to save specific perspectives for quick access, streamlining navigation through large models.

Effective file management is vital; regularly save incremental versions to avoid data loss. Leverage the Model Explorer to navigate the structural hierarchy and quickly locate specific elements. Tutorials highlight the importance of consistent naming conventions for clarity. Consider using Templates for repetitive design elements, saving time and ensuring consistency.

For truly large projects, break down the model into manageable sub-structures, analyzing them separately before combining results. Mastering these techniques will significantly improve your workflow and reduce errors.

Optimizing Workflow for Efficiency

Efficient RISA 3D usage hinges on mastering shortcuts and streamlining repetitive tasks. Keyboard shortcuts for common actions – adding members, applying loads – drastically reduce modeling time. Utilize the Quick Add feature for rapid element creation. Tutorials emphasize the power of pre-defined load patterns, saving time on load case definitions.

Leverage the software’s automation capabilities; explore macros and scripting for complex, recurring operations. Regularly update your RISA 3D version to benefit from performance improvements and new features. Effective use of the Model Explorer and Named Views minimizes navigation time.

Prioritize a logical modeling sequence – define grids, then members, then loads – for a smoother workflow. Consistent application of these techniques will significantly boost productivity.

Customizing RISA 3D Settings

RISA 3D allows extensive customization to tailor the environment to individual preferences and project needs. Units – imperial or metric – are foundational, set during initial setup. Display options, including background color and element visibility, enhance clarity. Tutorials demonstrate how to modify default member properties for consistent modeling.

Customize the Analysis Settings to control precision and convergence criteria. Adjust the Reporting Options to include only relevant data in output files. Explore the File Locations settings for efficient data management. Personalize keyboard shortcuts for frequently used commands.

Remember to save customized settings as templates for future projects, ensuring consistency and saving setup time.

Resources and Tutorials

RISA-3D’s YouTube channel provides video tutorials, while the Users Guide (v11) offers detailed documentation. Quick Start courses and online help files are available.

RISA-3D YouTube Channel Tutorials

The RISA-3D YouTube channel serves as an invaluable resource for users seeking visual guidance and practical demonstrations of the software’s capabilities. These tutorials cater to a wide range of skill levels, from absolute beginners taking their first steps with RISA 3D to experienced engineers looking to refine their workflows or explore advanced features.

Video lessons cover fundamental aspects such as navigating the interface, creating basic structural models, defining load cases, and running static analyses. More advanced tutorials delve into topics like dynamic analysis, buckling analysis, and the use of shell elements. The step-by-step approach employed in these videos makes complex concepts easier to grasp, allowing users to learn at their own pace.

Furthermore, the channel frequently features updates on new features and functionalities within RISA 3D, ensuring that users stay informed about the latest advancements. The availability of these free, accessible tutorials significantly lowers the barrier to entry for new users and provides ongoing support for existing ones.

RISA 3D Users Guide (Version 11)

The RISA 3D Users Guide (Version 11), spanning 158 pages, represents a comprehensive and detailed reference manual for the software. It’s an essential companion for engineers seeking a thorough understanding of RISA 3D’s functionalities and underlying principles. This guide goes beyond basic tutorials, offering in-depth analytical details and explanations of the software’s capabilities.

Users can expect to find detailed instructions on modeling various structural elements – beams, columns, braced frames, and entire buildings – along with guidance on applying loads, defining load cases, and interpreting analysis results. The guide also covers advanced topics, providing a solid foundation for tackling complex engineering challenges.

It serves as a valuable resource for both learning the software and troubleshooting issues. While video tutorials offer a visual learning experience, the Users Guide provides the detailed documentation needed for a complete and nuanced understanding of RISA 3D.

RISA 3D Quick Start Course Materials

The RISA 3D Quick Start Course Materials are designed to rapidly onboard new users to the software’s core functionalities. These materials provide a focused learning path, enabling engineers to quickly become productive with RISA 3D. The document includes practical examples and accompanying homework assignments, reinforcing the concepts presented.

These resources cover essential modeling techniques, demonstrating how to create beams, columns, braced frames, and basic building structures. Emphasis is placed on practical application, allowing users to immediately apply their knowledge to real-world scenarios. This is a great starting point before diving into more complex tutorials.

The course materials aim to provide a solid foundation for further exploration of RISA 3D’s advanced features, offering a stepping stone towards mastering the software’s full potential. They are ideal for those seeking a hands-on introduction to structural analysis.

Online Help File & Documentation

RISA 3D’s comprehensive online help file serves as an invaluable resource for users seeking detailed information on specific functions and features. This documentation is meticulously organized, allowing for quick and efficient access to the answers you need. It complements the broader tutorials and guides available, offering a deeper dive into the software’s capabilities.

The documentation includes a General Reference manual, providing in-depth analytical details for those requiring a thorough understanding of the underlying principles. This resource is particularly useful for experienced engineers and researchers. It’s a crucial component of the learning process.

Furthermore, the online help file is regularly updated to reflect the latest software enhancements and bug fixes, ensuring users always have access to the most current information. It’s an essential tool for maximizing your efficiency with RISA 3D.

the lovesong of j alfred prufrock pdf

T.S. Eliot’s poignant poem explores paralyzing self-doubt and societal alienation, readily available as a PDF for scholarly study and personal enjoyment.

Historical Context of the Poem

“The Love Song of J. Alfred Prufrock,” published in 1915, emerges from a period of significant societal upheaval and intellectual ferment. The Victorian era’s certainties had crumbled, giving way to anxieties about modernity, industrialization, and the aftermath of World War I. This era fostered a sense of disillusionment and fragmentation, mirrored in the poem’s structure and themes.

Accessing the poem as a PDF allows for focused study of these historical undercurrents. The poem reflects a growing sense of alienation and the breakdown of traditional social structures, themes resonating with a generation grappling with rapid change. The availability of the text in PDF format facilitates deeper engagement with its historical context.

T.S. Eliot’s Life and Influences

T.S. Eliot’s personal experiences profoundly shaped “The Love Song of J. Alfred Prufrock.” His upbringing, education at Harvard, and subsequent move to Europe exposed him to diverse literary and philosophical traditions. Struggling with personal anxieties and a sense of displacement, Eliot channeled these feelings into his poetry.

Studying the poem as a PDF reveals how his influences – including the French Symbolists and Dante – contributed to its innovative style. Eliot’s own psychological state, marked by indecision and social awkwardness, finds expression in Prufrock’s character. Accessing the PDF aids in understanding the biographical roots of this iconic work.

Modernism and its Impact on Poetry

“The Love Song of J. Alfred Prufrock” stands as a cornerstone of Modernist poetry, rejecting traditional forms for fragmented expression. Modernism, born from societal upheaval, questioned established norms and embraced experimentation. Studying the poem via a PDF reveals its break from Victorian conventions, utilizing free verse and stream of consciousness.

This shift reflected a disillusionment with the past and a focus on the internal psychological landscape. The PDF format allows close analysis of Eliot’s innovative techniques, showcasing how Modernism reshaped poetic language and structure. Prufrock’s anxieties embody the alienation central to the Modernist aesthetic.

The Poem’s Structure and Form

Analyzing the poem’s unique structure through a PDF reveals its dramatic monologue, free verse, and fragmented narrative, mirroring Prufrock’s fractured psyche.

Dramatic Monologue as a Literary Device

“The Love Song of J. Alfred Prufrock” masterfully employs the dramatic monologue, offering a deep dive into the speaker’s consciousness. A readily available PDF version allows close examination of this technique. Eliot presents Prufrock’s internal struggles directly, without external dialogue, revealing his anxieties and indecision.

This form allows readers to intimately experience Prufrock’s hesitant thoughts and self-deprecating observations. The monologue isn’t a ‘song’ in the traditional sense, but a stream of consciousness, revealing a character paralyzed by social anxieties and a fear of rejection. Studying the PDF highlights how Eliot uses this device to portray modern alienation.

Free Verse and its Characteristics

“The Love Song of J. Alfred Prufrock” exemplifies free verse, abandoning traditional rhyme schemes and metrical patterns. Accessing a PDF copy facilitates detailed analysis of its unconventional structure. Eliot’s choice reflects a break from poetic conventions, mirroring the fragmented experience of modern life.

The poem’s rhythm is dictated by the natural cadences of speech and thought, creating a conversational, yet unsettling, effect. Irregular line lengths and a lack of consistent rhyme contribute to the poem’s sense of unease and uncertainty. Examining the PDF reveals how Eliot utilizes enjambment and varied stanza lengths to enhance this effect.

Fragmented Narrative and Stream of Consciousness

“The Love Song of J. Alfred Prufrock” masterfully employs a fragmented narrative, mirroring the disjointed nature of modern consciousness. A readily available PDF allows close study of this technique. The poem doesn’t follow a linear storyline; instead, it presents a series of impressions, memories, and anxieties as they occur in Prufrock’s mind.

This stream-of-consciousness style mimics the flow of thought, jumping between observations, self-doubt, and social anxieties. The PDF highlights how Eliot uses associative leaps and abrupt shifts in focus to create this effect, immersing the reader in Prufrock’s internal world and his paralyzing indecision.

Character Analysis: J. Alfred Prufrock

Prufrock, a middle-aged man paralyzed by indecision, is vividly portrayed; a PDF version aids in dissecting his anxieties and failed connections.

Prufrock’s Age and Social Standing

J. Alfred Prufrock is demonstrably middle-aged, grappling with anxieties stemming from a perceived lack of societal impact. He occupies a position within the upper echelons of society, evidenced by his attendance at refined social gatherings – tea parties and polite conversations; However, this standing doesn’t equate to fulfillment.

He feels acutely aware of judgment, particularly concerning his appearance, as noted in observations about his balding head. Accessing a PDF of the poem allows for close textual analysis, revealing how his social standing ironically amplifies his feelings of inadequacy and isolation. He’s trapped by expectations and self-consciousness.

Prufrock’s Psychological State: Anxiety and Indecision

Prufrock is profoundly paralyzed by self-doubt and indecision, a core element explored within the poem. He endlessly contemplates actions, particularly approaching women, but consistently retreats into inaction, fearing rejection and social missteps. This anxiety manifests as a fragmented internal monologue, revealing a deeply troubled psyche.

A PDF version of “The Love Song” facilitates detailed examination of these internal struggles. His questioning – “Do I dare disturb the universe?” – exemplifies his overwhelming apprehension. He measures his life in trivialities, highlighting a sense of futility and a lack of purpose, trapped within his own mind.

Prufrock’s Fear of Rejection and Social Interaction

Prufrock’s central torment stems from a debilitating fear of rejection, particularly in social settings and romantic encounters. He anticipates judgment, obsessing over how others perceive him – his balding head, his clothes, his social awkwardness. This anxiety prevents genuine connection, trapping him in a cycle of observation rather than participation.

Accessing a PDF copy of the poem allows close analysis of these anxieties. He envisions critical conversations and feels inadequate, leading to a profound sense of isolation. The poem portrays social rituals as “excruciation,” highlighting his discomfort and inability to navigate them effectively.

Themes Explored in the Poem

Eliot’s masterpiece, easily found as a PDF, delves into alienation, indecision, and the futility of connection within a decaying modern society.

Alienation and Isolation in Modern Society

“The Love Song of J. Alfred Prufrock,” readily accessible as a PDF, profoundly portrays the isolating experience of modern life. Prufrock’s internal struggles reflect a broader societal disconnect, where meaningful connection feels elusive. He navigates “muttering retreats” and “restless nights,” symbolizing a fragmented existence.

The poem highlights the difficulty of authentic interaction, with Prufrock fearing judgment and social rituals becoming “excruciations.” This sense of detachment, amplified by urban decay, underscores the poem’s central theme: the modern individual’s profound alienation. Obtaining the PDF allows for deeper exploration of these themes.

The Futility of Human Connection

“The Love Song of J. Alfred Prufrock,” easily found as a PDF, masterfully depicts the frustrating inability to forge genuine bonds. Prufrock’s anxieties surrounding women reveal a deep-seated fear of rejection, hindering any possibility of intimacy. He’s “full of high sentence, but a bit obtuse,” suggesting communication barriers.

The poem’s fragmented structure mirrors the broken nature of these potential connections. Prufrock’s contemplation of the “overwhelming question” hints at a longing for meaning, yet he remains paralyzed by indecision. Accessing the PDF allows readers to dissect this poignant exploration of failed human connection.

The Passage of Time and Mortality

T.S. Eliot’s “The Love Song of J. Alfred Prufrock,” readily available as a PDF, profoundly explores the anxieties surrounding aging and the inevitability of death. Prufrock meticulously “measures out his life with coffee spoons,” highlighting a monotonous existence consumed by routine. This imagery underscores the fleeting nature of time and the regret of unfulfilled potential.

His self-consciousness about his balding head, alluding to John the Baptist, further emphasizes mortality. The PDF reveals a character acutely aware of his diminishing years and the futility of seeking lasting significance. The poem’s fragmented form mirrors the disintegration of time itself.

Social Anxiety and Self-Consciousness

T.S. Eliot’s “The Love Song of J. Alfred Prufrock,” easily accessed as a PDF, masterfully portrays crippling social anxiety and intense self-consciousness. Prufrock’s fear of disturbing the universe, and specifically, of being judged, dominates his internal monologue. He anticipates criticism regarding his appearance and social awkwardness, exemplified by concerns about his clothes and hairstyle.

The PDF reveals a man paralyzed by indecision, unable to initiate meaningful connection due to overwhelming self-doubt. These “benignly empty social rituals” become sources of “excruciation,” highlighting his profound discomfort and isolation within society.

Symbolism and Imagery

Eliot’s poem, often studied via PDF, utilizes potent symbols like yellow fog and elusive mermaids, reflecting urban decay and unattainable desires.

The Yellow Fog as a Symbol of Urban Decay

Eliot’s masterful use of imagery, readily accessible within a PDF version of the poem, presents the yellow fog as far more than mere weather. It embodies the pervasive sense of stagnation and moral decay within the modern urban landscape. The fog “rubs its back upon the window-panes,” a cat-like movement suggesting a sinister, creeping presence.

This isn’t a natural phenomenon, but an insidious element clinging to the city, mirroring Prufrock’s own feelings of entrapment and the suffocating atmosphere of societal constraints. The color yellow itself often signifies sickness or decay, reinforcing the poem’s bleak outlook. Studying the poem’s PDF reveals how this recurring image underscores the poem’s central themes.

The Mermaids and their Allusive Nature

Within the readily available PDF of “Prufrock,” the mermaids represent a tantalizing yet ultimately unattainable ideal. They symbolize a realm of beauty, freedom, and sensual experience that remains forever beyond Prufrock’s reach; Their song, however, doesn’t beckon him; they will not sing to him, highlighting his profound isolation and inability to connect.

These mythical creatures are allusive, drawing on folklore and literature, suggesting a longing for a romanticized past. Analyzing the poem’s PDF reveals Eliot’s deliberate use of myth to underscore Prufrock’s alienation from both the natural world and genuine human connection, a poignant symbol of his unfulfilled desires.

The “Overwhelming Question” and its Significance

Examining the PDF version of Eliot’s “Prufrock” reveals the central, yet perpetually deferred, “overwhelming question.” This question, never explicitly stated, embodies Prufrock’s deepest anxieties about love, purpose, and the possibility of meaningful connection. It represents a pivotal moment of potential self-revelation that he consistently avoids, paralyzed by fear of rejection and social disruption.

The poem’s structure, easily traced within the PDF, builds towards this question, only to continually retreat into digressions and self-deprecating thoughts. Its significance lies in its representation of the modern individual’s inability to confront existential truths, trapped in a cycle of indecision and regret.

References to Michelangelo and John the Baptist

A close reading of the poem, facilitated by a readily available PDF, reveals striking allusions to both Michelangelo and John the Baptist. Prufrock’s self-deprecating comparison of his balding head to that of John the Baptist, presented on a platter, underscores his feelings of inadequacy and perceived lack of heroic stature.

The reference, easily located within the PDF’s text, highlights Prufrock’s anxieties about mortality and his inability to achieve significance. The allusion to Michelangelo, though less direct, suggests a yearning for artistic creation and enduring legacy, further emphasizing his sense of personal failure.

Allusions and Literary References

PDF versions reveal rich allusions—Shakespeare, the Bible—deepening the poem’s layers. These references illuminate Prufrock’s internal struggles and modern anxieties.

Biblical Allusions: John the Baptist’s Head

Eliot’s masterful weaving of literary references includes a striking allusion to John the Baptist, readily apparent within PDF analyses of the poem. Prufrock, consumed by self-deprecation, compares his own balding head unfavorably to the beheaded saint, presented on a platter.

This comparison isn’t about religious piety, but rather Prufrock’s feeling of insignificance. John the Baptist’s fate was dramatic and impactful; Prufrock believes his own existence lacks such heroic weight. The PDF format allows close examination of this imagery, highlighting how Eliot uses it to underscore Prufrock’s anxieties and perceived lack of consequence.

Shakespearean Echoes in Prufrock’s Soliloquies

T;S. Eliot deliberately echoes Shakespearean dramatic techniques, particularly in Prufrock’s internal monologues, easily traceable within a PDF version of the poem. Prufrock’s hesitant, questioning style mirrors the soliloquies of Hamlet, revealing a tormented inner life.

Like Hamlet, Prufrock wrestles with indecision and contemplates the meaning of action – or inaction. The PDF format facilitates comparative analysis, showcasing how Eliot adapts Shakespeare’s conventions to portray modern alienation. These echoes aren’t imitation, but rather a sophisticated layering of literary tradition to amplify Prufrock’s psychological complexity.

Analyzing Key Passages

PDF access unlocks detailed examination of pivotal lines like “Let us go then, you and I…”, revealing Prufrock’s anxieties and fragmented consciousness.

“Let us go then, you and I..;” ⎼ The Opening Lines

These iconic opening lines, easily accessible within a PDF version of the poem, immediately establish a sense of hesitant invitation and ambiguous companionship. The “you and I” isn’t clearly defined, suggesting an internal dialogue or a reluctant guide.

Eliot’s deliberate vagueness draws the reader into Prufrock’s internal world, a landscape of social anxiety and indecision. The journey hinted at isn’t a physical one, but a descent into the speaker’s consciousness. Studying these lines in a PDF allows for close annotation and reveals the subtle nuances of Eliot’s masterful opening, setting the stage for the poem’s exploration of modern alienation.

“Do I dare disturb the universe?” ⎯ The Central Question

This pivotal question, prominently featured in any PDF edition of the poem, encapsulates Prufrock’s paralyzing self-consciousness and fear of disrupting the established social order. It’s not a literal inquiry about cosmic upheaval, but a metaphor for the audacity of genuine human connection.

Prufrock’s hesitation reveals a profound sense of inadequacy and a belief in his own insignificance. Accessing the poem via PDF facilitates repeated readings, highlighting the weight of this question and its implications for Prufrock’s inaction. The line embodies the poem’s central theme: the futility of modern life and the inability to overcome social anxieties.

“I have measured out my life with coffee spoons” ⎼ Prufrock’s Routine

This iconic line, easily found within any downloadable PDF of the poem, vividly illustrates Prufrock’s monotonous and circumscribed existence. The image of “coffee spoons” symbolizes the triviality and precise, yet ultimately meaningless, rituals that define his days. It’s a life devoid of passion or significant experience, meticulously portioned into small, unremarkable increments.

Studying the poem’s PDF reveals how this line underscores the theme of alienation and the stifling nature of modern society. Prufrock’s routine represents a surrender to the mundane, a quiet desperation born from fear and indecision, a life unlived.

Critical Interpretations

PDF analyses reveal feminist, psychoanalytic, and societal critiques of Prufrock’s neuroses, interactions, and the poem’s broader commentary on modern life’s anxieties.

Feminist Readings of Prufrock’s Interactions with Women

Feminist critiques, often accessible through PDF versions of scholarly articles, dissect Prufrock’s interactions with women as embodying patriarchal anxieties and objectification. The poem doesn’t present fully realized female characters, but rather fragments viewed through Prufrock’s self-absorbed lens. These readings highlight how women are reduced to body parts or societal expectations, fueling Prufrock’s indecision and fear of rejection.

The “women talking of Michelangelo” represent a sophisticated social sphere from which Prufrock feels excluded, and his inability to connect stems from a power imbalance. Analyses within PDF formats explore how Eliot’s portrayal reinforces societal norms that silence and marginalize female voices, contributing to Prufrock’s overall sense of alienation.

Psychoanalytic Interpretations of Prufrock’s Neuroses

Psychoanalytic readings, frequently detailed in PDF academic papers, view Prufrock’s anxieties as stemming from repressed desires and unresolved Oedipal conflicts. His self-consciousness and inability to act are interpreted as manifestations of a deep-seated fear of castration and inadequacy. The fragmented structure of the poem mirrors Prufrock’s fractured psyche, revealing a subconscious struggle with identity and sexuality.

PDF analyses often explore Prufrock’s preoccupation with aging and physical decay as symbolic of his anxieties surrounding mortality and lost potential. His inability to form meaningful connections is linked to a fear of intimacy and vulnerability, rooted in early childhood experiences, as explored within critical essays available in PDF format.

The Poem as a Critique of Modern Life

Many PDF scholarly articles posit “Prufrock” as a scathing indictment of early 20th-century societal norms and the alienation of modern existence. The poem’s depiction of tedious social rituals – tea parties, polite conversation – highlights the emptiness and superficiality of bourgeois life, readily analyzed in detailed PDF studies.

Eliot, through Prufrock, critiques the paralysis of indecision and the loss of genuine connection in an increasingly fragmented world. PDF resources demonstrate how the poem’s fragmented form mirrors the disjointedness of modern experience, exposing the spiritual void at the heart of modern civilization and the anxieties of a changing era.

“The Love Song of J. Alfred Prufrock” PDF Availability

PDF versions of Eliot’s poem are widely accessible through reputable online literary archives and educational websites, offering convenient study options.

Reputable Sources for Downloading the PDF

Numerous online platforms provide access to “The Love Song of J. Alfred Prufrock” in PDF format. Owl Eyes (owleyes.org) offers the full text alongside insightful analysis, making it a valuable resource for students and enthusiasts. Poetry Foundation (poetryfoundation.org) also hosts the poem, ensuring a reliable and legally sound download.

Additionally, many university and college websites, dedicated to literary studies, often archive classic poems like Eliot’s, providing PDF copies for academic purposes. Project Gutenberg, while focusing on older works, may also contain versions, though annotation quality can vary. Always verify the source’s legitimacy to ensure copyright compliance and avoid potentially harmful downloads.

Copyright Considerations and Legal Access

“The Love Song of J. Alfred Prufrock” is protected by copyright, though many editions are now in the public domain due to the poem’s age. Accessing PDF versions from reputable sources like the Poetry Foundation or Owl Eyes ensures legal compliance. Downloading from unofficial websites carries risks of copyright infringement and potential malware.

Always prioritize sources that explicitly state their legal right to distribute the work. Educational institutions often provide access through licensed databases. Be mindful of usage restrictions; academic study is generally permitted, but redistribution without permission is prohibited. Respecting copyright supports authors and fosters a sustainable literary ecosystem.

Different Editions and Annotations Available

Numerous PDF editions of “The Love Song of J. Alfred Prufrock” exist, ranging from plain text versions to those with extensive scholarly annotations. Owl Eyes provides a version with detailed analysis, while academic publishers offer editions geared towards students. Some PDFs include contextual essays on T.S. Eliot and Modernism.

Consider editions with footnotes explaining allusions to Shakespeare and the Bible, enhancing comprehension. Annotated versions clarify complex imagery like the yellow fog and mermaids. Choosing an edition depends on your needs – a basic text for reading pleasure or a fully annotated version for in-depth study.

The Poem’s Lasting Legacy

“Prufrock” profoundly influenced 20th-century poetry, establishing archetypes of modern anxiety; its readily available PDF ensures continued study and impact.

Influence on Subsequent Poets and Writers

T.S. Eliot’s groundbreaking work, easily accessible as a PDF, irrevocably altered poetic landscapes. Its innovative use of stream of consciousness, fragmented narratives, and psychological depth resonated deeply with later generations. Poets like Sylvia Plath and Ted Hughes adopted similar introspective and confessional styles, exploring themes of alienation and existential angst. The poem’s influence extends beyond poetry, impacting novelists and playwrights who embraced its modernist techniques. Prufrock’s internal struggles became a touchstone for portraying the anxieties of modern individuals, inspiring countless artists to delve into the complexities of the human psyche. The poem’s enduring legacy is cemented by its continued availability and scholarly analysis through readily downloadable PDF versions.

Prufrock as an Archetype of the Modern Man

J. Alfred Prufrock, vividly portrayed in the widely available PDF version of T.S. Eliot’s poem, embodies the anxieties and insecurities of the modern individual. He represents a generation grappling with disillusionment, social alienation, and a loss of traditional values; His paralyzing self-doubt and inability to connect authentically resonate with the modern experience. Prufrock’s fear of rejection and his meticulous self-consciousness make him a relatable figure, even today. Studying the poem’s PDF reveals how Eliot crafted a timeless archetype, reflecting the fragmented psyche of a world undergoing rapid change.

Continued Relevance in Contemporary Society

Even with easy access to the poem’s PDF, “The Love Song of J. Alfred Prufrock” maintains striking relevance. Prufrock’s anxieties about social interaction and self-worth echo in today’s digitally-connected yet isolating world. The poem’s exploration of alienation and the futility of connection resonates with contemporary experiences of loneliness and superficial relationships. Analyzing the PDF reveals how Eliot’s depiction of modern malaise continues to mirror our own struggles with identity and purpose. The poem’s enduring power lies in its ability to articulate universal human anxieties, making it perpetually insightful.

1 2 3