free crochet patterns pdf format

Discover a vast world of creative possibilities with readily available, free crochet patterns in convenient PDF format! These digital resources offer accessible crafting for all skill levels․

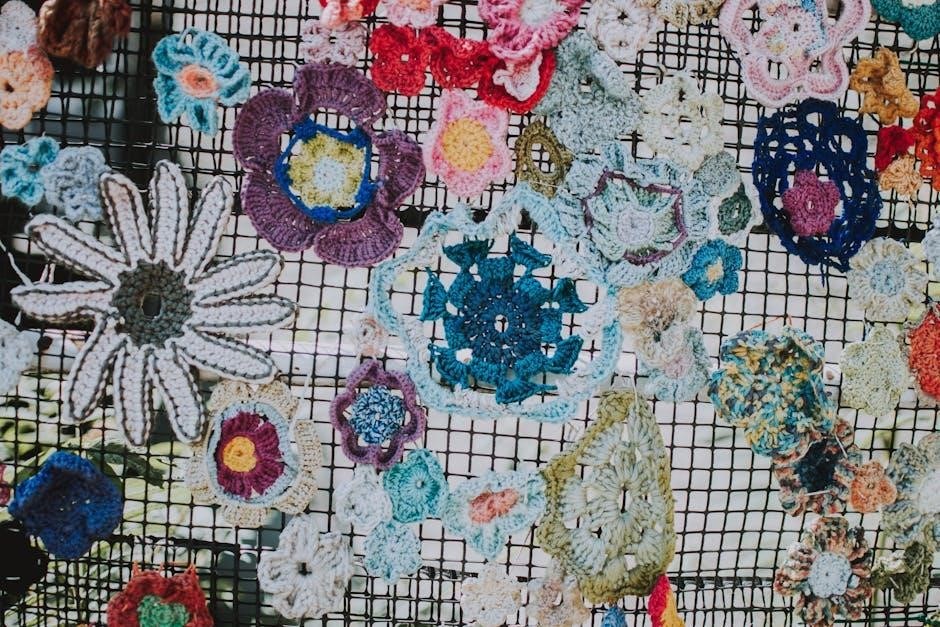
Explore diverse designs, from charming amigurumi to cozy home décor, all downloadable and easily printable for enjoyable crochet projects․

The Growing Popularity of Crochet

Crochet has experienced a remarkable resurgence in recent years, captivating a new generation of makers alongside seasoned enthusiasts․ This renewed interest is fueled by several factors, including its meditative qualities and the satisfaction of creating handmade items․ The accessibility of free crochet patterns, particularly in the convenient PDF format, has significantly contributed to this growth․

PDF patterns democratize the craft, removing financial barriers and allowing individuals to explore diverse projects without significant upfront investment․ Social media platforms like Instagram and Pinterest showcase stunning crochet creations, inspiring others to pick up a hook․ Furthermore, the rise of “slow living” and a desire for mindful activities have positioned crochet as a perfect hobby, offering a creative outlet and a tangible connection to the handmade world․ The availability of patterns for all skill levels ensures inclusivity, fostering a vibrant and expanding crochet community․

Why PDF Format is Preferred

PDF (Portable Document Format) has become the gold standard for distributing free crochet patterns due to its numerous advantages․ Primarily, PDFs ensure consistent formatting across various devices – computers, tablets, and smartphones – preserving the designer’s intended layout and clarity․ This eliminates potential issues with website rendering or browser compatibility․

PDFs are also easily downloadable and printable, allowing crocheters to work offline or have a physical copy of the pattern readily available․ Their compact file size makes them quick to download, even with limited internet access․ Moreover, PDFs often include detailed charts, diagrams, and photographs, enhancing understanding and minimizing errors․ The format’s universal accessibility and preservation of design integrity make it the ideal choice for sharing crochet patterns globally․

Where to Find Free Crochet Patterns PDF

Numerous online platforms offer a treasure trove of free crochet patterns in PDF format, including Ravelry, LoveCrafts, Yarnspirations, and AllFreeCrochet – a fantastic starting point!

Ravelry: A Comprehensive Database

Ravelry stands as an exceptionally robust and widely-used resource for crochet enthusiasts seeking free patterns in PDF format․ This vibrant online community boasts an extensive database, meticulously curated by users, offering a staggering selection of designs․

Navigating Ravelry is straightforward; you can filter searches by pattern type, yarn weight, difficulty level, and, crucially, availability of a PDF download․

Beyond simply finding patterns, Ravelry fosters a collaborative environment where crocheters share project photos, modifications, and helpful tips․

Users frequently upload PDF versions of patterns directly, or link to designers’ websites where the PDF is available for free․ It’s a truly comprehensive hub for discovering and connecting with the crochet world․

LoveCrafts: Patterns and Supplies

LoveCrafts presents itself as a fantastic destination for crochet lovers, offering a curated selection of both free and paid patterns, frequently available in convenient PDF format․ The platform distinguishes itself by seamlessly integrating pattern access with a comprehensive yarn and supply store․

Users can easily browse free crochet patterns, filtering by project type, skill level, and yarn requirements․ Many patterns include clear, downloadable PDFs, making project initiation simple․

LoveCrafts often features exclusive free patterns designed by popular crochet designers, adding unique options to its collection․

Furthermore, the site’s integrated shopping experience allows you to purchase all necessary materials directly alongside your chosen pattern, streamlining the crafting process․

Yarnspirations: Brand-Specific Patterns

Yarnspirations stands out as a premier resource for free crochet patterns, particularly those designed specifically for their own yarn brands – Bernat, Caron, Lily Sugar’n Cream, and Patons․ The website boasts an extensive library of patterns, almost all offered as downloadable PDF files․

This focus on brand-specific designs ensures that patterns are optimized for the texture, weight, and color palettes of their yarns, leading to excellent project results․

Users can easily filter patterns by yarn brand, project type, and skill level, making it simple to find the perfect match for their crafting needs․

Yarnspirations consistently updates its pattern offerings, providing a fresh and inspiring collection of free crochet projects․

AllFreeCrochet: A Curated Collection

AllFreeCrochet functions as a fantastic aggregator, meticulously curating free crochet patterns from various designers and websites across the internet․ This platform simplifies the search process, presenting a diverse range of projects in one convenient location, readily available as PDF downloads․

The site categorizes patterns extensively, allowing users to browse by project type – blankets, wearables, amigurumi, and more – or by skill level, ensuring something for everyone․

AllFreeCrochet also features daily email newsletters, delivering fresh pattern selections directly to your inbox, keeping your creative inspiration flowing․

It’s a valuable resource for discovering new designers and expanding your crochet pattern library without any cost․

Popular Crochet Pattern Categories (Free PDF)

Dive into a world of crochet possibilities! Free PDF patterns span numerous categories, including adorable baby items, charming amigurumi, stylish wearables, and cozy home décor projects․

Baby Crochet Patterns

Create precious keepsakes with an abundance of free baby crochet patterns available in PDF format! These patterns cater to all skill levels, offering delightful projects for little ones․

Discover over 80 patterns for crafting adorable baby booties and slippers, perfect for keeping tiny feet warm and stylish․ Explore a wide selection of baby blanket patterns, ranging from simple designs for beginners to intricate creations for experienced crocheters․

Find patterns for hats, cardigans, and other charming garments, all downloadable and ready to inspire your next baby shower gift or nursery décor project․ These free resources provide endless opportunities to express your creativity and create heartfelt treasures for the newest members of your family․

Baby Booties and Slippers (80+ Patterns)

Dive into a delightful collection of over 80 free crochet patterns specifically for baby booties and slippers, all conveniently available in PDF format! These patterns showcase a diverse range of styles, from classic designs to whimsical creations, ensuring there’s something to suit every taste․

Explore patterns featuring intricate stitchwork, charming embellishments, and various closure options like buttons or ties․ Whether you’re a beginner or an experienced crocheter, you’ll find patterns with clear instructions and helpful visuals․

Craft adorable footwear for newborns, infants, and toddlers, creating personalized gifts that will be cherished for years to come․ These free resources offer endless inspiration for keeping little feet cozy and stylish!

Baby Blankets

Discover a heartwarming selection of free crochet patterns for baby blankets, readily downloadable in PDF format! These patterns offer a beautiful way to create a cherished keepsake for newborns and young children, providing warmth and comfort with every stitch․

Explore a wide variety of designs, from simple and classic granny squares to intricate textured patterns and adorable character-themed blankets․ You’ll find options for all skill levels, with clear instructions and helpful diagrams․

Craft personalized blankets using soft, baby-friendly yarns in a rainbow of colors․ These free resources empower you to create unique and meaningful gifts, celebrating the joy of new life!

Amigurumi Crochet Patterns

Dive into the delightful world of amigurumi with a treasure trove of free crochet patterns available in PDF format! These patterns allow you to create adorable, miniature stuffed toys, perfect for gifts, collectibles, or simply adding a touch of whimsy to your life․

Explore a diverse range of characters, from cuddly animals and mythical creatures to popular cartoon figures like the iconic Teletubbies․ Patterns cater to various skill levels, offering both beginner-friendly designs and more complex projects․

Unleash your creativity and craft unique amigurumi companions using colorful yarns and a little imagination․ These free PDFs provide detailed instructions, bringing these charming creations to life!

Teletubbies Amigurumi

Relive your childhood nostalgia by crocheting your very own Teletubbies amigurumi! Free PDF patterns are readily available online, allowing you to recreate Tinky Winky, Dipsy, Laa-Laa, and Po in adorable, huggable form; These patterns typically include detailed instructions and clear photographs to guide you through each step of the process․

Craft these iconic characters using vibrant yarn colors and simple crochet stitches․ The patterns often feature the Teletubbies’ signature antenna shapes and smiling faces, capturing their playful personalities․

Perfect for fans of all ages, these free Teletubbies amigurumi patterns offer a fun and rewarding crochet project!

Animal Amigurumi (Frogs, etc․)

Dive into the delightful world of animal amigurumi with a plethora of free crochet patterns in PDF format! From charming frogs like Freddy Froggy – complete with detailed instructions and photos – to a whole zoo of other creatures, the options are endless․ These patterns cater to various skill levels, offering projects for beginners and experienced crocheters alike․

Create a whimsical collection of cuddly companions, utilizing different yarn weights and colors to bring each animal to life․ Explore patterns for bears, bunnies, cats, and beyond, all easily downloadable and ready to inspire your next crochet adventure․

Enjoy the satisfaction of crafting unique, handmade gifts or adding a touch of cuteness to your own home!

Wearable Crochet Patterns

Elevate your wardrobe with stylish, handmade pieces using free crochet patterns available in PDF format! Discover a diverse range of wearable designs, perfect for adding a personal touch to your everyday style․ From cozy and practical items to fashionable accessories, there’s something for everyone․

Explore patterns for scarves, cowls, hats, and beanies, offering warmth and flair during cooler months․ These downloadable PDFs provide clear instructions, making it easy to create unique garments tailored to your preferences․ Experiment with different yarn types and colors to express your individuality!

Enjoy the rewarding experience of crafting your own comfortable and fashionable wearables․

Scarves and Cowls

Wrap yourself in warmth and style with a beautiful, crocheted scarf or cowl! Numerous free patterns in PDF format are readily available online, offering a delightful range of designs for all skill levels․ From simple beginner projects to intricate textured creations, you’ll find the perfect pattern to suit your taste․

Explore options like ribbed scarves, lacy shawls, and cozy cowls, ideal for adding a touch of handmade charm to any outfit․ These downloadable PDFs provide step-by-step instructions, ensuring a smooth and enjoyable crafting experience․ Experiment with different yarn weights and colors to create a truly unique accessory!

Enjoy the satisfaction of creating a personalized and fashionable piece․

Hats and Beanies

Keep your head cozy and stylish with a handmade crochet hat or beanie! A plethora of free patterns in PDF format awaits, offering designs for every age and preference․ Discover simple beanies perfect for beginners, or challenge yourself with more intricate cable knit or textured hat patterns․

Explore a diverse range of styles, including slouchy beanies, fitted hats, and adorable animal-themed designs for children․ These downloadable PDFs provide clear instructions and often include multiple sizes, ensuring a perfect fit․ Experiment with different yarn colors and embellishments to create a truly personalized accessory!

Enjoy the warmth and satisfaction of a handcrafted hat․

Home Decor Crochet Patterns

Transform your living space with the cozy charm of handmade crochet décor! Numerous free PDF patterns are available, empowering you to create unique and personalized accents for your home․ From stunning blankets and throws to practical dishcloths and washcloths, the possibilities are endless․

Discover patterns for intricate mandalas, textured cushion covers, and delightful plant pot cozies․ These downloadable PDFs often include detailed instructions and visual aids, making even complex projects achievable․ Experiment with different yarn weights and colors to complement your existing décor and express your individual style!

Add a touch of handmade warmth to every room․

Blankets and Throws

Create comforting and beautiful blankets and throws with a wealth of free crochet patterns available in PDF format! These patterns cater to all skill levels, from beginner-friendly granny squares to more intricate designs․ Download and begin crafting cozy additions to your living room or bedroom․

Explore patterns for baby blankets, lap throws, and full-sized bedspreads․ Many PDFs offer stitch variations and color suggestions to personalize your project․ Discover textured stitches, cable patterns, and vibrant color combinations to create a truly unique piece․

Enjoy the relaxing process of crochet while crafting a cherished heirloom!

Dishcloths and Washcloths

Begin your crochet journey or expand your skills with a fantastic collection of free dishcloth and washcloth patterns in PDF format! These small projects are perfect for practicing new stitches and using up yarn scraps․ Download patterns ranging from simple single crochet designs to textured stitches like moss stitch or waffle stitch․

Explore a variety of shapes and sizes, creating functional and attractive additions to your kitchen or bathroom․ Many patterns incorporate colorwork or textured stitches for added visual appeal․ Discover eco-friendly alternatives to disposable sponges and cloths!

Enjoy quick and satisfying crochet projects!

Understanding Crochet Pattern Terminology

Decoding crochet patterns requires familiarity with common terms and abbreviations․ Mastering US versus UK terminology is crucial for accurate project completion and enjoyable crafting․

US vs․ UK Crochet Terms

Navigating the world of crochet often presents a delightful, yet sometimes confusing, challenge: the difference between US and UK terminology․ These variations stem from the historical development of crochet in each region, resulting in distinct names for identical stitches․ For example, a “single crochet” in the US is known as a “double crochet” in the UK․ Similarly, a “double crochet” in the US translates to a “treble crochet” across the pond․

Understanding this distinction is paramount when working with free crochet patterns, particularly those sourced internationally․ Many patterns will explicitly state which terminology is used, but it’s always wise to double-check․ Failing to recognize these differences can lead to significant errors in stitch count and overall project size․ Numerous online resources provide comprehensive charts mapping US terms to their UK equivalents, ensuring a smooth and successful crochet experience․

Common Crochet Stitches (Abbreviations)

Decoding crochet patterns relies heavily on understanding common stitch abbreviations․ These shorthand notations streamline instructions, making patterns concise and easier to follow․ “sc” represents single crochet, the foundational stitch for many projects․ “dc” signifies double crochet, creating a taller, more open fabric․ “hdc” denotes half double crochet, a stitch between single and double in height․

Other frequently encountered abbreviations include “sl st” for slip stitch, used for joining or edging, and “ch” for chain, the base for most crochet work․ Familiarizing yourself with these abbreviations is crucial when utilizing free crochet patterns in PDF format․ Many patterns include a key defining these terms, but proactively learning them will enhance your comprehension and enjoyment of the craft․

Tips for Downloading and Using PDF Patterns

Ensure a compatible PDF reader is installed for seamless viewing․ Print patterns at 100% scale to maintain correct sizing, and adjust as needed!

Ensuring PDF Reader Compatibility

Accessing your downloaded free crochet patterns requires a reliable PDF reader․ Adobe Acrobat Reader is a widely used, free option, ensuring consistent display across various devices․ However, many alternative readers, like Foxit Reader or even built-in browser viewers, can also successfully open these files․

Occasionally, patterns may contain specific fonts that aren’t automatically installed on your system․ If you encounter display issues – such as missing characters or distorted text – try updating your PDF reader to the latest version; This often includes font embedding updates․ If problems persist, consider downloading and installing any fonts specifically mentioned by the pattern designer․

Testing the PDF on multiple devices (computer, tablet, phone) is a smart practice to confirm consistent readability․ This helps identify potential compatibility issues before you begin your project!

Printing Patterns Correctly

Printing your free crochet PDF patterns accurately is crucial for a smooth crafting experience․ Before hitting ‘print’, carefully review the PDF’s print settings․ Ensure you’ve selected “Actual Size” or “100%” scaling to avoid distortion of charts and text․ Avoid “Fit to Page” as this will alter the intended dimensions․

Always perform a test print of the first page to verify the size and clarity․ Check if all charts and instructions are legible․ If the print is too faint, adjust your printer’s ink density settings․ Consider using a higher quality paper stock for durability and easier readability during use․

Double-sided printing can save paper, but ensure your printer handles it reliably to prevent misaligned pages!

Adjusting Pattern Size

Occasionally, a free crochet PDF pattern might print slightly off-size, or you may desire a different finished project dimension․ While altering a pattern requires some crochet knowledge, it’s often achievable․ Understanding gauge is paramount; crochet a gauge swatch using the yarn and hook specified․

Compare your swatch’s gauge to the pattern’s gauge․ If your stitches are tighter, use a larger hook; looser, use a smaller one․ Recalculate stitch counts for desired size changes, keeping in mind that increasing or decreasing size impacts yarn consumption․

Simple adjustments, like adding or subtracting rows, are easier than complex modifications․ Always test changes before committing to the entire project!

Resources for Learning Crochet

Enhance your crochet skills with abundant online tutorials on platforms like YouTube and blogs! Join vibrant crochet forums and communities for support and shared knowledge․

Online Tutorials (YouTube, Blogs)

Unlock a treasure trove of crochet knowledge through the dynamic world of online tutorials! YouTube channels offer visual, step-by-step guidance, perfect for beginners learning basic stitches or tackling complex patterns found in free PDF downloads․

Numerous crochet blogs provide detailed written instructions, helpful photos, and insightful tips for interpreting those PDF patterns․ These resources often break down intricate techniques into manageable steps, ensuring success with your projects․

Search for specific stitches, pattern types, or even the name of a free PDF pattern you’re working with – chances are, someone has created a tutorial to help! Leverage these free resources to build confidence and expand your crochet skillset, making those downloadable patterns even more enjoyable․

Crochet Forums and Communities

Immerse yourself in the vibrant world of crochet enthusiasts through dedicated online forums and communities! These platforms are invaluable resources when navigating free crochet patterns in PDF format․ Connect with fellow crafters to ask questions, share project progress, and receive helpful advice on deciphering pattern instructions․

Many forums feature dedicated threads for specific patterns, allowing you to learn from others’ experiences and troubleshoot any challenges you encounter․ Discover hidden gems – members often share links to free PDF patterns they’ve found, expanding your collection․

Benefit from the collective knowledge of experienced crocheters, fostering a supportive environment for learning and growth․ Participate in discussions, offer your own insights, and build lasting connections within the crochet community!

Legal Considerations & Copyright

Respect designer rights when using free crochet patterns in PDF format; understand usage permissions․ Distinguish between free patterns for personal use and those requiring purchase․

Respecting Designer Rights

When enjoying free crochet patterns in PDF format, it’s crucial to acknowledge and respect the intellectual property of the designers․ These patterns represent significant creative effort and skill․ While offered freely, they are generally protected by copyright, even without explicit statements․

Therefore, refrain from redistributing, reselling, or claiming ownership of the pattern itself․ Sharing the link to the original source is perfectly acceptable and encourages the designer․ Creating items from the pattern for personal use or charitable donations is typically permitted, but selling finished objects might have restrictions – always check the designer’s terms․

Supporting designers, even with free patterns, fosters a thriving crochet community and encourages continued creation of beautiful and inspiring designs for everyone to enjoy․ Acknowledging their work is a simple yet impactful gesture․

Free vs․ Paid Patterns

Free crochet patterns in PDF format are a fantastic entry point, offering diverse projects without initial cost․ However, paid patterns often provide a more refined experience․ These typically include more detailed instructions, professional editing, extensive photos, and sometimes even video tutorials for clarity․

Paid patterns frequently feature unique and complex designs not readily available for free, alongside dedicated designer support․ Consider paid options when tackling challenging projects or seeking exceptionally polished results․ Supporting designers through purchases ensures continued pattern creation․

Ultimately, both free and paid patterns have their place․ Free patterns are ideal for beginners or quick projects, while paid patterns cater to more ambitious crafters seeking in-depth guidance and exclusive designs․

mitsubishi air conditioner troubleshooting guide

This comprehensive guide offers practical solutions for common issues with Mitsubishi AC units, covering error codes, operational problems, and maintenance tips for optimal performance.

Mitsubishi split air conditioners, renowned for their efficiency and reliability, can still encounter various malfunctions. Like any sophisticated electronic device, they are susceptible to errors that impact performance. These issues range from easily fixable problems, such as clogged filters, to more complex faults requiring professional attention. Understanding these potential issues is the first step towards effective troubleshooting.

Common problems include error codes signaling sensor failures, communication errors between indoor and outdoor units, or temperature regulation issues. Regular maintenance, including filter cleaning and coil inspection, is crucial for preventing many of these problems. Addressing error codes promptly can significantly prolong the lifespan of your Mitsubishi AC unit and ensure consistent, efficient operation. Mitsubishi Electric provides extensive support, from pre-sales design to ongoing service and maintenance, ensuring a seamless experience for its customers.

Understanding Mitsubishi AC Error Codes

Mitsubishi Electric air conditioners utilize a comprehensive error code system to diagnose malfunctions. These codes, displayed on the unit’s control panel, pinpoint the source of the problem, aiding in efficient troubleshooting. Recognizing these codes is vital for both homeowners and technicians. Common examples include P1, indicating an intake sensor error, and P2/P9, signaling a pipe sensor (liquid or 2-phase) issue.

Other frequent codes are E6/E7, which points to communication problems between the indoor and outdoor units, and 0403, denoting a serial communication error. Codes like 0900 represent a test run, while 1102 signifies a discharge temperature fault. A complete list of malfunction error codes, along with their potential causes, is readily available to help determine the state and address the issue effectively, ensuring optimal AC performance.

Common Mitsubishi AC Problems & Solutions

Mitsubishi split air conditioners, like all electronics, can experience various issues impacting efficiency. Frequent problems include the unit failing to turn on, often due to power supply issues or a tripped breaker – check these first! Warm air blowing instead of cool indicates a refrigerant leak, a faulty compressor, or a blocked filter. Water leaks commonly stem from a clogged drain line, requiring cleaning.

Addressing these issues often involves simple fixes like replacing air filters, clearing drain lines, or resetting the unit. However, more complex faults, such as sensor errors or communication failures, necessitate professional intervention. Regular maintenance, including filter changes and coil cleaning, can prevent many problems and prolong the AC’s lifespan. Timely attention to error codes is crucial for maintaining optimal performance and avoiding costly repairs.

Error Code: P1 ⎯ Intake Sensor Error

The Mitsubishi AC error code P1 specifically indicates a malfunction with the intake sensor. This sensor is responsible for monitoring the temperature of the air entering the air conditioning unit, providing crucial data for optimal operation. When a P1 error appears, it suggests the sensor is either faulty, disconnected, or providing inaccurate readings.

Troubleshooting steps involve first visually inspecting the sensor and its wiring for any obvious damage or loose connections. If everything appears secure, the sensor may need replacement. This is best handled by a qualified technician, as proper calibration is essential. Ignoring a P1 error can lead to inefficient cooling, increased energy consumption, and potential damage to other components. Accurate intake temperature readings are vital for the AC’s performance.

Error Code: P2/P9 ⎯ Pipe Sensor Error (Liquid/2-Phase)

Mitsubishi AC error codes P2 and P9 both point to a problem with the pipe sensors – specifically those monitoring the liquid or 2-phase refrigerant pipes. These sensors are critical for ensuring the refrigerant cycle operates correctly and efficiently. A malfunctioning sensor can disrupt the cooling or heating process, leading to reduced performance or complete system failure.

Troubleshooting this error requires checking the sensor wiring for damage or loose connections. The sensors themselves may be faulty and require replacement. It’s also important to verify proper refrigerant levels, as low refrigerant can sometimes trigger this error. Due to the complexities of refrigerant handling, it’s strongly recommended to consult a qualified HVAC technician for diagnosis and repair. Ignoring these errors can lead to compressor damage and costly repairs.

Error Code: E6/E7 ⎯ Indoor/Outdoor Unit Communication Error

Mitsubishi air conditioner error codes E6 and E7 indicate a breakdown in communication between the indoor and outdoor units. This is a common issue that can stem from several sources, disrupting the coordinated operation of your system. Effective cooling or heating relies on seamless data exchange between these components.

Troubleshooting steps include verifying the wiring connections between the units, ensuring no wires are loose or damaged. Check the control board for any visible signs of failure. Interference from other electrical devices can sometimes cause communication errors, so try minimizing nearby electronic activity. If the problem persists, the communication cable itself may be faulty and require replacement. Given the complexity, professional diagnosis by a qualified HVAC technician is highly recommended to avoid further damage and ensure a proper fix.

Error Code: 0403 ─ Serial Communication Error

Mitsubishi AC error code 0403 signals a disruption in the serial communication pathway within the system. This typically affects the exchange of data between the control board and other vital components, hindering the air conditioner’s ability to function correctly. Identifying the root cause is crucial for restoring optimal performance.

Initial troubleshooting involves inspecting the wiring connections associated with the serial communication lines. Look for loose connections, corrosion, or any physical damage to the wires. A faulty control board can also trigger this error, necessitating a professional assessment. Interference from external electrical sources is another potential culprit, so minimizing nearby electronic activity is advisable. If the issue remains unresolved, a technician may need to replace the communication cable or reprogram the control board. Addressing this error promptly prevents further complications and ensures efficient operation.

Error Code: 0900 ─ Test Run

The Mitsubishi AC error code 0900 indicates that the unit is currently undergoing a self-diagnostic test run. This is a normal operational phase, often initiated after installation, maintenance, or a power interruption. During this test, the air conditioner assesses various functions to ensure everything is working as expected.

Generally, no immediate action is required when encountering this code. The test run typically completes within a few minutes, after which the unit should resume normal operation. However, if the 0900 error persists for an extended period, it could signify an underlying issue preventing the test from finishing successfully. In such cases, power cycling the unit (turning it off and on) might resolve the problem. If the error continues, consulting a qualified technician is recommended to diagnose and address any potential faults hindering the completion of the test run and ensuring proper functionality.

Error Code: 1102 ─ Discharge Temperature Fault

Mitsubishi AC error code 1102 signals a discharge temperature fault, meaning the temperature of the refrigerant leaving the compressor is outside the expected range. This often points to issues within the refrigerant circuit itself. Potential causes include refrigerant leaks, compressor malfunctions, or restrictions within the system, like a blocked expansion valve or dirty filter drier.

Addressing this error requires professional expertise. Attempting to handle refrigerant-related issues without proper training and equipment is dangerous and illegal. A qualified technician will need to diagnose the specific cause – checking refrigerant levels, inspecting the compressor, and examining the refrigerant lines for obstructions. Correcting the issue may involve repairing leaks, replacing faulty components, or performing a thorough system cleaning. Ignoring this error can lead to compressor damage and further system failures, so prompt professional attention is crucial.

Troubleshooting Cooling Issues

When your Mitsubishi AC isn’t cooling effectively, begin with basic checks. Ensure the air filter is clean, as a clogged filter restricts airflow and reduces cooling capacity. Verify the thermostat is set to “Cool” mode and the desired temperature is lower than the room temperature. Check outdoor unit for obstructions like leaves or debris blocking airflow around the condenser coils.

If these simple steps don’t resolve the issue, investigate potential refrigerant problems. Low refrigerant levels can significantly impair cooling performance, requiring a professional to locate and repair any leaks and recharge the system. A frozen evaporator coil, often caused by restricted airflow, can also hinder cooling. If you suspect a more complex issue, such as a compressor malfunction or electrical problem, it’s best to consult a qualified HVAC technician for diagnosis and repair. Regular maintenance can prevent many cooling issues.

Troubleshooting Heating Issues

If your Mitsubishi AC isn’t providing sufficient heat, start by confirming the system is set to “Heat” mode on the thermostat and the desired temperature is higher than the room temperature. Inspect the outdoor unit for ice buildup, which can restrict airflow and reduce heating efficiency. Ensure the air filter is clean, as a dirty filter can impede airflow and strain the heating components.

For heat pump systems, check the defrost cycle. If the unit is constantly defrosting, it may indicate a problem with the defrost sensor or control board. Low refrigerant levels can also affect heating performance, requiring professional attention. If the unit isn’t heating at all, there could be an issue with the reversing valve or electric resistance heaters. Complex heating problems often necessitate a qualified HVAC technician for accurate diagnosis and repair, ensuring safe and efficient operation;

AC Unit Not Turning On ⎯ Basic Checks

When your Mitsubishi AC fails to power on, begin with the simplest checks. Verify the unit is properly plugged into a functioning electrical outlet and that the circuit breaker hasn’t tripped. Inspect the thermostat batteries, replacing them if necessary, and ensure it’s set to “Cool” or “Heat” mode, depending on your needs; Check for any error codes displayed on the indoor unit, as these can provide clues about the issue.

Examine the outdoor unit’s disconnect switch, ensuring it’s in the “On” position. A faulty capacitor or a blown fuse within the unit can also prevent it from starting. If these basic steps don’t resolve the problem, it’s advisable to consult a qualified HVAC technician to diagnose and address more complex electrical or mechanical faults, ensuring safety and preventing further damage.

AC Unit Blowing Warm Air ⎯ Diagnosis

If your Mitsubishi AC is running but emitting warm air, several factors could be at play. A clogged air filter restricts airflow, reducing cooling efficiency. Regularly cleaning or replacing the filter is crucial. Check the outdoor unit for debris obstructing the condenser coils, hindering heat dissipation. A refrigerant leak is a common cause, requiring professional attention to locate and repair the leak, then recharge the system.

Furthermore, a malfunctioning compressor or a faulty fan motor can contribute to warm air output. Inspect the ductwork for leaks or disconnections, allowing conditioned air to escape. If you suspect a refrigerant issue or mechanical failure, immediately contact a qualified HVAC technician. Attempting to handle refrigerant yourself is dangerous and illegal; professional diagnosis and repair are essential for restoring optimal cooling performance.

AC Unit Leaking Water ⎯ Identifying the Source

Water leaks from a Mitsubishi AC unit often indicate a blockage in the condensate drain line. This line removes moisture collected during the cooling process. Algae growth or debris can cause obstructions, leading to water overflow. Carefully inspect and clear the drain line using a wet/dry vacuum or a stiff wire – always disconnect power first! Another potential source is a frozen evaporator coil, resulting from restricted airflow, often due to a dirty air filter.

Additionally, improper installation, such as incorrect unit leveling, can cause water to spill. Check the indoor unit’s pan for cracks or damage. If the leak persists after addressing these common issues, a professional inspection is recommended. Internal component failures or refrigerant line sweating (in humid conditions) may require expert diagnosis and repair to prevent further water damage and ensure efficient operation.

Maintaining Your Mitsubishi AC Unit

Regular maintenance is crucial for extending the lifespan and efficiency of your Mitsubishi AC. Begin with monthly air filter cleaning or replacement – a dirty filter restricts airflow, impacting performance and potentially causing coil freeze-up. Annually, schedule a professional cleaning of the indoor and outdoor coils to remove accumulated dust and debris. Inspect the condensate drain line for blockages and flush it with a mild solution of water and bleach to prevent algae growth.

Furthermore, ensure the outdoor unit is free from obstructions like leaves and branches, allowing for proper ventilation. Periodically check refrigerant levels (best left to a qualified technician) and tighten any loose electrical connections. Proactive maintenance not only prevents costly repairs but also ensures optimal cooling and heating performance, contributing to energy savings and a comfortable indoor environment.

When to Call a Professional

While many Mitsubishi AC issues can be addressed with basic troubleshooting, certain problems necessitate professional intervention. If you encounter complex error codes like those involving serial communication (0403) or persistent communication errors between indoor and outdoor units (E6/E7), a technician is required. Refrigerant leaks, requiring specialized equipment for detection and repair, should always be handled by a certified professional.

Additionally, electrical issues, unusual noises emanating from the unit, or a complete failure to power on despite basic checks warrant professional attention. Attempting to repair these issues yourself could lead to further damage or safety hazards. Mitsubishi Electric offers extensive support and a network of qualified technicians to ensure your system receives expert care, maximizing its lifespan and efficiency.

Mitsubishi Electric Support & Resources

Mitsubishi Electric provides a wealth of resources to assist owners with their air conditioning systems. Their official website offers detailed product manuals, frequently asked questions, and troubleshooting guides covering a wide range of issues. You can access these resources directly through their support portal, often categorized by model number for precise information.

Furthermore, Mitsubishi Electric maintains a network of authorized dealers and service centers. These professionals are trained to diagnose and repair Mitsubishi AC units, ensuring quality workmanship and genuine parts. For immediate assistance, a customer support hotline is available to address urgent concerns and guide you towards the appropriate solution. Regular maintenance and utilizing these resources will prolong your AC’s life.

Preventative Maintenance Schedule

To ensure optimal performance and longevity of your Mitsubishi AC unit, a consistent preventative maintenance schedule is crucial. Monthly, inspect and clean or replace air filters to maintain efficient airflow and indoor air quality. Every three months, carefully clean the outdoor unit’s coils, removing any debris like leaves or dirt that can impede heat transfer.

Annually, schedule a professional inspection and servicing. A qualified technician can assess refrigerant levels, check electrical connections, and lubricate moving parts. This proactive approach prevents minor issues from escalating into costly repairs. Before peak seasons (summer and winter), perform a thorough system check to guarantee reliable operation when you need it most. Regular maintenance extends lifespan and saves energy!

fibre cement sheet installation guide

This comprehensive guide details the process of installing fibre cement sheets, ensuring a secure, long-lasting roof or siding. It covers essential tools,
step-by-step instructions, and best practices for a successful installation, referencing James Hardie’s recommendations.

Fibre cement sheets represent a durable and versatile building material increasingly favoured in both roofing and siding applications. Composed of cement, sand, and cellulose fibres, these sheets offer exceptional resistance to weather, fire, and pests, making them a long-term investment for property owners. James Hardie, a leading manufacturer, has pioneered advancements in fibre cement technology, notably with their ColorPlus Technology, enhancing aesthetic appeal and longevity.

Understanding the properties and installation nuances of fibre cement is crucial for achieving optimal performance. Proper installation, adhering to best practices and safety standards, ensures the sheets deliver their intended benefits – protection, durability, and aesthetic enhancement. This guide will navigate the process, providing insights for both DIY enthusiasts and construction professionals.

Benefits of Fibre Cement Roofing & Siding

Fibre cement roofing and siding offer a compelling array of advantages over traditional materials. Notably, they exhibit exceptional durability, resisting rot, decay, and insect damage, leading to reduced maintenance costs. Their fire-resistant properties enhance building safety, providing peace of mind. Furthermore, fibre cement is remarkably versatile, mimicking the appearance of wood or other materials while offering superior performance.

James Hardie’s ColorPlus Technology adds another layer of benefit, ensuring long-lasting colour retention and resistance to fading. The material’s inherent stability minimizes warping and cracking, contributing to a visually appealing and structurally sound building envelope. Choosing fibre cement is a sustainable option, offering longevity and reducing the need for frequent replacements.

Safety Precautions During Installation (as of 02/15/2026)

Prioritizing safety is paramount when installing fibre cement products. As of February 15, 2026, minimizing exposure to respirable crystalline silica is crucial. James Hardie’s best practice guides emphasize the use of dust control measures, including water suppression during cutting and drilling. Always wear a properly fitted respirator, safety glasses, and gloves.

Ensure adequate ventilation in the work area. Follow all applicable government safety standards and regulations. Proper handling techniques are essential to prevent cuts and abrasions from the material’s edges. Secure ladders and scaffolding to prevent falls. Review product-specific installation instructions for any additional safety recommendations.

Essential Tools for Fibre Cement Installation

Successful fibre cement installation requires a specific set of tools. A hand drill is fundamental for fastening, alongside appropriate fibre cement nails (typically 2.8 x 30mm). Cutting necessitates specialized tools – options include fibre cement cutters, scoring knives, or circular saws with fibre cement blades.

Accurate measuring and marking tools, such as tape measures, levels, and chalk lines, are vital for precise sheet layout. Safety equipment, including respirators, safety glasses, and gloves, is non-negotiable. Consider a nail gun designed for fibre cement for increased efficiency, but hand nailing remains a viable option.

Cutting Tools

Selecting the right cutting tool is crucial for clean, efficient fibre cement sheet modification. Dedicated fibre cement cutters provide dust control and precise cuts. Alternatively, a scoring knife can be used for straight lines, followed by snapping the sheet along the score.

For more complex cuts, a circular saw equipped with a diamond-tipped blade specifically designed for fibre cement is recommended. Always prioritize dust control when using power tools, employing a dust extraction system or wearing a respirator. Avoid using standard wood-cutting blades, as they can damage the material and create hazardous dust.

Fastening Tools (Hand Drill & Nails)

Securely fastening fibre cement sheets requires appropriate tools and techniques. A hand drill is essential for pre-drilling nail holes, preventing cracking and ensuring proper alignment. Use a drill bit slightly larger than the nail shank.

Specifically, 2.8 x 30mm fibre cement nails are recommended for optimal holding power and corrosion resistance. These nails are designed to penetrate the sheet and substrate without causing damage. A hammer is, of course, needed to drive the nails. Ensure nails are driven straight and flush with the surface, avoiding overdriving which can compromise the sheet’s integrity.

Measuring & Marking Tools

Accurate measurement and marking are crucial for a professional fibre cement sheet installation. A reliable tape measure is fundamental for determining sheet layout and cutting dimensions. A spirit level ensures sheets are installed perfectly straight, both horizontally and vertically, preventing uneven surfaces and potential water ingress.

For precise marking, use a pencil or marker suitable for exterior use. A chalk line can be invaluable for creating long, straight lines for cutting, especially across multiple sheets. A square helps ensure corners are 90 degrees, vital for a neat and structurally sound installation.

Preparing the Substrate

Proper substrate preparation is paramount for a durable and long-lasting fibre cement sheet installation. The surface must be clean, dry, and structurally sound to ensure adequate support and adhesion. For brickwork, it’s recommended to install a timber batten system, securely glued and screwed into position, creating a level surface for fixing the sheets.

This batten system acts as a fixing point and provides ventilation behind the fibre cement. Ensure battens are straight and evenly spaced, with a maximum centre spacing of 450mm, to prevent sheet deflection and maintain structural integrity. Addressing any existing imperfections is crucial before proceeding.

Timber Batten Systems (for Brickwork)

When installing fibre cement sheets over brickwork, a timber batten system is highly recommended. This system provides a crucial level playing field and a secure fixing point for the sheets, overcoming the unevenness inherent in brick surfaces. Battens should be constructed from treated timber to resist moisture and decay, ensuring longevity.

They must be firmly adhered to the brickwork using a suitable construction adhesive and mechanically fixed with screws for added stability. The battens effectively create a ventilated cavity, promoting airflow and preventing moisture build-up behind the fibre cement cladding, which is vital for preventing damage.

Batten Spacing (Maximum 450mm Centres)

Maintaining correct batten spacing is critical for the structural integrity and weather resistance of the fibre cement installation. The maximum recommended centre-to-centre spacing for timber battens is 450mm. This ensures adequate support for the sheets, preventing deflection and potential cracking, especially under wind loads or heavy snow.

Closer spacing may be necessary depending on the specific fibre cement product, local building codes, and anticipated environmental conditions. Always consult the manufacturer’s specifications for precise batten spacing requirements. Consistent spacing is essential for a uniform and aesthetically pleasing finish, facilitating a smooth and secure sheet installation.

Measuring and Cutting Fibre Cement Sheets

Accurate measurement and precise cutting are paramount for a professional fibre cement sheet installation. Begin by carefully measuring the area to be covered, accounting for overlaps and any necessary trimming around openings. Transfer these measurements onto the fibre cement sheets using a marker and straight edge.

Utilize appropriate cutting tools – specialized fibre cement cutters or carbide-tipped saws are recommended to minimize dust and ensure clean cuts. Always score the sheet firmly before attempting a full cut. Remember to wear appropriate safety gear, including a dust mask and eye protection, during the cutting process to mitigate respirable crystalline silica exposure.

Fibre Cement Sheet Installation ⏤ Step-by-Step Guide

Begin with initial sheet placement, ensuring proper alignment with the substrate and adjacent sheets. Maintain consistent overlaps as specified by the manufacturer, typically around 25-50mm, to prevent water ingress. Fastening is crucial; utilize fibre cement nails (2.8 x 30mm) and a hand drill for pre-drilling to avoid cracking.

Nailing should be done carefully, ensuring nails are driven straight and flush with the sheet surface. Space nails according to the manufacturer’s guidelines, generally around 300mm apart along battens. Regularly check alignment and adjust as needed throughout the installation process for a professional finish.

Initial Sheet Placement & Alignment

Start by carefully positioning the first fibre cement sheet, ensuring it’s square and level with the building’s framework. Precise alignment is paramount for a professional and weatherproof installation. Begin at a corner or edge, working systematically across the surface. Use a spirit level and measuring tape to verify both horizontal and vertical alignment before fastening.

Maintain consistent overlaps, typically 25-50mm, as recommended by the manufacturer, to prevent water penetration. Check for any gaps or inconsistencies, making adjustments before securing the sheet. Proper initial placement sets the foundation for the entire installation, influencing the final aesthetic and performance.

Fastening Techniques (Nailing)

Secure fibre cement sheets using appropriate fibre cement nails, typically 2.8 x 30mm, driven flush with the sheet surface. Hand nailing is often recommended, ensuring controlled placement and preventing damage to the material. Maintain consistent nail spacing, generally around 300mm along battens and 450mm at sheet edges, adhering to manufacturer guidelines.

Avoid over-driving nails, which can cause cracking or compromise the sheet’s integrity. Ensure nails penetrate the timber battens sufficiently for a secure hold. Pre-drilling may be necessary in certain situations to prevent splitting, especially near sheet edges. Proper nailing technique is crucial for long-term stability and weather resistance.

Using Fibre Cement Nails (2.8 x 30mm)

Specifically designed 2.8 x 30mm fibre cement nails are essential for secure and lasting installation. These nails possess specialized corrosion-resistant coatings, preventing rust and ensuring long-term durability, even in harsh weather conditions. They are engineered to penetrate the fibre cement without causing excessive splitting or cracking.

Always use nails that meet relevant Australian standards. Avoid using standard nails, as they lack the necessary properties for fibre cement applications. Correct nail placement – flush with the sheet surface – is vital. Ensure sufficient penetration into the timber battens for a robust connection, typically a minimum of 20mm.

Overlap and Sheet Layout Considerations

Proper sheet layout and overlap are crucial for weatherproofing and structural integrity. Staggering end joints – avoiding continuous lines – enhances strength and minimizes water ingress. Recommended side overlaps vary by product and roof pitch; consult the manufacturer’s specifications for precise details.

Consider prevailing wind directions when laying sheets, ensuring overlaps face away from the wind. Maintain consistent overlaps throughout the installation. Plan the layout to minimize waste, optimizing sheet usage and reducing offcuts. Accurate measurements and careful planning are key to a professional finish and efficient material utilization;

Specific Product Installation Instructions (James Hardie)

James Hardie products require adherence to their specific installation guidelines for optimal performance and warranty validity. For instance, Hardie Plank lap siding with ColorPlus Technology arrives with a protective slip sheet; this must be removed after installation to prevent damage during handling.

Furthermore, each product is assigned to a specific “Hardie Zone,” dictating unique installation processes based on climate and exposure. Always review the official installation instructions and best practice guide relevant to the product and Hardie Zone. Following these detailed instructions ensures a durable, aesthetically pleasing, and compliant installation.

Hardie Plank with ColorPlus Technology ⏤ Slip Sheet Removal

Hardie Plank siding featuring ColorPlus Technology is shipped with a protective laminate slip sheet applied to its surface. This sheet is crucial during transit and storage, minimizing marring and scratching that could compromise the finished appearance. However, it’s vitally important to understand when to remove it.

Do not remove the slip sheet prematurely. Instead, wait until the siding is fully installed and securely fastened. Removing it beforehand increases the risk of damage. Once installation is complete, carefully peel off the slip sheet, revealing the vibrant ColorPlus finish. Proper slip sheet removal ensures a flawless and long-lasting aesthetic.

Hardie Zone Specific Processes

James Hardie products are categorized into Hardie Zones, each representing different climate conditions and exposure levels. Recognizing the appropriate Hardie Zone for your project is paramount, as it dictates specific installation processes and requirements. These zones – ranging from coastal to inland – influence fastening schedules, joint preparation, and coating recommendations.

Always consult the official James Hardie installation guide for the specific product and its corresponding Hardie Zone. Each product has unique processes tailored to maximize performance and longevity within its designated climate. Ignoring these zone-specific instructions can void warranties and compromise the integrity of the installation. Prioritize adherence to these guidelines for optimal results.

Minimizing Respirable Crystalline Silica Exposure

Fibre cement products contain silica, and cutting or breaking them can generate respirable crystalline silica (RCS) dust. Prolonged exposure to RCS can lead to serious health issues, including silicosis, lung cancer, and kidney disease. Therefore, minimizing exposure during installation is crucial.

James Hardie’s best practice recommendations are designed to mitigate RCS risk. Employ dust control measures like using wet cutting methods, vacuum-equipped saws, and wearing properly fitted respirators (N95 or higher).
Ensure adequate ventilation and follow all applicable government safety standards. Prioritize worker safety and implement comprehensive dust control protocols.

Complying with Government Safety Standards

Installation of fibre cement sheets must adhere to relevant government safety regulations concerning respirable crystalline silica (RCS) exposure. These standards are in place to protect worker health and prevent silica-related diseases. Regulations vary by location, so it’s vital to understand and implement the specific requirements for your region.

James Hardie’s best practice guide assists in meeting these standards, outlining procedures for dust control, respiratory protection, and worker training. Staying informed about updates to safety regulations is essential. Proper documentation of safety measures and worker training is also crucial for demonstrating compliance during inspections.

Fixing 4.5mm Fibre Cement Lining

When fixing 4.5mm fibre cement lining, a timber batten system is generally recommended, particularly over brickwork. This system, glued and screwed into position, provides a solid substrate for secure fastening. Battens should be installed with a maximum centre spacing of 450mm to ensure adequate support across the sheet.

Hand nailing is a common method for attaching the lining, utilizing 2.8 x 30mm fibre cement nails. Ensure nails are driven straight and flush with the surface to avoid cracking or damaging the material. Proper batten spacing and nailing techniques are crucial for a durable and aesthetically pleasing finish.

Best Practices for Long-Lasting Installation

To ensure a long-lasting fibre cement installation, always prioritize safety and adherence to manufacturer guidelines. Review the official installation instructions and James Hardie’s best practice guide specific to the product and Hardie Zone. Proper substrate preparation, including a correctly installed timber batten system, is fundamental.

Minimize respirable crystalline silica exposure by employing dust control measures and wearing appropriate personal protective equipment. Accurate measuring and cutting, coupled with correct fastening techniques using 2.8 x 30mm fibre cement nails, are vital. Regular inspection during and after installation will identify and rectify any issues promptly.

Dealing with Waste and Offcuts

Effective waste management is crucial during fibre cement sheet installation. Carefully plan cuts to minimize offcuts, and consider utilizing smaller pieces for detailing or patching in less visible areas; Always handle fibre cement waste with care, as it can generate respirable crystalline silica when disturbed.

Dispose of waste materials responsibly, following local regulations and guidelines. Avoid dry sweeping or brushing of offcuts; instead, use a HEPA-filtered vacuum or wet methods to control dust. Securely contain waste in labeled bags or containers to prevent fibre release during transportation and disposal, prioritizing both safety and environmental responsibility.

Inspection and Quality Control

Regular inspection throughout the fibre cement sheet installation process is vital for ensuring a high-quality, durable result. Check for proper alignment, consistent overlaps, and secure fastening of each sheet. Verify that all nails are correctly driven and haven’t caused cracking or damage to the material.

Pay close attention to Hardie Zone specific processes and product instructions. After completion, conduct a final inspection to identify any imperfections or areas needing adjustment. Address any issues promptly to maintain the integrity and longevity of the installation, adhering to James Hardie’s best practice guidelines.

Troubleshooting Common Installation Issues

During fibre cement sheet installation, issues like cracking, chipping, or incorrect overlaps can occur. Cracking often results from over-tightening fasteners; adjust nailing pressure accordingly. Chipping can be minimized by using appropriate cutting tools and techniques, and ensuring proper support during handling.

Incorrect overlaps compromise weather resistance; immediately correct misaligned sheets. If encountering difficulties, consult the James Hardie best practice guide and specific product instructions for Hardie Zone requirements. Addressing these issues promptly prevents long-term problems and maintains the installation’s integrity, ensuring a durable and weather-tight finish.

Fibre Cement Siding Installation Tips

When installing fibre cement siding, prioritize accurate measurements and consistent overlaps for a professional finish. Remember to remove the protective slip sheet from products like Hardie Plank with ColorPlus Technology after installation to prevent damage during handling.

Always adhere to the manufacturer’s recommended nailing patterns and fastener types – typically 2.8 x 30mm fibre cement nails. Proper substrate preparation, including a securely fastened timber batten system, is crucial. Review the official installation instructions and Hardie Zone specific processes for optimal results and long-lasting performance.

Fibre Cement Board Considerations

Fibre cement boards offer durability and versatility, but require careful handling and installation. Prioritize minimizing respirable crystalline silica exposure by utilizing appropriate cutting and fastening techniques, and always comply with government safety standards.

Ensure the substrate is properly prepared with a timber batten system, maintaining maximum 450mm centres. Accurate measuring and cutting are essential for a seamless fit. James Hardie’s best practice guide provides valuable insights into working safely with these materials, maximizing product lifespan and minimizing potential hazards during the installation process.

Roofing Sheet Specifics

Fibre cement roofing sheets demand precise installation for optimal weather protection and longevity. Proper overlap and sheet layout are crucial, alongside utilizing appropriate fastening techniques with 2.8 x 30mm fibre cement nails.

Consider the specific product instructions, particularly those from manufacturers like James Hardie, as each product may have unique installation processes. A well-installed fibre cement roof provides excellent durability, but requires adherence to safety precautions to minimize exposure to respirable crystalline silica. Careful planning and execution are key to a successful roofing project.

James Hardie Best Practice Guide

James Hardie, a leading manufacturer, provides a comprehensive best practice guide for working safely with fibre cement products. This guide is designed to minimize the risk of exposure to respirable crystalline silica during installation, ensuring compliance with government safety standards.

Reviewing the official installation instructions and Hardie Zone-specific processes for each product is essential, as each has unique requirements. For example, Hardie Plank with ColorPlus Technology ships with a slip sheet that should be removed after installation. Following these guidelines guarantees a durable, safe, and compliant fibre cement installation.

Resources and Further Information

For detailed guidance, consult James Hardie’s official installation instructions and best practice guides, tailored to specific products and Hardie Zones. These resources provide crucial insights into proper techniques and safety protocols.

The Bunnings Workshop community offers valuable DIY advice and practical tips from experienced users, supplementing the manufacturer’s recommendations. Additionally, exploring online articles and comprehensive DIY guides can enhance your understanding of fibre cement sheet installation. Remember to prioritize safety and adhere to all relevant government standards for a successful and compliant project.

health professionals and support services award 2024 pdf

Health Professionals and Support Services Award 2024/2025/2026: A Comprehensive Plan

This award‚ effective January 31‚ 2025‚ rescinds the 2024 version‚ establishing minimum standards for wages and conditions.
Access the 2025/2026 pay rates via interactive viewers and a PDF summary.

The Health Professionals and Support Services Award governs employment terms within hospitals and medical centres‚ setting a foundational framework for fair labor practices. This comprehensive award‚ initially published on January 31‚ 2025‚ and superseding the 2024 version‚ details minimum standards for wages‚ working conditions‚ and crucial entitlements for both health professionals and dedicated support staff.

Understanding this award is vital for employers and employees alike. It ensures equitable treatment and clarity regarding rights and responsibilities. The 2025/2026 award‚ available as a PDF document‚ outlines specific pay rates‚ leave provisions‚ and other key aspects of employment. Regularly checking for updates from the Fair Work Commission (FWC) is recommended‚ as proposed changes may impact minimum pay rates.

Purpose and Scope of the Award

The primary purpose of the Health Professionals and Support Services Award is to establish and maintain fair and equitable employment standards across the health sector. This encompasses a broad range of roles‚ from highly skilled health professionals to essential support staff‚ ensuring consistent treatment and minimum entitlements.

The scope extends to various health settings‚ including hospitals and medical centres‚ and crucially‚ incorporates labour hire businesses supplying personnel to these organizations. The 2025/2026 award‚ accessible as a PDF‚ clarifies coverage for employees placed through these agencies. It aims to provide clarity on pay rates‚ working conditions‚ and entitlements‚ fostering a stable and productive workforce within the Australian healthcare system.

Rescission and Replacement of Previous Awards (NSW Health Service)

Effective January 31‚ 2025‚ this Health Professionals and Support Services Award formally rescinds and replaces the prior NSW Health Service Health Professionals (State) Award 2024. This transition‚ documented in 397 I.G. 485‚ ensures all employees operate under the most current and legally compliant framework.

The replacement is vital for maintaining up-to-date standards regarding wages‚ conditions‚ and entitlements. Accessing the 2025/2026 award as a PDF document is crucial for employers and employees alike to understand the changes. This rescission streamlines regulations and provides a single‚ authoritative source for all relevant information within the NSW Health Service.

Effective Dates and Versions of the Award

The current Health Professionals and Support Services Award operates across the 2024/2025/2026 period‚ with key dates marking its evolution. The most recent version commenced on January 31‚ 2025‚ superseding the 2024 iteration. Employers and employees can readily access a PDF copy of the current award for detailed review.

Understanding these dates is crucial for compliance. The 2024 award is no longer valid for determining entitlements. Regularly checking for updates via the Fair Work Commission is recommended‚ as proposed changes may impact future versions. Accessing the official PDF ensures you are referencing the legally operative document.

Key Provisions of the Award

The Health Professionals and Support Services Award establishes fundamental employment standards within the health sector. Core provisions encompass minimum wage rates‚ categorized by classification and experience‚ detailed within the PDF document. It also regulates working conditions‚ including hours of work‚ overtime‚ and penalty rates.

Furthermore‚ the award outlines specific entitlements for both health professionals and support staff‚ covering areas like annual leave‚ sick leave‚ and long service leave. The PDF version provides a comprehensive overview of these rights. Compliance with these provisions is legally mandated‚ ensuring fair treatment and appropriate compensation for all covered employees.

Minimum Wage Standards

The Health Professionals and Support Services Award dictates specific minimum wage standards based on employee classification and skill level. Detailed pay rates are readily accessible within the official PDF document‚ offering clarity for both employers and employees. These rates are subject to updates following Fair Work Commission (FWC) decisions‚ potentially leading to increases.

The award ensures a baseline level of compensation‚ protecting workers from exploitation. Interactive pay rate viewers‚ linked to the PDF‚ facilitate easy access to current figures. Employers are legally obligated to adhere to these standards‚ guaranteeing fair remuneration for all covered staff within hospitals and medical centers.

Working Condition Regulations

The Health Professionals and Support Services Award outlines comprehensive working condition regulations‚ ensuring a safe and equitable environment for all staff. The detailed PDF document specifies guidelines regarding hours of work‚ overtime‚ breaks‚ and leave entitlements. These regulations aim to balance the demands of healthcare delivery with the wellbeing of employees.

Key provisions cover areas like shift arrangements‚ on-call duties‚ and access to appropriate facilities. Employers are responsible for maintaining compliance with these standards‚ fostering a positive and productive workplace. The award also addresses considerations for labour hire employees‚ ensuring consistent protections regardless of employment arrangement‚ as detailed in the PDF.

Entitlements for Health Professionals

The Health Professionals and Support Services Award‚ accessible as a PDF‚ details specific entitlements for qualified health professionals. These include provisions for professional development‚ allowing for continued education and skill enhancement. Salary packaging options and allowances for specific qualifications or responsibilities are also outlined within the document.

Furthermore‚ the award addresses entitlements related to health and safety‚ ensuring a secure working environment. Access to employee assistance programs and support services is also specified. The PDF provides a comprehensive overview of these benefits‚ designed to attract and retain skilled professionals within the healthcare sector‚ promoting a high standard of patient care.

Entitlements for Support Staff

The Health Professionals and Support Services Award‚ available as a PDF document‚ clearly defines entitlements for vital support staff within healthcare settings. This includes detailed provisions for annual leave‚ sick leave‚ and long service leave accrual‚ ensuring fair compensation for their dedication. The award also outlines specific allowances‚ potentially covering uniform maintenance‚ laundry costs‚ or shift penalties.

Access to training opportunities‚ aimed at enhancing skills and career progression‚ is also addressed within the PDF. Importantly‚ the document emphasizes safe working conditions and access to employee assistance programs. These entitlements collectively support the wellbeing of support staff‚ recognizing their crucial role in delivering quality patient care.

Coverage of the Award

The Health Professionals and Support Services Award‚ detailed in its PDF format‚ extends its coverage to a broad spectrum of healthcare environments. This encompasses employees working within hospitals‚ medical centres‚ and other related health facilities. Crucially‚ the award isn’t limited to directly employed staff; it also includes individuals placed through labour hire businesses.

The PDF clarifies that any organization utilizing labour hire for health-related roles falls under the award’s jurisdiction. This ensures consistent minimum standards are applied across the industry‚ regardless of employment arrangement. The award’s scope aims to protect all workers contributing to healthcare delivery‚ promoting fairness and equity within the sector.

Applicability to Various Health Settings (Hospitals‚ Medical Centres)

The Health Professionals and Support Services Award‚ as outlined in the PDF document‚ demonstrates consistent application across diverse healthcare settings. Whether personnel are employed in large hospitals providing complex care‚ or smaller medical centres offering primary healthcare services‚ the award’s provisions apply uniformly.

The PDF confirms that the minimum wage standards‚ working condition regulations‚ and entitlements detailed within the award are legally binding in both environments. This ensures equitable treatment for all covered employees‚ regardless of the specific healthcare facility. The award’s broad applicability fosters a standardized and fair working environment throughout the health sector.

Inclusion of Labour Hire Businesses

The Health Professionals and Support Services Award‚ detailed within the PDF‚ explicitly extends its coverage to labour hire businesses operating within the health industry. This means agencies providing temporary or contract staff to hospitals and medical centres are also bound by the award’s conditions.

The PDF clarifies that the award isn’t limited to directly employed staff; it encompasses employees placed through these agencies. This ensures consistent standards for all workers‚ preventing exploitation and guaranteeing fair pay and conditions‚ regardless of employment type. Labour hire companies must adhere to the award’s requirements when supplying personnel to healthcare organizations.

Employees Placed Through Labour Hire

The Health Professionals and Support Services Award 2024 PDF specifically addresses the rights of employees sourced via labour hire. These individuals are entitled to the same minimum wages‚ working conditions‚ and entitlements as directly employed staff within the healthcare setting.

The PDF emphasizes that the responsibility for compliance rests with both the labour hire company and the host employer (hospital or medical centre). This dual responsibility ensures consistent application of the award’s provisions. Employees placed through agencies are covered by the award‚ regardless of the duration of their assignment‚ guaranteeing equitable treatment.

Fair Work Commission (FWC) Updates

The Fair Work Commission (FWC) continually reviews and updates awards‚ including the Health Professionals and Support Services Award 2024 PDF. Recent activity indicates proposed changes potentially leading to increased minimum pay rates. Employers and employees should regularly consult the FWC website for the latest determinations.

The PDF document itself will be updated to reflect any FWC decisions. Staying informed about these updates is crucial for ensuring compliance and maintaining fair employment practices within the health sector. Monitoring FWC announcements guarantees adherence to the most current award stipulations and avoids potential penalties.

Proposed Changes to Minimum Pay Rates

The Fair Work Commission (FWC) is considering adjustments to minimum pay rates outlined in the Health Professionals and Support Services Award 2024 PDF. These proposed changes aim to reflect current economic conditions and ensure fair compensation for vital healthcare workers.

While specific details are subject to finalization‚ potential increases are being evaluated. Employers should proactively prepare for possible adjustments to payroll budgets. Accessing the updated PDF version of the award‚ once released‚ will be essential for implementing correct pay scales. Regularly checking the FWC website for announcements is highly recommended to stay informed about these evolving changes.

Impact of FWC Decisions on the Award

Fair Work Commission (FWC) decisions directly influence the Health Professionals and Support Services Award 2024 PDF‚ impacting wages‚ conditions‚ and entitlements. Any rulings regarding minimum pay rate adjustments necessitate updates to the award document and employer practices.

Employers must meticulously monitor FWC publications and promptly implement changes reflected in the revised PDF. Failure to comply can lead to penalties. The FWC’s interpretations of the award also clarify ambiguities‚ guiding both employers and employees. Staying current with these decisions is crucial for maintaining a legally compliant and equitable workplace within the health sector. Accessing the latest PDF is paramount.

Pay Rate Information

Comprehensive pay rate details for health professionals and support staff are readily available‚ supplementing the Health Professionals and Support Services Award 2024 PDF. Interactive pay rate viewers offer a user-friendly way to determine specific entitlements based on classification and experience.

These resources provide clarity on minimum rates‚ allowances‚ and penalty payments. Employers should utilize these tools to ensure accurate wage calculations. The PDF document itself contains selected minimum rates for various positions‚ offering a quick reference guide. Regularly checking for updates to both the viewer and the PDF is essential for compliance and transparency.

Accessing Interactive Pay Rate Viewers

Interactive pay rate viewers are crucial tools for navigating the complexities of the Health Professionals and Support Services Award 2024 PDF. These digital resources allow users to pinpoint exact pay rates based on specific classifications‚ skill levels‚ and years of experience.

Typically found on dedicated websites specializing in workplace relations‚ these viewers simplify the process of determining correct wages. They eliminate the need to manually sift through the extensive details within the PDF document. Regularly updated to reflect Fair Work Commission decisions‚ these viewers ensure employers and employees have access to the most current and accurate pay information.

A concise summary of support services employee pay rates‚ derived from the Health Professionals and Support Services Award 2024 PDF‚ provides a quick reference guide. This overview highlights minimum rates for various roles‚ including assistants‚ technicians‚ and administrative staff.

These summaries typically categorize positions based on skill level and responsibilities‚ offering a clear understanding of the applicable wage. While not exhaustive‚ they serve as a valuable starting point for employers and employees alike. Accessing the full PDF remains essential for detailed classification definitions and specific entitlements. Remember to consult the interactive pay rate viewers for personalized calculations.

Minimum Rates of Pay – Selected Positions

The Health Professionals and Support Services Award 2024 PDF details specific minimum pay rates for numerous positions. While a complete listing is extensive‚ selected examples illustrate the range. These rates are categorized by classification levels‚ reflecting skill and responsibility.

Common roles like Assistants in Nursing‚ Allied Health Assistants‚ and various Administrative positions have defined minimums. The PDF provides precise figures‚ updated with Fair Work Commission decisions. Remember these are minimum rates; individual contracts may offer higher remuneration. Utilizing the interactive pay rate viewer alongside the PDF ensures accurate calculations based on specific duties and qualifications.

Health and Wellbeing Resources

Recognizing the demanding nature of healthcare‚ numerous resources support the health and wellbeing of professionals covered by the Health Professionals and Support Services Award 2024 PDF. Healthline offers trusted medical information and advice‚ promoting informed self-care. Daily Dose provides accessible‚ expert-backed health lessons for positive lifestyle changes.

Furthermore‚ resources address specific conditions like Age-related Macular Degeneration (AMD)‚ offering whole-body health support. The PDF itself doesn’t directly list these‚ but highlights the importance of employee wellbeing. Accessing these external resources complements the award’s provisions‚ fostering a healthier and more sustainable workforce.

Definition of Health (Human Context)

Within the framework of the Health Professionals and Support Services Award 2024 PDF‚ understanding ‘health’ extends beyond mere physical wellbeing. As defined on February 2‚ 2026‚ health encompasses an individual’s ongoing emotional‚ mental‚ and social capacity to navigate their environment effectively.

This holistic view acknowledges the pressures faced by healthcare workers and underscores the importance of support services outlined in the award. The PDF‚ while focused on employment conditions‚ implicitly supports this broader definition by advocating for fair wages and working conditions‚ contributing to overall employee wellbeing and a healthier human context.

Specialized Healthcare Initiatives

While the Health Professionals and Support Services Award 2024 PDF primarily details employment standards‚ it indirectly supports specialized healthcare initiatives. Recent announcements highlight opportunities within Cardiac Catheterization Labs in regions like Mianwali‚ Attock‚ and others‚ requiring skilled professionals.

The award ensures these roles are filled with staff receiving fair compensation and working conditions‚ as stipulated in the PDF document. This fosters a stable and qualified workforce crucial for delivering advanced cardiac care. These initiatives‚ coupled with the award’s provisions‚ aim to improve healthcare access and quality within these communities.

Cardiac Catheterization Labs – Employment Opportunities

The Health Professionals and Support Services Award 2024 PDF underpins employment within emerging specialized areas like Cardiac Catheterization Labs. Current openings exist in Mianwali‚ Attock‚ Jhelum‚ Kasur‚ Layyah‚ Vehari‚ and other locations‚ seeking qualified applicants.

These positions offer attractive pay packages‚ governed by the minimum wage standards detailed within the PDF. The award ensures fair treatment and working conditions for all staff employed in these labs‚ supporting the delivery of critical cardiac care services. Interested individuals should consult the official announcements for specific requirements and application procedures‚ referencing the award for employment rights.

Resources and Further Information

For comprehensive details regarding the Health Professionals and Support Services Award 2024 PDF‚ the Official Fair Work Commission Website is the primary resource. This site provides access to the full award document‚ updates‚ and related determinations.

Healthline offers trusted medical information and health advice‚ complementing the employment standards outlined in the award. Daily Dose provides accessible‚ expert-backed health lessons. Additionally‚ resources for managing Age-related Macular Degeneration (AMD) and promoting whole-body health are available‚ supporting the wellbeing of professionals covered by the award. Refer to these links for supplementary information and support.

Official Fair Work Commission Website

The Fair Work Commission (FWC) website serves as the definitive source for the Health Professionals and Support Services Award 2024 PDF and subsequent updates. Here‚ you can access the complete award document‚ including all schedules and variations.

The FWC also publishes details of proposed changes‚ such as potential increases to minimum pay rates‚ and records of decisions impacting the award. Regularly checking the FWC site ensures compliance with the latest regulations. Access to pay rate calculators and detailed explanations of entitlements are also available‚ providing clarity for both employers and employees covered under this award.

Healthline – Medical Information

Healthline provides reliable and accessible medical information‚ though it’s separate from the Health Professionals and Support Services Award 2024 PDF itself. While the award details employment conditions‚ Healthline offers valuable resources for understanding health-related terminology and conditions encountered within the healthcare sector.

This can be particularly useful for support staff seeking to enhance their understanding of patient care. Healthline’s content‚ covering a wide range of medical topics‚ complements the award by supporting a more informed and skilled healthcare workforce. It’s a trusted source for both professionals and the public seeking health advice and insights.

Daily Dose – Health Lessons

Daily Dose offers concise‚ expert-backed health lessons – a valuable resource for continuous professional development‚ though distinct from the Health Professionals and Support Services Award 2024 PDF. These “bite-sized” lessons can enhance understanding of health principles for all staff covered by the award.

For support staff‚ these 5-minute lessons can improve patient interaction and awareness of health issues. While the award outlines employment rights and pay‚ Daily Dose focuses on knowledge enhancement. It’s a proactive approach to staying current with health best practices‚ complementing the foundational standards set by the award.

AMD and Whole-Body Health Support

AMD (Age-related Macular Degeneration) support emphasizes a holistic approach to wellbeing‚ a concept relevant to the health professionals and support staff governed by the Health Professionals and Support Services Award 2024 PDF. While the award focuses on employment conditions‚ understanding patient needs – like managing chronic conditions such as AMD – is crucial.

Resources highlight science-backed strategies for living well with AMD‚ encompassing treatment‚ daily tasks‚ and hobbies. This knowledge empowers staff to provide compassionate‚ informed care. Supporting whole-body health aligns with a patient-centered approach‚ enhancing the quality of care delivered within the framework of the award’s standards.

noirot 2400w panel heater manual

Noirot 2400W Panel Heater Manual: A Comprehensive Guide

This manual provides detailed instructions for the Noirot 2400W panel heater‚ covering installation‚ operation‚ safety‚ maintenance‚ and troubleshooting.
It ensures optimal performance and longevity.

Learn about WIFI application download‚ remote control functionality‚ and integration with smart home systems for the Spot Plus Pro model.

Noirot panel heaters represent a sophisticated approach to electric heating‚ renowned for their efficiency and comfort. These heaters utilize radiant heat‚ directly warming objects and people rather than the air‚ resulting in a more consistent and pleasant temperature.

The Spot Plus Pro‚ including the 2400W model‚ builds upon this foundation with advanced features like Wi-Fi connectivity‚ allowing for remote control and integration with smart home ecosystems. Noirot heaters are designed for minimal maintenance‚ requiring only occasional dusting with a soft cloth.

Understanding the core principles of Noirot technology – precise temperature control and energy-efficient operation – is key to maximizing your heating experience. This manual will guide you through the specific features of your 2400W panel heater‚ ensuring safe and effective use. Proper installation and adherence to safety guidelines are crucial for optimal performance and longevity.

Understanding the 2400W Model

The Noirot 2400W panel heater is a powerful and efficient heating solution‚ ideal for medium to large-sized rooms. Its 2400W output provides rapid heating‚ while the precise thermostat ensures consistent temperature maintenance.

This model‚ particularly the Spot Plus Pro variant‚ boasts advanced features like Wi-Fi connectivity‚ enabling remote control via a dedicated smartphone application. It can be used on a stable surface with castors or securely mounted to a wall‚ offering flexible installation options.

Key components include the heating element‚ thermostat‚ control panel‚ and (in the Pro version) the Wi-Fi module. Understanding these elements and their functions is essential for effective operation and troubleshooting. Always refer to the safety precautions outlined in this manual before use.

Installation and Mounting

Proper installation is crucial for safe and efficient operation. This section details wall mounting procedures and guidelines for using the heater on a horizontal surface with castors.

Wall Mounting Instructions

Secure wall mounting ensures the Noirot panel heater operates safely and efficiently. Begin by identifying suitable wall studs for robust support‚ avoiding electrical wiring and plumbing within the wall cavity. Utilize appropriate screws and wall plugs‚ ensuring they are rated for the heater’s weight – approximately 12kg.

Maintain a minimum distance of 15cm from surrounding objects and the floor to allow for adequate air circulation. Carefully mark the mounting holes on the wall‚ using a spirit level to guarantee a perfectly horizontal installation. Drill pilot holes before inserting screws‚ preventing wall damage.

Once mounted‚ verify the heater is firmly attached and stable. Incorrect mounting could void the warranty and pose a safety hazard. Always consult a qualified electrician if unsure about any aspect of the installation process.

Horizontal Surface & Castor Use

For temporary placement‚ the Noirot heater can be used on a horizontal‚ stable surface or with optional castors. Ensure the surface is heat-resistant and level to prevent tipping. When using castors‚ verify they are securely attached and lockable for added stability‚ especially on uneven floors.

Maintain a safe distance from flammable materials when positioned on a surface or with castors. Avoid placing the heater in high-traffic areas where it could be accidentally bumped or knocked over. Regularly check the castor wheels for wear and tear‚ replacing them if necessary.

Remember that wall mounting is the recommended permanent installation method. Using castors offers portability‚ but prioritize safety and stability at all times.

Electrical Connection Requirements

The Noirot 2400W panel heater requires a dedicated 230-240V AC electrical supply. Do not use extension cords or adapters. A qualified electrician should perform the installation‚ ensuring compliance with local electrical codes and regulations. The heater must be properly grounded to prevent electrical shock.

Verify the circuit breaker is appropriately sized for the 2400W load. Overloading the circuit can cause tripping or pose a fire hazard. The electrical outlet should be in good condition and easily accessible. Inspect the power cord for any damage before each use; do not operate if damaged.

Incorrect electrical connection can void the warranty and create a safety risk. Always disconnect the heater from the power supply before performing any maintenance or cleaning;

Operating Instructions

Easily power the heater on and off‚ adjust temperature settings to your comfort‚ and utilize the timer function (if equipped) for convenient heating control.

Powering On and Off

To initiate heating‚ locate the main power switch‚ typically situated on the heater’s control panel. Ensure the switch is firmly in the ‘On’ position; a clear indicator light will usually illuminate to confirm activation.

Conversely‚ to deactivate the heater‚ simply return the power switch to the ‘Off’ position. Always ensure the switch is fully disengaged to prevent accidental reactivation.

Some models may feature a dedicated power button alongside the main switch‚ offering an additional layer of control. Regularly check the power cord and outlet for any signs of damage before powering on.

Remember to disconnect the heater from the power source during extended periods of non-use for enhanced safety and energy conservation.

Temperature Control Settings

Noirot heaters offer precise temperature control‚ typically managed via a dial or digital interface on the control panel. Rotate the dial or use the buttons to select your desired heating level‚ often indicated with numerical values or comfort settings like ‘Low‚’ ‘Medium‚’ and ‘High.’

For optimal comfort‚ start with a lower setting and gradually increase it until you achieve the desired room temperature. Some models feature ‘frost protect’ settings‚ maintaining a minimum temperature to prevent freezing.

The Spot Plus Pro allows remote temperature adjustments via the WIFI application‚ offering convenient control from anywhere. Regularly calibrate the thermostat for accurate temperature readings.

Using the Timer Function (if applicable)

If your Noirot 2400W heater includes a timer‚ it allows for automated operation‚ enhancing energy efficiency and convenience. The timer is typically programmed using buttons on the control panel‚ setting start and end times for heating cycles.

Consult the specific model’s instructions for detailed programming steps‚ as interfaces vary. Some models offer multiple timer settings for different days or times; The Spot Plus Pro’s timer function is also accessible and controllable through the WIFI application.

Ensure accurate time settings for proper timer operation. Utilizing the timer can significantly reduce energy consumption by only heating when needed.

Safety Precautions

Always prioritize safety when using your Noirot heater. Keep children safe‚ avoid overheating‚ and follow general guidelines for electrical appliance operation.

Never use abrasive cleaners‚ and ensure proper installation to prevent hazards.

General Safety Guidelines

Before operating your Noirot panel heater‚ carefully read and understand all instructions within this manual. Ensure the heater is positioned on a stable‚ level surface or securely mounted to the wall‚ preventing accidental tipping or damage. Never cover the heater‚ as this can lead to overheating and a potential fire hazard.

Maintain a safe distance from flammable materials such as curtains‚ furniture‚ and paper. Do not use the heater in areas where gasoline‚ paint‚ or other flammable liquids are stored. Regularly inspect the power cord for any signs of damage‚ and if found‚ discontinue use immediately. Avoid using extension cords‚ as they may not be rated to handle the heater’s wattage.

Always unplug the heater before cleaning or performing any maintenance. This heater is designed for indoor use only; do not operate it outdoors or in damp environments. Ensure the electrical outlet is properly grounded and meets the specified voltage requirements.

Child Safety Considerations

Prioritize child safety when using the Noirot panel heater. The surface can become hot during operation‚ posing a burn risk. Supervise children closely when the heater is in use‚ and educate them about the dangers of touching the hot surfaces. Consider installing a protective guard around the heater to prevent accidental contact‚ especially for young children.

Keep children away from the heater’s controls to prevent unauthorized adjustments. Ensure the power cord is out of reach to avoid tripping hazards or accidental unplugging. Regularly check the heater for any signs of damage that could compromise its safety features.

Teach children not to play near the heater or use it as a drying rack. The heater is not a toy and should be treated with respect. Always unplug the heater when not in use and store it in a safe location‚ inaccessible to children.

Avoiding Overheating

Preventing overheating is crucial for safe operation of your Noirot panel heater. Ensure adequate ventilation around the unit; do not cover it with clothing‚ curtains‚ or other materials that could restrict airflow. Avoid placing the heater in enclosed spaces or near flammable substances.

Regularly inspect the heater for dust accumulation‚ as this can impede heat dissipation. Do not use extension cords unless absolutely necessary‚ and if used‚ ensure they are of the appropriate gauge for the heater’s wattage. Never leave the heater unattended for extended periods‚ especially when operating at high settings.

If the heater begins to emit an unusual odor or makes strange noises‚ immediately turn it off and unplug it. Allow the heater to cool down completely before attempting to move or store it. Follow the manufacturer’s instructions regarding maximum operating time and recommended temperature settings.

Maintenance and Cleaning

Regular upkeep ensures optimal performance. Use a soft cloth for dust and a damp cloth for marks – avoid abrasive cleaners that damage the coating.

Dust Removal Techniques

Maintaining a dust-free Noirot panel heater is crucial for efficient operation and longevity. Dust accumulation can impede airflow and reduce heating performance. The recommended method for dust removal is utilizing a soft‚ dry cloth. Gently wipe down the entire surface of the heater‚ paying attention to vents and crevices where dust tends to gather.

Avoid using water or cleaning solutions during this process‚ as moisture can damage the internal components. For stubborn dust buildup‚ a soft brush attachment on a vacuum cleaner can be employed‚ ensuring it’s set to a low suction level to prevent scratching the heater’s finish. Regular dusting‚ ideally every few weeks during peak heating season‚ will keep your Noirot heater functioning optimally.

Cleaning Surface Marks

Addressing surface marks on your Noirot heater is simple‚ yet requires care to preserve the polyester coating. To remove marks‚ dampen a soft cloth with water – ensure it’s not dripping wet. Gently wipe the affected area‚ applying minimal pressure. Avoid harsh scrubbing‚ which could damage the finish. For more persistent marks‚ a mild soap solution can be used‚ but always rinse with a clean‚ damp cloth afterward to remove any soap residue.

Thoroughly dry the surface with a clean‚ dry cloth after cleaning. This prevents water spots and ensures the heater is ready for use. Remember‚ regular dusting minimizes the need for more intensive cleaning. Always test any cleaning solution on an inconspicuous area first.

Avoiding Abrasive Cleaners

Protecting your Noirot heater’s finish is crucial for its longevity and appearance. Never use abrasive cleaners‚ metal scourers‚ or harsh chemicals when cleaning the unit. These can severely damage the polyester coating‚ leading to scratches‚ discoloration‚ and potential corrosion. Abrasive materials compromise the protective layer‚ making the heater more susceptible to future damage and reducing its overall lifespan.

Stick to gentle cleaning methods‚ such as a soft cloth dampened with water or a mild soap solution. Always prioritize non-abrasive options to maintain the heater’s pristine condition. Using appropriate cleaning techniques ensures your Noirot heater remains both effective and aesthetically pleasing for years to come.

Troubleshooting Common Issues

This section addresses frequent problems like the heater failing to power on‚ temperature inaccuracies‚ and Wi-Fi connectivity issues (Spot Plus Pro models).

Find solutions to ensure optimal performance.

Heater Not Turning On

If your Noirot heater fails to power on‚ begin by verifying the electrical connection. Ensure the power cord is securely plugged into a functioning outlet‚ and the outlet itself is switched on. Check the circuit breaker or fuse box to confirm that the circuit hasn’t tripped or blown.

Inspect the heater’s power switch; it may be inadvertently set to the ‘off’ position. Some models feature a safety cut-off switch that activates if the heater overheats or is tilted. Allow the unit to cool completely and reset the switch if applicable. Confirm the thermostat setting is at a temperature higher than the ambient room temperature.

For Spot Plus Pro models‚ verify the Wi-Fi connection isn’t interfering with operation. If the issue persists‚ consult a qualified electrician to rule out any electrical faults.

Temperature Inaccuracy

If your Noirot heater displays inaccurate temperatures‚ several factors could be at play. Ensure the heater isn’t positioned near direct sunlight‚ heat sources‚ or drafts‚ as these can interfere with temperature sensing. Verify the thermostat setting is appropriate for your desired room temperature and hasn’t been accidentally adjusted.

Allow sufficient time for the heater to reach the set temperature; initial fluctuations are normal. Check for obstructions blocking the heater’s air intake or output vents‚ as this can affect heat distribution and temperature readings. For Spot Plus Pro models‚ confirm the Wi-Fi connection isn’t causing interference with the temperature sensor.

If the problem continues‚ a recalibration of the thermostat might be necessary – consult a qualified technician.

Wi-Fi Connectivity Problems (Spot Plus Pro)

Experiencing Wi-Fi issues with your Spot Plus Pro? First‚ ensure your home Wi-Fi network is functioning correctly and the heater is within range of the router. Double-check the Wi-Fi password entered during setup within the Noirot application. Restart both your router and the heater – a simple reboot often resolves connectivity glitches.

Verify the Noirot app is updated to the latest version‚ as updates frequently include bug fixes and improved compatibility. Confirm your router’s firewall isn’t blocking the heater’s access to the internet. If problems persist‚ try resetting the heater’s Wi-Fi settings and re-establishing the connection through the app.

Refer to the app’s troubleshooting section or Noirot’s support website for further assistance.

Warranty Information

Noirot Australia Pty offers a warranty on their heaters; registration is required. Failure to follow instructions or misuse may VOID the warranty coverage.

Warranty Registration Process

To ensure your Noirot panel heater is covered by the manufacturer’s warranty‚ prompt registration is essential. Begin by locating the official Noirot Australia website. Navigate to the ‘Support’ or ‘Warranty’ section – often found in the footer of the page.

You will find a dedicated warranty registration form. Carefully complete all required fields‚ including the model number (2400W)‚ date of purchase‚ and your personal contact information. Accurate details are crucial for a smooth process.

You may need to provide proof of purchase‚ such as a scanned copy of your receipt or invoice. Submit the completed form and supporting documentation electronically through the website. Confirmation of registration will typically be sent via email.

Warranty Voiding Conditions

Several actions can unfortunately invalidate your Noirot heater’s warranty. Any unauthorized repairs or modifications performed by individuals not certified by Noirot Australia will immediately void coverage. Misuse of the product‚ including operation outside of specified voltage requirements‚ is also a disqualifying factor.

Damage resulting from improper installation‚ such as failing to follow wall mounting instructions‚ will not be covered. Similarly‚ neglecting regular maintenance – like failing to remove dust buildup – can lead to warranty denial.

Evidence of accidental damage or negligence‚ and attempting to disassemble the unit yourself‚ will also void the warranty. Always retain proof of purchase and adhere to the guidelines outlined in the manual.

Contacting Noirot Australia Pty

For any warranty claims‚ technical support‚ or general inquiries regarding your Noirot 2400W panel heater‚ reaching Noirot Australia Pty is essential. While specific contact details aren’t explicitly provided in the readily available documentation‚ their official website is the primary resource for up-to-date information.

Customers can typically find contact forms‚ email addresses‚ and potentially phone numbers on the Noirot Australia website. Ensure you have your heater’s model number and proof of purchase readily available when contacting them.

Additionally‚ exploring their online resources‚ including FAQs and troubleshooting guides‚ may resolve your issue quickly. You can also find links to their official YouTube channel for helpful video tutorials.

Advanced Features (Spot Plus Pro)

The Spot Plus Pro model boasts WIFI connectivity‚ enabling remote control via a dedicated application and seamless integration with existing smart home ecosystems.

WIFI Application Download & Setup

To unlock the smart features of your Noirot Spot Plus Pro‚ downloading and setting up the dedicated WIFI application is essential. Begin by searching for the “Noirot” application on either the Apple App Store (for iOS devices) or the Google Play Store (for Android devices). Once downloaded‚ launch the application and create a user account‚ following the on-screen prompts.

The application will then guide you through the process of connecting your heater to your home’s WIFI network. Ensure your smartphone or tablet is connected to the same network. The app will likely request permission to access your location‚ which is necessary for discovering nearby devices. Follow the instructions carefully to pair your Spot Plus Pro with the application‚ allowing for remote control and advanced scheduling options.

Remote Control Functionality

Once your Noirot Spot Plus Pro is connected to the WIFI via the dedicated application‚ you gain comprehensive remote control capabilities. From anywhere with an internet connection‚ you can power the heater on or off‚ adjust the temperature settings‚ and create customized heating schedules. This functionality allows for pre-heating your space before arrival‚ ensuring a comfortable environment upon entering.

The application provides a user-friendly interface for monitoring the heater’s current status and energy consumption. You can also receive notifications regarding any operational changes or potential issues. This remote access offers convenience and energy savings‚ optimizing your heating experience and providing peace of mind‚ knowing you’re in control‚ even when away from home.

Integration with Smart Home Systems

The Noirot Spot Plus Pro’s WIFI connectivity extends beyond its dedicated application‚ offering seamless integration with popular smart home ecosystems. Compatibility with systems like Google Assistant and Amazon Alexa allows for voice control of your heater‚ adding a layer of convenience to your daily routine. Simply use voice commands to adjust the temperature or turn the heater on/off.

This integration enables the creation of automated heating scenarios‚ triggered by other smart devices or pre-defined schedules. For example‚ you can link the heater to a smart thermostat or motion sensor‚ optimizing energy usage and comfort. Enjoy a truly connected home experience‚ where your Noirot heater works harmoniously with your existing smart home infrastructure.

bosch dishwasher series 6 manual

Bosch Serie 6 dishwashers boast high ratings, with manuals readily available online. Users appreciate features like adjustable racks and remote start, detailed in guides.

Overview of the Serie 6 Range

Bosch Serie 6 dishwashers represent a balance of performance and features, offering a step up from the entry-level models. Online manuals, like those for the SMV6ZCX01G and SMS68II07E, detail various models within this range. These guides highlight adjustable settings, program options, and installation instructions. The Serie 6 caters to households seeking efficient cleaning with smart functionalities, as evidenced by available documentation and user reviews.

Key Features and Benefits

Bosch Serie 6 dishwashers, as detailed in their manuals, offer features like adjustable racks for versatile loading and a Remote Start function for convenience. Guides emphasize time settings and display symbol explanations for easy operation. Benefits include energy-efficient programs, quiet operation, and effective cleaning performance. Manuals also cover safety precautions, including a child lock, ensuring user peace of mind and optimal dishwasher functionality.

Initial Setup and Installation

Bosch Serie 6 manuals stress unpacking inspection, proper water connection, and secure electrical installation. Leveling with adjustable feet is crucial for stable operation.

Unpacking and Inspection

Bosch Serie 6 dishwasher manuals emphasize a thorough unpacking process. Carefully inspect the appliance for any transport damage immediately upon arrival. Verify all included components are present, referencing the parts list within the manual. Any discrepancies or damage should be reported to the retailer promptly. Retain the packaging materials until you’ve confirmed the dishwasher functions correctly, as they may be needed for a potential return or claim. Ensure removal of all securing straps and protective films before installation.

Water Connection and Drainage

Bosch Serie 6 manuals detail proper water connection and drainage procedures. Connect the dishwasher to a cold water supply using the supplied hose, ensuring a secure fit to prevent leaks. The drain hose must be positioned correctly to avoid backflow, typically looped high under the sink. Verify all connections are tight before operation. Manuals stress the importance of leveling the unit for optimal drainage performance and to prevent water pooling.

Electrical Connection and Safety

Bosch Serie 6 dishwasher manuals emphasize electrical safety during installation. Ensure the voltage matches the appliance’s requirements before connecting to a grounded outlet. Never use extension cords. Disconnect power before any maintenance. The manual highlights the importance of a qualified technician for electrical work. It also details proper grounding procedures to prevent electric shock and outlines safety precautions regarding the power cord.

Understanding the Control Panel

Bosch Serie 6 manuals detail display symbols and button functions for settings adjustments. Time settings and the delay start feature are clearly explained within the guide.

Display Symbols and Indicators

Bosch Serie 6 dishwasher manuals thoroughly explain the control panel’s display. Users can decipher symbols indicating program status, remaining time, and selected options. Indicators alert to issues like low rinse aid or salt levels. The manual details specific meanings for error codes, assisting in troubleshooting. Understanding these symbols allows for precise program selection and monitoring of the wash cycle, ensuring optimal cleaning performance and appliance care. Proper interpretation prevents confusion and maximizes dishwasher functionality.

Button Functions and Settings

Bosch Serie 6 manuals detail each button’s function, from program selection to special options. Users learn to adjust settings like temperature and drying intensity. The manual clarifies how to utilize features like delay start and the child lock. It explains how to modify basic settings via the display and buttons, customizing the dishwasher’s operation. Understanding these controls ensures efficient use and allows tailoring wash cycles to specific needs, maximizing cleaning results and convenience.

Time Setting and Delay Start

Bosch Serie 6 manuals thoroughly explain time setting and the delay start function. Users can program the dishwasher to begin a cycle at a later, more convenient time. Instructions detail how to set the current time accurately and utilize the delay start feature, often indicated by a clock symbol. This allows for off-peak energy usage and quieter operation. The manual clarifies the maximum delay duration and provides troubleshooting tips if the function isn’t working as expected.

Loading the Dishwasher

Bosch Serie 6 manuals emphasize proper dish placement and cutlery arrangement for optimal cleaning. Ensure even height in baskets and secure items properly.

Proper Placement of Dishes

Bosch Serie 6 dishwasher manuals detail crucial loading guidelines. Face soiled surfaces towards the spray arms for effective cleaning. Avoid overcrowding; dishes shouldn’t block water circulation. Larger items belong on the lower rack, while glassware and smaller items are best suited for the upper rack. Ensure tall items don’t impede the upper spray arm’s rotation. Proper spacing maximizes cleaning performance and prevents re-washing.

Cutlery Basket Arrangement

Bosch Serie 6 manuals emphasize proper cutlery basket loading. Alternate utensil direction – handles up, then down – to prevent nesting and ensure thorough cleaning. Sharp knives should be placed blade-down for safety. Avoid overloading; allow space between items. Some models feature adjustable cutlery tines for accommodating various utensil sizes. This arrangement maximizes water reach and minimizes re-washing, contributing to optimal cleaning results.

Maximum Loading Capacity

Bosch Serie 6 dishwasher manuals advise against exceeding the stated maximum loading capacity. Overloading hinders water circulation, resulting in poor cleaning performance. Ensure dishes don’t obstruct the spray arms’ rotation. The manual details specific load limits for each rack. Proper spacing is crucial; avoid stacking or nesting items. Respecting capacity limits ensures efficient operation and prevents potential damage to the dishwasher.

Detergent and Rinse Aid

Bosch Serie 6 manuals recommend specific detergent types and dosages. Proper rinse aid settings enhance drying, preventing water spots and ensuring sparkling clean dishes.

Recommended Detergent Types

Bosch Serie 6 dishwasher manuals generally advise using high-quality dishwasher detergents – powders, gels, or tablets – specifically formulated for automatic dishwashing machines. Avoid hand dish soap, as it creates excessive suds;

The manual may detail compatibility with various detergent brands, though Bosch doesn’t explicitly endorse one over another.

For optimal results, particularly with hard water, consider using detergents with built-in water softening agents. Always follow the dosage guidelines provided on both the detergent packaging and within your Bosch Serie 6’s instruction manual.

Detergent Dosage Guidelines

Bosch Serie 6 dishwasher manuals emphasize adjusting detergent dosage based on water hardness and dish soiling levels. Typically, for moderately hard water and normal soiling, 20-30ml of detergent is recommended.

Heavily soiled dishes or very hard water may require up to 40ml.

Using too much detergent can leave residue, while too little results in poor cleaning. The manual advises consulting your local water authority for hardness information and referencing the detergent packaging for specific dosage charts.

Rinse Aid Compartment and Settings

Bosch Serie 6 dishwasher manuals detail a dedicated compartment for rinse aid, typically located inside the door. The manual stresses that rinse aid improves drying performance and prevents water spots.

Settings are adjustable, usually ranging from 1-6, with higher numbers dispensing more rinse aid.

Initial settings should be around 3-4, then adjusted based on results. Regularly check and refill the compartment to maintain optimal performance, as indicated in the user guide.

Wash Programs

Bosch Serie 6 manuals outline programs like Eco, Intensive, Normal, Quick Wash, and Delicate, catering to varied soil levels and dish types for optimal cleaning.

Eco Program – Energy Saving

Bosch Serie 6 dishwasher manuals detail the Eco Program as a key energy-saving feature. This program utilizes lower temperatures and extended wash cycles to minimize water and electricity consumption. It’s ideal for lightly to normally soiled dishes, offering a sustainable cleaning solution without compromising performance.

The manual emphasizes that while cycle times are longer, the Eco Program delivers excellent results while significantly reducing environmental impact and utility bills. It’s a recommended daily use option for eco-conscious households.

Intensive Program – Heavily Soiled Dishes

Bosch Serie 6 dishwasher manuals highlight the Intensive Program for tackling heavily soiled cookware and dishes. This program employs higher water temperatures and increased spray pressure to effectively remove stubborn food residues. It’s designed for pots, pans, and dishes with baked-on grime.

The manual advises using appropriate detergent dosage for optimal results with the Intensive Program. While effective, it consumes more energy and water, making it best suited for occasional use when dealing with particularly challenging cleaning tasks.

Normal Program – Daily Use

Bosch Serie 6 dishwasher manuals recommend the Normal Program for everyday dishwashing needs. This cycle balances cleaning performance with energy and water efficiency, making it ideal for routinely soiled dishes. It’s suitable for a mixed load of plates, glasses, and cutlery without heavily baked-on food.

The manual suggests this program offers a good compromise between cleaning power and resource consumption, making it a practical choice for daily use within a household setting. Proper detergent dosage is still crucial for optimal results.

Quick Wash Program – Lightly Soiled Dishes

Quick Wash Program – Daily Use

Bosch Serie 6 dishwasher manuals detail the Quick Wash Program as a solution for lightly soiled dishes needing a fast turnaround. This program utilizes increased water pressure and temperature for a shorter cycle duration, saving both time and energy. It’s best suited for glassware, cups, and plates without stubborn food residue.

The manual cautions against overloading and emphasizes the importance of using appropriate detergent for effective cleaning within the reduced timeframe. It’s a convenient option for smaller loads or when time is limited.

Delicate Program – Glassware and Sensitive Items

Bosch Serie 6 dishwasher manuals highlight the Delicate Program for glassware, crystal, and sensitive items. This program employs a lower water temperature and reduced water pressure to prevent damage. The manual advises proper loading, ensuring items don’t touch and are securely positioned.

Using a mild detergent is recommended, and pre-rinsing heavily soiled items is crucial. The cycle duration is longer to ensure gentle yet effective cleaning, preserving the integrity of delicate dishware.

Maintenance and Cleaning

Bosch Serie 6 manuals emphasize regular cleaning of spray arms, filters, and the interior to maintain optimal performance and prevent malfunctions.

Cleaning the Spray Arms

Bosch Serie 6 dishwasher manuals detail spray arm cleaning as crucial for effective washing. Remove the arms – typically by unscrewing or unclipping – and inspect the nozzles for blockages. Use a thin wire or toothpick to clear any food particles or debris obstructing the water flow. Rinse thoroughly under running water before reattaching, ensuring proper alignment for optimal spray coverage. Regular cleaning prevents reduced washing performance and ensures dishes are thoroughly cleaned.

Filter Cleaning Procedures

Bosch Serie 6 dishwasher manuals emphasize regular filter cleaning. Locate the cylindrical filter – often at the base of the dishwasher – and twist to unlock. Remove and rinse thoroughly under running water, removing any food particles or debris. Some models have multiple filter components; ensure all are cleaned. Reassemble correctly and lock into place. Consistent filter maintenance prevents clogging, ensures efficient drainage, and maintains optimal dishwasher performance, avoiding potential malfunctions.

Interior Cleaning and Descaling

Bosch Serie 6 dishwasher manuals recommend periodic interior cleaning and descaling. Use a dishwasher cleaner specifically designed to remove limescale and grease buildup. Run an empty hot wash cycle with the cleaner, following the product’s instructions. This process eliminates odors, improves cleaning performance, and extends the dishwasher’s lifespan. Regularly check spray arms for blockages and clean as needed to ensure thorough cleaning action throughout the appliance.

Exterior Cleaning and Care

Bosch Serie 6 dishwasher manuals advise using a damp cloth with mild detergent for exterior cleaning. Avoid abrasive cleaners or scouring pads, as they can damage the surface. Stainless steel models benefit from occasional polishing with a stainless steel cleaner. Ensure the control panel is wiped gently to prevent liquid ingress. Regularly inspect the door seal for damage and clean to maintain a tight seal during operation, preventing leaks and ensuring efficient performance.

Troubleshooting Common Issues

Bosch Serie 6 manuals detail solutions for issues like start failures, poor washing, and leaks, including error code explanations for quick diagnosis.

Dishwasher Not Starting

If your Bosch Serie 6 dishwasher fails to start, the manual suggests verifying the power connection and ensuring the door is securely latched. Check the circuit breaker or fuse box for tripped circuits.
Also, examine for any error codes displayed, as these pinpoint the problem. Some models feature a child lock; confirm it’s disengaged. Refer to the manual’s troubleshooting section for specific error code definitions and potential remedies, potentially avoiding a service call.

Poor Washing Results

If dishes aren’t clean, the Bosch Serie 6 manual advises checking spray arm functionality – ensure they rotate freely and aren’t clogged; Verify proper detergent dosage and the correct wash program selection for the load’s soil level. Confirm the water temperature reaches the recommended 60°C. Inspect the filter for debris; a dirty filter significantly reduces cleaning performance. Proper loading, avoiding overcrowding, is also crucial for optimal results, as detailed in the manual.

Water Leaks

Should leaks occur, the Bosch Serie 6 manual instructs users to first check the water connection and drainage hose for tightness and damage. Inspect the door seal for obstructions or deterioration. Ensure the dishwasher is level; improper leveling can cause leaks. Verify the spray arms aren’t cracked. If the issue persists, consult the manual’s troubleshooting section or contact a qualified technician for assistance, as detailed within the provided documentation.

Error Codes and Their Meanings

The Bosch Serie 6 dishwasher manual details specific error codes displayed on the control panel. These codes indicate various malfunctions, from water supply issues to drainage problems or sensor failures. The manual provides a comprehensive list, explaining each code’s meaning and suggesting potential solutions. Referencing this section allows users to diagnose and potentially resolve issues before contacting service, ensuring efficient troubleshooting as outlined in the documentation.

Safety Precautions

Bosch Serie 6 manuals emphasize general safety, including the child lock function. Instructions detail procedures for handling malfunctions, prioritizing user and appliance protection.

General Safety Guidelines

Bosch Serie 6 dishwasher manuals strongly advise ensuring proper installation and leveling for stable operation. Before any maintenance, always disconnect the power supply to prevent electrical shock. Never operate the dishwasher if damaged, and consult qualified personnel for repairs.

Keep children away during operation and avoid storing cleaning agents nearby. The manual highlights the importance of following all instructions carefully to guarantee safe and efficient use, minimizing potential hazards. Always read the full manual before first use.

Child Lock Function

Bosch Serie 6 dishwasher manuals detail the Child Lock feature, activated via a button combination on the control panel. This prevents accidental program changes or interruptions by children. The manual explains how to engage and disengage the lock, ensuring safe operation within households with young ones.

Activating the lock illuminates a corresponding indicator, confirming its status. It’s a crucial safety feature, preventing unintended use and potential hazards, as outlined in the user guide.

What to Do in Case of Malfunction

Bosch Serie 6 dishwasher manuals dedicate sections to troubleshooting. If a malfunction occurs, the guide advises checking for error codes displayed on the panel, referencing a detailed code explanation list. Initial steps include verifying the power supply and water connection.

For persistent issues, the manual recommends contacting Bosch customer support, providing the model number (e.g., SMV6ZCX01G) for efficient assistance and potential repair services.

Advanced Features

Bosch Serie 6 manuals detail remote start functionality and smart features. Adjustable rack systems enhance loading flexibility, optimizing space and cleaning performance.

Remote Start Functionality

Bosch Serie 6 dishwasher manuals explain the remote start feature, allowing operation via a connected device. This convenient function enables users to initiate wash cycles from anywhere, optimizing schedules. The manual guides setup and troubleshooting for this connectivity. It details how to utilize the Home Connect app for remote control, monitoring progress, and receiving notifications. Ensure a stable Wi-Fi connection for optimal performance, as outlined in the instructions. This feature adds significant convenience to daily routines.

Connectivity and Smart Features

Bosch Serie 6 dishwashers, as detailed in their manuals, integrate smart technology via Home Connect; This connectivity enables remote control, diagnostics, and software updates. The manual explains how to connect the dishwasher to your home Wi-Fi network. Users can monitor cycles, receive notifications, and access special programs through the app. Troubleshooting connectivity issues is also covered, ensuring a seamless smart home experience. These features enhance convenience and optimize dishwasher performance.

Adjustable Rack System

The Bosch Serie 6 manual highlights the dishwasher’s flexible rack system. It details how to adjust the upper rack height to accommodate taller items. Instructions explain sliding the upper basket in and out for optimal loading. The manual emphasizes ensuring both sides are at the same height for proper spray arm function. This adjustability maximizes loading capacity and accommodates various dish sizes, enhancing cleaning performance and user convenience.

Technical Specifications

Bosch Serie 6 manuals detail dimensions, weight, water consumption, and energy efficiency ratings. These specifications aid in installation and understanding operational costs.

Dimensions and Weight

Bosch Serie 6 dishwasher manuals provide precise dimensional data crucial for seamless kitchen integration. These measurements ensure proper fitting within existing cabinetry. Weight specifications are also detailed, aiding in assessing floor load capacity and facilitating safe installation. Manuals emphasize leveling the unit with adjustable feet post-installation for optimal performance and stability. Accurate dimensions prevent installation issues, while weight information supports safe handling during setup and potential relocation.

Water Consumption

Bosch Serie 6 dishwasher manuals highlight efficient water usage, a key feature of the range. Specific models detail water consumption per cycle, often emphasizing the ‘Eco’ program’s reduced water needs; Manuals explain factors influencing consumption, like load size and program selection. Understanding these figures helps users minimize environmental impact and potentially lower utility bills. Detailed specifications within the manual ensure informed operation and responsible resource management.

Energy Efficiency Rating

Bosch Serie 6 dishwasher manuals prominently display the energy efficiency rating, crucial for environmentally conscious consumers. These ratings, often indicated by a scale, detail the appliance’s energy performance. Manuals explain how to maximize efficiency, recommending the ‘Eco’ program for optimal results. Understanding the energy label and following manual guidelines contribute to lower energy bills and a reduced carbon footprint, aligning with sustainable practices.

Warranty Information

Bosch Serie 6 manuals detail comprehensive warranty coverage, outlining claim processes and specifying what’s protected against defects and malfunctions.

Coverage Details

Bosch Serie 6 dishwasher warranties typically cover defects in materials and workmanship for a specified period, often one year for parts and labor. Extended warranties are frequently available for enhanced protection. Manuals clarify what components are covered, excluding items damaged by misuse or improper installation.

Coverage may vary based on the model and region; Registration of the appliance is often required to activate the full warranty benefits. Carefully review the manual for specific terms and conditions to understand your rights.

Claim Process

Bosch Serie 6 dishwasher warranty claims generally begin with contacting Bosch’s customer service, providing the model number and purchase date. The manual details required documentation, such as proof of purchase and a description of the issue.

A technician may be dispatched for diagnosis. Approved claims result in repair or replacement, at Bosch’s discretion. Keep records of all communication and repair attempts. Online resources and the manual offer claim submission guidance.

bosch classixx washing machine user manual

Welcome! This guide assists with your Bosch Classixx, offering setup, operation, and maintenance details. Register your device on MyBosch for exclusive benefits and further assistance.

Understanding the Classixx Series

Bosch Classixx washing machines represent a commitment to reliable performance and efficient laundry care, designed for everyday use. This series balances practicality with innovative features, offering a range of models to suit diverse household needs. ManualsLib hosts numerous Classixx manuals, including those for the 7 WAE28369GB and 1400 Express WFO2867GB, demonstrating the breadth of the series.

The Classixx line often incorporates VarioPerfect technology, as seen in the 6 VarioPerfect model, optimizing water and energy consumption. These machines are designed for ease of use, with clear control panels and a selection of specialized programs. Accessing the user manual, readily available online, is crucial for maximizing your machine’s potential and understanding its specific capabilities. Registering your device on MyBosch unlocks additional support and benefits.

Safety Precautions

Prioritize safety when installing and operating your Bosch Classixx washing machine. Always disconnect the appliance from the electrical supply before cleaning or performing maintenance. Ensure proper grounding to prevent electric shock. Do not use extension cords or adapters; connect directly to a suitable outlet.

Keep children and pets away from the washing machine during operation. Never open the door while a wash cycle is in progress. Avoid contact with detergent solutions, as they can cause skin and eye irritation. Refer to the user manual for detailed safety instructions specific to your model – resources are available on ManualsLib for various Classixx series. Registering on MyBosch provides access to updated safety information and support.

Installation Guide

Proper installation is crucial for optimal performance. This section details unpacking, connecting water, drainage, and electrical components, ensuring safe and efficient operation.

Unpacking and Positioning

Carefully unpack your Bosch Classixx washing machine, removing all packaging materials, including transport bolts – these are vital to remove! Inspect the appliance for any visible damage sustained during shipping. If damage is present, immediately contact the retailer or Bosch customer support.

Position the washing machine on a firm, level surface. Adjust the leveling feet to ensure stability and minimize vibration during operation; Ensure there is sufficient space around the machine for ventilation and access for maintenance. Avoid direct sunlight and extreme temperatures.

Confirm the water supply and drainage connections are readily accessible before finalizing the machine’s position. Incorrect positioning can lead to operational issues and potential damage, so take your time and double-check everything!

Connecting to Water Supply

Connect the inlet hose to both the washing machine and a suitable water tap with a ¾ inch thread. Ensure the hose is securely tightened to prevent leaks. Use only the supplied inlet hose; do not reuse old hoses. A protective filter is integrated within the inlet hose connection – regularly check and clean this filter to maintain optimal water flow.

Verify the water pressure is within the recommended range specified in the full user manual. Insufficient water pressure can affect washing performance. Open the water tap slowly to allow the system to pressurize gradually, checking for any leaks at the connections.

Always follow local plumbing regulations when connecting the water supply. A faulty connection can cause significant water damage, so double-check everything!

Connecting to Drainage

Securely attach the drain hose to a suitable standpipe or sink drain with a diameter of at least 60cm and a height between 60-90cm. Ensure the hose is positioned firmly to prevent it from slipping out during operation. Avoid kinks or sharp bends in the drain hose, as these can restrict water flow and cause drainage issues.

The drain hose must be securely fastened to prevent siphoning. Check the user manual for specific instructions regarding securing the hose at the correct height. Proper installation is crucial to avoid wastewater backflow.

Regularly inspect the drain hose for any signs of damage or wear and tear, replacing it if necessary. A damaged hose can lead to leaks and potential water damage.

Electrical Connection

Important: Electrical installation must comply with local regulations and should only be performed by a qualified electrician. Before connecting, ensure the voltage and frequency of the power supply match the specifications on the washing machine’s rating plate. The machine requires a grounded outlet with the correct fuse rating to prevent electrical hazards.

Never use extension cords or adapters. Connect the power cord directly to a wall socket. Avoid using multi-socket outlets or power strips, as they may not provide sufficient power. Regularly inspect the power cord for damage and replace it if necessary.

Ensure the power socket is easily accessible to allow for quick disconnection in emergencies.

Operating Your Washing Machine

Get started! Familiarize yourself with the control panel, laundry loading, detergent use, program selection, and initiating wash cycles for optimal performance.

Control Panel Overview

Navigating the Controls: The Bosch Classixx washing machine features an intuitive control panel designed for ease of use. Typically, a rotary dial selects the desired wash program – options include delicates, quick wash, and eco modes. Digital displays clearly indicate the remaining wash time and selected settings.

Key Buttons & Indicators: Essential buttons manage functions like start/pause, temperature adjustment, and spin speed selection. Indicator lights illuminate to show the active program stage – washing, rinsing, spinning, or completion. Some models include specialized buttons for stain removal or extra rinse cycles.

Understanding Symbols: Familiarize yourself with the symbols representing different fabric types and wash intensities. Refer to the full user manual for a detailed explanation of each symbol and function, ensuring optimal laundry care and machine performance.

Loading Laundry

Preparing Your Load: Before loading, always empty pockets, close zippers, and untangle garments. Separate laundry by color, fabric type, and soil level to prevent dye transfer and damage. Delicate items should be placed inside a mesh laundry bag for added protection during the wash cycle.

Optimal Load Size: Avoid overloading the drum, as this can reduce washing efficiency and potentially damage the machine. Consult the user manual for recommended load capacities based on the selected program and fabric type. A loosely filled drum allows for proper agitation and rinsing.

Distributing the Load: Distribute items evenly around the drum to maintain balance during spinning. Uneven loads can cause excessive vibration and noise. Ensure items aren’t wrapped around the central agitator, if present.

Detergent Dispenser

Understanding the Compartments: Your Bosch Classixx detergent dispenser typically features separate compartments for pre-wash detergent, main wash detergent, and fabric softener. Refer to the symbols on the dispenser for correct placement. Using the wrong compartment can affect washing performance;

Detergent Amounts: Always follow the detergent manufacturer’s instructions regarding dosage. Adjust the amount based on load size, water hardness, and soil level. Overusing detergent can leave residue on clothes and in the machine.

Liquid vs. Powder Detergent: Both liquid and powder detergents can be used. For liquid detergents, use the designated compartment and avoid overfilling. Powder detergent should be added loosely, not compacted. Fabric softener should be diluted with water before adding.

Program Selection

Choosing the Right Cycle: Your Bosch Classixx washing machine offers a variety of programs tailored to different fabric types and soil levels. Carefully select the program that best suits your laundry needs for optimal results and fabric care. Common programs include cottons, delicates, synthetics, and quick wash.

Program Indicators: The control panel displays indicators for each program, often with symbols representing the recommended fabric type and wash temperature. Consult the program overview in this manual for detailed descriptions of each cycle’s settings.

Special Functions: Many programs allow you to customize settings like temperature, spin speed, and pre-wash. Utilize these options to fine-tune the wash cycle to your specific requirements, ensuring efficient cleaning and protecting your garments.

Starting a Wash Cycle

Initiating the Wash: Once you’ve selected your desired program, loaded the laundry, and added detergent, you’re ready to begin. Ensure the door is securely closed; the machine won’t start otherwise. Press the ‘Start/Pause’ button to initiate the wash cycle. The display will show the remaining time.

Cycle Monitoring: During the wash, you can monitor the progress on the display. Avoid interrupting the cycle unless absolutely necessary. If you need to pause, press the ‘Start/Pause’ button again.

Cycle Completion: Upon completion, the machine will beep, and the display will indicate ‘End’. Wait for the door lock to release before opening it. Remove your clean laundry promptly to prevent creasing and mildew.

Special Programs & Functions

Explore options! Your Bosch Classixx offers specialized programs like Delicate/Silk, Quick Wash, and Eco, alongside adjustable spin speeds for optimal results.

Delicate/Silk Program

Gentle Care for Fine Fabrics: The Delicate/Silk program is specifically designed for washing items requiring extra care, such as lingerie, silk blouses, and other delicate materials. This program utilizes a reduced drum action and lower water temperature to minimize the risk of damage or stretching.

Program Settings: When selecting this program, the washing machine automatically adjusts the spin speed to a lower setting, typically around 400-600 RPM, to prevent excessive wrinkling and maintain the fabric’s integrity. The water temperature is also carefully controlled to avoid shrinking or color fading.

Loading Considerations: It is recommended to place delicate items inside a laundry bag to provide an additional layer of protection during the wash cycle. Avoid overloading the machine, as this can reduce the effectiveness of the gentle wash action. Always check the care label on your garments before selecting this program.

Quick Wash Program

For Lightly Soiled Laundry: The Quick Wash program is ideal for refreshing lightly soiled clothes, offering a significantly reduced wash cycle duration. This program is perfect when you need clean clothes in a hurry, providing a convenient solution for everyday laundry needs. It’s designed for smaller loads and items that don’t require intensive cleaning.

Program Efficiency: This cycle utilizes a higher water flow rate and optimized drum movements to achieve effective cleaning in a shorter timeframe, typically around 15-30 minutes. While efficient, it’s important to note that the Quick Wash program may not be suitable for heavily stained or soiled items.

Detergent Usage: Use a reduced amount of detergent compared to a standard wash cycle to prevent excessive sudsing. Always check the garment care label before using this program to ensure compatibility.

Eco Program

Energy and Water Saving: The Eco Program, also known as the ‘EcoSilence Drive’ program on some models, is designed to minimize both water and energy consumption during the wash cycle. This program operates at a lower temperature, typically 40°C or lower, and adjusts the drum movements to optimize cleaning efficiency while reducing environmental impact.

Extended Wash Duration: While incredibly efficient, the Eco Program generally has a longer wash duration compared to other cycles. This extended time allows for thorough cleaning using less energy and water, making it a sustainable choice for everyday laundry.

Load Capacity: For optimal results, fully load the washing machine when using the Eco Program. This ensures maximum efficiency and minimizes wasted resources. Always refer to the garment care labels for washing instructions.

Spin Speed Selection

Adjusting Moisture Levels: Your Bosch Classixx washing machine allows you to select the spin speed, measured in revolutions per minute (RPM), to customize the moisture content of your laundry after washing. Higher spin speeds extract more water, reducing drying time, but can also increase wrinkling.

Fabric Considerations: Delicate fabrics, like silk or lace, require lower spin speeds (e.g., 400-800 RPM) to prevent damage. Sturdier items, such as towels and jeans, can withstand higher spin speeds (e.g., 1200-1400 RPM) for more efficient water removal.

Spin Speed Options: Available options typically range from ‘No Spin’ to maximum spin speed. Selecting ‘No Spin’ leaves garments very wet, ideal for hand-drying. Always check garment care labels before choosing a spin speed.

Maintenance and Cleaning

Regular upkeep ensures optimal performance and longevity of your Bosch Classixx. Clean the detergent dispenser, drum, and filter routinely for best results.

Cleaning the Detergent Dispenser

Maintaining a clean detergent dispenser is crucial for optimal washing performance and preventing residue buildup. Periodically, remove the dispenser drawer – typically by pressing a release button or lever – and rinse it thoroughly under warm running water. Stubborn detergent or fabric softener residue can be loosened with a soft brush or cloth.

Inspect the individual compartments within the drawer for any blockages and clear them as needed. Pay particular attention to the pre-wash compartment, as this area is prone to clogging; After cleaning, ensure the dispenser is completely dry before reinserting it into the washing machine. A buildup of detergent can affect the wash cycle and potentially damage your clothes, so regular cleaning is highly recommended. Refer to your Bosch Classixx user manual for specific instructions related to your model.

Cleaning the Drum

Regular drum cleaning keeps your Bosch Classixx washing machine fresh and hygienic, preventing unpleasant odors and residue buildup. To clean the drum, run an empty wash cycle at a high temperature – typically 90°C (194°F) – using a washing machine cleaner or a cup of white vinegar. This helps to dissolve any lingering detergent, fabric softener, and limescale deposits.

Ensure no laundry is inside during this cleaning cycle. For optimal results, repeat this process every few months, or more frequently if you regularly wash at low temperatures. After the cycle completes, wipe down the drum interior with a clean, damp cloth. A clean drum ensures your clothes are thoroughly cleaned and remain fresh. Consult your Bosch Classixx user manual for specific drum cleaning recommendations for your model.

Filter Cleaning

Regular filter cleaning is crucial for maintaining your Bosch Classixx washing machine’s performance and preventing drainage issues. The filter, typically located behind a small access panel at the front of the machine, traps lint, hair, and small objects. Before cleaning, ensure the machine is switched off and unplugged. Place a shallow container beneath the access panel to catch any residual water.

Carefully open the panel and unscrew the filter cap – be prepared for water to flow out. Remove any debris from the filter and clean it thoroughly under running water. Check the filter housing for obstructions as well. Reinsert the cleaned filter, ensuring it’s securely tightened, and close the access panel. Clean the filter periodically, as outlined in your Bosch Classixx user manual, to ensure optimal operation.

Troubleshooting

Encountering issues? Consult the error codes in your manual or check for common problems like drainage failures. Refer to the user guide for solutions.

Common Error Codes

Understanding error codes is crucial for diagnosing issues with your Bosch Classixx washing machine. These codes provide valuable insights into the problem, allowing for quicker resolution. For example, an E11 code often indicates a water supply issue – check the inlet hose for kinks or obstructions and ensure the water tap is fully open. A frequently appearing E15 suggests a drainage problem; inspect the drain hose for blockages and verify the drain pump filter is clean.

Other common codes include: E09 (improper foam detection, use less detergent), E24 (door not properly closed – ensure it latches securely), and E22 (water level too high – may indicate a faulty pressure switch). Always consult your full user manual for a comprehensive list and specific troubleshooting steps related to your particular Bosch Classixx model. Ignoring error codes can lead to further damage, so prompt attention is recommended.

Machine Not Draining

If your Bosch Classixx washing machine isn’t draining, several factors could be at play. First, check the drain hose for any kinks, bends, or obstructions that might be restricting water flow. Ensure the hose isn’t inserted too far into the drainpipe, as this can also cause siphoning issues. Crucially, inspect and clean the drain pump filter. This filter catches lint, buttons, and other debris, and a clogged filter is a common cause of drainage problems.

Locate the filter access panel (usually at the front, bottom of the machine) and carefully remove and clean the filter. If the issue persists, verify the drain pump itself isn’t faulty. A professional appliance repair technician may be needed for this diagnosis. Always disconnect the power before attempting any maintenance.

stage 3 spelling instructional sequence

Stage 3 Spelling Instructional Sequence: A Comprehensive Plan

Stage 3 marks significant progress, building upon phonetic awareness with focused activities like spelling checks and utilizing resources such as ‘Say and Spell’ flashcards.

Stage 3 in spelling development, often termed the phonetic stage, represents a crucial transition for young learners. Children move beyond simply associating sounds with letters – a hallmark of earlier stages – and begin to apply consistent, though not always accurate, phonetic rules to encode words. This stage is characterized by a growing understanding of letter-sound correspondences and an increasing ability to segment and blend sounds within words.

Instruction at this level focuses on solidifying these foundational skills. Regular spelling checks, as noted in observed classroom practices, become valuable tools for monitoring progress and identifying areas needing reinforcement. Resources like the ‘Read With Oxford: Biff, Chip and Kipper: Say and Spell’ flashcards are specifically designed to support success in both spelling and reading during this pivotal phase. Understanding the five stages – precommunicative, semiphonetic, phonetic, transitional, and correct – provides a framework for targeted instruction.

The goal is to build confidence and fluency in applying phonetic knowledge, paving the way for more complex spelling patterns in later stages.

Characteristics of Stage 3 Spellers

Stage 3 spellers, operating within the phonetic stage, demonstrate a noticeable shift in their approach to spelling. They typically represent all sounds in a word, though often with unconventional spellings. This means you’ll see attempts to map sounds to letters, even if the resulting spelling isn’t conventionally correct – for example, “sed” for “said”.

A key characteristic is their reliance on sound-based spellings; vowel sounds are often represented by single vowels, and consonant blends may be simplified. While they are beginning to understand orthographic patterns, their vocabulary size and print exposure still influence accuracy. Error analysis reveals consistent, rule-based attempts, rather than random letter strings seen in earlier stages.

These spellers are actively building orthographic knowledge, and their progress is evident through regular spelling checks. They benefit from activities that build, practice, and consolidate reading and writing skills, and respond well to leveled activity books supporting phonic knowledge.

Phonetic Awareness Skills in Stage 3

Stage 3 spellers possess well-developed phonemic awareness, enabling them to segment and blend sounds within words with increasing accuracy. They can typically identify individual phonemes and manipulate them, though challenges may arise with more complex sound patterns. Crucially, they are transitioning from solely relying on sound to incorporating some understanding of letter-sound correspondences.

Their ability to hear and represent all sounds in a word is a hallmark of this stage. However, they may still struggle with vowel teams or silent letters, leading to phonetic, but non-conventional, spellings. Activities focusing on blending and segmenting remain vital, alongside explicit phonics instruction to solidify these skills.

Further development involves recognizing how sounds change within words and applying this knowledge to spelling. Supporting their orthographic processing through varied activities is key to building confidence and fluency.

Common Spelling Patterns in Stage 3

Stage 3 spellers begin to consistently represent most consonant sounds, but vowel representation remains a key area of development. They frequently utilize single vowel letters to represent vowel sounds, even when digraphs or blends are more accurate. The ‘ou’ digraph, as seen in targeted word sorts, presents a common challenge, requiring focused practice.

Consonant blends (like ‘bl’, ‘st’, ‘tr’) are generally mastered, though occasional reversals or omissions may occur. Students start to recognize common short vowel patterns (CVC – consonant-vowel-consonant) and apply them in their spellings. They are also beginning to experiment with longer words, attempting to encode multiple syllables.

Understanding the relationship between sounds and letters within these patterns is crucial. Activities should emphasize identifying these patterns in words and applying them during spelling and writing tasks, building a foundation for more complex patterns later.

Instructional Strategies for Stage 3

Effective strategies involve explicit phonics instruction, blending/segmenting practice, word building, and multisensory techniques to solidify spelling skills and reading comprehension.

Explicit Phonics Instruction

Explicit phonics instruction is foundational in Stage 3, systematically teaching the relationship between sounds and letters. This goes beyond simple letter-sound correspondence, delving into more complex patterns. Focus should be placed on vowel teams – like ‘ou’ as seen in provided word sorts – and consonant blends, acknowledging potential difficulties students may encounter.

Instruction must be direct and sequential, building upon previously learned skills. Teachers should model the decoding and encoding process, clearly articulating sounds and demonstrating how to blend them to form words. Activities should incorporate opportunities for students to practice these skills independently and in small groups. Utilizing leveled activity books that support phonic knowledge is crucial for building confidence.

Regularly revisit previously taught concepts to reinforce learning and ensure retention. Connecting phonics instruction to reading and writing activities, such as sentence writing with focus spellings, will further solidify understanding and promote fluency. Remember to address individual needs and provide targeted support for students who are struggling.

Blending and Segmenting Activities

Blending and segmenting are critical skills for Stage 3 spellers, directly impacting their ability to decode and encode words. Activities should move beyond simple CVC words, incorporating consonant blends and vowel teams. Teachers can utilize ‘Say and Spell’ activities, prompting students to orally blend sounds before writing the corresponding word.

Segmenting practice involves breaking down words into individual sounds. This can be done using manipulatives like counters or sound boxes, where each counter represents a phoneme. Encourage students to articulate each sound as they segment. Word sorts, categorized by sound, provide opportunities to practice both blending and segmenting simultaneously.

Games and playful activities can enhance engagement. Dictation exercises, where students write words dictated by the teacher, offer valuable practice in both segmenting and blending. Remember to scaffold activities, providing support as needed, and gradually increasing complexity as students progress. Consistent practice is key to mastery.

Word Building Exercises

Word building exercises for Stage 3 spellers should focus on manipulating phonemes within words, solidifying their understanding of spelling patterns. Begin with simple additions – changing “cat” to “hat” – then progress to more complex transformations, like adding blends (“stop” to “spot”). Utilize letter tiles or magnetic letters to allow for hands-on manipulation.

Activities can involve changing one letter at a time to create new words, emphasizing the impact of each phoneme. For example, transforming “pain” to “pan” highlights the role of the silent ‘e’. Encourage students to explain why a change results in a new word, reinforcing the connection between sounds and letters.

Building words from dictation, focusing on specific patterns (like vowel teams), is also beneficial. These exercises build orthographic knowledge and vocabulary simultaneously. Remember to incorporate activities that build, practice, and consolidate reading and writing skills, catering to diverse learner needs.

Multisensory Spelling Practice

Multisensory practice is crucial for Stage 3 spellers, engaging multiple senses to reinforce learning. Incorporate visual, auditory, kinesthetic, and tactile elements. For example, have students write words in sand or shaving cream while saying the sounds aloud – a tactile and auditory approach.

Skywriting – tracing letters in the air – combines kinesthetic and visual learning. Simultaneously, students can verbally segment and blend the sounds. Using colored pencils to highlight specific spelling patterns within words provides a visual cue.

Activities should be designed to build and consolidate skills for all learners. Consider using playdough to form letters, or building words with blocks. These methods cater to different learning styles and strengthen memory retention. Remember to link spelling practice to reading, reinforcing the connection between decoding and encoding.

Activities to Support Stage 3 Spelling

Supportive activities include ‘Say and Spell’, word sorts by sound, regular dictation exercises, and sentence writing focused on target spellings for practice.

Say and Spell Activities

Say and Spell activities are a cornerstone of Stage 3 instruction, directly supporting the development of phoneme-grapheme correspondence. These exercises, often utilizing flashcards like those in the ‘Read With Oxford: Biff, Chip and Kipper’ series, encourage students to verbally articulate each sound within a word before attempting to write it.

The process involves the teacher clearly pronouncing a word, and the student then repeating it, consciously segmenting the sounds. Following segmentation, students ‘spell’ the word aloud, sound by sound, before writing the letters. This multi-sensory approach – auditory (hearing the word), kinesthetic (saying the sounds), and visual/motor (writing the letters) – reinforces learning.

Variations include having students work in pairs, taking turns saying and spelling words, or incorporating movement, such as clapping for each syllable or sound. These activities build confidence and fluency, solidifying the connection between spoken and written language, crucial for progressing through the stages of spelling development.

Word Sorts Based on Sound

Word sorts, categorized by sound patterns, are highly effective for Stage 3 spellers, reinforcing phonetic awareness and orthographic mapping. These activities move beyond simple sound identification to focus on comparative analysis of sounds within words. For example, a sort might focus on the ‘ou’ digraph, requiring students to categorize words based on its different pronunciations, as seen in example documents.

The teacher provides a collection of words, and students actively group them based on shared phonetic elements – vowel sounds, consonant blends, or digraphs. This hands-on approach encourages students to listen critically, identify subtle sound differences, and connect those sounds to corresponding letter patterns.

Word sorts can be adapted for various skill levels, starting with simple vowel sounds and progressing to more complex patterns. They support reading and writing skills, consolidating phonic knowledge and building confidence as learners actively construct their understanding of spelling rules and patterns.

Dictation Exercises

Dictation serves as a crucial component of Stage 3 spelling instruction, bridging the gap between auditory processing and written representation. This practice involves the teacher reading words or sentences aloud, and students writing them down, focusing on accurate spelling based on phonetic knowledge. Regular spelling checks, as noted in instructional practices, highlight areas needing reinforcement, making dictation a targeted intervention.

Begin with isolated words containing previously taught phonetic patterns, gradually increasing complexity to include phrases and simple sentences. Encourage students to segment sounds before writing, utilizing blending and segmenting skills. Provide immediate feedback, addressing errors collaboratively and reinforcing correct spellings.

Dictation isn’t merely about memorization; it’s about applying learned rules and patterns in real-time. It strengthens auditory discrimination, phoneme-grapheme correspondence, and overall spelling fluency, supporting both reading and writing development.

Sentence Writing with Focus Spellings

Sentence writing, incorporating focus spellings, elevates Stage 3 instruction beyond isolated word practice. This activity encourages students to apply their phonetic knowledge and spelling patterns within a meaningful context, fostering both accuracy and comprehension. Building upon activities designed to consolidate reading and writing skills, sentence construction reinforces orthographic processing.

Provide a list of target words – those containing specific vowel teams or consonant blends – and challenge students to create original sentences using them. Encourage creativity and grammatical correctness alongside accurate spelling. This process demands students actively recall and apply learned rules.

Review sentences collaboratively, focusing not only on spelling errors but also on sentence structure and meaning. This holistic approach strengthens overall literacy skills, demonstrating how spelling contributes to effective communication. It’s a practical application of the patterns learned during spelling checks.

Assessment and Monitoring

Regular checks and error analysis are crucial for tracking progress in Stage 3. Monitoring tools reveal patterns, informing instructional adjustments and ensuring student success.

Regular Spelling Checks

Consistent spelling checks are a cornerstone of monitoring Stage 3 progress, as evidenced by weekly practices noted in educational resources. These aren’t simply about assigning a grade; they’re diagnostic opportunities. Frequent, low-stakes checks – perhaps weekly – provide a continuous stream of data regarding student understanding of phonetic patterns and spelling rules.

The focus should be on identifying recurring errors, not penalizing mistakes. Checks can take various forms: traditional paper-and-pencil tests, quick whiteboard activities, or even digital assessments. Importantly, the words selected for these checks should align directly with the instructional focus of the current week or unit. This ensures that the assessment is measuring what has been explicitly taught.

Furthermore, incorporating a variety of question types – such as fill-in-the-blank, multiple choice, or dictation – can provide a more comprehensive picture of a student’s spelling abilities. The goal is to build confidence and reinforce learning, not to create anxiety around spelling.

Error Analysis

Effective error analysis is crucial following regular spelling checks in Stage 3. It moves beyond simply marking answers wrong to understanding why errors occur. A systematic approach involves categorizing mistakes – are they vowel-related, consonant-based, positional, or related to specific spelling patterns? Identifying these trends reveals gaps in a student’s understanding.

For example, consistent misspellings of vowel teams (like ‘ou’ or ‘ai’) suggest a need for focused instruction on those specific patterns. Errors with consonant blends might indicate difficulties with segmenting and blending sounds. Analyzing errors also helps determine if mistakes are random or systematic, informing instructional adjustments.

This analysis shouldn’t be a solitary task. Discussing errors with students – asking them to explain their thinking – provides valuable insight. It fosters metacognitive awareness and empowers them to take ownership of their learning. The data gathered from error analysis directly informs future instructional decisions, ensuring targeted support.

Progress Monitoring Tools

Consistent progress monitoring is vital throughout the Stage 3 spelling sequence; Beyond weekly spelling checks, utilize tools that provide a more nuanced understanding of student growth. These can include curriculum-based measurements (CBMs), where students spell a standardized list of words within a time limit, tracking accuracy and rate.

Running records focused on spelling, observing a student’s attempts to encode words during writing activities, offer qualitative data. Regularly reviewing student work samples – looking for consistent application of taught patterns – provides authentic assessment. Digital platforms offering adaptive spelling practice can also track progress and adjust difficulty levels.

The key is to gather data frequently and use it to inform instruction. Progress monitoring isn’t about assigning grades; it’s about identifying students who need additional support and adjusting teaching strategies accordingly. Visual representations of progress, like graphs, can motivate students and demonstrate their achievements.

Addressing Common Challenges

Stage 3 spellers often struggle with vowel teams and consonant blends; targeted practice and multisensory techniques are crucial for overcoming these hurdles effectively.

Difficulties with Vowel Teams

Vowel teams – combinations like ‘ou’, ‘ai’, and ‘ee’ – frequently present challenges for Stage 3 spellers. These digraphs and diphthongs don’t follow predictable phonetic rules, leading to inconsistent vowel sounds and spelling errors. Students may struggle to differentiate between the sounds these teams represent, resulting in misspellings like “rait” for “right” or “bote” for “boat”.

Effective instruction involves explicitly teaching the common vowel teams and their associated sounds. Activities should focus on sorting words by vowel team sound, identifying the vowel team within words, and practicing spelling words containing these patterns. Utilizing multisensory approaches, such as building words with letter tiles or tracing vowel teams in sand, can reinforce learning.

Furthermore, connecting vowel team spellings to known words and providing ample opportunities for reading and writing words with these patterns is essential. Error analysis, focusing specifically on vowel team misspellings, can inform targeted instruction and address individual student needs. Consistent review and reinforcement are key to mastering these often-tricky spelling patterns.

Challenges with Consonant Blends

Consonant blends – like ‘bl’, ‘str’, and ‘fr’ – pose difficulties for Stage 3 spellers as they require recognizing and accurately representing two or three consonants together. Students may omit one of the blend’s consonants, reverse their order (e.g., “brag” for “grab”), or substitute incorrect consonants. This stems from difficulties with segmenting the individual sounds within the blend and coordinating the motor movements for writing them.

Instruction should emphasize explicitly teaching common consonant blends and providing ample practice in blending and segmenting words containing them. Word building exercises, where students manipulate letter tiles to create and deconstruct words with blends, are highly effective. Multisensory practice, such as tracing blends in textured materials, can also aid retention.

Dictation exercises focusing on blend-rich words, coupled with targeted error analysis, help pinpoint specific areas of difficulty. Activities that build, practice, and consolidate reading and writing skills, specifically targeting blends, are crucial for mastery. Consistent reinforcement and varied practice are essential for overcoming these challenges.

Strategies for Students with Dyslexia

Students with dyslexia often require a highly structured and multisensory approach to spelling instruction within Stage 3. Explicit phonics instruction is paramount, breaking down words into their smallest units of sound (phonemes) and linking them to corresponding graphemes (letters). Repetition and overlearning are crucial, as rote memorization can be challenging.

Utilize assistive technology like speech-to-text software to reduce the cognitive load of writing, allowing students to focus on spelling patterns. Provide visual aids, such as color-coded vowels or consonant blends, to support orthographic processing. Break down tasks into smaller, manageable steps and offer frequent positive reinforcement.

Employ a variety of modalities – visual, auditory, kinesthetic, and tactile – during spelling practice. Activities like tracing letters in sand or building words with magnetic tiles can be particularly beneficial. Regular progress monitoring and individualized instruction, tailored to specific needs, are essential for success.

Resources for Stage 3 Spelling Instruction

Leverage phonics-based reading programs, spelling workbooks, and engaging online games to reinforce learning; ‘Read With Oxford’ flashcards are also incredibly useful.

Phonics-Based Reading Programs

Selecting a robust phonics-based reading program is crucial for supporting Stage 3 spellers, as these programs systematically build upon foundational skills. These programs often integrate reading and spelling, reinforcing the connection between sounds and letters. Look for programs that explicitly teach common spelling patterns, vowel teams, and consonant blends – areas where Stage 3 learners often encounter challenges.

Programs like those associated with ‘Read With Oxford’ (Biff, Chip and Kipper) can be particularly beneficial, offering structured activities and resources. The emphasis should be on decoding and encoding skills, allowing students to both read and spell words accurately. Furthermore, effective programs will incorporate multisensory techniques, engaging visual, auditory, and kinesthetic pathways to enhance learning and retention. Consistent use of such programs, alongside targeted spelling practice, will significantly contribute to a student’s progress through the Stage 3 developmental phase.

Spelling Workbooks and Materials

Supplementary spelling workbooks and materials provide focused practice to reinforce concepts taught during explicit instruction. These resources should align with the phonetic skills being developed in Stage 3, concentrating on patterns like vowel teams and consonant blends. Look for workbooks that offer a variety of activities – word sorts, fill-in-the-blanks, and sentence writing – to cater to different learning styles.

Activity books carefully leveled to support phonic knowledge are particularly valuable, building confidence as students progress. Materials that encourage building, practicing, and consolidating reading and writing skills are ideal. Ensure the materials include opportunities for error analysis and self-correction. The goal is to move beyond rote memorization towards a deeper understanding of spelling rules and patterns. Consistent, focused practice with appropriate materials will solidify Stage 3 spellers’ understanding and improve their accuracy.

Online Spelling Games and Activities

Digital resources offer engaging and interactive ways to reinforce Stage 3 spelling skills. Online spelling games can transform practice into a fun challenge, motivating students to apply their knowledge. Look for platforms that focus on phonetic patterns and allow for personalized learning, adapting to each student’s pace and needs. Many games incorporate multisensory elements, enhancing retention.

Interactive activities, such as virtual word sorts and digital dictation exercises, provide valuable practice. Streaming platforms, like Twitch, showcase educational content and gameplay that can indirectly support spelling development. Ensure the chosen games align with the instructional sequence and target specific areas of difficulty. Supplementing traditional methods with online tools can increase engagement and provide opportunities for independent practice, solidifying skills and building confidence in Stage 3 spellers.

panasonic sd 2501 instruction manual

Welcome! This manual guides you through the Panasonic SD-2501‚ ensuring a delightful baking experience. Discover optimal operation and maximize your bread-making journey.

Overview of the SD-2501 Model

The Panasonic SD-2501 is designed for effortless home baking. As showcased at CES 2026‚ Panasonic integrates AI for enhanced solutions. This bread maker simplifies the process‚ from ingredient preparation to enjoying fresh loaves. It’s a user-friendly appliance‚ supported by readily available online manuals and Panasonic’s dedicated support teams. Expect a seamless experience‚ guided by this instruction manual‚ for consistently delicious results.

Key Features and Benefits

The SD-2501 boasts preset programs – Basic‚ Whole Wheat‚ and French bread – offering baking versatility. Benefit from customizable crust color and loaf size adjustments. Panasonic’s AI strategy‚ demonstrated at CES 2026‚ translates to user-friendly features. Enjoy rapid baking and a convenient delay timer; Supported by Panasonic’s newsroom and UK support‚ this model delivers consistent‚ high-quality bread with ease.

Getting Started with Your SD-2501

Begin your baking adventure! This section details unboxing‚ component verification‚ and initial power-up procedures for your new Panasonic bread maker.

Unboxing and Component Check

Carefully unpack your Panasonic SD-2501. Ensure all components are present: the bread maker unit‚ bread pan‚ kneading blade‚ measuring cup‚ measuring spoon‚ and this instruction manual. Inspect for any shipping damage. Verify the bread pan and blade are securely fitted before first use. Retain the packaging for potential future transport or warranty claims. A complete component list is detailed within this guide.

Initial Setup and Powering On

Place the SD-2501 on a stable‚ level surface‚ ensuring adequate ventilation. Before plugging in‚ confirm the voltage matches your household supply. Connect the power cord securely. Press the ‘Start/Stop’ button briefly to initiate a self-check. The display screen will illuminate‚ indicating readiness; Your new bread maker is now set up and awaiting your first recipe!

Understanding the Control Panel

Explore the intuitive control panel featuring buttons and indicators for selecting programs‚ adjusting settings‚ and monitoring the bread-making process effortlessly.

Detailed Explanation of Buttons and Indicators

The control panel boasts clearly labeled buttons for “Menu‚” “Start/Stop‚” and “Crust Color.” Indicators illuminate to show selected program status. The “Delay Timer” button sets baking start times. Understanding each function is key. The display screen provides crucial information regarding program selection‚ baking time remaining‚ and chosen settings for optimal results. Familiarize yourself with these controls for seamless operation and customized bread creations.

Display Screen Functions

The LCD display clearly shows the selected bread program‚ baking stage (kneading‚ rising‚ baking)‚ and remaining time. It also indicates loaf size and crust color choices. Error messages appear here if issues arise during operation. Utilize the display to monitor progress and adjust settings as needed for perfect loaves. It’s your central hub for controlling and understanding the bread-making process.

Bread Making Basics

Essential steps include accurate ingredient measurement and proper preparation. Understanding yeast activation and selecting the correct flour type are crucial for successful baking.

Ingredient Measurement and Preparation

Precise measurements are vital for consistent results with your SD-2501. Use dry measuring cups for flour and liquid measuring cups for liquids. Ensure ingredients are fresh; expired yeast impacts rise. Water temperature is key – lukewarm (around 80°F/27°C) activates yeast effectively. Properly prepare ingredients as the manual instructs‚ often adding liquids first‚ then dry‚ with yeast last to avoid direct contact with salt.

Understanding Yeast and Flour Types

Yeast selection impacts bread texture; instant yeast can be added directly‚ while active dry yeast needs proofing. Flour types vary – bread flour has higher protein for gluten development‚ crucial for structure. Whole wheat flour adds a nutty flavor but may require more liquid. The SD-2501 performs best with quality ingredients‚ as detailed in your manual.

Preset Programs Explained

Explore convenience! The SD-2501 offers pre-programmed settings for basic‚ whole wheat‚ and French bread‚ simplifying baking with optimized time and temperature controls.

Basic Bread Program

The foundation of baking! This program is ideal for classic loaves. Simply add ingredients – flour‚ water‚ yeast‚ and sugar – and select the program. The SD-2501 automatically handles kneading‚ rising‚ and baking. Adjust crust color for your preference. This setting provides consistently delicious results‚ perfect for beginners and everyday bread needs. Enjoy freshly baked bread with minimal effort!

Whole Wheat Bread Program

Nutritious and flavorful! This program is specifically designed for 100% whole wheat or blends. It features a longer kneading and rising time to fully develop the gluten in whole wheat flour. This ensures a lighter‚ airier loaf. Adjust the water slightly as whole wheat absorbs more liquid. Enjoy a healthy and hearty homemade bread!

French Bread Program

Crispy crust‚ soft interior! The French Bread program creates a loaf with a delightfully crunchy exterior and a tender crumb; It utilizes a specific kneading pattern and baking temperature to achieve this classic texture. High-gluten flour is recommended for optimal results. Expect a slightly elongated loaf shape‚ perfect for slicing and enjoying!

Customizing Your Bread Recipes

Personalize your bake! Adjust crust color for light‚ medium‚ or dark preferences‚ and select loaf size – 1.5 or 2 pounds – to suit your needs.

Adjusting Crust Color

Customize your crust! The SD-2501 offers three crust color settings: Light‚ Medium‚ and Dark. Use the “Crust Color” button on the control panel to cycle through these options before starting the baking process. A lighter setting results in a paler crust‚ while Dark delivers a richer‚ more browned finish. Experiment to find your perfect shade‚ considering the recipe and your personal preference for texture and taste. Remember to note your settings for consistent results!

Adjusting Loaf Size

Choose your loaf! The Panasonic SD-2501 allows you to select between loaf sizes – typically 1.0lb and 1.5lb. Utilize the “Loaf Size” button on the control panel to toggle between these options before initiating the baking cycle. A smaller loaf is ideal for individuals or smaller families‚ while the larger size suits bigger households or those who enjoy leftovers. Ensure ingredient quantities align with the selected loaf size for optimal results.

Advanced Features

Explore more! The SD-2501 boasts a Rapid Bake function for quicker results and a Delay Timer for convenient‚ freshly baked bread whenever you desire.

Rapid Bake Function

Need bread fast? The Rapid Bake function significantly reduces the overall baking time‚ perfect for when you’re short on time but craving homemade goodness. This feature prioritizes speed‚ delivering a loaf in a shorter timeframe compared to standard programs.

However‚ note that utilizing Rapid Bake may slightly affect the loaf’s texture and rise‚ offering a convenient trade-off for quicker baking.

Delay Timer Function

Wake up to fresh bread! The Delay Timer allows you to conveniently schedule baking up to 12 hours in advance. Simply add your ingredients‚ set the desired finish time‚ and the SD-2501 will automatically begin baking‚ ensuring a warm loaf is ready when you are.

This feature is ideal for busy mornings or enjoying freshly baked bread throughout the week.

Maintenance and Cleaning

Keep your bread maker pristine! Regularly clean the bread pan and kneading blade for optimal performance and longevity. Proper care ensures delicious results.

Cleaning the Bread Pan and Kneading Blade

Thorough cleaning is essential! After each use‚ remove the bread pan and kneading blade. Wash them with warm‚ soapy water‚ ensuring all dough residue is removed. The non-stick coating requires gentle handling – avoid abrasive cleaners or scouring pads.

Dishwasher safe? Check your specific model’s manual‚ but generally‚ hand washing is recommended to prolong the life of the non-stick surface. Dry completely before reassembling.

Exterior Cleaning and Care

Keep it spotless! Regularly wipe down the exterior of your Panasonic SD-2501 with a soft‚ damp cloth. Avoid using harsh chemicals or abrasive cleaners‚ as these can damage the finish.

Power off first! Always ensure the bread maker is unplugged and completely cool before cleaning. A slightly damp cloth is usually sufficient for removing crumbs or spills. Dry thoroughly afterwards.

Troubleshooting Common Issues

Don’t despair! This section addresses frequent problems like bread not rising or burning smells‚ offering solutions for a perfect loaf every time.

Bread Not Rising

Insufficient yeast is a primary cause; ensure it’s fresh and properly measured. Incorrect flour type can also hinder rising – use bread flour for best results. Temperature matters; too cold impacts yeast activity. Verify the delay timer isn’t interfering. Finally‚ check the kneading blade is securely attached for proper dough development.

Burning Smell During Baking

A burning smell often indicates excess sugar or ingredients stuck to the bread pan’s heating element. Immediately stop the bread maker and carefully inspect. Ensure ingredients are measured accurately‚ and the pan is clean. Overfilling the pan can also cause burning. Reduce ingredient amounts or adjust the crust color setting for future loaves.

Safety Precautions

Always unplug the SD-2501 before cleaning. Avoid water entering the unit. Ensure proper electrical safety and follow all instructions carefully for safe operation.

Important Safety Instructions

Read all instructions carefully before operating the SD-2501. To prevent electrical shock‚ do not immerse the appliance in water. Always unplug before cleaning or when not in use. Never operate with a damaged cord or plug. Keep the appliance away from flammable materials. Ensure proper ventilation during operation. This appliance is for household use only.

Electrical Safety Guidelines

Always ensure the voltage of your outlet matches the appliance’s rating. Never use an extension cord unless absolutely necessary‚ and then only a heavy-duty‚ grounded one. Do not operate the SD-2501 with wet hands. If the appliance malfunctions or the cord is damaged‚ disconnect it immediately and contact Panasonic support for assistance.

Panasonic’s AI Integration at CES 2026

Panasonic showcased AI-driven solutions at CES 2026‚ demonstrating technology implementation across various sectors – a future focused innovation display.

AI Driven Business Solutions

At CES 2026‚ Panasonic highlighted how their AI strategy translates into tangible business solutions. This included advancements across diverse industries‚ showcasing a commitment to innovation. The focus was on implementing technologies to enhance efficiency and create new value. These solutions aim to address real-world challenges and improve operational outcomes‚ demonstrating Panasonic’s forward-thinking approach to technological integration.

Future Innovations Showcased

CES 2026 saw Panasonic unveil innovations under the theme “The Future We Make.” The group demonstrated a vision for integrating technology into daily life‚ focusing on both physical products and mindful solutions. This included exploring new applications of AI and connectivity‚ hinting at future product enhancements and a commitment to creating a more sustainable and convenient future for consumers;

Panasonic Group’s Strategic Partnership

Collaboration with Apollo Global Management began in December 2024‚ initiating a new management system focused on business operations and future growth strategies.

Collaboration with Apollo Global Management

Strategic Alignment: Panasonic’s partnership with Apollo Global Management‚ initiated in December 2024‚ signifies a pivotal shift in operational strategy. This collaboration aims to bolster business performance through a newly implemented management system. While seemingly unrelated to the SD-2501‚ this restructuring reflects Panasonic’s broader commitment to innovation and quality—values embedded in their appliance design‚ including your bread maker. Expect continued support and advancements.

New Management System Implementation

Operational Enhancements: Following the strategic partnership with Apollo Global Management in late 2025‚ Panasonic initiated a new management system. This impacts overall business operations‚ indirectly influencing product support and development‚ like the SD-2501 bread maker. Expect streamlined processes for accessing manuals‚ firmware updates‚ and contacting support teams‚ ensuring a smoother user experience with your appliance.

Panasonic Newsroom and Support

Find Assistance: Access online manuals‚ firmware updates‚ and direct contact options for Panasonic support teams via the official Panasonic Newsroom and UK Support portal.

Accessing Online Manuals and Firmware

Digital Resources: Easily locate your Panasonic SD-2501’s user manual and the latest firmware updates through the Panasonic Newsroom and dedicated UK Support website. These online resources provide comprehensive guidance for optimal performance and troubleshooting. Regularly checking for firmware ensures your bread maker benefits from the newest features and improvements‚ enhancing your baking experience. Direct links are available for convenient access.

Contacting Panasonic Support Teams

Need Assistance? For personalized help with your Panasonic SD-2501‚ reach out to Panasonic Support. The Panasonic UK Support website offers various contact methods‚ including searching for answers‚ accessing manuals‚ and direct communication options. Their dedicated teams are equipped to resolve any issues and ensure you enjoy seamless bread-making. Prompt and efficient support is readily available.

the extras academy survival guide novel

The Extras Academy Survival Guide: A Comprehensive Guide

The Extras Academy Survival Guide quickly resonated with Isekai and Magic School enthusiasts, offering a compelling narrative crafted by Argentinian author Lucas, a seasoned narrative designer.

Overview of the Novel

The Extras Academy Survival Guide presents a refreshing take on the well-trodden Isekai genre, focusing not on the chosen one, but on those relegated to the background – the ‘extras’. The story centers around an academy specifically designed to train individuals with minimal magical potential, often overlooked in traditional magical education systems.

This novel distinguishes itself by exploring themes of self-worth and found family within a world brimming with powerful mages and fantastical creatures. It’s a narrative driven by character development and relatable struggles, rather than epic battles and world-ending stakes. Lucas, the author, skillfully crafts a world where even the seemingly insignificant can find purpose and strength. The story’s appeal lies in its endearing characters and the unique premise of empowering those typically considered powerless, offering a heartwarming and engaging experience for readers.

Genre and Target Audience

The Extras Academy Survival Guide firmly plants itself within the Isekai and Magic School genres, appealing to readers who enjoy stories featuring characters transported to fantastical worlds and undergoing magical training. However, it subtly blends elements of slice-of-life and character-driven narratives, broadening its appeal.

The primary target audience consists of young adults and adults who appreciate stories with strong emotional cores and relatable characters. Fans of underdog narratives and those seeking a departure from typical power fantasy tropes will find this novel particularly engaging. The story’s focus on self-discovery and found family resonates with readers who enjoy character-focused plots. It’s a great fit for those who enjoy exploring themes of belonging and overcoming adversity, offering a heartwarming and optimistic reading experience.

Author Lucas and His Background

Lucas, the author behind The Extras Academy Survival Guide, is a writer and narrative designer hailing from Argentina, boasting over fifteen years of experience in crafting compelling stories. His professional background is deeply rooted in the gaming industry and news writing, providing him with a unique skillset for worldbuilding and character development.

Lucas’s extensive experience allows him to skillfully blend intricate plotlines with emotionally resonant character arcs. He maintains a keen interest in the ever-evolving gaming landscape, which clearly influences his writing style and thematic choices. This passion translates into a novel that feels both fresh and familiar, appealing to a broad audience. His dedication to narrative design is evident in the carefully constructed world and engaging storyline of The Extras Academy Survival Guide.

Plot Summary & Key Themes

The Extras Academy Survival Guide centers around characters navigating a challenging academy, exploring themes of self-worth, found family, and overcoming adversity within a magical setting.

Initial Setup: The Extras’ Predicament

The Extras Academy Survival Guide immediately throws readers into a unique situation: a school specifically for those deemed “extras” in other Isekai worlds. These individuals, lacking the typical protagonist power-ups or destined roles, find themselves discarded into this academy – a last resort for magical education.

The story begins with Ren, a character who experienced a particularly underwhelming transfer, possessing a barely noticeable magical ability. The initial predicament isn’t a grand villain or looming threat, but the sheer demoralization and lack of purpose felt by these students. They grapple with feelings of inadequacy, constantly comparing themselves to the heroes of other worlds.

This setup establishes a refreshing contrast to traditional Isekai tropes, focusing on the struggles of the overlooked and the journey to find value beyond predetermined destinies. The academy itself represents a haven, but also a constant reminder of their perceived failures.

The Academy’s Purpose and Curriculum

The Extras Academy isn’t designed to create heroes, but to equip its students with the skills to survive – and potentially thrive – in a world that doesn’t need them. Its purpose is fundamentally practical, focusing on abilities that are useful, even if not glamorous.

The curriculum deviates sharply from typical magic school fare. Instead of offensive spells, students learn advanced potion-making for self-sufficiency, enchanting everyday objects for utility, and defensive magic tailored for evasion rather than confrontation. There’s a strong emphasis on resourcefulness and teamwork, recognizing that extras must rely on each other.

Subjects like “Negotiation with Monsters” and “Urban Survival” highlight the academy’s pragmatic approach. The goal isn’t to become powerful, but to become indispensable – to carve out a niche where their unique, albeit minor, abilities can be valuable.

Core Themes: Found Family & Self-Worth

The Extras Academy Survival Guide deeply explores the themes of found family and discovering self-worth in a world that devalues its protagonists. The students, initially ostracized and overlooked, forge powerful bonds through shared adversity, creating a support system where they truly belong.

The narrative challenges the conventional hero’s journey, suggesting that value isn’t solely derived from exceptional power. Instead, it emphasizes the importance of recognizing and celebrating individual strengths, no matter how small. The extras learn to appreciate their unique contributions and find purpose in supporting one another.

This theme resonates strongly with readers, offering a heartwarming message about acceptance, resilience, and the power of community in overcoming feelings of inadequacy.

Main Characters & Their Arcs

The Extras Academy Survival Guide features a compelling cast, led by Ren, whose journey of self-discovery intertwines with those of mentors and adversaries alike.

Ren: The Protagonist’s Journey

Ren, the central figure in The Extras Academy Survival Guide, begins as an unremarkable student, initially overlooked and underestimated within the Academy’s challenging environment; Their arc centers around overcoming feelings of inadequacy and discovering hidden potential. This journey isn’t about becoming the strongest, but about defining strength on their own terms.

Initially, Ren struggles with self-worth, a common theme within the narrative. However, through interactions with supportive allies and facing daunting obstacles, they gradually gain confidence. The story meticulously charts Ren’s emotional growth, showcasing vulnerability alongside burgeoning power.

Ren’s development isn’t linear; setbacks and moments of doubt are integral to their progression. Ultimately, their arc embodies the novel’s core message: finding value not in exceptional abilities, but in inherent self-worth and the bonds forged with others.

Supporting Characters: Notable Mentors & Allies

The Extras Academy Survival Guide thrives on its ensemble cast, particularly the mentors and allies who profoundly impact Ren’s journey. These characters aren’t simply plot devices; they possess rich backstories and motivations that intertwine with the main narrative.

Several instructors at the Academy, initially appearing stern, reveal themselves as compassionate guides, offering Ren crucial support and unconventional training methods. Equally important are Ren’s fellow students, forming a ‘found family’ dynamic. These allies provide emotional anchors and practical assistance, demonstrating the power of collaboration.

These supporting characters challenge Ren’s perspectives and encourage self-belief. Their individual arcs, though less prominent than Ren’s, contribute significantly to the novel’s thematic depth, reinforcing the importance of community and mutual growth.

Antagonists & Their Motivations

The Extras Academy Survival Guide features antagonists who are far from one-dimensional villains. Their motivations stem from complex histories and deeply held beliefs, adding layers of nuance to the conflicts within the narrative. While some exhibit outright hostility towards Ren and the ‘extras,’ others operate with more subtle, manipulative tactics.

A key antagonist is driven by a rigid adherence to tradition and a disdain for those deemed ‘unworthy’ of magical power. This character believes in maintaining a strict hierarchy, viewing the Academy’s inclusivity as a threat; Others are motivated by personal ambition, seeking to exploit the extras for their own gain.

Lucas skillfully portrays these antagonists, revealing their vulnerabilities and the origins of their prejudices, fostering a sense of understanding even amidst conflict.

Magic System & Worldbuilding

The Extras Academy Survival Guide boasts a meticulously crafted world, centered around the mechanics of ‘mana’ and diverse abilities, enriching the immersive reading experience.

The Mechanics of Mana and Abilities

The Extras Academy Survival Guide’s magic system revolves around ‘mana’, the fundamental energy source powering all abilities within its world. However, unlike typical systems where mana equates to raw power, Lucas introduces a fascinating constraint: Extras, the novel’s focus, possess limited or ‘broken’ mana pathways.

This isn’t simply a matter of weaker spells; it fundamentally alters how abilities manifest. Characters must creatively adapt, combining fragmented mana with unique techniques, often resulting in unconventional and surprisingly effective skills. The system isn’t about maximizing power, but about ingenuity and resourcefulness.

Abilities aren’t inherited or learned through traditional methods. Instead, they’re often discovered through accidental activations or by exploiting loopholes in their flawed mana structures. This leads to a diverse range of powers, from minor conveniences to surprisingly potent combat techniques, all born from limitations.

The World’s History and Political Landscape

The Extras Academy Survival Guide unfolds within Aethelgard, a world steeped in ancient magical history and fractured political alliances. Centuries ago, a cataclysmic event known as ‘The Great Severance’ shattered the unified magical empire, birthing numerous independent kingdoms and city-states.

These factions are now locked in a delicate balance of power, constantly vying for resources and influence. The Academy itself exists as a neutral ground, funded by a consortium of these nations, ostensibly to train promising magical talents. However, beneath the surface lies a web of intrigue and hidden agendas.

The lingering effects of The Great Severance also permeate the land, creating zones of unstable mana and remnants of forgotten civilizations. This history directly impacts the Extras, as their ‘broken’ mana is theorized to be a consequence of the cataclysm, adding a layer of societal prejudice to their struggles.

Unique Creatures and Locations

The Extras Academy Survival Guide’s Aethelgard teems with fantastical creatures, ranging from the majestic Gryphons soaring above the Cloudpeak Mountains to the mischievous Sprites inhabiting the Whisperwood Forest. More uniquely, ‘Mana Wraiths’ – beings formed from concentrated, unstable mana – pose a constant threat, particularly in areas scarred by The Great Severance.

Key locations include Silverhaven, the capital city renowned for its advanced magical research, and the Sunken City of Eldoria, a haunting ruin holding secrets of the pre-Severance era. The Academy itself is nestled within the Evergreena Valley, a region blessed with naturally high mana concentration.

The ‘Shifting Sands Desert’ presents a perilous landscape, home to nomadic tribes and ancient, sand-dwelling beasts. These diverse environments not only enrich the worldbuilding but also play crucial roles in the challenges faced by the Extras.

Critical Reception & Fanbase

The Extras Academy Survival Guide garnered positive initial reviews, quickly building a dedicated fanbase within the Isekai and Magic School communities, praising its endearing qualities.

Initial Reviews and Popularity

Upon its release, The Extras Academy Survival Guide received largely favorable initial reviews, particularly from readers already invested in the Isekai and Magic School genres. Critics highlighted the novel’s engaging premise and Lucas’s skillful narrative design, honed through his fifteen years of experience in game development and journalism.

Early praise focused on the story’s ability to subvert common tropes while still delivering a satisfying and heartwarming experience. The endearing qualities of the characters and the unique worldbuilding were frequently cited as strengths. Popularity surged rapidly through online platforms, fueled by word-of-mouth recommendations and enthusiastic discussions within relevant online communities.

The novel quickly gained traction on webnovel platforms, consistently ranking high in reader charts and attracting a growing number of dedicated followers eager for each new chapter. This initial success laid a strong foundation for the novel’s continued growth and expansion within the fantasy literature landscape.

Common Fan Theories and Discussions

The Extras Academy Survival Guide’s fanbase is remarkably active, generating numerous theories and lively discussions surrounding the novel’s unfolding plot. A prevalent theory centers on the true origins of the Academy itself, with many speculating about a hidden purpose beyond simply training “extras.”

Another popular discussion revolves around the potential connections between seemingly minor characters and larger, overarching storylines. Fans meticulously analyze character interactions, searching for clues about hidden allegiances and future revelations. Debates frequently arise regarding the nature of mana and the limits of the abilities displayed within the world;

Speculation also abounds concerning the motivations of key antagonists, with fans proposing complex backstories and hidden agendas. These discussions demonstrate the novel’s success in fostering a deeply engaged and inquisitive readership.

Impact on the Isekai Genre

The Extras Academy Survival Guide has quickly become a noteworthy entry within the increasingly popular Isekai genre, distinguishing itself through its focus on character development and found family dynamics. While many Isekai narratives emphasize overpowered protagonists, Lucas’s work centers on the growth of individuals often overlooked.

This approach has resonated with readers seeking a more grounded and emotionally resonant experience. The novel’s emphasis on self-worth and overcoming perceived limitations offers a refreshing perspective within the genre. It’s sparked discussions about subverting typical Isekai tropes and prioritizing relatable character arcs;

Furthermore, the novel’s success demonstrates a growing appetite for Isekai stories that explore themes beyond simple power fantasies, influencing other emerging works in the field.

Analyzing the Narrative Structure

The Extras Academy Survival Guide masterfully blends humor with emotional depth, employing clever plot twists and focused character development techniques by author Lucas.

Pacing and Plot Twists

The Extras Academy Survival Guide distinguishes itself through a carefully modulated pacing, avoiding both sluggish exposition and overwhelming rushes of information. Lucas expertly balances moments of quiet character interaction with escalating challenges within the Academy, maintaining consistent reader engagement.

The narrative isn’t reliant on constant, shocking twists, but rather employs strategically placed reveals that organically stem from established lore and character motivations. These aren’t simply for shock value; they deepen the understanding of the world and the characters’ places within it.

Subtle foreshadowing is a key element, rewarding attentive readers while not feeling manipulative. The plot twists feel earned, arising from the internal logic of the story and contributing to the overall themes of self-discovery and found family. This approach elevates the novel beyond typical Isekai tropes.

Use of Humor and Emotional Depth

The Extras Academy Survival Guide masterfully blends lighthearted humor with genuinely moving emotional moments, creating a reading experience that is both entertaining and resonant. Lucas doesn’t shy away from exploring the vulnerabilities and insecurities of his characters, particularly Ren, the protagonist.

The humor often arises from the relatable awkwardness of the “extras” navigating their newfound abilities and the eccentricities of the Academy’s environment. It’s never at the expense of character development, but rather serves to highlight their growth and resilience.

The emotional core of the novel centers around themes of belonging and self-worth, explored through poignant interactions and internal struggles. This balance prevents the story from becoming overly saccharine or grim, offering a nuanced and satisfying emotional journey for the reader.

Character Development Techniques Employed by Lucas

Lucas skillfully employs several techniques to craft compelling and believable characters in The Extras Academy Survival Guide. He utilizes internal monologues to reveal Ren’s anxieties and motivations, allowing readers to deeply connect with her journey. Supporting characters aren’t simply plot devices; they receive dedicated scenes showcasing their backstories and personal growth.

A key technique is showing, not telling – character traits are demonstrated through actions and interactions rather than explicit descriptions. The challenges within the Academy serve as catalysts for growth, forcing characters to confront their weaknesses and embrace their strengths.

Furthermore, Lucas avoids static characters; even minor roles undergo subtle transformations, contributing to the novel’s dynamic and immersive world. This attention to detail elevates the narrative beyond a typical Isekai story.

Where to Read & Further Exploration

The Extras Academy Survival Guide is readily available on popular webnovel platforms, inviting readers into its world and inspiring vibrant fanfiction communities.

Available Platforms (Webnovel, etc.)

The Extras Academy Survival Guide finds its primary home on several prominent webnovel platforms, catering to a wide audience of eager readers. Currently, the novel is extensively available on Webnovel, where it has garnered a substantial following and consistently ranks among the platform’s most popular titles within the Isekai genre.

Readers can access the story through both free and premium access options, with premium chapters unlocked via the platform’s currency. Beyond Webnovel, select chapters and promotional content may occasionally appear on platforms like Royal Road, though this is less consistent. Lucas, the author, also maintains a presence on associated social media channels, often directing fans to the primary Webnovel link for the most up-to-date reading experience. Keep an eye out for potential future expansions to other digital reading services!

Related Works by Lucas

Lucas, the creative force behind The Extras Academy Survival Guide, boasts a rich background in narrative design and game writing, extending beyond this popular webnovel. While The Extras Academy represents a significant focus of his recent work, his portfolio includes contributions to several video game titles, showcasing his expertise in crafting immersive worlds and compelling characters.

Details regarding specific game titles remain somewhat limited, reflecting the confidential nature of his professional work. However, fans can find hints and discussions about his broader experience through his online presence and interviews. Currently, Lucas hasn’t publicly announced any direct sequels or spin-offs to The Extras Academy, but actively engages with the fanbase, suggesting potential future projects inspired by the universe. Keep an eye on his social media for updates!

Fanfiction and Community Creations

The Extras Academy Survival Guide has fostered a vibrant and dedicated online community, resulting in a flourishing ecosystem of fanfiction and creative works. Platforms like Archive of Our Own (AO3) and FanFiction.net host a diverse range of stories, exploring alternate scenarios, character backstories, and romantic pairings within the novel’s universe.

Beyond written works, fans actively create fan art, character edits, and even musical compositions inspired by the series. Social media platforms, particularly Twitter and Reddit, serve as hubs for sharing these creations and engaging in discussions. The community’s enthusiasm extends to detailed analyses of the magic system and worldbuilding, demonstrating a deep investment in Lucas’s creation. This passionate fanbase continues to expand the story’s reach and impact.

1 2