guider book

What is a Travel Guidebook?
Definition and Purpose
Travel guidebooks are publications offering detailed information about destinations, aiding travelers with planning and exploration; they blend practical advice with cultural context.
Travel guidebooks serve as comprehensive resources for explorers, meticulously detailing destinations to facilitate informed travel planning. They aren’t merely lists of attractions; instead, they skillfully weave practical advice – concerning transportation, accommodation, and costs – with enriching cultural and historical insights. These publications empower travelers to navigate unfamiliar territories confidently, fostering a deeper understanding and appreciation of the places they visit, ultimately enhancing the overall travel experience.
Evolution of Travel Guidebooks
Initially, travel narratives documented personal journeys, evolving into more structured guides in the 19th century, like railway guides aiding trolley travel across New England. The 20th century saw increased specialization. Today, digitalization dramatically reshapes guidebooks, integrating with platforms while still offering offline accessibility, mirroring a shift from purely descriptive texts to immersive, informative resources.
Types of Travel Guidebooks
Diverse guides cater to varied interests – destination-specific, thematic (food, history), and regional, offering focused information for tailored travel experiences and explorations;
Destination-Specific Guides
These guides concentrate on a single city, country, or region, providing exhaustive details about attractions, lodging, dining, and transportation. They often include maps and practical tips tailored to that location. Resources like Lonely Planet exemplify this approach, delivering comprehensive coverage for focused travel planning, ensuring a rich experience.
Thematic Guides (e.g., Food, History)
These specialized guides cater to particular interests, such as culinary adventures or historical explorations. The “A Traveller’s History of…” series exemplifies this, offering in-depth historical context for destinations. They enhance travel by focusing on passions, providing curated experiences beyond typical tourist routes, enriching understanding.
Regional Guides
Regional guidebooks concentrate on specific geographical areas, like New England, offering comprehensive coverage of multiple destinations within that region. The “Trolley Wayfinder” exemplifies this, detailing towns connected by electric railways. These guides are invaluable for extended trips, providing detailed maps and transportation information.

Historical Context of Travel Guidebooks
Early Travel Narratives
Early travel accounts evolved into structured guides, with the 19th and 20th centuries witnessing their rise; digitalization now reshapes how we access travel information.
Before standardized guidebooks, travelers relied on personal narratives detailing experiences and observations. These accounts, often subjective, gradually incorporated practical details like routes and lodging. The “Trolley Wayfinder” of 1908 exemplifies early attempts at organized travel information, specifically for electric railway networks in New England. These initial forms laid the groundwork for the more comprehensive guides that followed, evolving to meet growing travel demands.
The Rise of Modern Guidebooks (19th & 20th Century)
The 19th and 20th centuries witnessed the formalization of travel guidebooks, moving beyond personal accounts. Increased accessibility of rail travel fueled demand for structured information. Publications like Baedeker’s emerged, offering detailed maps, schedules, and hotel recommendations. This period established the core features of modern guidebooks, prioritizing practicality and comprehensive destination coverage.
The Impact of Digitalization
Digitalization profoundly reshaped travel guidebooks, initially threatening their existence but ultimately fostering adaptation. Online travel blogs and platforms offered immediate, user-generated content. However, guidebooks responded by integrating digital platforms, offering companion apps and updated online resources, ensuring continued relevance in a rapidly evolving travel landscape.

Key Features of a Good Travel Guidebook
Essential elements include detailed maps, transportation details, accommodation suggestions, restaurant reviews, and insightful historical and cultural context for an enriched travel experience.
Detailed Maps and Transportation Information
Comprehensive maps are crucial, showcasing key attractions, neighborhoods, and points of interest, enabling efficient navigation. Reliable transportation details – encompassing routes, schedules, fares for trains, buses, and local transport – are equally vital. A good guidebook clarifies distances between locations touched by trolley cars, as exemplified by the Trolley Wayfinder, aiding seamless travel planning.
Accommodation and Restaurant Recommendations
Guidebooks expertly curate lodging options, ranging from budget-friendly hostels to five-star luxury hotels – like those recognized by Forbes Travel Guide. Similarly, they suggest diverse dining experiences, highlighting local eateries and culinary gems. These recommendations save travelers valuable time and ensure quality experiences throughout their journey.
Historical and Cultural Insights
Travel guidebooks, such as those from Lonely Planet, delve beyond surface-level tourism, offering rich historical context and cultural understanding. Series like “A Traveller’s History of…” specifically focus on this, enhancing the travel experience and fostering a deeper appreciation for destinations and their unique heritage.
The Role of History in Travel Guidebooks
History within guidebooks provides crucial local context, enriching the travel experience and fostering a deeper understanding of a destination’s past and present.
Understanding Local Context
Delving into a destination’s history, as highlighted by resources like “A Traveller’s History of…” series, is paramount for meaningful travel. Guidebooks offering historical insights move beyond superficial sightseeing, enabling travelers to appreciate the cultural nuances and societal evolution that shaped a place.
Enhancing the Travel Experience
Historical knowledge profoundly enriches travel; understanding a location’s past transforms visits into immersive experiences. Guided tours, featuring knowledgeable experts, unlock deeper appreciation for historical sites, fostering a connection beyond mere observation. This contextual awareness elevates journeys from sightseeing to genuine cultural engagement.
“A Traveller’s History of…” Series
The “A Traveller’s History of…” series directly addresses the desire for pre-trip historical immersion. These books specifically focus on providing detailed historical context for destinations, going beyond simple descriptions. They offer a focused, scholarly approach, enriching travel with a deeper understanding of a place’s past.

Benefits of Using Travel Guidebooks
Travel guidebooks deliver in-depth, expert-vetted information, offering offline accessibility and reliable recommendations—crucial for informed decisions and a richer travel experience.
In-Depth Information
Travel guidebooks excel by providing comprehensive details beyond superficial overviews. They delve into a destination’s history, culture, and practicalities—transportation, accommodation, and local customs—offering a nuanced understanding. Unlike fleeting online content, guidebooks present curated, thoroughly researched information, ensuring travelers are well-prepared and can maximize their experience with confidence.
Expert Recommendations
Travel guidebooks distinguish themselves through carefully vetted recommendations. Authors and researchers dedicate time to experiencing destinations firsthand, identifying exceptional accommodations, restaurants, and attractions. This curated selection offers travelers reliable choices, saving valuable time and ensuring quality experiences, surpassing generalized online reviews or unverified social media suggestions.
Offline Accessibility
Travel guidebooks provide a crucial advantage: offline access to information. Unlike relying solely on digital resources, guidebooks function without internet connectivity, invaluable when exploring remote areas or incurring roaming charges. This feature ensures travelers can confidently navigate and discover, regardless of technological limitations or signal availability.

Comparing Guidebooks to Other Resources
Travel guidebooks offer curated, expert-vetted content, contrasting with the variable quality of online blogs, the standardized approach of agencies, and social media’s fleeting trends.
Guidebooks vs. Online Travel Blogs
Guidebooks present professionally edited, fact-checked information, offering reliability often absent in the diverse landscape of online travel blogs. While blogs provide personal perspectives and current updates, guidebooks deliver in-depth, structured knowledge. Blogs can be subjective and inconsistent; guidebooks strive for objectivity and comprehensive coverage, making them valuable for thorough pre-trip planning.
Guidebooks vs. Travel Agencies
Travel agencies offer personalized service and package deals, handling logistics for travelers, but often at a cost. Guidebooks empower independent exploration, providing detailed information for self-planned trips. Agencies focus on convenience; guidebooks prioritize knowledge and control. While agencies curate experiences, guidebooks facilitate discovery, allowing travelers to tailor their journeys precisely.
Guidebooks vs. Social Media
Social media provides real-time updates and user-generated content, but can be unreliable and lack depth. Guidebooks offer curated, vetted information, providing a structured and comprehensive overview of a destination. While social media is dynamic, guidebooks prioritize accuracy and context. Guidebooks deliver researched insights, unlike the often fleeting nature of social media trends.
Popular Travel Guidebook Publishers
Lonely Planet, Rough Guides, and Fodor’s Travel are renowned publishers, offering diverse perspectives and detailed coverage for global destinations and travel styles.
Lonely Planet
Lonely Planet stands as a globally recognized travel guidebook publisher, celebrated for its comprehensive destination coverage and independent, budget-focused approach. Users appreciate their guides for encompassing not just sights, but also cultural insights and practical travel tips.
Notably, Reddit discussions highlight Lonely Planet’s strength in providing broader contextual information beyond simple location descriptions, making it valuable for informed travel planning.
Rough Guides
Rough Guides are known for their detailed and insightful travel information, often emphasizing cultural experiences and local perspectives. They provide extensive background on destinations, appealing to travelers seeking a deeper understanding beyond typical tourist trails.
Like Lonely Planet, Rough Guides aim to equip travelers with knowledge, fostering more meaningful and immersive journeys.
Fodor’s Travel
Fodor’s Travel guidebooks traditionally focus on providing curated recommendations for hotels, restaurants, and attractions, often leaning towards a more upscale travel experience. They are recognized for their rigorous editorial standards and detailed reviews, assisting travelers in selecting quality options.
Fodor’s offers a blend of practical advice and sophisticated insights.

The Future of Travel Guidebooks
Travel guidebooks are evolving, integrating with digital platforms for personalized experiences and focusing on sustainability, adapting to modern traveler needs and preferences.
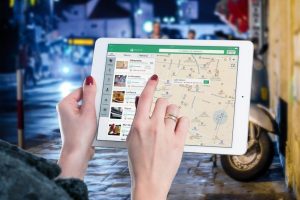
Integration with Digital Platforms
Travel guidebooks are increasingly merging with digital spaces, offering interactive maps, augmented reality experiences, and regularly updated content via apps and websites. This synergy provides travelers with dynamic, accessible information, complementing the traditional printed format. Digital integration allows for personalized recommendations, user reviews, and seamless booking options, enhancing the overall travel planning process.
Personalized Guidebook Experiences
Future guidebooks will likely leverage data and AI to curate highly personalized itineraries, catering to individual interests and preferences. Imagine a guidebook adapting to your pace, suggesting hidden gems based on your history, and offering tailored recommendations for accommodations and activities – a truly bespoke travel companion.
Sustainability and Responsible Travel
Modern guidebooks are increasingly emphasizing sustainable tourism practices, promoting eco-friendly accommodations, and encouraging respectful interactions with local cultures. They’ll highlight responsible tour operators and provide guidance on minimizing environmental impact, fostering a more conscious and ethical approach to exploration.

Utilizing Guidebooks for Genealogical Research
Historical guidebooks, alongside maps, offer valuable local history resources, aiding genealogical research by providing insights into past settlements and transportation networks.
Local History Resources
Travel guidebooks, particularly older editions like the 1908 Trolley Wayfinder, function as unexpected local history resources. They detail past transportation – trolley lines in New England, for example – revealing settlement patterns and connectivity. These publications, accessible digitally via HathiTrust, complement genealogical studies, offering geographical and historical context crucial for tracing ancestors and understanding their lived environments.
Maps and Cartography
Travel guidebooks historically included detailed maps, vital for navigation and understanding a region’s layout. The Trolley Wayfinder exemplifies this, charting electric railway routes across New England. These cartographic elements aren’t merely directional; they reveal past infrastructure, settlement patterns, and geographical changes, offering valuable insights for both travelers and genealogical research.

The Value of Guided Tours
Guided tours provide expert insights into historical sites, enriching understanding and appreciation of the past through knowledgeable guides’ detailed explanations.
Expert Insights from Knowledgeable Guides
Knowledgeable guides elevate travel experiences by offering in-depth historical context and nuanced perspectives often missed by independent travelers. Their expertise unlocks hidden stories, fostering a deeper connection with destinations. They navigate complexities, providing valuable insights into local cultures and traditions, ultimately enhancing understanding and appreciation.
Enhanced Understanding of Historical Sites
Guided tours significantly deepen comprehension of historical sites, moving beyond surface-level observation. Experts reveal layers of significance, detailing events, architectural nuances, and the lives intertwined with these locations. This immersive approach transforms visits into educational journeys, fostering a richer, more meaningful connection to the past.
New England Street Railway Club Guidebooks (Historical Example)
Trolley Wayfinder and its Significance
The Trolley Wayfinder (1908) provided crucial travel details for New England via electric railways, listing cities, fares, and travel times alphabetically.
Published in 1908 by the New England Street Railway Club, the Trolley Wayfinder served as an essential resource for travelers navigating the region’s expanding electric railway network. It meticulously detailed cities and towns accessible by trolley, offering valuable information like distances, fares, and estimated travel times.
This alphabetically arranged guide facilitated efficient trip planning, showcasing the interconnectedness of New England communities through this modern transportation system, and remains a fascinating historical artifact.
Alphabetical Arrangement of Destinations
The Trolley Wayfinder distinguished itself through its practical organizational structure – an alphabetical listing of destinations reachable via New England’s electric railways. This method allowed travelers to quickly locate information pertaining to specific towns and cities, streamlining the process of planning multi-stop journeys.
Such a format prioritized user accessibility and efficiency.

Forbes Travel Guide and Luxury Travel
Forbes Travel Guide recognizes exceptional hospitality with its Five-Star Awards, evaluating both newly established and long-standing luxury properties based on rigorous standards.
Five-Star Award Winners
Forbes Travel Guide’s prestigious Five-Star designation signifies world-class properties delivering exceptional experiences. Many recent winners are new builds, showcasing innovative luxury, yet established hotels consistently maintain these high standards. This recognition highlights commitment to impeccable service, stunning design, and unforgettable guest journeys, setting a benchmark for luxury travel globally.
New Builds vs. Established Properties
Forbes Travel Guide notes a trend: many first-time Five-Star awards go to new hotels, demonstrating innovation in luxury hospitality. However, numerous established properties continually earn this distinction, proving consistent excellence is achievable through dedicated service and ongoing refinement, regardless of age or initial construction.
Reddit Discussions on Travel and History
Importance of Pre-Trip Historical Research
Reddit users value pre-trip historical research, often utilizing Lonely Planet guidebooks and supplementary materials like books and documentaries for deeper cultural immersion.
Reddit discussions reveal a strong preference for understanding a destination’s history before arrival, enhancing the travel experience. Many travelers still appreciate Lonely Planet guidebooks for their broad subject coverage, going beyond simple location descriptions. Supplementing guidebooks with dedicated history books and documentaries is also common, fostering a richer, more informed journey.
Community Recommendations for Historical Travel Resources
Reddit users frequently recommend the “A Traveller’s History of…” book series as an excellent resource for pre-trip historical immersion. This series specifically focuses on providing detailed historical context for various destinations, enriching the travel experience beyond superficial sightseeing and offering deeper cultural understanding.