bernina record 830 manual

Bernina Record 830 Manual: A Comprehensive Guide

Discover a wealth of information for your Bernina 830! This guide offers access to free PDF manuals, troubleshooting tips, and specifications for optimal sewing.

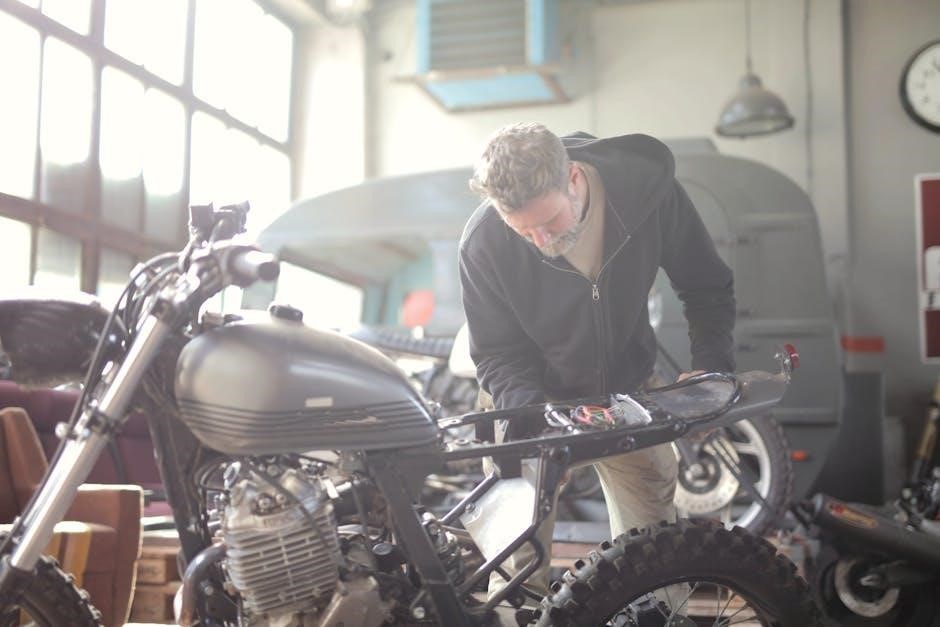
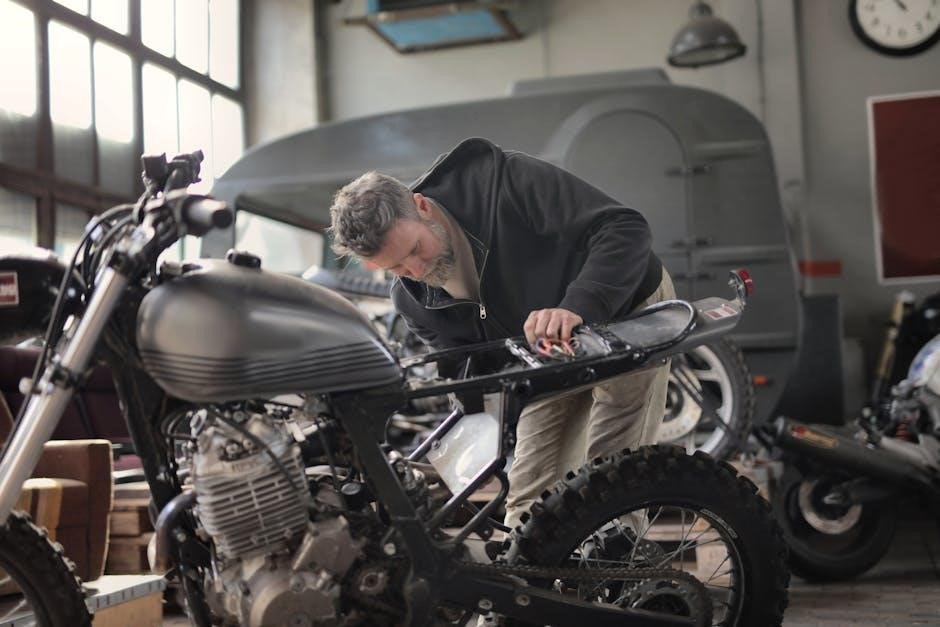
The Bernina 830, a sewing machine manufactured between 1971 and 1982, represents a pinnacle of Swiss engineering and design. It’s renowned for its robust construction, precision, and versatile capabilities, making it a favorite among sewing enthusiasts and professionals alike. Finding a comprehensive Bernina 830 manual is crucial for unlocking the full potential of this classic machine.

This guide serves as a central resource for locating and understanding the various manuals available for the Bernina 830. Whether you need assistance with basic operation, advanced techniques, or troubleshooting common issues, the appropriate manual will provide invaluable support. Several manuals are available in PDF format, offering convenient access to detailed instructions and diagrams. These resources cover everything from threading and lubrication to more complex embroidery functions.

Understanding the machine’s features and accessing the correct documentation will ensure years of reliable performance and creative exploration with your Bernina 830.

Historical Context of the Bernina 830 (1971-1982)

The Bernina 830 emerged during a period of significant innovation in home sewing technology, between 1971 and 1982. It quickly established itself as a premium machine, favored for its durability and precision – hallmarks of Bernina’s Swiss manufacturing. This era saw a growing demand for versatile sewing machines capable of handling a wider range of fabrics and techniques.

The Bernina 830 was designed to meet this demand, offering both standard sewing functions and advanced features like embroidery capabilities. Its robust mechanical construction ensured longevity, making it a reliable workhorse for serious sewers. Consequently, many Bernina 830 machines remain in use today, highlighting their enduring quality.

Access to the original Bernina 830 manual is particularly valuable for owners of these vintage machines, providing essential guidance for maintenance, repair, and optimal performance. Understanding the historical context enhances appreciation for this iconic sewing machine.

Availability of Bernina 830 Manuals (PDF Format)

Finding a Bernina 830 manual in PDF format is readily achievable thanks to numerous online resources. Several websites offer free downloads of original manuals, service guides, and supplementary materials. These digital copies are invaluable for owners seeking assistance with operation, troubleshooting, or repair.

Currently, over ten Bernina 830 manuals are available for free PDF download, encompassing various document types like user manuals, service manuals, at-a-glance references, and even software updates. These resources cater to diverse user needs, from basic operation to advanced maintenance.

Websites dedicated to Bernina sewing machines frequently host these manuals, providing a centralized location for owners to access essential documentation. A quick online search for “Bernina 830 manual PDF” will yield numerous results, ensuring convenient access to the information you require. Don’t hesitate to explore these digital archives!

Key Features and Specifications

The Bernina 830 boasts a precision needle, a large sewing surface, and versatile capabilities, making it ideal for intricate designs and professional results.

Bernina 830: Precision Needle and Sewing Surface

Bernina Record 830: Precision Needle and Sewing Surface

Central to the Bernina 830’s exceptional performance is its renowned precision needle system. This system ensures accurate stitch placement and consistent thread delivery, crucial for achieving professional-quality results across a diverse range of fabrics. The machine’s design prioritizes minimizing fabric feed inconsistencies, contributing to smoother sewing and reduced puckering.

Furthermore, the Bernina 830 features a generously sized sewing surface. This expansive area provides ample space for handling larger projects, quilting intricate patterns, and maneuvering fabrics with ease. The larger throat space is particularly beneficial when working with bulky materials or creating elaborate embroidery designs. This combination of needle precision and ample workspace empowers users to tackle complex sewing tasks with confidence and control, ultimately enhancing both efficiency and creative expression.

The machine’s robust construction and carefully engineered components contribute to its stability and minimize vibrations, further enhancing the precision of each stitch.

Bernina 830: Versatile Sewing Capabilities

The Bernina 830 excels in its remarkable versatility, offering a comprehensive suite of sewing capabilities suitable for both beginner and experienced sewists. Beyond standard straight and zigzag stitches, this machine boasts a wide array of decorative stitches, enabling users to personalize projects with unique embellishments. Its adaptability extends to various sewing techniques, including free-motion quilting, appliqué, and buttonholing.

The Bernina 830 is adept at handling a broad spectrum of fabrics, from lightweight silks to heavy denim, thanks to adjustable presser foot pressure and stitch settings. This adaptability ensures optimal results regardless of material thickness or texture. Moreover, the machine’s compatibility with various accessories, such as specialized presser feet, further expands its functional range, allowing for specialized tasks like blind hemming and zipper insertion.

Its robust motor and precise engineering deliver consistent power and control, making it a reliable companion for any sewing endeavor.

Detailed Specifications of the Bernina 830 Sewing Machine

The Bernina 830, a premium sewing machine from 1971-1982, features a robust mechanical system. It boasts a maximum stitch length of 5mm and a maximum stitch width of 9mm, providing versatility for diverse projects; The machine operates on standard household current and includes a built-in motor delivering consistent power.

Its construction incorporates a precision needle system, ensuring accurate stitch formation. The generous sewing surface allows for comfortable handling of larger fabric pieces and quilts. The Bernina 830 includes a variety of presser feet for specialized tasks, enhancing its functionality.

While specific weight varies, it’s a substantial machine reflecting its durable build. The machine’s dimensions are considerable, requiring adequate workspace. Detailed specifications regarding amperage and voltage can be found within the original Bernina 830 manual, available in PDF format for download.

Understanding the Manual Sections

Explore the Bernina 830 manual’s table of contents for quick navigation. Troubleshooting, threading, and lubrication guides ensure optimal performance and longevity.

Table of Contents: Navigating the Bernina 830 Manual

The Bernina 830 manual’s table of contents is your key to efficiently accessing vital information. It’s structured to guide you swiftly to specific sections, eliminating frustrating searches. Expect to find clearly defined chapters covering everything from initial setup and basic operation to advanced techniques and detailed maintenance procedures.

Commonly, the table of contents will categorize sections by function – for example, a dedicated area for understanding stitch selection, another for threading procedures (often with diagrams), and a crucial troubleshooting guide addressing frequent issues. Look for sections detailing the machine’s capabilities with various fabrics, and specific instructions for embroidery features if applicable.

Furthermore, the manual’s organization typically includes a comprehensive specifications list, outlining technical details and dimensions. Utilizing the table of contents effectively will empower you to maximize your Bernina 830’s potential and maintain its performance for years to come. It’s the first step towards becoming a confident and skilled user.

Troubleshooting Common Problems

The Bernina 830 manual dedicates significant space to resolving typical issues. Expect detailed guidance on problems like thread bunching, skipped stitches, and needle breakage – frequent concerns for sewing machine users. The manual often categorizes these issues by symptom, allowing for quick diagnosis.

A key feature is the inclusion of potential causes for each problem, ranging from incorrect threading to improper needle selection or tension settings. Step-by-step solutions are provided, often accompanied by illustrative diagrams. Don’t overlook sections addressing error messages, if your model displays them.

Beyond mechanical issues, the troubleshooting section may cover electrical concerns or problems with optional accessories. Remember to consult this section before seeking professional repair, as many issues can be easily resolved with a little patience and the manual’s guidance. Prioritize safety and disconnect the power before attempting any internal adjustments.

Bernina 830: Threading and Lubrication Guide

Proper threading is crucial for the Bernina 830’s performance, and the manual provides detailed, illustrated diagrams for both upper and bobbin threading. It emphasizes the importance of following the correct path to avoid tension issues and skipped stitches. Different thread types may require slight adjustments, which are often noted.

Lubrication is equally vital for maintaining the machine’s longevity. The manual specifies recommended lubrication points and the appropriate type of oil to use – typically a high-quality sewing machine oil. Over-oiling can be as detrimental as under-oiling, so adhere to the recommended frequency and quantity.

The guide also details how to access lubrication points and provides warnings against lubricating certain components. Regular threading practice and consistent lubrication, as outlined in the manual, will ensure smooth and reliable operation of your Bernina 830 for years to come.

Advanced Features & Techniques

Unlock the Bernina 830’s full potential! Explore embroidery, fabric compatibility, and stitch customization options detailed within the comprehensive manual.

Embroidery Capabilities of the Bernina 830

The Bernina 830, while primarily a sewing machine, possesses remarkable embroidery capabilities for its time, extensively detailed within its manual. Though not a dedicated embroidery machine like later models, the 830 can achieve impressive decorative stitching and free-motion embroidery with the appropriate accessories and techniques. The manual provides guidance on utilizing the machine’s stitch patterns creatively to mimic embroidery designs.

Users can leverage the wide stitch selection and adjustable settings to create intricate floral motifs, monograms, and other embellishments. The manual illustrates how to properly stabilize fabrics for embroidery and select appropriate threads and needles. It also covers free-motion embroidery techniques, allowing for personalized designs and artistic expression. Mastering these features requires careful study of the manual’s instructions and practice with different materials.

While lacking modern computerized embroidery features, the Bernina 830 empowers skilled users to produce beautiful, handcrafted embroidery work. The manual serves as an essential resource for unlocking these capabilities and achieving professional-looking results.

Using Bernina 830 with Different Fabrics

The Bernina 830 manual provides crucial guidance on adapting sewing settings for various fabrics, ensuring optimal stitch quality and preventing damage to both the machine and materials. It details adjustments for lightweight silks, heavy denims, stretchy knits, and everything in between. Understanding these nuances is key to successful sewing projects.

The manual emphasizes the importance of selecting the correct needle type and size for each fabric weight. It explains how to adjust presser foot pressure, stitch length, and thread tension to achieve balanced stitches. Specific recommendations are given for handling delicate fabrics like chiffon and challenging materials like leather or vinyl.

Furthermore, the manual offers insights into fabric stabilization techniques, such as using interfacing or stabilizers, to prevent puckering or distortion. By following these guidelines, users can confidently tackle a wide range of fabrics and create professional-quality garments and home décor items with their Bernina 830.

Bernina 830: Stitch Selection and Customization

The Bernina 830 manual comprehensively details the machine’s extensive stitch repertoire, from basic straight and zigzag stitches to more decorative and specialized options. It provides clear diagrams and explanations for each stitch, outlining its intended use and optimal settings. Mastering stitch selection is fundamental to unlocking the Bernina 830’s full potential.

Beyond pre-programmed stitches, the manual guides users through customization options, allowing for adjustments to stitch length, width, and density. It explains how to combine different stitch patterns to create unique designs and embellishments. Detailed instructions are provided for creating buttonholes, overlock stitches, and other specialized applications.

The manual also covers advanced techniques like stitch programming and memory functions, enabling users to save their favorite stitch combinations for future projects. By exploring these features, sewers can personalize their creations and achieve professional-looking results with their Bernina 830.

Maintenance and Repair

Bernina 830 manuals offer detailed guidance on routine upkeep, service procedures, and locating repair resources to ensure longevity and peak performance.

Routine Maintenance Procedures

Maintaining your Bernina 830 involves several key procedures detailed within its manual. Regular cleaning is paramount; lint and dust accumulation can significantly impact performance. The manual emphasizes frequent removal of lint from the bobbin area and feed dogs.

Lubrication is another critical aspect. The Bernina 830 requires periodic oiling of specific points, as illustrated in the manual’s threading and lubrication guide. Using the correct type of oil is crucial to avoid damaging internal components.

Inspecting the machine for wear and tear is also recommended. Check the belt for cracks or fraying, and ensure all screws are tightened. The manual provides diagrams to assist with identifying these components. Following these routine steps, as outlined in the Bernina 830 manual, will help ensure your machine operates smoothly and reliably for years to come, preventing costly repairs and maximizing its lifespan.

Bernina 830: Service and Maintenance Manual Details

The Bernina 830’s service and maintenance manual provides in-depth instructions beyond routine upkeep. It’s a resource for experienced technicians or dedicated owners comfortable with disassembly. Detailed exploded views illustrate component placement, aiding in repairs and part identification.

Specific sections cover timing adjustments, motor servicing, and troubleshooting complex mechanical issues. The manual outlines procedures for replacing belts, bearings, and other wear-prone parts. It also details electrical testing procedures for diagnosing malfunctions.

Accessing this manual is vital for comprehensive repairs. While the standard owner’s manual covers basic maintenance, the service manual unlocks advanced diagnostic and repair capabilities. It’s often available as a PDF download alongside the standard manual, offering a complete resource for preserving the longevity of your Bernina 830 sewing machine.

Finding Bernina 830 Repair Resources

Locating repair assistance for a Bernina 830 requires exploring several avenues. While a comprehensive manual aids self-repair, specialized expertise is sometimes necessary. Authorized Bernina dealers remain a primary resource, offering certified technicians familiar with vintage models.

Online forums and communities dedicated to vintage sewing machines are invaluable. These platforms connect owners who share knowledge, troubleshooting tips, and even locate hard-to-find parts. Websites specializing in Bernina parts often stock components for the 830.

Independent sewing machine repair shops, particularly those with experience in mechanical machines, can also provide service. When seeking external repair, verify the technician’s experience with Bernina machines to ensure proper diagnosis and repair. Remember to consult your manual before seeking assistance.

Related Bernina Models & Resources

Explore similar Bernina machines like the 820QE, 880, 930, 1001, 1004/1005, 1011, and 1031DC for expanded options and manual access.

Comparison: Bernina 830 vs. Bernina 880

Comparing the Bernina 830 and 880 reveals key differences despite both being high-quality machines. The Bernina 830, manufactured from 1971-1982, is a robust mechanical machine celebrated for its durability and precision. It excels in straightforward sewing tasks and offers a substantial sewing surface. Finding a complete Bernina 830 manual is crucial for maximizing its potential, with readily available PDF versions online.

The Bernina 880, a later model, introduces computerized features and embroidery capabilities absent in the 830. While the 830 focuses on mechanical excellence, the 880 provides greater versatility through programmable stitch patterns and designs. However, the 880’s complexity may require more specialized maintenance. Both machines benefit from dedicated manuals; locating a Bernina 880 manual is essential for understanding its advanced functions. Ultimately, the best choice depends on individual sewing needs and preferences – simplicity versus advanced features.

Bernina 820QE Sewing Machine Information

While focusing on the Bernina 830, understanding related models like the 820QE provides context. The Bernina 820QE, though distinct, shares the brand’s commitment to quality and precision. Information regarding the 820QE is often found alongside resources for older models like the 830, as many online archives group Bernina manuals together. Accessing a Bernina 820QE quick manual or full user guide is readily available in PDF format online.

The 820QE offers features not present in the 830, such as a faster sewing speed and enhanced stitch selection. However, the 830’s mechanical simplicity appeals to those preferring a more direct sewing experience. Regardless of the model, locating the correct manual – whether a Bernina 830 manual or a 820QE guide – is paramount for proper operation and maintenance. Both machines represent Bernina’s dedication to durable, high-performance sewing solutions.

Accessing Additional Bernina Manuals (930, 1001, 1004/1005, 1011, 1031DC)

Beyond the Bernina 830 manual, a comprehensive collection of resources exists for other Bernina models. Finding manuals for the 930, 1001, 1004/1005, 1011, and 1031DC is often possible through the same online archives where the 830 manual resides. These resources frequently offer PDF downloads, providing convenient access to user guides, service manuals, and at-a-glance references.

Many sewing enthusiasts and repair technicians maintain digital libraries of vintage Bernina documentation. Exploring these online communities can yield valuable insights and troubleshooting assistance. While each model possesses unique features, the core principles of Bernina engineering remain consistent. Accessing these additional manuals can broaden your understanding of the brand’s legacy and potentially aid in repairing or maintaining your Bernina 830, offering comparative insights into similar mechanisms.

beautyrest heated blanket manual

BeautyRest Heated Blanket Manual: Comprehensive Guide

Welcome! This comprehensive guide details setup, operation, troubleshooting, and warranty details for your BeautyRest heated blanket, ensuring cozy warmth and peace of mind․

BeautyRest heated blankets are designed to provide luxurious warmth and comfort during colder months․ These electric blankets utilize advanced heating technology, offering customizable temperature settings for a personalized sleep experience․ Understanding your blanket’s features and following the provided instructions are crucial for safe and optimal performance․

This manual serves as a complete resource, guiding you through every aspect of your BeautyRest heated blanket – from initial setup and operation to troubleshooting common issues․ Whether you’re experiencing an E2 or E3 error, persistent blinking lights, or a blanket that simply won’t heat, this guide offers step-by-step solutions․

We prioritize your safety and satisfaction․ Therefore, carefully review the safety precautions and warnings before use․ Proper maintenance and care, including cleaning and storage instructions, will extend the life of your BeautyRest heated blanket and ensure years of cozy enjoyment․

Understanding Your Blanket’s Controller

Your BeautyRest heated blanket features a user-friendly controller designed for intuitive operation․ The controller typically includes a power button, multiple heat settings (often ranging from low to high), and potentially a timer function for customized warmth duration․ Familiarize yourself with each button and its corresponding function before use․

Pay close attention to indicator lights․ These lights display the current heat setting, timer status, and any error codes that may arise․ Understanding these signals is vital for troubleshooting․ Blinking lights often indicate a specific issue, such as a power problem or sensor malfunction, requiring attention․

The controller may also have a safety shut-off feature, automatically turning off the blanket after a set period․ Always ensure the controller is securely connected to the blanket and the power outlet for optimal performance․ Refer to the diagrams within this manual for a detailed overview of the controller’s components․

Safety Precautions and Warnings

Important Safety Instructions: Always read and understand all instructions before operating your BeautyRest heated blanket․ Never use the blanket with damaged cords or plugs․ Avoid using with infants, children, or individuals insensitive to heat․ Do not pin, probe, or puncture the blanket․

Warning: Risk of fire or electric shock exists if the blanket is used improperly․ Never immerse the controller or blanket in water․ Disconnect the blanket from the power source when not in use and before cleaning․ Do not operate if wet․

Caution: Prolonged use on the highest setting may cause skin irritation․ Do not use with liniments, creams, or ointments․ If overheating occurs, immediately discontinue use․ Regularly inspect the blanket for wear and tear․ Store the blanket loosely folded to avoid damaging the internal wires․

Setting Up Your BeautyRest Heated Blanket

Prepare for ultimate comfort! This section guides you through inspection, controller connection, and powering on your BeautyRest heated blanket safely and efficiently․

Initial Inspection and Preparation

Before first use, carefully inspect your BeautyRest heated blanket for any signs of damage․ Examine the blanket fabric, the controller, and especially the power cord for cuts, fraying, or exposed wires․ Do not use the blanket if any damage is detected; contact customer support immediately․

Ensure the blanket is fully unfolded and laid flat on a clean, dry surface․ Avoid placing it on uneven or potentially damaging surfaces․ Familiarize yourself with the controller’s buttons and settings – understanding these beforehand will enhance your experience․ Confirm that the controller cord is securely attached to the blanket․

It’s crucial to read the entire manual before operation, paying close attention to the safety precautions․ Proper preparation ensures safe and enjoyable use of your new BeautyRest heated blanket, maximizing its benefits and longevity․

Connecting the Controller and Blanket

Locate the connection port on your BeautyRest heated blanket – it’s typically found along one of the edges․ Carefully insert the controller’s plug into this port, ensuring a secure and snug fit․ Do not force the connection; if it doesn’t easily connect, double-check the alignment․ A loose connection can cause intermittent heating or prevent the blanket from working altogether․

Once connected, gently tug on the controller to confirm it’s firmly attached․ Avoid pulling directly on the cord itself․ The connection should withstand a reasonable, gentle pull without disconnecting․ Before plugging into a wall outlet, verify the connection again․

A secure connection is vital for safe and effective operation․ Improperly connected controllers can pose a safety risk․ Always prioritize a firm, reliable connection before powering on your BeautyRest heated blanket․

Powering On and Selecting Heat Settings

After confirming the controller is securely connected, plug the BeautyRest heated blanket into a standard 120V AC wall outlet․ Locate the power switch on the controller and turn it to the “On” position․ The controller display should illuminate, indicating it’s receiving power․

Most BeautyRest heated blankets offer multiple heat settings, typically ranging from low to high․ Use the designated buttons on the controller to cycle through the available heat levels․ Start with the lowest setting and gradually increase it to your desired comfort level․

Be mindful of the heating time; it may take a few minutes for the blanket to reach the selected temperature․ Avoid using the highest setting for extended periods, especially during sleep, to prevent overheating․ Always turn off the blanket before leaving it unattended․

Troubleshooting Common Issues

Encountering problems? This section provides solutions for common BeautyRest heated blanket issues like error codes, blinking lights, and heating malfunctions, restoring cozy comfort quickly․

E2 Error Code: What It Means and How to Fix It

The E2 error code on your BeautyRest heated blanket controller typically indicates a sensor issue or a break in the wiring connecting the blanket to the control unit․ This means the controller isn’t accurately reading the blanket’s temperature, preventing it from heating safely․

To resolve this, first, ensure the cord connecting the blanket to the controller is securely plugged in at both ends․ Unplug the blanket and controller from the wall outlet, then carefully inspect the cord for any visible damage – frays, cuts, or exposed wires․ If damage is found, discontinue use immediately․

Next, try resetting the controller by unplugging it for a full ten minutes before reconnecting․ If the E2 error persists after these steps, a sensor malfunction is likely․ Contact BeautyRest customer support or consult the warranty information for assistance, as sensor repairs often require professional servicing․ Do not attempt to disassemble or repair the blanket yourself․

E3 Error Code: Diagnosis and Solutions

The E3 error code on a BeautyRest heated blanket signals a more serious internal fault within the controller itself, often related to the power supply or internal circuitry․ This error suggests the blanket isn’t receiving adequate power or the controller is malfunctioning, posing a potential safety risk․

Initial troubleshooting involves verifying the wall outlet is functioning correctly by testing it with another device․ Ensure the power cord is firmly connected to both the controller and the outlet․ If the issue persists, unplug the blanket and controller and allow them to rest for at least 30 minutes before attempting to power on again․

However, an E3 error typically requires professional attention․ Do not attempt to open or repair the controller yourself․ Contact BeautyRest customer support immediately, referencing the E3 error code, and inquire about warranty options or authorized repair services․ Continuing to use the blanket with an E3 error could be hazardous․

Blinking Lights: Identifying the Problem

Blinking lights on your BeautyRest heated blanket’s controller are a key indicator of an issue, communicating various problems with the system․ The pattern of the blinking – slow, fast, or a specific sequence – is crucial for diagnosis․ Often, blinking signifies a communication error between the controller and the blanket itself, or a detected safety concern․

Before proceeding, always unplug the blanket from the power outlet․ Inspect the connection between the controller and the blanket cord, ensuring it’s securely fastened․ A loose connection is a common cause of blinking lights․ If the connection is secure, a simple controller reset might resolve the issue․

Persistent blinking, however, often points to a more significant problem, potentially involving the control board or internal sensors․ Further troubleshooting steps, or contacting BeautyRest support, may be necessary to determine the root cause and ensure safe operation․

Persistent Blinking: Potential Causes

Persistent blinking on your BeautyRest heated blanket controller suggests a deeper issue than a simple connection problem․ A primary cause can be a faulty control board, the “brain” of the blanket, unable to regulate temperature correctly․ This often requires professional repair or replacement․

Sensor malfunctions are another frequent culprit․ The blanket utilizes sensors to monitor temperature and prevent overheating; if these fail, the controller may blink continuously as a safety measure․ A damaged power cord, even if seemingly intact, can also trigger persistent blinking due to inconsistent power delivery․

Internal wiring issues within the blanket itself, though less common, can disrupt the electrical flow and cause the controller to signal an error․ Before assuming a major component failure, ensure a complete reset has been attempted, but persistent blinking usually indicates a hardware problem needing attention․

Resetting the Controller for Blinking Issues

Resetting the controller is a crucial first step when encountering blinking lights on your BeautyRest heated blanket․ Begin by turning off the power switch located directly on the controller itself․ Next, disconnect the power cord from the wall outlet – a complete power cycle is essential․

Allow the blanket to remain unplugged for a full ten minutes․ This allows any residual electrical charge to dissipate, effectively resetting the internal components․ After the ten-minute period, firmly reconnect the power cord to the outlet and then switch the controller power switch back on․

Observe if the blinking has ceased and the blanket functions normally․ If the blinking persists after this reset, it indicates a more significant issue requiring further troubleshooting, potentially involving sensor or control board problems․ Repeat the reset process only once before seeking additional support․

Blanket Not Heating: Troubleshooting Steps

If your BeautyRest heated blanket isn’t producing warmth, begin with a thorough inspection of the power connections․ Ensure the controller is securely plugged into a functioning wall outlet and that the blanket’s cord is firmly connected to the controller․ Verify the controller’s power switch is in the ‘on’ position and a heat setting is selected․

Next, check for any visible damage to the power cord itself – frays, cuts, or exposed wires․ A damaged cord presents a safety hazard and requires immediate replacement․ If the cord appears intact, attempt to adjust the heat setting to a higher level․

If the issue persists, try unplugging the blanket for several minutes, then reconnecting․ If still no heat, an E2 error might be present, indicating a potential internal fault․ Consult the error code section for specific guidance․

Controller Not Responding: Possible Solutions

A non-responsive controller can be frustrating․ First, confirm the outlet is providing power by testing it with another device․ Ensure the power cord is securely connected to both the controller and the wall outlet․ Check the controller’s power switch; it must be in the ‘on’ position for operation․

Attempt a reset by unplugging the blanket from the outlet for a full ten minutes․ This allows the controller to fully discharge and potentially resolve minor glitches․ After reconnecting, try powering on the controller again․ If it remains unresponsive, inspect the cord for any visible damage, like fraying or cuts․

Persistent lack of response could indicate an internal controller malfunction․ If resetting doesn’t work, and the cord is undamaged, contact customer support for assistance or explore warranty options․

Maintenance and Care

Proper care extends your BeautyRest blanket’s life! Follow cleaning instructions carefully, and utilize appropriate storage techniques to preserve functionality and warranty validity․

Cleaning Instructions for Your BeautyRest Blanket

Maintaining cleanliness is crucial for the longevity and performance of your BeautyRest heated blanket․ Always disconnect the controller and ensure the blanket is completely unplugged before attempting any cleaning procedures․ Most BeautyRest blankets are machine washable, but always refer to the care label sewn into the blanket for specific instructions․

Generally, use a mild detergent on a delicate cycle with cold water․ Avoid using bleach or fabric softeners, as these can damage the heating wires․ Gently wash the blanket, and avoid excessive wringing or twisting․ Once washed, lay the blanket flat to dry or tumble dry on a low heat setting․

Never attempt to wash the controller itself! Wipe it down with a slightly damp cloth only․ Do not immerse the controller in water․ Ensure the blanket is completely dry before reconnecting the controller and using it․ Regular, gentle cleaning will help maintain the comfort and safety of your BeautyRest heated blanket․

Proper Storage Techniques

Correct storage significantly extends the life of your BeautyRest heated blanket․ Before storing, ensure the blanket is completely clean and dry to prevent mildew or damage to the heating elements․ Disconnect the controller and avoid tightly folding or creasing the blanket, as this can harm the internal wiring․

Ideally, store the blanket loosely rolled or folded in a breathable storage bag, such as cotton or linen․ Avoid using plastic bags, as they can trap moisture․ Choose a cool, dry location away from direct sunlight and extreme temperatures․

Do not store the blanket with mothballs or other pest control products, as these can damage the fabric․ Keep the controller separate, stored in its original packaging if possible, to protect it from dust and physical damage․ Following these guidelines ensures your BeautyRest blanket remains in optimal condition for years to come․

Warranty Information and Claim Process

Your BeautyRest heated blanket is covered by a limited warranty against defects in materials and workmanship․ The warranty period typically begins from the date of original purchase․ Please retain your proof of purchase, as it is required for all warranty claims․ The warranty covers normal residential use; damage resulting from misuse, abuse, or unauthorized repairs is not covered․

To initiate a warranty claim, contact BeautyRest customer support with your purchase details and a description of the issue․ You may be asked to provide photos or videos demonstrating the defect․

If a valid claim is approved, BeautyRest will, at its discretion, repair or replace the defective blanket․ Shipping costs for returning the blanket may be the responsibility of the customer․ For complete warranty details and claim submission instructions, please visit the official BeautyRest website or refer to the warranty card included with your product․

Advanced Troubleshooting

For persistent issues, carefully inspect the power cord for damage and identify potential sensor malfunctions; these often require professional assessment for resolution․

Inspecting the Power Cord for Damage

Before undertaking any advanced troubleshooting, a thorough inspection of the power cord is crucial for safety and identifying potential faults․ Visually examine the entire length of the cord, from the plug to the controller connection point, looking for any signs of physical damage․

Specifically, check for cuts, abrasions, fraying, or exposed wires․ Pay close attention to areas where the cord bends or connects to other components, as these are common stress points․ Gently flex the cord along its length, feeling for any stiffness or internal breaks․

If any damage is detected, immediately discontinue use of the blanket and do not attempt to repair the cord yourself․ A damaged power cord poses a serious electrical hazard․ Contact BeautyRest customer support or a qualified electrician for assistance․ Using a damaged cord can lead to electric shock or fire, so prioritize safety above all else․ Remember, a faulty cord often indicates a more significant internal issue․

Identifying Potential Sensor Malfunctions

BeautyRest heated blankets utilize sensors to monitor temperature and prevent overheating․ Malfunctions within these sensors can trigger error codes or prevent the blanket from heating correctly․ Identifying a sensor issue often requires a process of elimination, as symptoms can mimic other problems․

Persistent blinking lights, particularly in conjunction with a lack of heat, can indicate a sensor fault․ Error codes like E2 or E3, while having other potential causes, may also point to sensor issues․ If the controller displays inconsistent temperature readings or fails to respond accurately to adjustments, suspect a sensor problem․

Unfortunately, diagnosing specific sensor failures typically requires specialized equipment and knowledge․ Attempting to repair sensors yourself is not recommended․ If you suspect a sensor malfunction after performing basic troubleshooting, contact BeautyRest customer support for assistance or to initiate a warranty claim; Professional diagnosis is essential for safe and effective repair․

2018 toyota highlander owners manual

The 2018 Highlander manual, available digitally as a PDF, details vehicle features, operation, maintenance, and troubleshooting—a comprehensive guide for all owners.

Overview of the Manual’s Purpose

The 2018 Toyota Highlander Owner’s Manual serves as a vital resource, meticulously designed to familiarize owners with every aspect of their vehicle. It’s more than just a guide; it’s a comprehensive compendium detailing operation, maintenance schedules, and crucial safety information. This manual empowers drivers to maximize their Highlander’s performance and longevity.

Specifically, it explains features, controls, and driving modes, ensuring a confident and informed driving experience. It also provides essential troubleshooting steps and emergency procedures, offering peace of mind on the road. The manual’s detailed diagrams and descriptions, particularly of the instrument panel and indicator symbols, are invaluable for understanding vehicle status. Ultimately, it’s a tool for safe, efficient, and enjoyable Highlander ownership.

Where to Find a Digital Copy

Locating a digital copy of the 2018 Toyota Highlander Owner’s Manual is readily achievable through several online avenues. Many websites offer free downloads of the manual in PDF format, ensuring compatibility across various devices. A quick internet search using keywords like “Toyota Highlander 2018 owner’s manual PDF” will yield numerous results.

Understanding the Manual’s Organization

The 2018 Toyota Highlander Owner’s Manual is meticulously organized for ease of use, covering all aspects of vehicle ownership. It begins with a general introduction to features and controls, progressing to detailed explanations of driving procedures and safety systems like Toyota Safety Sense.

Subsequent sections focus on maintenance schedules, fluid checks, tire care, and emergency procedures. A dedicated technical specifications chapter provides engine details, dimensions, audio system information, and wheel/tire specifications. The manual utilizes clear diagrams and descriptions, particularly for the instrument panel and indicator symbols. This structured approach allows owners to quickly locate information relevant to their needs, ensuring a comprehensive understanding of their Highlander.

Vehicle Features and Controls

This section details the 2018 Highlander’s interior, covering the instrument panel, indicator symbols, seat adjustments, and the operation of the climate control system.

Instrument Panel Overview

The 2018 Toyota Highlander’s instrument panel is designed for clear and concise information delivery to the driver. It prominently features the speedometer and tachometer, providing crucial data regarding vehicle speed and engine RPM.

Between these gauges, a multi-information display (MID) presents vital statistics such as fuel consumption, outside temperature, and trip information. Warning lights and indicator symbols are strategically positioned to alert the driver to potential issues or system status.

The panel also incorporates gauges for engine coolant temperature and fuel level. Understanding the layout and function of each component is essential for safe and informed operation of your Highlander. Diagrams and detailed descriptions within the owner’s manual further clarify each element’s purpose.

Indicator Symbols and Warnings

The 2018 Toyota Highlander utilizes a comprehensive system of indicator symbols and warnings to communicate vehicle status and potential problems. These symbols illuminate on the instrument panel, alerting the driver to various conditions requiring attention.

Warning lights, typically red or amber, signify critical issues demanding immediate action, such as low oil pressure or engine malfunction. Indicator symbols, often green or blue, provide information about system operation, like headlight activation or cruise control engagement.

The owner’s manual provides a detailed explanation of each symbol, its meaning, and the recommended course of action. Ignoring warning lights can lead to severe vehicle damage or safety hazards; therefore, prompt attention is crucial. Familiarize yourself with these indicators for a safer driving experience.

Seat Adjustments and Settings

The 2018 Toyota Highlander offers a range of seat adjustments to ensure optimal driver and passenger comfort and safety. These adjustments include manual or power-operated controls for fore/aft positioning, seat height, and backrest angle.

Many Highlander models feature power lumbar support, allowing customization of lower back support for enhanced ergonomics. Headrest adjustments are also crucial for proper neck support and whiplash protection.

The owner’s manual details the location and operation of all seat adjustment controls. Properly adjusted seats are vital for maintaining good posture, reducing fatigue, and maximizing visibility. Explore all available settings to find your ideal driving position for a comfortable and secure journey.

Climate Control System

The 2018 Toyota Highlander’s climate control system is designed to provide comfortable cabin temperatures for both driver and passengers. The system typically includes dual-zone or tri-zone automatic temperature control, allowing independent temperature settings for different areas of the vehicle.

Controls allow adjustment of fan speed, airflow direction (face, feet, defrost), and temperature. The system also features an air recirculation mode to filter outside air and improve cooling efficiency.

Refer to the owner’s manual for detailed instructions on operating the climate control system, including the use of features like the quick cool function and rear-seat climate controls. Proper use ensures optimal comfort and air quality during all driving conditions.

Driving Your 2018 Highlander

This section covers essential driving procedures, including starting, stopping, utilizing driving modes (Normal, Eco, Sport), and understanding Toyota Safety Sense features;

Starting and Stopping the Engine

Starting your 2018 Toyota Highlander is straightforward, requiring a key fob or smart key. Ensure the vehicle is in Park (P) or Neutral (N), and firmly depress the brake pedal. Press the engine start/stop button until the engine starts.

To stop the engine, ensure the vehicle is completely stopped, then depress the brake pedal and press the engine start/stop button again. The ignition should switch off, and the instrument panel lights will dim.

Always allow the engine to idle for a short period before and after driving, especially in cold weather, to ensure proper lubrication. Never attempt to start the engine while it is already running.

Driving Modes (Normal, Eco, Sport)

The 2018 Toyota Highlander offers three distinct driving modes: Normal, Eco, and Sport, selectable via a switch typically located near the gear shifter. Normal mode provides a balanced driving experience for everyday conditions.

Eco mode prioritizes fuel efficiency by adjusting throttle response and other systems, resulting in slightly reduced performance. Sport mode enhances acceleration and responsiveness, offering a more engaging driving experience, but at the cost of increased fuel consumption.

Experiment with each mode to determine which best suits your driving style and the current road conditions.

Toyota Safety Sense Features

The 2018 Toyota Highlander comes standard with Toyota Safety Sense (TSS), a suite of advanced driver-assistance systems designed to enhance safety. This includes Pre-Collision System with Pedestrian Detection, which can help mitigate or avoid collisions.

Lane Departure Alert with Lane Keep Assist warns you if you unintentionally drift from your lane and can provide gentle steering assistance. Automatic High Beams automatically adjust headlight brightness for optimal visibility.

Dynamic Radar Cruise Control maintains a preset distance from the vehicle ahead. Familiarize yourself with the limitations of these systems; they are aids, not substitutes for attentive driving.

Hill Start Assist Control

The 2018 Toyota Highlander features Hill Start Assist Control (HSAC), a system designed to help prevent rollback when starting on an incline. When activated on a slope, HSAC momentarily holds the brakes after you release the pedal.

This provides you with a few seconds to move your foot from the brake to the accelerator without the vehicle rolling backward. HSAC automatically disengages when you apply sufficient throttle or when the vehicle is on a level surface.

It’s important to note HSAC is not a substitute for proper driving techniques and may not function in all conditions.

Maintenance and Care

Regular maintenance, including fluid checks, tire upkeep, and battery care, is crucial for your 2018 Highlander’s longevity and optimal performance.

Recommended Maintenance Schedule

The 2018 Toyota Highlander’s maintenance schedule is designed to ensure reliability and longevity. Key intervals include fluid checks (oil, coolant, brake fluid) every 5,000 miles or 6 months, with oil changes being particularly vital.

Tire rotations are recommended every 5,000 miles to promote even wear, extending their lifespan. Inspections of belts, hoses, and filters should occur at 15,000-mile intervals.

More extensive services, like spark plug replacement and coolant flushing, are typically scheduled around 60,000 and 100,000 miles. Refer to the owner’s manual for a detailed, mileage-based schedule tailored to your driving conditions and usage.

Following this schedule helps maintain your Highlander’s value and prevents costly repairs.

Fluid Checks and Replacements

Regularly checking and replacing fluids is crucial for the 2018 Highlander’s performance. Engine oil should be inspected monthly and changed every 5,000-10,000 miles depending on oil type and driving conditions. Coolant levels need monitoring, with a complete flush recommended every 60,000 miles.

Brake fluid absorbs moisture, reducing effectiveness; inspect annually and replace every two to three years. Power steering fluid should be checked periodically for leaks and proper levels.

Transmission fluid is vital for smooth shifting; a drain and fill is typically recommended around 60,000 miles. Always use Toyota-approved fluids to maintain warranty coverage and optimal performance.

Refer to the owner’s manual for specific fluid types and capacities;

Tire Information and Maintenance

Maintaining proper tire pressure is essential for safety, fuel efficiency, and tire longevity on your 2018 Highlander. Check tire pressure monthly when tires are cold, referencing the sticker on the driver’s side doorjamb for recommended PSI.

Regularly inspect tires for wear and damage, including cuts, bulges, and uneven tread wear. Rotate tires every 5,000-7,500 miles to promote even wear.

The owner’s manual specifies the correct tire size and load rating. Ensure replacement tires meet these specifications.

Tire alignment should be checked periodically, especially if you notice uneven wear or pulling to one side.

Battery Care and Jump Starting

Your 2018 Toyota Highlander’s battery provides essential power. To prolong its life, avoid leaving lights on when the engine is off and minimize short trips. Corrosion on the terminals should be cleaned regularly with a baking soda and water solution.

If the battery is drained, jump starting is possible, but follow the procedure outlined in the owner’s manual carefully to avoid damage to the electrical system.

Ensure the booster cables are connected in the correct order: positive to positive, negative to a grounded metal surface on the Highlander, not the negative terminal.

Consult the manual for specific jump starting instructions and safety precautions.

Troubleshooting and Emergency Procedures

This section of the 2018 Highlander manual provides guidance for roadside assistance, emergency situations, and basic troubleshooting steps for common vehicle issues.

What to Do in an Emergency

In any emergency situation involving your 2018 Toyota Highlander, your safety is the top priority. The owner’s manual emphasizes remaining calm and assessing the situation before taking action.

If involved in a collision, check for injuries and call for medical assistance immediately. Secure the vehicle by activating hazard lights and, if possible, moving it to a safe location.

The manual details procedures for dealing with breakdowns, including safely pulling over to the side of the road and utilizing warning devices. It also provides essential information regarding contacting emergency services and reporting incidents.

Furthermore, the guide outlines steps for handling situations like fires, floods, or other natural disasters, stressing the importance of evacuating the vehicle and seeking shelter.

Basic Troubleshooting Guide

The 2018 Toyota Highlander owner’s manual includes a basic troubleshooting section to assist with common vehicle issues. This guide helps owners diagnose and potentially resolve minor problems before seeking professional assistance.

It covers frequently encountered concerns like a vehicle that won’t start, warning light illumination, and unusual noises. The manual provides step-by-step instructions for checking simple components such as the battery, fuses, and fluid levels.

Owners can find guidance on addressing issues with the lights, wipers, and climate control system. The guide emphasizes safety precautions and advises when professional service is necessary, preventing further damage.

Remember, this section is for minor issues; complex problems require a qualified technician.

Towing Information

The 2018 Toyota Highlander owner’s manual dedicates a section to towing, crucial for owners planning to haul trailers or other vehicles. It details the Highlander’s maximum towing capacity, varying based on engine and drivetrain configuration (2WD or 4WD).

This section outlines proper hitch and trailer selection, emphasizing the importance of using compatible equipment rated for the intended load. It provides guidance on weight distribution, trailer brakes, and connecting/disconnecting procedures.

Safety is paramount; the manual stresses adhering to speed limits and adjusting driving habits when towing.

Owners will find information on appropriate trailer wiring and lighting connections, ensuring safe and legal operation.

Jump Starting Procedures

The 2018 Toyota Highlander owner’s manual provides detailed, step-by-step instructions for safely jump-starting a vehicle with a discharged battery. It emphasizes crucial safety precautions to prevent damage to the electrical system and potential injury.

The guide clearly illustrates the correct cable connection sequence – positive to positive, negative to a grounded metal surface on the disabled vehicle – and the importance of avoiding sparks.

It advises on the proper jump-starting technique, including allowing the assisting vehicle to run for a few minutes before attempting to start the Highlander.

Post-jump start, the manual recommends allowing the Highlander to run for an extended period to recharge the battery fully.

Technical Specifications

The manual details engine specs, dimensions, capacities, and audio system specifics for the 2018 Highlander, including wheel and tire information.

Engine Specifications

The 2018 Toyota Highlander offered several engine options, meticulously detailed within the owner’s manual. The standard engine was a 2.7-liter four-cylinder producing 185 horsepower and 184 lb-ft of torque. A popular upgrade was the 3.5-liter V6 engine, delivering a more substantial 295 horsepower and 263 lb-ft of torque.

For those seeking enhanced fuel efficiency, a hybrid powertrain combining a 3.5-liter V6 with an electric motor was also available, achieving a combined system output of 306 horsepower. The manual provides precise specifications for each engine, including compression ratios, valve train configurations, and fuel system details. It also outlines recommended fuel grades and oil types for optimal performance and longevity of the engine.

Dimensions and Capacities

The 2018 Toyota Highlander’s owner’s manual thoroughly outlines its physical dimensions and various capacities. Overall length measures 192.5 inches, with a width of 76 inches and a height ranging from 68.1 to 68.6 inches depending on the configuration. Wheelbase is 110.6 inches, contributing to a stable ride.

Cargo capacity is a key feature, offering 13.8 cubic feet behind the third row, expanding to 42.3 cubic feet with the third row folded, and a generous 83.7 cubic feet with both rear rows stowed. Fuel tank capacity is 19.2 gallons. The manual also details passenger volume, maximum towing capacity (typically 5,000 lbs), and curb weight variations based on engine and drivetrain choices.

Audio System Details

The 2018 Toyota Highlander’s owner’s manual provides comprehensive details regarding its audio systems. Base models feature a 6.1-inch touchscreen display with AM/FM radio, USB connectivity, and Bluetooth wireless technology. Upgraded trims boast an 8-inch touchscreen, integrated navigation, and access to Toyota’s Entune App Suite.

Premium JBL audio systems, available on higher trims, include up to 12 speakers and a powerful amplifier for immersive sound. The manual details operation of features like voice recognition, steering wheel controls, and audio settings adjustments. It also explains compatibility with various audio formats and provides troubleshooting tips for common audio system issues. Configuration options include two-way component and coaxial speakers for optimized sound quality.

Wheel and Tire Specifications

The 2018 Toyota Highlander owner’s manual outlines precise wheel and tire specifications crucial for optimal performance and safety. Standard wheel sizes vary by trim level, typically ranging from 18 to 20 inches in diameter. Recommended tire sizes are detailed, including width, aspect ratio, and load index.

The manual emphasizes the importance of using tires that meet Toyota’s specifications and provides guidance on tire pressure monitoring systems (TPMS). It details proper tire inflation pressures for both normal and heavy load conditions. Information regarding tire rotation, replacement, and seasonal tire changes is also included. Adhering to these specifications ensures proper handling, braking, and fuel efficiency, contributing to a safe driving experience.

simpson pressure washer 3100 psi manual

Simpson 3100 PSI Pressure Washer Manual: A Comprehensive Guide

This manual provides detailed instructions for Simpson 3100 PSI pressure washers, including models MS60763-S and MS61217, ensuring optimal performance and safety.

The Simpson 3100 PSI pressure washer is a powerful cleaning tool designed for residential use, offering a balance of performance and affordability. These models, like the MS60763-S and MS61217, are ideal for tackling various outdoor cleaning tasks, from decks and patios to siding and vehicles.

This manual serves as a comprehensive guide to ensure safe and effective operation. It covers everything from initial setup and operation to routine maintenance and troubleshooting. Whether you’re a first-time user or an experienced homeowner, understanding the features and proper procedures outlined here will maximize the lifespan and cleaning power of your Simpson pressure washer. Remember to register your warranty for added peace of mind.

Model Numbers and Variations

Simpson offers several variations within the 3100 PSI pressure washer line, catering to diverse needs. Key models include the MS60763-S and the MS61217. The MS60763-S is a premium option, while the MS61217, available at retailers like Tractor Supply Co, is geared towards do-it-yourself enthusiasts seeking maximum performance without a substantial investment.

While sharing core functionality, slight differences may exist in specifications like GPM (gallons per minute) – some models offer 2.3 GPM, others 2.4 or 2.6 GPM. Always refer to the specific model number on your unit and corresponding documentation for accurate details. This manual aims to cover commonalities, but model-specific nuances should be considered.

MS60763-S Model Specifics

The MS60763-S is identified as a 3100 PSI, 2.4 GPM premium pressure washer. This model is highlighted in various instruction manuals and parts listings (Part No. 7109294 Rev. 0 OCT207). It’s designed for robust cleaning tasks around the home, offering a balance of power and efficiency.

Users should retain the purchase date and serial number for warranty registration and future service needs. Simpson’s customer service (1-877-362-4271 or www.simpsoncleaning.com) is the primary contact point for issues, avoiding returns to the point of purchase. Detailed operating instructions and safety guidelines are available within the dedicated manual for this specific model.

MS61217 Model Specifics

The Simpson MS61217 is a 3100 PSI, 2.3 GPM gas-powered residential pressure washer, frequently available at Tractor Supply Co. It’s marketed towards DIY enthusiasts seeking high performance without a substantial investment. This “MegaShot” series model is known for its user-friendly operation and suitability for cleaning decks, patios, and outdoor furniture.

Like the MS60763-S, retaining purchase details (date and serial number) is crucial for warranty claims and accessing support. Simpson recommends contacting their customer service directly for any malfunctions or missing parts, rather than returning the unit to the retailer. Detailed operational guidance can be found in the official Simpson instruction manual.

Safety Precautions

Always adhere to general safety guidelines, high-pressure spray protocols, and proper fuel handling procedures when operating your Simpson 3100 PSI pressure washer.

General Safety Guidelines

Read this manual thoroughly before using the Simpson 3100 PSI pressure washer. Always wear safety glasses or goggles to protect your eyes from debris. Never operate the unit if you are tired or under the influence of drugs or alcohol. Ensure a clear working area, free from obstructions and bystanders. Avoid directing the spray at people, animals, or electrical connections.

Do not modify the pressure washer in any way. Keep children and unauthorized personnel away during operation. Be aware of your surroundings and potential hazards. Inspect hoses and connections for damage before each use. Never attempt to repair the unit yourself; contact qualified service personnel. Always disconnect the spark plug wire before performing any maintenance.

High-Pressure Spray Safety

Exercise extreme caution when using the high-pressure spray. The force of the water can cause serious injury. Never point the wand at yourself or others. Maintain a firm grip on the spray gun and wand at all times. Be aware that the spray can ricochet off surfaces. Use appropriate nozzles for the task at hand, starting with a wider angle.

Avoid spraying delicate materials that could be damaged. Keep your feet firmly planted and maintain a stable stance. Release the trigger when not actively spraying. Inspect the spray tip for wear or damage. Never bypass any safety devices. Understand the potential for kickback and control the wand accordingly.

Fuel Handling Safety

Always fuel the pressure washer outdoors in a well-ventilated area. Allow the engine to cool completely before refueling. Avoid spilling gasoline and immediately wipe up any spills with a clean cloth. Never smoke or use open flames near gasoline. Store gasoline in a properly labeled, approved container, away from heat and ignition sources.

Do not overfill the fuel tank, leaving space for expansion. Check fuel lines for leaks or damage before each use. Use the correct fuel type as specified in the manual. Be aware of static electricity buildup when fueling. Never operate the pressure washer with a fuel leak. Dispose of old fuel responsibly.

Assembly and Setup

Proper assembly involves unboxing, checking components, attaching hoses and nozzles, and connecting a water supply for effective operation of your Simpson unit.

Unboxing and Component Check

Carefully unpack your Simpson 3100 PSI pressure washer, ensuring all packaging materials are removed. Verify all listed components are present before proceeding. These typically include the pressure washer unit itself, a high-pressure hose, various nozzles (0°, 25°, 40°, soap), a trigger gun, and potentially quick-connect fittings.

Inspect each part for any shipping damage – cracks, dents, or missing pieces. If damage is found, do not attempt to operate the unit and immediately contact Simpson’s Customer Service Department at 1-877-362-4271 or visit www.simpsoncleaning.com. Retain all original packaging for potential returns or warranty claims. A thorough component check prevents issues during setup and ensures safe, efficient operation.

Attaching Hoses and Nozzles

Begin by securely connecting the high-pressure hose to both the pressure washer pump outlet and the trigger gun. Ensure a tight, hand-tightened connection to prevent leaks during operation. Next, select the appropriate nozzle for your cleaning task – 0° for concentrated cleaning, 25° for general use, 40° for wider coverage, and the soap nozzle for applying detergent.

Attach the chosen nozzle to the trigger gun, again ensuring a secure connection. The nozzles typically click into place. Always verify the nozzle is firmly attached before starting the engine. Incorrectly attached components can lead to reduced performance or potential injury. Refer to the manual for specific nozzle application guidelines.

Connecting the Water Supply

Before starting, connect a standard garden hose to the water inlet on the pressure washer. Ensure the hose is free from kinks and obstructions for consistent water flow. A water source with at least 20 PSI is recommended for optimal performance. Avoid drawing water from sources containing debris, as this can damage the pump.

Fully open the water supply valve to allow water to flow into the pressure washer. The unit is designed for cold water use only; do not connect it to a hot water source. Check all connections for leaks before starting the engine. Proper water supply is crucial for preventing pump damage and ensuring effective cleaning.

Operating Instructions

Follow these steps to safely and effectively operate your Simpson 3100 PSI pressure washer, adjusting throttle and pressure for optimal cleaning results.

Starting the Engine

Before starting, ensure the pressure washer is on a level surface and the water supply is connected. Locate the choke and throttle controls; understanding their operation is crucial for successful starts.

Cold Engine Starting Procedure: Turn the fuel valve to the ‘ON’ position. Set the choke to ‘FULL’ and the throttle to approximately half-way. Pull the starter cord firmly and repeatedly until the engine attempts to start. Once it sputters, gradually move the choke to the ‘RUN’ position. Continue pulling until the engine runs smoothly.

Warm Engine Starting Procedure: With a warm engine, the choke may not be necessary. Turn the fuel valve to ‘ON’ and set the throttle to half-way. Pull the starter cord; the engine should start with less effort. Adjust the throttle as needed for stable operation.

Choke and Throttle Operation

The choke controls the air-fuel mixture for starting a cold engine. When set to ‘FULL’, it restricts airflow, enriching the mixture for easier ignition. Gradually move it to ‘RUN’ as the engine warms.

The throttle regulates engine speed and power. Increasing the throttle increases engine RPMs and water pressure. Locate the throttle trigger on top of the unit, near the choke. Use it to adjust performance based on the cleaning task.

Proper choke and throttle adjustment is vital for smooth starting and efficient operation. Refer to the full manual for detailed guidance and safety precautions regarding these controls.

Starting Procedure – Cold Engine

Ensure the pressure washer is on a level surface with the water supply connected. Turn the fuel valve to the ‘ON’ position. Set the choke to ‘FULL’. Slowly pull the starter cord until resistance is felt, then pull briskly. Repeat if necessary, but avoid continuous pulling.

Once the engine starts, gradually move the choke to the ‘RUN’ position as it warms up. Adjust the throttle to control engine speed. Allow the engine to run for a few minutes to stabilize before engaging the spray gun.

Always follow safety guidelines and consult the complete manual for detailed instructions and troubleshooting tips.

Starting Procedure – Warm Engine

If the engine is warm, the starting procedure is simplified. Ensure the fuel valve is in the ‘ON’ position. The choke may not be necessary; attempt to start the engine without engaging it initially. Slowly pull the starter cord until resistance is felt, then pull with a firm, brisk motion.

If the engine doesn’t start, engage the choke partially and repeat the starting process. Adjust the throttle as needed to maintain a stable idle. Allow the engine to warm up briefly before using the pressure washer.

Refer to the full manual for comprehensive safety instructions and detailed troubleshooting guidance.

Adjusting Pressure Settings

The Simpson 3100 PSI pressure washer allows for adjustable pressure settings to suit various cleaning tasks. Locate the pressure adjustment knob, typically found near the trigger gun or pump. Turning the knob clockwise increases the pressure, while turning it counterclockwise decreases it.

Start with the lowest pressure setting and gradually increase it until the desired cleaning power is achieved. Always test the pressure on an inconspicuous area first to avoid damage. Be mindful of the surface you are cleaning and select an appropriate pressure level.

Refer to the nozzle guide for recommended pressure settings for different applications.

Using Different Nozzles

Your Simpson 3100 PSI pressure washer includes multiple nozzles for diverse cleaning needs. The 0-degree nozzle delivers a concentrated, powerful stream ideal for stubborn dirt and small areas, use with caution. A 25-degree nozzle offers a wider spray pattern for general cleaning tasks like decks and siding.

The 40-degree nozzle provides a gentler spray, suitable for delicate surfaces like painted wood or vehicles. Finally, the soap nozzle (often white) creates a low-pressure spray for applying detergents and soaps effectively. Always ensure the nozzle is securely attached before operation.

0-Degree Nozzle Applications

The 0-degree nozzle concentrates the Simpson 3100 PSI’s power into a pinpoint stream, making it exceptionally effective for blasting away deeply embedded grime. Ideal applications include removing stubborn stains from concrete, cleaning narrow cracks, and stripping paint from surfaces. However, extreme caution is crucial.

Due to its intensity, never use this nozzle on soft materials like wood, vinyl siding, or vehicles, as it can cause significant damage. Maintain a safe distance and test in an inconspicuous area first. Always wear safety glasses and appropriate protective gear when utilizing the 0-degree nozzle.

25-Degree Nozzle Applications

The 25-degree nozzle offers a versatile spray pattern, striking a balance between cleaning power and surface protection for your Simpson 3100 PSI pressure washer. It’s excellent for general cleaning tasks around the home, including washing decks, patios, siding, and outdoor furniture. This nozzle effectively removes dirt, mildew, and algae without causing excessive damage.

It’s a safe choice for most surfaces, but testing in an unseen area is still recommended. Maintain a consistent distance for even cleaning. The 25-degree nozzle is a great all-purpose option for routine maintenance and revitalizing exterior surfaces, providing effective results with minimal risk.

40-Degree Nozzle Applications

The 40-degree nozzle delivers a wider, lower-pressure spray pattern, making it ideal for delicate cleaning tasks with your Simpson 3100 PSI pressure washer. This nozzle is perfect for washing cars, boats, and other vehicles, as it minimizes the risk of paint damage. It’s also suitable for cleaning windows, screens, and more sensitive siding materials.

Because of its gentler spray, the 40-degree nozzle is excellent for rinsing away soap and detergents after cleaning. It provides a broad coverage area, reducing cleaning time. Always test on an inconspicuous spot first to ensure compatibility with the surface being cleaned, maximizing safety and effectiveness.

Soap Nozzle Applications

The soap nozzle, typically black in color, is specifically designed for applying detergents and soaps with your Simpson 3100 PSI pressure washer. This nozzle creates a low-pressure, high-volume spray that effectively mixes soap with water for optimal cleaning power. It’s ideal for washing cars, decks, patios, and siding.

Ensure you use detergents specifically formulated for pressure washers to avoid damage to the unit or the surface being cleaned. Adjust the detergent dial on the pressure washer to control the soap-to-water ratio. Always rinse thoroughly after applying soap to prevent residue buildup, ensuring a clean and professional finish.

Maintenance and Troubleshooting

Regular maintenance extends your Simpson 3100 PSI pressure washer’s life, while troubleshooting guides address common issues like starting problems or low pressure.

Routine Maintenance Schedule

Regular upkeep is crucial for optimal performance. After each use, inspect hoses and connections for damage, ensuring a secure fit. Clean the exterior with a damp cloth. Every 25 hours of operation, check the oil level and add if necessary; a consistent oil level protects the engine.

After 50 hours, clean or replace the air filter to maintain efficient combustion. Inspect the nozzles for clogs and clean them thoroughly. Annually, change the engine oil completely, following the oil change procedure outlined in this manual. Also, inspect fuel lines for cracks or leaks. Properly storing the unit during off-season will also prolong its lifespan, draining fuel and adding fuel stabilizer.

Oil Change Procedure

Before starting, ensure the engine is warm, but not hot. Locate the oil drain plug, typically on the lower part of the engine. Place a suitable oil drain pan beneath the plug. Carefully remove the plug, allowing the old oil to drain completely.

Once drained, replace the plug and tighten securely. Locate the oil fill cap and remove it. Slowly pour in the recommended amount of oil – typically around 20 ounces – using a funnel to avoid spills. Check the oil level with the dipstick, adding more if needed. Replace the oil fill cap and dispose of the used oil responsibly at a recycling center.

Air Filter Cleaning

Regular air filter maintenance is crucial for engine performance. First, locate the air filter housing, usually on the side of the engine. Open the housing and carefully remove the air filter. Inspect the filter for dirt and debris; a visibly dirty filter needs cleaning or replacement.

For foam filters, wash gently in warm, soapy water, rinse thoroughly, and allow to dry completely before re-oiling lightly with air filter oil. For paper filters, tap gently to remove loose dirt, or use compressed air – blowing from the inside out. Never wash a paper filter with water. Reinstall the clean filter and close the housing securely.

Nozzle Cleaning and Maintenance

Maintaining clean nozzles ensures optimal spray patterns and pressure. Over time, nozzles can become clogged with mineral deposits or debris. To clean, first disconnect the nozzle from the spray wand. Inspect the nozzle orifice for any obstructions.

Use a nozzle cleaning tool or a thin wire to carefully clear any blockages – avoid enlarging the orifice. For stubborn clogs, soak the nozzle in vinegar or a nozzle cleaner solution. Rinse thoroughly with water before reattaching. Regularly inspect nozzles for wear and tear; damaged nozzles should be replaced to maintain performance and safety.

Troubleshooting Common Issues

Engine Won’t Start: Check fuel levels, ensure the spark plug is clean and properly connected, and verify the choke is in the correct position. Low Pressure Output: Inspect the water supply connection, check for kinks in the hose, and clean the nozzles. A clogged nozzle significantly reduces pressure.

Leaking Water: Examine hose connections for tightness and damage. Inspect the pump and spray wand for cracks or leaks. If issues persist, contact Simpson’s customer service at 1-877-362-4271 or visit www.simpsoncleaning.com for assistance and potential parts replacement.

Engine Won’t Start

If the Simpson 3100 PSI engine fails to start, first verify sufficient fuel is present. Ensure the spark plug connector is securely attached and the spark plug itself is clean. Confirm the fuel valve is open, allowing fuel flow to the carburetor. Proper choke operation is crucial; use the choke for cold starts and gradually reduce it as the engine warms.

Check the throttle position; it should be set appropriately for starting; If problems continue, consult the full instruction manual for detailed diagrams and troubleshooting steps. Contact Simpson’s customer service at 1-877-362-4271 if needed.

Low Pressure Output

Experiencing low pressure? First, inspect the nozzle for clogs or obstructions and clean it thoroughly. Verify the water supply is fully open and provides adequate volume. Check the high-pressure hose for kinks, damage, or leaks, as these restrict water flow. Ensure the pump is primed correctly, following the instructions in the manual.

Confirm you’ve selected the appropriate nozzle for the task. A partially clogged fuel filter or a malfunctioning pressure regulator can also cause low pressure. If issues persist, consult the manual or contact Simpson’s customer service at 1-877-362-4271.

Leaking Water

Water leaks can originate from several areas. Inspect all hose connections – the water inlet, high-pressure hose to the pump, and nozzle connection – ensuring they are tight and properly secured. Examine the pump itself for any visible cracks or damage. Check the o-rings and seals around these connections; replacement may be necessary;

A leaking nozzle often indicates a worn or damaged seal. If the leak is from the engine area, it could signify a more serious issue requiring professional attention. Always disconnect the power source before inspecting for leaks. Contact Simpson’s customer service at 1-877-362-4271 for assistance.

Warranty Information

Simpson pressure washers are covered by a warranty; register your purchase at www.simpsoncleaning.com for parts replacement and service details.

Warranty Registration

Protect your investment! Registering your Simpson 3100 PSI pressure washer warranty is crucial for efficient claims processing and access to support. Visit www.simpsoncleaning.com to complete the online registration form. You’ll need your purchase date and the serial number, so keep your sales receipt handy.

Proper registration ensures you receive updates on product recalls, maintenance tips, and exclusive offers. Without registration, processing warranty claims may be delayed. Simpson Cleaning values its customers and strives to provide excellent service. Registering your product demonstrates your commitment to maintaining its performance and longevity. Don’t delay – register today for peace of mind!

Customer Service Contact Information

Need assistance with your Simpson 3100 PSI pressure washer? Our dedicated customer service team is here to help! For immediate support, please call us at 1-877-362-4271. Our representatives are available to answer your questions, troubleshoot issues, and guide you through the operation and maintenance of your unit.

Alternatively, you can visit our comprehensive online support portal at www.simpsoncleaning.com. Here, you’ll find FAQs, helpful videos, downloadable manuals, and a parts lookup tool. We are committed to providing exceptional customer care and ensuring your complete satisfaction with your Simpson pressure washer. Contact us – we’re happy to assist!

Parts Replacement

Maintaining your Simpson 3100 PSI pressure washer requires occasional parts replacement. For genuine Simpson replacement parts, visit www.simpsoncleaning.com. Their online parts lookup tool allows you to quickly identify the correct components for your specific model – MS60763-S or MS61217.

Ensure you have your pressure washer’s serial number handy for accurate identification. Replacing worn or damaged parts, such as nozzles, hoses, or filters, will restore your unit’s performance and extend its lifespan. Always disconnect the power source before attempting any repairs. Simpson Cleaning offers a wide selection of parts, ensuring you can keep your pressure washer running smoothly for years to come.

canon t3i manual

Canon provides a comprehensive 324-page PDF manual for the T3i‚ accessible online‚ detailing setup‚ operation‚ and advanced features for optimal photographic results.

This digital guide unlocks a new world of possibilities‚ designed for beginners and experienced users alike‚ offering detailed instructions.

What is the Canon Rebel T3i?

The Canon EOS Rebel T3i‚ also known as the EOS 600D‚ is a versatile Digital SLR camera renowned for its user-friendly design and impressive image quality. It serves as an excellent entry point into the world of DSLR photography‚ offering a balance between affordability and performance.

A detailed instruction manual‚ available as a PDF‚ is crucial for understanding its capabilities. This guide covers everything from initial setup to mastering advanced settings‚ ensuring users can fully utilize the camera’s 18MP CMOS sensor and Vari-Angle Touchscreen LCD. The manual empowers both beginners and experienced photographers to explore creative possibilities.

Key Features and Specifications

The Canon EOS Rebel T3i boasts an 18.0 Megapixel CMOS sensor‚ enabling high-resolution images and videos. Its DIGIC 4 Image Processor delivers excellent image quality‚ while the 3.0-inch Vari-Angle Touchscreen LCD facilitates easy navigation and live view shooting.

The comprehensive manual details features like Full HD video recording‚ a 9-point autofocus system‚ and ISO sensitivity up to 6400. It also covers compatibility with EF and EF-S lenses. The PDF manual provides specifications on shooting modes‚ image quality settings (RAW/JPEG)‚ and customizable camera functions‚ ensuring optimal performance.

Getting Started with Your T3i

The Canon T3i manual guides initial setup‚ battery insertion‚ and memory card installation‚ preparing you to explore its features and capture stunning images.

Unboxing and Initial Setup

Unboxing your Canon EOS Rebel T3i (600D) is the first step towards unlocking its photographic potential. The official Canon manual‚ available as a PDF download‚ provides detailed guidance through this process. Carefully unpack all components‚ ensuring you have the camera body‚ EF-S 18-55mm lens (often included in a kit)‚ battery‚ battery charger‚ neck strap‚ and essential documentation.

Before powering on‚ consult the manual for proper battery insertion and memory card installation. The guide illustrates the location of the battery compartment and card slot. Following these instructions correctly prevents potential damage. Familiarize yourself with the included software CD and instructions for installing necessary drivers and software on your computer for image transfer and editing.

Understanding the Camera Body and Controls

The Canon EOS Rebel T3i’s body features a variety of controls‚ thoroughly explained in the official manual (available as a PDF). Key elements include the mode dial‚ shutter button‚ control dial‚ and directional buttons. The manual details the function of each‚ guiding you through navigating the camera’s interface.

Pay close attention to the rear LCD screen and its menu system. The manual provides step-by-step instructions for customizing settings and accessing various shooting modes. Understanding the placement and function of these controls is crucial for efficient operation and unlocking the camera’s full creative potential. Refer to the diagrams within the manual for visual clarity.

Inserting the Battery and Memory Card

The Canon T3i manual provides clear instructions for inserting both the battery and memory card. Locate the battery compartment door on the camera’s bottom; the PDF manual includes a diagram. Insert the battery‚ ensuring correct polarity‚ until it clicks into place. Similarly‚ the memory card slot is typically found on the side of the camera.

The manual emphasizes gently inserting the card until it locks. Proper insertion is vital for reliable operation. Always power off the camera before inserting or removing either the battery or memory card to prevent data corruption. Consult the manual for compatible memory card types and capacities.

Basic Camera Operations

The Canon T3i manual details powering the camera on/off‚ navigating the menu‚ and taking photos using the shutter button and autofocus system.

Powering On/Off and Mode Dial Explained

The Canon EOS Rebel T3i’s manual thoroughly explains the camera’s power sequence‚ detailing the location of the power button and its function. It also provides a comprehensive overview of the mode dial‚ a crucial control for selecting shooting modes.

The dial features options like Auto for simple point-and-shoot photography‚ Program (P) for balanced control‚ and Aperture Priority (Av) and Shutter Priority (Tv) for more creative adjustments. Furthermore‚ the manual clarifies the function of Manual (M) mode‚ granting full creative control over settings. Understanding these modes‚ as outlined in the PDF guide‚ is essential for maximizing the T3i’s capabilities.

Navigating the Menu System

The Canon EOS Rebel T3i’s manual dedicates significant attention to navigating its menu system. It details how to access the menu using the MENU button‚ and explains the hierarchical structure of the various settings. The PDF guide illustrates how to use the directional buttons to scroll through options and make selections.

Users will learn to customize camera settings‚ adjust image quality‚ and configure various functions. The manual emphasizes the importance of understanding menu options for tailoring the camera to individual shooting preferences. It also provides guidance on locating specific settings quickly and efficiently‚ enhancing the overall user experience.

Taking Your First Photo: Shutter Button and Focus

The Canon T3i manual provides clear instructions on taking your first photograph. It details the two-step shutter button process: half-press for autofocus‚ and full-press to capture the image. The guide explains autofocus modes – One-Shot‚ AI Servo‚ and AI Focus – and how they impact image sharpness.

It emphasizes the importance of achieving proper focus before fully depressing the shutter. The manual illustrates how to select focus points using the directional buttons‚ ensuring critical areas of the image are sharp. Beginners will find this section crucial for understanding the fundamentals of capturing well-focused photographs with their new camera.

Understanding Shooting Modes

The Canon T3i manual details various shooting modes‚ from fully automatic for simplicity to manual mode for complete creative control over settings.

Auto Mode: For Simple Point-and-Shoot

Auto Mode on the Canon EOS Rebel T3i (600D) is designed for effortless photography‚ ideal for beginners or quick snapshots. As the manual explains‚ the camera automatically selects the optimal settings – aperture‚ shutter speed‚ ISO‚ and white balance – based on the scene.

This mode simplifies operation‚ allowing users to focus solely on composition and capturing the moment. It’s perfect for everyday situations where immediate results are desired without needing to understand complex camera settings. The manual emphasizes that while convenient‚ Auto Mode offers limited creative control compared to other shooting modes.

Essentially‚ it’s a true “point-and-shoot” experience‚ letting the camera handle the technical aspects.

Program Mode (P): Balancing Control and Automation

Program Mode (P)‚ as detailed in the Canon T3i manual‚ offers a balance between automatic operation and user control. The camera automatically sets both aperture and shutter speed‚ but allows you to adjust ISO‚ white balance‚ and Picture Style.

This mode is excellent for situations where you want the convenience of automatic settings but still desire some creative input. You can utilize exposure compensation to brighten or darken images without directly controlling aperture or shutter speed. The manual highlights Program Mode as a stepping stone towards more manual control.

It’s a versatile option for various shooting scenarios‚ providing flexibility without overwhelming complexity.

Aperture Priority (Av) Mode: Controlling Depth of Field

Aperture Priority (Av) Mode‚ explained in the Canon T3i manual‚ lets you select the aperture (f-stop) while the camera automatically determines the appropriate shutter speed for correct exposure. This is crucial for controlling depth of field – the area in focus.

A wider aperture (lower f-number like f/2.8) creates a shallow depth of field‚ ideal for portraits with blurred backgrounds. A narrower aperture (higher f-number like f/16) yields a greater depth of field‚ suitable for landscapes. The manual emphasizes understanding how aperture impacts image aesthetics.

It’s a powerful mode for creative control over your images.

Shutter Priority (Tv) Mode: Capturing Motion

The Canon T3i manual details Shutter Priority (Tv) Mode‚ allowing you to set the shutter speed while the camera adjusts the aperture for proper exposure. This mode is essential for controlling how motion is captured in your photographs.

Fast shutter speeds (e.g.‚ 1/1000s) freeze action‚ perfect for sports or wildlife. Slower shutter speeds (e.g.‚ 1/30s) blur motion‚ conveying a sense of movement‚ ideal for waterfalls or light trails. The manual guides users in selecting the appropriate shutter speed for desired effects.

Experimentation is key to mastering motion capture!

Manual Mode (M): Full Creative Control

The Canon T3i manual explains that Manual Mode (M) grants photographers complete control over both aperture and shutter speed‚ offering ultimate creative flexibility. This mode requires understanding the relationship between these settings and their impact on exposure.

In M mode‚ you independently adjust aperture for depth of field and shutter speed for motion blur or freezing action. The camera’s light meter assists in achieving proper exposure‚ but the final decisions rest with the photographer. The manual emphasizes practice to master this mode.

It’s the pathway to truly personalized images!

Focusing and Image Quality

The Canon T3i manual details autofocus modes (One-Shot‚ AI Servo‚ AI Focus) and focus point selection for sharp images‚ alongside RAW versus JPEG settings.

Autofocus Modes: One-Shot‚ AI Servo‚ and AI Focus

The Canon T3i manual thoroughly explains the three autofocus modes available. One-Shot is ideal for stationary subjects‚ locking focus when the shutter button is half-pressed. AI Servo continuously tracks moving subjects‚ maintaining focus as they change position – perfect for sports or wildlife.

AI Focus intelligently switches between One-Shot and AI Servo‚ attempting to predict subject movement. The manual guides users on selecting the appropriate mode based on the shooting scenario. Understanding these modes‚ as detailed in the PDF‚ is crucial for achieving consistently sharp and well-focused photographs‚ maximizing the camera’s capabilities.

Focus Points and Selection

The Canon T3i features nine autofocus points‚ detailed within the camera’s manual. Users can select a single focus point for precise control‚ or allow the camera to automatically choose one. The manual explains how to navigate the menu to change focus point selection methods.

Selecting the appropriate focus point is vital for ensuring sharpness on your intended subject. The PDF guide illustrates how to move the active focus point across the frame‚ enabling accurate focusing even with off-center compositions. Mastering focus point selection‚ as outlined in the manual‚ significantly improves image quality.

Image Quality Settings: RAW vs. JPEG

The Canon T3i manual thoroughly explains the difference between shooting in RAW and JPEG formats. JPEG files are compressed‚ ready to share‚ but offer limited editing flexibility. RAW files‚ conversely‚ contain all image data captured by the sensor‚ providing extensive post-processing control.

The manual details how to adjust the image quality setting within the camera’s menu. Choosing RAW allows for non-destructive editing‚ preserving original image information. While RAW files require processing‚ the PDF guide emphasizes the benefits for serious photographers seeking maximum image quality and editing latitude.

Advanced Features and Settings

The Canon T3i manual details customization options‚ Picture Styles‚ and white balance understanding‚ empowering users to fine-tune their photographic vision.

Customizing Camera Settings

Canon’s EOS Rebel T3i/600D manual extensively covers personalization options. Users can tailor the camera to their preferences‚ adjusting autofocus behavior‚ image quality‚ and display settings.

Explore menu options for customizing button functions‚ optimizing shooting experiences‚ and establishing personalized presets. The manual guides you through setting up custom functions‚ enabling efficient workflow.

Furthermore‚ the PDF manual details how to adjust the camera’s response to various shooting scenarios‚ ensuring optimal performance. Dive into the settings to unlock the T3i’s full potential and achieve your desired photographic style.

Using Picture Styles

Canon’s EOS Rebel T3i/600D offers Picture Styles‚ pre-set image processing parameters influencing color‚ contrast‚ and sharpness. The manual details how to select from Standard‚ Portrait‚ Landscape‚ Neutral‚ Faithful‚ and Monochrome styles.

Users can also create and save custom Picture Styles‚ fine-tuning settings to match their artistic vision. The PDF manual explains adjusting sharpness‚ contrast‚ color saturation‚ and color tone for personalized results.

Experimenting with Picture Styles allows photographers to achieve desired looks directly in-camera‚ reducing post-processing needs. Mastering these styles unlocks creative control and enhances image aesthetics.

Understanding White Balance

The Canon T3i manual explains White Balance (WB) as crucial for accurate color rendition‚ compensating for different lighting conditions. Auto White Balance (AWB) is convenient‚ but the manual details presets like Daylight‚ Cloudy‚ Tungsten‚ and Fluorescent for specific scenarios.

Custom WB allows precise color correction by referencing a white or gray card. The PDF manual guides users through setting a custom WB for optimal results. Incorrect WB leads to color casts; understanding its function is vital.

Experimenting with WB creatively can also produce artistic effects‚ as detailed in the comprehensive guide.

Troubleshooting Common Issues

The Canon T3i manual offers solutions for blurry photos‚ exposure problems‚ and memory card errors‚ ensuring smooth operation and optimal image quality.

Dealing with Blurry Photos

Blurry images with the Canon EOS Rebel T3i often stem from incorrect focus or slow shutter speeds. The official manual emphasizes checking your autofocus mode – ensuring it matches your subject’s movement (One-Shot for static‚ AI Servo for moving).

Insufficient light necessitates a faster shutter speed‚ but can introduce noise. Refer to the manual for guidance on ISO settings to balance brightness and image quality. Also‚ verify your lens is clean and properly attached. Finally‚ consider using a tripod for stability‚ especially in low-light conditions‚ as detailed within the comprehensive PDF guide.

Fixing Exposure Problems

Exposure issues – photos too dark or bright – are common. The Canon T3i manual highlights the importance of understanding the exposure triangle: aperture‚ shutter speed‚ and ISO. Utilize Program (P) mode for balanced control‚ or venture into Aperture Priority (Av) or Shutter Priority (Tv) for specific adjustments.

Check your metering mode (Evaluative‚ Partial‚ Spot) as explained in the manual‚ selecting the one best suited to your scene. Experiment with Picture Styles to influence contrast and sharpness. For persistent problems‚ consult the PDF guide’s section on exposure compensation for fine-tuning.

Memory Card Errors and Solutions

The Canon T3i manual addresses common memory card issues. “Card is not formatted” or “Card is full” errors require attention. Always format cards in the camera to ensure compatibility‚ as detailed in the PDF guide. Avoid removing cards during data transfer to prevent corruption.

If a card is unreadable‚ try a different card reader. The manual advises checking card capacity and speed class for optimal performance. For persistent errors‚ consider replacing the card. Back up your images regularly to avoid data loss‚ a crucial step outlined in the comprehensive instructions.

Resources and Further Learning

Download the official Canon T3i instruction manual in PDF format for detailed guidance‚ alongside numerous online tutorials and support resources.

Downloading the Canon T3i Manual (PDF)

Canon makes the complete EOS Rebel T3i / 600D instruction manual readily available as a downloadable PDF file. This comprehensive 324-page document covers every aspect of your camera‚ from initial setup and basic operations to advanced features and troubleshooting.

Accessing the manual digitally allows you to easily search for specific information‚ zoom in on diagrams‚ and even save a copy directly to your computer or mobile device for convenient on-the-go reference. Having the PDF manual ensures you always have detailed instructions at your fingertips‚ maximizing your learning and photographic experience with the T3i.

It’s a valuable resource for both beginners and experienced photographers.

Online Tutorials and Support

Beyond the official PDF manual‚ a wealth of online resources exists to support your Canon EOS Rebel T3i (600D) journey. Numerous tutorials‚ guides‚ and forums cater to all skill levels‚ offering visual demonstrations and practical advice.

Websites and video platforms host content covering everything from basic camera functions to advanced photography techniques specifically for the T3i. Canon’s support website provides FAQs‚ troubleshooting assistance‚ and software downloads. Engaging with online communities allows you to share experiences‚ ask questions‚ and learn from fellow T3i users‚ enhancing your overall understanding and enjoyment.

These resources complement the manual perfectly.

presto 16 qt pressure cooker manual

Presto 16 Qt Pressure Cooker Manual: A Comprehensive Guide

This manual details the Presto 16 Qt cooker‚ referencing resources like Walmart Canada for purchase and Evinox Rapid manuals for comparison. It covers operation‚ safety‚ and maintenance.

Welcome to the world of faster‚ more efficient cooking! This guide introduces the Presto 16-quart pressure cooker‚ a versatile kitchen appliance designed to simplify meal preparation. Like resources found referencing PCC-Manual-Evinox-Rapid-Manual‚ understanding your cooker’s features is paramount for safe and successful operation.

The Presto 16 Qt model is popular‚ readily available at retailers like Walmart Canada‚ offering a substantial capacity ideal for families or batch cooking. This manual will walk you through everything from initial setup and understanding basic pressure cooking principles to advanced techniques and troubleshooting. We’ll cover essential safety precautions‚ ensuring you can confidently utilize this appliance.

Whether you’re a seasoned pressure cooking enthusiast or a complete beginner‚ this comprehensive guide will equip you with the knowledge to unlock the full potential of your Presto 16 Qt pressure cooker‚ making delicious meals with ease.

Understanding Pressure Cooking Basics

Pressure cooking utilizes steam pressure to significantly reduce cooking times. Unlike conventional methods‚ a sealed environment elevates the boiling point of water‚ cooking food faster and preserving more nutrients. This principle‚ applicable to the Presto 16 Qt‚ is similar to techniques detailed in various cooker manuals‚ including those referencing Evinox Rapid models.

The key is understanding the relationship between pressure‚ temperature‚ and cooking time. Higher pressure equates to higher temperatures‚ accelerating the cooking process. Proper liquid levels are crucial – too little can cause scorching‚ while too much may hinder pressure build-up.

Safety is paramount; the Presto’s locking mechanism and pressure regulator are designed to maintain safe operating conditions. Familiarizing yourself with these features‚ as outlined in the full manual‚ is essential before your first use. Mastering these basics unlocks a world of quick and flavorful meals.

Key Components & Parts Identification

Essential parts include the lid‚ locking mechanism‚ pressure regulator‚ cooking pot‚ and rack. Understanding each component‚ like those in Evinox models‚ is vital.

Lid & Locking Mechanism

The Presto 16 Qt pressure cooker lid is engineered for a secure‚ airtight seal‚ crucial for building and maintaining internal pressure. Proper alignment is paramount; ensure the lid markings align with the cooker body handles before attempting to lock it. The locking mechanism features a robust design‚ preventing the lid from being opened while under pressure – a critical safety feature.

Inspect the lid gasket regularly for cracks or damage‚ as a compromised gasket will prevent proper sealing. The locking mechanism typically involves rotating the lid to a locked position‚ indicated by clear markings. Never force the lid; if resistance is encountered‚ re-align and try again. Understanding this mechanism‚ similar in principle to those found in Evinox Rapid models‚ is essential for safe operation. Always verify a secure lock before initiating pressure cooking.

Pressure Regulator & Safety Features

The Presto 16 Qt pressure cooker incorporates multiple safety features‚ centered around the pressure regulator. This regulator maintains a consistent pressure level during cooking‚ typically offering settings for different food types. Crucially‚ the cooker includes safety valves designed to release excess pressure if the regulator malfunctions‚ preventing dangerous pressure build-up.

Regularly inspect the pressure regulator for clogs or damage‚ ensuring it moves freely. The safety valves – often a spring-loaded pin and a weighted valve – are vital backups. Understanding their function is paramount for safe operation. Never attempt to tamper with or block these safety mechanisms. Similar to other pressure cookers‚ like those from Evinox‚ the Presto prioritizes user safety through redundant protection systems.

Cooking Pot & Rack

The Presto 16 Qt pressure cooker features a durable‚ typically aluminum‚ cooking pot designed to withstand high pressure and temperature. This pot is the core of the cooking process‚ distributing heat evenly for efficient cooking. Included is a sturdy rack‚ essential for elevating food above the liquid level – particularly important when steaming or cooking delicate items like fish.

The rack prevents sticking and ensures even cooking throughout. It’s also crucial for recipes requiring minimal liquid. Ensure the pot is free from dents or warping before each use‚ as damage can compromise safety. Cleaning the pot and rack thoroughly after each use prevents food buildup and maintains optimal performance. Consider comparing materials with other brands‚ like Evinox‚ for longevity insights.

Operating Instructions: Step-by-Step

Follow these instructions carefully for safe and effective use. Proper food preparation‚ liquid addition‚ and lid securing are vital for optimal pressure cooking results.

Preparing Food for Pressure Cooking

Before you begin‚ proper food preparation is crucial for successful pressure cooking. Cut meats into uniform‚ bite-sized pieces to ensure even cooking. Larger cuts may require extended processing times. For vegetables‚ consider their density; root vegetables like carrots and potatoes will take longer than softer options like zucchini or spinach.

Remove excess fat from meats‚ as this can contribute to sputtering and potential clogging of the pressure release valve. Browning meats before pressure cooking adds depth of flavor – this can be done directly in the Presto cooker using the sauté function (if equipped)‚ or separately in a pan.

For beans and legumes‚ soaking is often recommended‚ though not always essential depending on the type. Check specific recipes for guidance. Remember that pressure cooking significantly reduces cooking times‚ so avoid overfilling the pot‚ and always adhere to minimum liquid requirements.

Adding Liquids & Minimum/Maximum Fill Levels

Adequate liquid is essential for generating steam and achieving proper pressure. For the Presto 16 Qt‚ always adhere to the minimum liquid requirement – typically at least 1 cup (237ml) – to prevent scorching and ensure safe operation. Water‚ broth‚ or even tomato juice can be used‚ adjusting flavor profiles accordingly.

Crucially‚ never exceed the maximum fill line. This is generally marked inside the cooking pot and should not be surpassed‚ even with foods that shrink during cooking. Overfilling can obstruct the pressure regulator and create a hazardous situation. A good rule of thumb is to fill no more than two-thirds full for most foods.

For foods that expand‚ like beans or grains‚ fill only halfway. Always check your recipe for specific liquid and fill level recommendations tailored to the ingredients.

Securing the Lid & Setting the Pressure

Proper lid alignment is paramount for safe pressure cooking. Ensure the lid is correctly positioned‚ with the arrow markings aligned‚ before attempting to lock it. Rotate the lid until it locks securely into place; a clicking sound confirms proper engagement.

The Presto 16 Qt typically features a weighted pressure regulator. This jiggles or rocks gently when the desired pressure is reached. Select the appropriate pressure setting based on your recipe – generally‚ higher pressure is used for faster cooking times‚ but lower pressure is better for delicate foods.

Never force the lid. If it doesn’t align easily‚ re-check the positioning. Once locked and pressurized‚ avoid disturbing the regulator. Monitor the pressure throughout the cooking process.

Cooking Times & Food Charts

Precise cooking times vary by food type. Charts detail optimal durations for beef‚ poultry‚ vegetables‚ and beans‚ ensuring perfectly cooked meals every time.

Beef‚ Pork & Lamb Cooking Times

Achieving tender‚ flavorful results with your Presto 16 Qt pressure cooker for beef‚ pork‚ and lamb requires understanding appropriate cooking times. For tougher cuts of beef like chuck roast (2-3 lbs)‚ a pressure cooking time of 60-75 minutes is recommended‚ followed by a natural pressure release.

Pork shoulder (2-3 lbs) benefits from 45-60 minutes under pressure‚ also with natural release‚ yielding incredibly succulent pulled pork. Lamb shanks (1-1.5 lbs) require approximately 30-40 minutes‚ ensuring fall-off-the-bone tenderness.

These times are guidelines; adjust based on the specific cut‚ thickness‚ and desired level of doneness. Always ensure meat reaches a safe internal temperature. Remember that natural pressure release allows for more tender results‚ while quick release is suitable for smaller cuts or when tenderness isn’t paramount. Consult reliable food safety resources for temperature guidelines.

Poultry & Fish Cooking Times

Pressure cooking dramatically reduces poultry and fish cooking times‚ preserving moisture and flavor in your Presto 16 Qt. Whole chickens (3-4 lbs) require approximately 25-30 minutes under pressure‚ followed by a quick release for optimal texture. Chicken pieces‚ like thighs or breasts (1-2 lbs)‚ cook in just 10-15 minutes with a similar release method.

For fish‚ timing is even shorter. Salmon or cod fillets (1-1.5 lbs) need only 3-5 minutes of pressure cooking‚ followed by a quick release to prevent overcooking. Larger fish steaks may require 6-8 minutes.

Always ensure poultry reaches an internal temperature of 165°F (74°C) and fish reaches 145°F (63°C) for safety. Adjust cooking times slightly based on thickness and desired doneness.

Vegetable & Bean Cooking Times

The Presto 16 Qt excels at quickly cooking vegetables and beans to perfection‚ retaining vital nutrients. Dried beans‚ a staple for many‚ benefit greatly; kidney beans require around 20-25 minutes‚ while chickpeas need 15-20 minutes‚ both with natural pressure release for best results.

Root vegetables like potatoes and carrots take approximately 8-12 minutes under pressure‚ offering a tender yet firm texture. Broccoli‚ spinach‚ and other leafy greens cook in just 3-5 minutes – a quick release is crucial to prevent mushiness.

Adjust times based on quantity and desired tenderness. Remember to add sufficient liquid (at least 1 cup) for proper steam generation and even cooking.

Safety Precautions & Troubleshooting

Prioritize safety! Address steam release‚ lid sealing‚ and potential accidents. Proper use prevents burns and ensures optimal performance of your Presto cooker.

Preventing Accidents & Burns

Always inspect the pressure cooker before each use‚ ensuring the lid seals correctly and the pressure regulator functions without obstruction. Never force the lid open while pressure remains inside; allow a natural pressure release or utilize the quick-release method cautiously‚ directing steam away from your face and body.

Avoid overfilling the cooker‚ as this can cause food to block the steam vent‚ leading to dangerous pressure buildup. Adhere strictly to the minimum and maximum fill levels specified in the operating instructions. Regularly check the gasket for cracks or damage‚ replacing it as needed to maintain a secure seal.

Be mindful of hot surfaces‚ using oven mitts or pot holders when handling the cooker or lid during and immediately after operation. Keep children and pets away from the pressure cooker during use to prevent accidental contact with hot steam or the cooker itself. Understanding these precautions is vital for safe operation.

Dealing with Excessive Steam Release

If excessive steam escapes from the pressure regulator during cooking‚ immediately reduce the heat to the lowest setting. This often indicates that the cooker is venting to maintain the set pressure‚ which is normal‚ but prolonged excessive venting suggests a potential issue.

Ensure the pressure regulator is clean and unobstructed‚ free from food particles or debris. A clogged regulator can cause erratic pressure fluctuations and excessive steam release. Never attempt to disassemble or repair the regulator yourself; contact Presto customer support for assistance.

If the excessive steam persists‚ carefully allow the cooker to depressurize naturally before opening the lid. Do not force the lid open. Inspect the gasket and lid for proper sealing. Consistent issues warrant discontinuing use and seeking professional advice or a replacement unit‚ prioritizing safety.

Addressing Lid Sealing Issues

A proper seal is crucial for safe and effective pressure cooking. If the lid doesn’t seal‚ pressure will not build‚ and cooking will be significantly prolonged or impossible. First‚ inspect the sealing gasket for cracks‚ tears‚ or deformation. A damaged gasket must be replaced.

Ensure the gasket is correctly positioned within the lid’s rim. Clean both the gasket and the rim thoroughly to remove any food particles that might impede a tight seal. Verify that the lid is aligned correctly with the cooker body and that the locking mechanism engages fully.

If problems persist‚ try a different outlet port for the regulator. Replacement gaskets are readily available online. Consistent sealing failures indicate a potential issue with the lid itself‚ requiring professional inspection or replacement.

Cleaning & Maintenance

Regular cleaning extends the cooker’s life. Proper procedures‚ storage guidelines‚ and timely replacement of parts like gaskets ensure optimal performance and safety.

Proper Cleaning Procedures

After each use‚ allow the Presto 16 Qt pressure cooker to cool completely before disassembling. Wash the cooking pot and rack with warm‚ soapy water; avoid abrasive cleaners that could damage the surface. The lid requires careful attention – remove the gasket and clean the sealing ring with soap and water‚ ensuring no food particles remain.

Inspect the steam vent and pressure regulator for blockages‚ clearing them with a small brush or toothpick. The exterior of the cooker can be wiped down with a damp cloth. Avoid immersing the lid in water‚ as this can damage the locking mechanism. Thoroughly dry all components before reassembling. Regular cleaning prevents buildup and ensures safe‚ efficient operation. Remember to check for any lingering odors and address them promptly.

Storage Guidelines

When storing your Presto 16 Qt pressure cooker‚ ensure all components are completely dry to prevent mildew or corrosion. It’s best to store the cooker in a cool‚ dry place‚ away from direct sunlight and extreme temperatures. Avoid stacking heavy items on top of the cooker‚ which could damage the lid or pot.

Consider storing the lid slightly ajar to allow for air circulation and prevent odors from building up. The gasket can be stored separately in a plastic bag to maintain its flexibility. If you have limited storage space‚ the cooking pot can be nested inside the cooker body. Regularly inspect the stored cooker for any signs of damage or deterioration before each use‚ ensuring continued safe operation.

Replacing Parts (Gaskets‚ Regulator)

Maintaining your Presto 16 Qt pressure cooker often involves replacing wear-and-tear parts like the gasket and pressure regulator. Gaskets should be replaced annually‚ or more frequently if they become cracked‚ hardened‚ or lose their seal. A worn gasket compromises pressure and safety. The pressure regulator‚ responsible for maintaining consistent pressure‚ should be replaced if it fails to regulate properly or shows signs of damage.

Genuine Presto replacement parts are recommended to ensure compatibility and safety. These can often be found online or at retailers like Walmart Canada. Always follow the manufacturer’s instructions when installing new parts; Incorrect installation can lead to malfunction or hazardous conditions. Regularly inspect these components and replace them proactively for optimal performance.

Advanced Techniques & Recipes

Explore beyond basics! This section unlocks pressure cooking soups‚ stews‚ yogurt‚ and even canning – with crucial safety notes for optimal results.

Pressure Cooking Soups & Stews

Transforming hearty soups and stews is remarkably efficient with your Presto 16 Qt pressure cooker. The sealed environment dramatically reduces cooking times‚ intensifying flavors as ingredients meld together beautifully. Begin by sautéing aromatics – onions‚ garlic‚ and carrots – directly in the pot using the browning function‚ if available‚ before adding your protein and liquids.

For optimal results‚ ensure sufficient liquid is present; a minimum fill line is crucial for proper pressure build-up. Browned meats contribute a richer depth of flavor. Consider layering ingredients strategically – denser vegetables like potatoes and root vegetables closer to the heat source.

Pressure cooking breaks down tough cuts of meat‚ creating incredibly tender results in a fraction of the time compared to traditional methods. Remember to adjust cooking times based on the specific recipe and ingredients. Always allow for natural pressure release for soups and stews to prevent splattering and ensure maximum flavor development. This technique yields incredibly flavorful and tender results!

Making Yogurt in a Pressure Cooker

Your Presto 16 Qt pressure cooker isn’t just for savory dishes; it excels at crafting creamy‚ homemade yogurt! The precise temperature control is ideal for maintaining the consistent warmth needed for successful fermentation. Begin by heating milk – whole milk yields the richest results – using the ‘keep warm’ function or a short pressure cycle‚ followed by a cooling period to around 110-115°F (43-46°C).

Introduce a yogurt starter‚ containing live and active cultures‚ and gently stir to combine. Seal the cooker‚ but do not pressurize. Instead‚ utilize the ‘keep warm’ setting or a wrapped heating pad to maintain the optimal temperature for 6-12 hours‚ depending on desired tartness.

After fermentation‚ refrigerate the yogurt to halt the process and thicken the consistency. Enjoy a healthy‚ probiotic-rich treat made conveniently in your Presto! Experiment with different milk types and starter cultures for varied flavors.

Using the Pressure Cooker for Canning (with caution)

While the Presto 16 Qt can be used for canning‚ extreme caution is paramount. This process demands strict adherence to tested recipes and procedures to ensure food safety and prevent botulism. Never deviate from recommended processing times or jar sizes specified in reputable canning guides – like those from the USDA.

Proper venting and pressure regulation are critical. Always follow the manual’s canning instructions precisely‚ ensuring a complete seal on each jar. Inspect jars thoroughly after processing for any signs of defects.

Important Disclaimer: Canning involves inherent risks. Improper technique can lead to serious illness or even death. Consult official canning resources and prioritize safety above all else. This cooker is not specifically designed as a dedicated canning appliance.

Where to Buy & Warranty Information

Find the Presto 16 Qt at retailers like Walmart Canada. Understand your Presto warranty details for coverage‚ and locate replacement parts online easily.

Presto 16 Qt Pressure Cooker at Walmart Canada

Walmart Canada frequently stocks the Presto 16 Qt Pressure Cooker‚ offering a convenient purchasing option for Canadian consumers. Availability can fluctuate‚ so checking the Walmart Canada website (walmart.ca) is recommended for current stock levels and pricing.

Online ordering allows for home delivery or in-store pickup‚ providing flexibility. Be sure to compare prices and consider any ongoing promotions or sales events. Walmart often features kitchen appliance deals‚ potentially including the Presto 16 Qt.

Customer reviews on the Walmart Canada website can offer valuable insights into other users’ experiences with the product. Pay attention to comments regarding ease of use‚ durability‚ and performance. Checking for bundled offers‚ such as accessories or recipe books‚ can also enhance your purchase. Always verify the product specifications to ensure it matches your needs before finalizing your order.

Understanding the Presto Warranty

The Presto warranty provides coverage against defects in materials and workmanship for a specified period from the date of original purchase. Typically‚ Presto offers a limited warranty‚ often one year‚ covering parts and labor for repairs or replacement.

The warranty does not cover damage resulting from misuse‚ accidents‚ improper cleaning‚ or unauthorized modifications. It’s crucial to retain your proof of purchase (receipt) to validate any warranty claims.

To initiate a warranty claim‚ contact Presto directly through their customer service channels‚ usually found on their official website. They will guide you through the process‚ potentially requiring you to ship the cooker for inspection. Review the complete warranty details outlined in the product manual for specific terms and conditions‚ exclusions‚ and limitations. Proper registration of your product may also be required to activate the full warranty benefits.

Finding Replacement Parts Online

Locating replacement parts for your Presto 16 Qt pressure cooker is readily achievable through various online retailers. Websites like Amazon‚ eBay‚ and specialized appliance parts stores frequently stock components such as gaskets‚ pressure regulators‚ and even entire replacement lids.

When searching‚ it’s vital to specify the model number (often found on the cooker’s base) to ensure compatibility. Directly visiting the Presto website can also lead you to authorized retailers or their own parts store.

Compare prices and shipping costs across different vendors. Always verify the seller’s reputation and return policy before making a purchase. Searching for “Presto 16 Qt parts” will yield numerous results‚ but double-check the part number against your manual to guarantee a proper fit and function.

retevis walkie talkie manual

Retevis Walkie Talkie Manual: A Comprehensive Guide

This manual details Retevis two-way radios, covering models like RT388, RB626, RT628, and B63S. It explains DMR, VOX, scanning, and safety features for optimal use.

Retevis walkie talkies offer reliable communication solutions for diverse needs, from recreational activities to professional applications. These devices cater to users seeking dependable connectivity, boasting features like long-range capabilities – exemplified by the NR30D DMR model with its high power and extended antenna.

Retevis radios prioritize user-friendliness, incorporating clear LCD screens for easy monitoring of battery life, channel selection, and operational status. Models like the B63S PMR446 are designed for portability, being ultra-thin and lightweight. Whether it’s emergency work utilizing a MA1 relay for extended range, or simple communication, Retevis provides versatile options.

Understanding Retevis Models: A Brief Overview

Retevis offers a diverse range of walkie talkies, each tailored to specific user requirements. The RT388 is a popular choice for children, operating on AAA batteries with 22 channels. For UHF communication, the RB626 provides a rechargeable solution with a 2000mAh battery. The RT628 boasts detailed functionality, while the B63S prioritizes a compact, lightweight design.

Advanced users may explore the RT668, a portable rechargeable radio, or the MA1 relay for extended range. Understanding these distinctions is crucial for selecting the optimal Retevis model for your intended purpose, ensuring effective and reliable communication.

Key Features Common to Retevis Devices

Retevis walkie talkies consistently integrate user-friendly features across many models. A prominent LCD screen displays vital information like battery status, channel selection, and operational mode, enhancing usability. Many devices offer noise reduction technology, improving audio clarity in challenging environments.

Rechargeable options, like the RB626 and RT668, provide extended operational time. Furthermore, features like scanning, manual dialing, and emergency alerts are frequently included, bolstering versatility. These shared characteristics contribute to a consistent and intuitive user experience across the Retevis product line.

Basic Operation & Setup

Initial setup involves powering the device on, selecting a channel, and adjusting volume. Familiarize yourself with button functions for seamless communication.

Powering On/Off and Initial Setup

To power on your Retevis walkie talkie, typically you’ll need to press and hold the power button, often located on the top or side of the device, until the screen illuminates. The initial setup may involve selecting a language, if prompted, and configuring basic settings like squelch level.

Ensure the battery is adequately charged for optimal performance. Some models require inserting batteries before powering on. After powering on, the device will usually scan for available channels. Refer to your specific model’s guide for detailed instructions on initial channel selection and any required programming. Properly setting up the device ensures clear communication from the start.

Navigating the Menu System

Retevis walkie talkies utilize a menu system accessed via dedicated menu buttons, often combined with the directional pad or rotary knob. Pressing the menu button reveals options for channel selection, frequency settings, squelch adjustment, and advanced features like VOX or DMR configuration.

Use the directional buttons to highlight desired menu items and the select/enter button to confirm your choice. Backtracking is usually achieved with a dedicated ‘back’ or ‘exit’ button. Familiarize yourself with the menu structure for efficient operation. The LCD screen displays menu options, making navigation straightforward and intuitive for users.

Setting Channel and Frequency

To set a channel, access the menu system and navigate to the ‘Channel Select’ option. Use the directional buttons to scroll through available channels, typically numbered. Confirm your selection with the ‘Enter’ or ‘Select’ button. For frequency setting, locate the ‘Frequency Mode’ within the menu.

Enter the desired frequency using the keypad. Ensure you are operating within legally permitted frequency bands for your region. Some models offer pre-programmed channels for convenience. Always verify channel and frequency settings before transmitting to avoid interference or legal issues.

Advanced Features & Functions

Explore DMR capabilities, VOX operation, and channel scanning. Utilize the ‘Back to Before Call Screen’ and manual dialing for enhanced communication experiences.

DMR (Digital Mobile Radio) Functionality (For Supported Models)

Digital Mobile Radio (DMR) offers improved voice quality and spectrum efficiency. Supported Retevis models leverage DMR for clear, reliable communication. This technology utilizes time-division multiple access (TDMA), effectively doubling channel capacity compared to analog systems. DMR enables features like individual and group calls, text messaging, and GPS location tracking (depending on the model).

To utilize DMR, ensure compatibility and proper programming. Configure talk groups and individual IDs through compatible programming software. Understanding DMR tiers (Tier I, Tier II, Tier III) is crucial for interoperability. Tier II is commonly supported by Retevis devices, offering basic digital voice and data services. Explore advanced DMR functionalities for enhanced operational capabilities.

VOX (Voice Operated Exchange) Operation

Voice Operated Exchange (VOX) allows hands-free communication. When enabled, the radio transmits when it detects sound, eliminating the need to press the PTT button. Adjust the VOX sensitivity level to match your environment and voice volume – lower sensitivity for quiet areas, higher for noisy ones.

Proper VOX setup minimizes unwanted transmissions. Background noise can trigger accidental transmissions, so find a quiet setting for initial configuration. Some models offer multiple VOX levels. Experiment to find the optimal setting. Consider using a compatible headset with a microphone for improved clarity and reduced background noise interference during VOX operation.

Scanning Channels for Activity

The scan function automatically searches all programmed channels for signals. When activity is detected, the radio pauses on that channel, allowing you to listen. Adjust the scan speed to control how quickly the radio cycles through channels. A faster scan speed detects activity quicker, but may miss short transmissions.

Customize scan lists for focused monitoring. Some models allow you to create scan lists, including only the channels you frequently use. This improves scan efficiency and reduces unnecessary interruptions. Monitor the display for channel numbers during scanning. Press PTT or the scan button to stop scanning and listen on the current channel.

Using the Back to Before Call Screen Feature

The “Back to Before” call screen swiftly returns you to the channel you were using prior to receiving a call. This feature streamlines communication, eliminating the need to manually re-select your preferred channel after an interruption. Access this function via a dedicated shortcut or menu option, depending on your Retevis model.

Ensure the feature is enabled in the menu settings. Some radios require activation for this functionality to work correctly. The display will briefly show the previous channel number upon returning, confirming successful operation. This is particularly useful in busy environments where quick channel switching is essential for efficient communication.

Manual Dialing and Contact Management

Retevis walkie talkies offer manual dialing for direct communication with specific individuals. Access the manual dial function through the menu, allowing you to input the desired contact’s ID or frequency directly. This bypasses the need to scroll through extensive contact lists, offering a faster connection method.

Contact management features vary by model, but generally include adding, editing, and deleting contacts. Some devices support importing/exporting contact lists for convenient sharing. Regularly updating your contact database ensures accurate and efficient communication. Explore your radio’s menu to fully utilize these contact management capabilities.

Troubleshooting Common Issues

This section addresses frequent problems like no power, poor reception, audio distortions, and battery concerns. Solutions and diagnostic steps are provided for each issue.

No Power/Device Won’t Turn On

If your Retevis walkie talkie fails to power on, begin with basic checks. Ensure the battery is correctly installed, observing proper polarity. Verify the battery has sufficient charge; attempt charging using a compatible charger for several hours. A completely discharged battery may take time to respond.

Inspect the battery contacts for any corrosion or debris, cleaning them gently if necessary. If using rechargeable batteries, confirm they are not damaged or nearing the end of their lifespan. Try a different, known-good battery to isolate the issue.

Also, check the power button for any physical damage or obstruction. If the problem persists, consult the specific model’s manual for reset procedures or contact Retevis support.

Poor Reception and Signal Strength

Experiencing weak signal strength with your Retevis walkie talkie? First, ensure you’re within the radio’s specified range and that there are no significant obstructions like buildings or dense foliage. Antenna plays a crucial role; verify it’s securely attached and undamaged. A longer antenna generally improves reception.

Try adjusting your position or moving to a higher location. Interference from other electronic devices can also impact signal quality; move away from potential sources. Confirm you’re on the correct channel and frequency for the intended communication.

Consider the environment; metal structures can reflect or absorb radio waves. If issues persist, check antenna VSWR (Voltage Standing Wave Ratio) if possible.

Audio Problems (Static, Low Volume)

Encountering static or low volume on your Retevis walkie talkie? Begin by verifying the volume control is appropriately adjusted. Check the speaker and microphone connections for any damage or obstructions. Ensure the squelch level isn’t set too high, as this can filter out weak signals and reduce audio clarity.

Static can indicate interference; try changing channels or relocating to a different area. Confirm the correct audio settings are selected within the menu system. A malfunctioning earpiece or headset can also cause audio issues; test with a different accessory.

If problems persist, a reset to factory defaults might resolve software-related glitches.

Battery Life and Charging Issues

Experiencing short battery life or charging problems with your Retevis walkie talkie? First, ensure you’re using the correct charger specified for your model. Avoid overcharging, as this can degrade battery performance. Check the battery contacts for corrosion or damage, cleaning them gently if necessary.

Low battery life could indicate an aging battery; consider replacement. Verify the battery is fully seated within the device. If the radio doesn’t charge, test the charger with another compatible device.

Extreme temperatures can affect battery performance; avoid prolonged exposure to heat or cold.

Specific Model Guides

Explore dedicated guides for Retevis RT388, RB626, RT628, B63S, MA1, and RT668. These sections offer tailored instructions for each walkie-talkie’s unique features.

Retevis RT388 Kids Walkie Talkie ⎯ Manual Highlights

The Retevis RT388 is designed for young users, prioritizing simplicity and ease of use. Each radio operates on 4 AAA batteries, ensuring portability and readily available power sources. It features 22 channels, allowing for varied communication options and minimizing interference.

Key features include a built-in flashlight for added safety and fun, and a compact, durable design suitable for children’s hands. The manual emphasizes simple button operations – push-to-talk, volume control, and channel selection. Parental supervision is recommended for initial setup and operation. The RT388 promotes safe and engaging communication for kids.

Retevis RB626 UHF Radio ⎯ Key Operations

The Retevis RB626 is a rechargeable UHF radio ideal for diverse applications, boasting a robust 2000mAh battery for extended use. Key operations include powering the device on/off via the power knob, and navigating channels using the up/down buttons.

The radio features a clear LCD screen displaying battery status, channel number, and operational mode. Users can adjust volume levels with dedicated controls. The RB626 supports manual dialing for direct contact, and offers scanning functionality to monitor channel activity. Its compact and lightweight design enhances portability, making it suitable for various environments and tasks;

Retevis RT628 ー Detailed Functionality

The Retevis RT628 walkie-talkie offers extensive functionality, including DMR (Digital Mobile Radio) capabilities for enhanced communication. Its LCD screen provides clear visibility of battery life, channel information, and operating status. Users can easily switch between analog and digital modes.

Key features include VOX operation for hands-free communication, and channel scanning to monitor for activity. The RT628 supports manual dialing and contact management, allowing for direct calls. It also features a “back to before call screen” function for quick access to previous contacts. The device’s robust design and versatile features make it suitable for professional and recreational use.

Retevis B63S PMR446 ⎯ User Guide

The Retevis B63S PMR446 is an ultra-thin and lightweight rechargeable walkie-talkie, designed for convenient portability. Measuring just 15mm thick and weighing 103g, it’s easily carried during various activities. This PMR446 radio operates license-free within Europe, making it ideal for short-range communication.

The device features an LCD screen for easy monitoring of battery status and channel selection. It supports basic functions like channel scanning and volume adjustment. Its robust battery provides extended talk time. The B63S is perfect for family outings, security personnel, or simple communication needs where a compact and user-friendly device is required.

Retevis MA1 Relay Operation

The Retevis MA1 functions as a cross-band repeater, significantly extending the range of handheld radios. It’s designed for emergency work or situations requiring long-distance communication. The MA1 allows transmissions to cover a much wider area than standard portable devices alone.

Operation involves connecting two radios to the MA1; one transmits on a frequency, and the MA1 re-transmits on another. This ‘cross-band’ functionality overcomes range limitations. The device displays warnings on the screen, alternating with the ID of the transmitting walkie-talkie. A red LED indicates emergency calls are in progress, displaying the emergency symbol on the screen.

Retevis RT668 ー Portable Radio Features

The Retevis RT668 is a rechargeable, portable two-way radio designed for versatile communication. It boasts a robust build and user-friendly interface, making it suitable for various applications. The RT668 features an LCD screen that clearly displays battery status, channel information, and operational modes, simplifying monitoring.

Its noise-reduction technology enhances audio clarity, even in noisy environments. The radio’s easy-to-read screen allows for quick assessment of its operating condition. The RT668 offers extended battery life, ensuring reliable performance during prolonged use. It’s a dependable choice for both recreational and professional users needing portable communication.

Safety and Regulatory Information

Adhere to RF exposure guidelines and warranty terms. Contact Retevis support for assistance, ensuring safe operation and compliance with regulatory standards for your device.

RF Exposure and Safety Guidelines

To ensure safe usage of your Retevis walkie talkie, adhere to these RF exposure guidelines. Maintain a recommended distance of at least 2.5 centimeters (one inch) between the radio and your body when transmitting. This minimizes potential RF energy absorption.

Operate within the specified frequency bands and power levels outlined in the device’s specifications. Avoid prolonged transmission times, as extended use can contribute to RF exposure. Be mindful of your surroundings and avoid operating near flammable materials or explosive environments.

Individuals with medical implants should consult their physician regarding potential interference. Regularly inspect the antenna for damage and ensure it is properly connected. Following these guidelines promotes responsible and safe operation of your Retevis radio.

Warranty Information and Support

Retevis offers a standard warranty on its walkie talkie devices, typically covering manufacturing defects for a specified period. Please retain your proof of purchase for warranty claims. The warranty does not cover damage resulting from misuse, accidents, or unauthorized modifications.

For technical support, troubleshooting assistance, or warranty inquiries, visit the official Retevis website at www.retevis.com. You can also contact your direct reseller for initial support. Shenzhen Retevis Technology Co., Ltd. provides comprehensive documentation, including manuals and FAQs, online.

Ensure you have your model number and serial number readily available when contacting support for efficient assistance. Retevis is committed to providing excellent customer service and resolving any issues you may encounter.

Contacting Retevis Support

For direct assistance with your Retevis walkie talkie, several support channels are available. The primary method is through their official website, www.retevis.com, where you’ll find FAQs, downloadable manuals, and a contact form. You can also reach them via email for detailed inquiries or technical issues.

Shenzhen Retevis Technology Co., Ltd. encourages users to first consult their reseller for immediate support. However, for warranty claims or complex problems, contacting Retevis directly is recommended. Be prepared to provide your device’s model and serial number for faster service.

Retevis aims to respond to all inquiries promptly, offering solutions and guidance to ensure a positive user experience.

one touch ultra mini manual

OneTouch UltraMini Manual: A Comprehensive Guide

This guide provides detailed instructions for using the OneTouch UltraMini blood glucose monitoring system, ensuring accurate testing and effective diabetes management.

Understand features like date/time settings, control solution tests, and data management for optimal device utilization and reliable results.

The OneTouch UltraMini is a compact and user-friendly blood glucose monitoring system designed to help individuals effectively manage their diabetes. This meter provides accurate and reliable blood glucose readings, empowering you to make informed decisions about your health.

Designed for convenience, the UltraMini allows testing directly within its case. It’s crucial to read and fully understand all instructions before operation, adhering to all warnings for safe and effective use.

This system supports optional note-taking alongside each reading, aiding in comprehensive tracking. Remember, always consult your healthcare professional for guidance and never disregard symptoms or alter your diabetes control plan without their advice.

The UltraMini is a valuable tool for proactive diabetes management.

Understanding the Kit Contents

Your OneTouch UltraMini kit includes essential components for accurate blood glucose monitoring. Typically, you’ll find the OneTouch UltraMini meter itself, a lancing device for obtaining blood samples, and a supply of OneTouch UltraMini test strips – crucial for each test.

The kit also contains a control solution, vital for verifying the meter and strips are functioning correctly. A user guide, providing detailed instructions and troubleshooting tips, is also included.

Additionally, you’ll receive a quick reference guide for easy access to key information. Ensure all components are present before beginning use. Proper understanding of each item is fundamental for reliable results and effective diabetes management. Always use the specified accessories.

Familiarize yourself with each component before proceeding.

Device Overview: Meter Components

The OneTouch UltraMini meter features a clear LCD display showcasing blood glucose readings, date, and time. It incorporates buttons for power, test initiation, and navigating menus for settings and past results; A test strip port accepts the OneTouch UltraMini test strips for analysis.

The meter’s internal memory stores previous readings, allowing for tracking trends over time. A micro-USB port facilitates data transfer to compatible devices or software. The device is designed for portability and ease of use.

Understanding these components is key to operating the meter effectively. The lancing device, separate but integral, adjusts depth for comfortable blood sampling. Proper component recognition ensures accurate testing and informed diabetes management.

Familiarize yourself with each part for optimal functionality.

Setting Up Your OneTouch UltraMini

Initial setup is crucial for accurate readings. Begin by ensuring the meter is off. Insert the battery into the designated compartment, observing correct polarity. Once powered on, the meter will likely prompt you to set the date and time.

Use the buttons to adjust the hour and minute, confirming each selection. Accurate date and time settings are vital for proper data logging and tracking of test results. Ensure the settings are correct before proceeding.

Familiarize yourself with the button functions for future adjustments. Proper setup guarantees reliable performance and facilitates effective diabetes management. Refer to the manual for detailed illustrations if needed.

A correctly configured meter is essential for consistent monitoring.

Initial Setup and Date/Time Configuration

Upon first use, the OneTouch UltraMini requires initial setup, primarily focusing on accurate date and time configuration. The meter will guide you through this process, displaying flashing digits for adjustment.

Press and release the designated buttons – typically labeled with arrows or plus/minus symbols – to increment or decrement the values. The hour will flash first, allowing for precise setting. Subsequently, the minutes will become adjustable.

Confirm each setting by pressing the appropriate button, moving to the next parameter. Accurate time and date are critical for correlating test results with specific moments, aiding in effective diabetes management and data analysis.

Double-check the settings before finalizing the configuration.

Inserting the Battery

Powering the OneTouch UltraMini is straightforward, requiring a standard battery, typically a CR2032. Locate the battery compartment, usually on the back or side of the meter, and gently slide open the cover.

Observe the polarity markings (+ and -) inside the compartment, ensuring correct battery orientation. Insert the new battery, aligning the positive and negative terminals accordingly.

Close the battery compartment cover securely until it clicks into place. The meter should power on automatically, displaying a welcome message or the initial setup screen.

If the meter doesn’t turn on, double-check the battery’s orientation and ensure it’s properly seated. Replace the battery if it’s depleted or damaged.

Performing a Blood Glucose Test

Initiating a blood glucose test with the OneTouch UltraMini is a simple process. Begin by ensuring the meter is turned on. Insert a new test strip into the designated port; the meter will recognize the strip and prepare for a sample.

Prepare the lancing device with a fresh lancet, adjusting the depth setting as needed for comfortable blood collection. Lance your fingertip gently, and wipe away the first drop of blood with a clean cloth.

Apply a small blood sample to the designated area on the test strip. The meter will begin analyzing the sample, displaying a countdown or progress indicator.

Within seconds, your blood glucose result will appear on the screen.

Preparing the Lancing Device

Proper preparation of the lancing device is crucial for a comfortable and accurate blood sample collection. First, ensure you have a fresh, sterile lancet. Remove the protective cap from the new lancet and insert it firmly into the lancing device, following the device’s specific instructions.

Adjust the depth setting on the lancing device according to your skin type and desired blood flow. Start with a shallower setting and increase it if needed to obtain an adequate sample.

Cock the lancing device according to the manufacturer’s directions, preparing it for use. Always use a new lancet for each test to maintain sterility and minimize discomfort.

Properly dispose of used lancets in a sharps container.

Applying a Blood Sample to the Test Strip

Ensure your hands are clean and dry before handling the test strip. Remove a new test strip from the vial, being careful not to touch the test area. Immediately close the vial tightly to maintain strip integrity. Insert the test strip into the meter, ensuring it’s properly seated.

Once the meter displays the “Ready” signal, gently touch the edge of the blood sample to the designated area on the test strip. The strip will automatically draw the required amount of blood.

Avoid smearing the blood or applying too much pressure. A small, hanging drop is sufficient for accurate results.

Do not re-use test strips.

Reading Your Blood Glucose Results

After applying the blood sample, the OneTouch UltraMini meter will begin analyzing it, displaying a countdown. Within seconds, your blood glucose result will appear on the screen, typically expressed in mg/dL.

The meter automatically stores each result with the date and time. Review the reading carefully, noting any associated symbols or error messages.

Pay attention to the target range indicated by your healthcare professional. The meter may highlight results outside this range.

Consider hematocrit levels as they can influence accuracy. Refer to the “Understanding Your Results” section for further guidance.

Understanding Your Results

Your OneTouch UltraMini meter provides valuable data, but interpreting results requires understanding target ranges set by your healthcare provider. Generally, target ranges vary based on individual needs and diabetes management plans.

High readings may indicate the need for medication adjustments, dietary changes, or increased physical activity. Conversely, low readings require immediate attention to prevent hypoglycemia.

Hematocrit significantly impacts accuracy; levels above 55% can affect results. Always consider this factor when evaluating readings.

Utilize the meter’s note-taking feature to record factors influencing your glucose levels, like meals or exercise, for better tracking and analysis.

Target Blood Glucose Ranges

Establishing personalized target ranges is crucial for effective diabetes management with your OneTouch UltraMini. These ranges are determined by your healthcare professional, considering your age, overall health, and treatment plan.

Generally, before meals, a target range of 80-130 mg/dL is often recommended. Two hours after starting a meal, a target of less than 180 mg/dL is commonly advised.

Individual targets may differ; some individuals may require tighter control, while others may have more lenient goals.

Regularly discuss your results with your doctor to refine your target ranges and optimize your diabetes control strategy.

High and Low Blood Glucose Readings – What to Do

If your OneTouch UltraMini displays a high reading, do not ignore the result. Follow your healthcare provider’s instructions, which may include checking for ketones, adjusting medication, and increasing fluid intake.

For low readings, consume a fast-acting carbohydrate source like glucose tablets or juice immediately. Re-test after 15 minutes; if still low, repeat the process.

Never hesitate to contact your doctor if readings consistently fall outside your target range or if you experience severe symptoms.

Always refer to your diabetes management plan and seek professional guidance when dealing with unexpected blood glucose levels.

Hematocrit Considerations and Result Accuracy

The OneTouch UltraMini’s accuracy can be affected by your hematocrit level – the percentage of red blood cells in your blood. Readings may be inaccurate if hematocrit is significantly high (above 55%) or low.

High hematocrit can falsely elevate glucose results, while low hematocrit may falsely lower them. It’s crucial to be aware of your hematocrit level, especially if you have conditions like anemia or polycythemia.

Discuss your hematocrit with your healthcare provider to understand potential impacts on your readings and ensure appropriate diabetes management.

Consider this factor when interpreting results and always correlate them with your overall health status and symptoms.

Using Control Solution

Control solution verifies your meter and test strips are working correctly. It’s recommended to use control solution if you suspect inaccurate results, or when opening a new vial of test strips.

Before testing, shake the control solution vial well. Discard the first drop by squeezing the vial and wiping the tip with a clean tissue. Gently squeeze a hanging drop, then touch and hold it to the test strip’s designated area.

The meter will display a result; compare this to the range printed on the test strip vial. If the result falls within the range, your system is functioning properly.

If the result is outside the range, repeat the test or contact customer support.

Why Use Control Solution?

Control solution testing confirms the accuracy of your OneTouch UltraMini system, ensuring reliable blood glucose readings. It checks that the meter, test strips, and your technique are all working together correctly.

Use control solution when you’re unsure if your meter is functioning properly, or if you’ve dropped the meter. It’s also vital to use it when opening a new box of test strips, to verify their integrity.

Regular control solution tests provide peace of mind, especially if your readings seem inconsistent with how you feel. It’s a proactive step towards confident diabetes management and informed healthcare decisions.

Don’t rely solely on control solution; always correlate results with your physical well-being.

Performing a Control Solution Test

Begin by shaking the control solution vial thoroughly before each test. Remove the cap and discard the first drop by squeezing the vial, then wipe the tip with a clean tissue.

Hold the vial upside down and gently squeeze to create a hanging drop. Touch the hanging drop to the test strip’s fill port, ensuring complete contact. The meter will automatically recognize the control solution.

The meter will display a result indicating whether the test passed or failed. Compare the result to the range printed on the test strip vial. If the result falls within the range, your system is working correctly.

Repeat the test if necessary, using a fresh test strip and control solution.

Interpreting Control Solution Results

The OneTouch UltraMini displays control solution results as “PASS” or “FAIL”. Compare the displayed result to the control solution range printed on your test strip vial – this range is crucial for accurate interpretation.

A “PASS” result indicates your meter, test strips, and technique are functioning correctly. However, consistently repeating the test is recommended for confirmation.

A “FAIL” result suggests a problem with the system. This could be due to expired or damaged test strips, improper testing technique, or a malfunctioning meter. Do not use the meter for blood glucose testing until the issue is resolved.

Repeat the test with a new strip and solution; if it fails again, contact customer support.

Memory and Data Management

The OneTouch UltraMini meter stores your blood glucose readings, allowing you to track your progress over time. You can review past test results directly on the meter’s display, helping identify trends and patterns in your glucose levels.

This feature is invaluable for sharing information with your healthcare professional during appointments. The meter also allows you to add optional notes to each blood glucose test result, providing context for specific readings – for example, noting meals, exercise, or medication changes.

These notes enhance the usefulness of your data, offering a more complete picture of your diabetes management. Regularly reviewing your stored data empowers you to make informed decisions about your health.

Reviewing Past Test Results

To access previously recorded readings on your OneTouch UltraMini, utilize the meter’s memory function. Typically, this involves pressing the appropriate buttons – often the up or down arrows – to scroll through your test history. The meter displays the date and time of each reading, alongside the corresponding glucose value.

You can navigate through your results to identify trends or specific instances of high or low blood sugar. The number of stored readings varies, but the meter generally retains a substantial history for comprehensive tracking.

Regularly reviewing this data, alongside any added notes, provides valuable insights into your diabetes management and helps you collaborate effectively with your healthcare provider.

Adding Notes to Test Results

The OneTouch UltraMini allows you to personalize your blood glucose monitoring by attaching optional notes to each test result. This feature is incredibly useful for recording contextual information that might influence your readings, such as meal details, exercise, medication adjustments, or feelings of illness.

To add a note, typically you’ll access the note-adding function immediately after a reading is displayed. Use the meter’s buttons to select from pre-defined options or enter custom text.

These notes provide valuable context when reviewing your test history, helping you identify patterns and understand how various factors impact your blood glucose levels. This enhances your overall diabetes management strategy.

Troubleshooting Common Issues

Encountering problems with your OneTouch UltraMini? This section addresses frequent issues. Meter error messages indicate specific problems; consult the manual for decoding each code and recommended actions. Inaccurate readings can stem from several causes, including expired test strips, improper storage, or insufficient blood sample volume.

Ensure your hands are clean and dry, and the lancing device is functioning correctly. Hematocrit levels significantly impact accuracy; very high or low levels may cause discrepancies. If issues persist, repeat the test with a new strip.

Always refer to the user guide or contact customer support for unresolved problems, and never ignore concerning symptoms without consulting your healthcare professional.

Meter Error Messages

The OneTouch UltraMini displays error messages to indicate specific issues requiring attention. Understanding these codes is crucial for effective troubleshooting. Common errors include strip errors (indicating a faulty or improperly inserted strip) and system errors (suggesting a more significant device malfunction).

If you encounter an error, first try removing and reinserting the test strip. Ensure the strip is not expired and is stored correctly. If the error persists, consult the user guide for a detailed explanation of the specific code and recommended solutions.

For unresolved errors, contact customer support for assistance, and never attempt to disassemble or repair the meter yourself.

Inaccurate Readings – Potential Causes

Several factors can contribute to inaccurate blood glucose readings with the OneTouch UltraMini. Hematocrit levels – the percentage of red blood cells – significantly impact results; readings may be skewed if levels are very high (above 55%). Improper testing technique, such as insufficient blood sample size or contamination, is another common cause.

Ensure your hands are clean and dry before testing. Expired or damaged test strips also yield unreliable results. Environmental factors, like extreme temperatures or humidity, can affect strip performance. Meter malfunction, though less frequent, should also be considered.

If consistently inaccurate readings occur, contact customer support.

Maintenance and Care

Proper maintenance ensures the longevity and accuracy of your OneTouch UltraMini meter. Regular cleaning is crucial; gently wipe the meter with a slightly damp cloth after each use, avoiding harsh chemicals. Do not immerse the meter in water. Test strips should be stored in their original vial, tightly closed, in a cool, dry place – avoid direct sunlight and humidity.

Inspect test strips for damage before use. The meter itself should be stored in a clean, dry environment, away from extreme temperatures. Always use the recommended accessories to prevent damage. Follow these guidelines to maintain optimal performance and reliable results.

Cleaning the Meter

Regular cleaning of your OneTouch UltraMini meter is essential for maintaining accuracy and hygiene. After each use, gently wipe the exterior of the meter with a slightly damp cloth. Avoid using harsh chemicals, abrasive cleaners, or solvents, as these can damage the device.

Ensure the meter is turned off before cleaning. Do not allow any liquid to enter the meter’s ports or openings. Pay particular attention to cleaning the test strip port, removing any potential residue. A clean meter ensures reliable readings and prolongs the device’s lifespan, contributing to effective diabetes management.

Storing the Meter and Test Strips

Proper storage of your OneTouch UltraMini meter and test strips is crucial for maintaining their functionality and accuracy. Store the meter in a clean, dry place, away from extreme temperatures and humidity. Avoid direct sunlight and keep it protected from dust and debris.

Test strips should be stored in their original vial, tightly closed, and also in a cool, dry location. Do not expose test strips to moisture or heat, as this can compromise their integrity. Always check the expiration date before use. Correct storage ensures reliable test results and optimal performance of your monitoring system.

Important Safety Precautions

When using the OneTouch UltraMini, adhere to strict safety guidelines. Handle all blood and used test strips as biohazardous materials, disposing of them properly in a sharps container according to local regulations. Never share your lancing device with others.

Always wash your hands thoroughly before and after testing. If you experience any unusual reactions or concerns, consult your healthcare professional immediately. Heed all warnings and follow instructions carefully. Do not attempt to modify or disassemble the device. Prioritize safety for accurate results and responsible diabetes management.

Handling Biohazardous Materials

Blood is considered a biohazardous material; therefore, extreme caution is necessary when using the OneTouch UltraMini. Always treat used test strips, lancets, and any materials contaminated with blood as potentially infectious. Dispose of these items immediately in an approved sharps container, following all local, state, and federal regulations for biohazard waste disposal.

Never recap a used lancet, and avoid touching the used portion of test strips. Wear gloves if you have open wounds or compromised skin. Thoroughly clean any surfaces that may have come into contact with blood using a suitable disinfectant. Prioritize safe handling to prevent potential exposure and infection.

Warnings and Cautions

Always read all instructions thoroughly before operating the OneTouch UltraMini. Never ignore symptoms or make changes to your diabetes control program without consulting your healthcare professional. Be aware that hematocrit levels (red blood cell percentage) significantly impact result accuracy; readings may be inaccurate if hematocrit is too high (above 55%) or too low.

If results are unexpected, verify proper testing technique and contact your doctor. Do not share the device with others. Store test strips properly to maintain their integrity. Use only OneTouch UltraMini test strips with the meter; Keep the system out of reach of children.

nuwave 2 induction cooktop manual

NuWave 2 Induction Cooktop Manual: A Comprehensive Guide

This guide provides detailed instructions for the NuWave 2 Induction Cooktop, covering setup, operation, safety, and troubleshooting. Explore features like precision temperature control and probe functionality.

Welcome to the world of precision cooking! The NuWave 2 Induction Cooktop represents a leap forward in kitchen technology, offering unparalleled control and efficiency. This cooktop utilizes induction heating, a method that directly heats cookware, resulting in faster cooking times and reduced energy consumption.

This manual serves as your comprehensive guide to unlocking the full potential of your NuWave 2. Whether you’re a seasoned chef or new to induction cooking, this resource will walk you through every step, from initial setup and registration – easily accessible via a QR code at www.nuwavenow.com/QR – to mastering advanced techniques like probe-based temperature control.

Discover how to leverage features like the LED display and heat-resistant glass surface for a seamless and safe cooking experience. We’ll also cover essential safety precautions and maintenance tips to ensure your NuWave 2 remains a reliable kitchen companion for years to come.

Understanding Induction Cooking Technology

Unlike traditional cooktops, induction cooking doesn’t heat the surface directly. Instead, it uses electromagnetic energy to excite the molecules within ferrous cookware, generating heat directly within the pot or pan. This process is remarkably efficient, minimizing wasted energy and providing incredibly responsive temperature control.

The NuWave 2 leverages this technology to offer precise heating, allowing you to quickly boil water, simmer delicate sauces, or sear meats with exceptional accuracy. Because the cooktop surface remains relatively cool – though residual heat is present after use – it’s safer than conventional methods.

Key to success is using compatible cookware; pots and pans must contain a magnetic base. This direct heating method translates to faster cooking and enhanced energy savings, making induction a modern and efficient choice.

Key Features of the NuWave 2

The NuWave 2 boasts precision temperature control, an intuitive LED display, a durable heat-resistant glass surface, and convenient probe functionality for perfect cooking results.

Precision Temperature Control

The NuWave 2 excels in providing exceptionally precise temperature control, a cornerstone of successful induction cooking. Unlike traditional cooktops, induction heats cookware directly, allowing for rapid and accurate temperature adjustments. Users can select desired temperatures in both Fahrenheit and Celsius, catering to diverse recipe requirements and preferences.

This feature ensures consistent cooking results, preventing undercooked or overcooked dishes. The cooktop’s responsiveness allows for immediate adjustments, crucial for delicate sauces or searing meats. Furthermore, the probe functionality, when utilized, works in tandem with precision temperature control, guaranteeing food reaches the ideal internal temperature. Achieving culinary perfection is simplified with this level of control.

LED Display and Control Panel

The NuWave 2 features a user-friendly control panel integrated with a clear, bright LED display. This intuitive interface allows for effortless navigation through various cooking modes and temperature settings. The LED display prominently showcases the selected temperature, timer duration, and any active cooking mode, providing real-time feedback.

Control buttons are logically arranged for easy operation, even for first-time users. Adjustments are made with a simple touch, ensuring precise control over the cooking process. The display also indicates when the cooktop is preheated or when residual heat is present, enhancing safety. Its modern design complements any kitchen aesthetic.

Heat-Resistant Glass Surface

The NuWave 2 boasts a sleek and durable heat-resistant glass surface, designed for both performance and easy maintenance. This smooth, flat surface not only provides an elegant look but also ensures efficient heat transfer for rapid and even cooking. The glass is specifically engineered to withstand high temperatures without cracking or warping during operation.

Spills and splatters are easily wiped away, simplifying cleanup after each use. The surface remains relatively cool to the touch around the cooking area, enhancing safety. However, it’s crucial to remember the cooktop retains residual heat after use, requiring caution.

Probe Functionality and Usage

The NuWave 2’s integrated probe is a key feature for achieving perfectly cooked results, especially with meats and poultry. This probe allows you to monitor the internal temperature of your food in real-time, ensuring it reaches your desired level of doneness. Insert the probe into the thickest part of the food, avoiding bone.

Connect the probe to the cooktop, and set your target internal temperature. The cooktop will automatically adjust the cooking power to maintain that temperature, or hold it once reached. Precise temperature control eliminates guesswork, delivering consistently delicious meals.

Setting Up Your NuWave 2

Initial setup involves registration via the QR code or website, ensuring access to support and resources. Power on and familiarize yourself with basic operations for optimal use.

Initial Setup and Registration

Before first use, it’s crucial to register your NuWave 2 Induction Cooktop. This process unlocks access to valuable resources, including the complete cookbook and dedicated customer support. Registration is simple: scan the QR code conveniently located on the cooktop or visit www.nuwavenow.com/QR directly through your web browser.

Completing the registration ensures you receive updates on features, exclusive deals, and important safety information. Keep your model number (30211 Rev.1) handy during the registration process. This step also validates your warranty, providing peace of mind. Proper registration guarantees a seamless and supported cooking experience with your new NuWave 2.

Powering On and Basic Operation

To begin, locate the power switch on the rear of the NuWave 2 Induction Cooktop and ensure it’s switched to the ‘on’ position. The cooktop will then be ready for operation. Temperature control is managed via the control panel with its integrated LED display. Adjust the desired temperature using the control buttons, observing the displayed value.

The cooktop responds quickly to temperature adjustments, offering precise cooking control. Remember to use compatible cookware for optimal performance. Familiarize yourself with the various cooking modes available. Basic operation involves selecting a temperature and placing compatible cookware on the heat-resistant glass surface.

Fahrenheit to Celsius Conversion

The NuWave 2 Induction Cooktop offers the convenience of displaying temperatures in either Fahrenheit or Celsius. To switch between these units, locate the designated button on the control panel – often indicated by °F and °C symbols. Pressing this button will toggle the display between the two scales.

Ensure you are comfortable with the selected unit before commencing cooking. Recipes often specify temperatures in either Fahrenheit or Celsius, so accurate conversion is crucial for successful results. The cooktop retains your selected unit until changed again, providing a personalized cooking experience. Refer to online resources for precise conversion if needed.

Cooking with the NuWave 2

Discover optimal cooking with your NuWave 2! Utilize compatible cookware and explore various temperature settings and cooking modes for precise, delicious results.

Compatible Cookware

Understanding cookware compatibility is crucial for efficient induction cooking with your NuWave 2. This cooktop utilizes electromagnetic energy, requiring cookware with a magnetic base. Ideal materials include cast iron and many stainless steel pots and pans – test with a magnet to confirm! If a magnet strongly adheres, the cookware will work effectively.

Avoid using aluminum, copper, or glass cookware unless they have a magnetic base layer. Ensure the bottom of your cookware is flat for optimal contact with the glass surface, maximizing heat transfer and cooking performance. Uneven surfaces can reduce efficiency and potentially lead to inconsistent cooking. Proper cookware selection ensures the best results from your NuWave 2 Induction Cooktop.

Temperature Settings and Cooking Modes

The NuWave 2 offers precise temperature control, ranging from 100°F to 400°F, allowing for versatile cooking. Utilize the control panel to select desired temperatures for simmering, frying, sautéing, and more. Explore pre-programmed cooking modes for specific tasks, simplifying meal preparation.

Experiment with different temperature settings to achieve optimal results for various foods. Lower temperatures are ideal for delicate sauces, while higher temperatures are perfect for searing meats. The cooktop also features a “keep warm” function, maintaining food temperature until serving. Mastering these settings unlocks the full potential of your induction cooktop.

Using the Probe for Precise Cooking

The NuWave 2’s probe functionality ensures perfectly cooked meals by monitoring internal food temperature. Insert the probe into the thickest part of the food, avoiding bone or fat. Set your desired internal temperature on the cooktop’s control panel. The cooktop will automatically adjust cooking power to maintain or reach the target temperature.

This feature is ideal for meats, poultry, and fish, guaranteeing safe and delicious results. The cooktop will alert you when the food reaches the set temperature, preventing overcooking. Regularly clean and maintain the probe for accurate readings and optimal performance. Enjoy consistently perfect meals with this innovative feature!

Cooking Specific Foods (Examples)

For steak, use the probe to set the desired internal temperature (e.g., 135°F for medium-rare). Select an appropriate temperature setting, often starting with a higher heat for searing, then reducing it for even cooking. Poultry benefits from probe use, ensuring it reaches 165°F for safety. Fish cooks quickly; use a lower temperature and monitor closely.

Vegetables can be steamed or sautéed using varying temperature settings. Experiment with different modes to achieve desired textures. Remember to consult the complete cookbook for detailed recipes and recommended settings. The NuWave 2 offers versatility for diverse culinary creations, delivering consistent results every time.

Safety Precautions

Always be mindful of residual heat after use. Ensure proper ventilation during operation and follow electrical safety guidelines to prevent hazards.

Residual Heat Warnings

The NuWave 2 Induction Cooktop retains significant heat even after being turned off, presenting a potential burn risk. The glass surface remains hot for a considerable period, so avoid touching it until it has completely cooled. Exercise extreme caution when removing cookware, utilizing pot holders or oven mitts to protect your hands.

Be aware that the cooktop may appear cool to the touch, but still possess enough residual heat to cause injury. Never place flammable materials near the cooktop while it is in use or immediately after it has been turned off. Always supervise children and pets around the appliance, ensuring they understand the dangers of residual heat. Prioritize safety by allowing sufficient cooling time before handling or storing the cooktop.

Proper Ventilation

Ensure adequate ventilation when operating the NuWave 2 Induction Cooktop to prevent the buildup of heat and moisture. Maintain sufficient space around the unit, avoiding placement directly under cabinets or near flammable materials. Proper airflow is crucial for optimal performance and longevity of the appliance.

Avoid obstructing the ventilation openings on the cooktop’s sides or rear. Using a range hood or opening a window can further enhance ventilation during cooking. This practice helps dissipate heat and reduces the risk of overheating. Always prioritize a well-ventilated kitchen environment for safe and efficient operation of your induction cooktop. Regularly check for any obstructions to airflow.

Electrical Safety Guidelines

Always ensure the NuWave 2 Induction Cooktop is properly grounded to prevent electrical shock. Never operate the appliance with a damaged cord or plug; replace immediately. Avoid using extension cords, as they can overheat and pose a fire hazard. Plug the cooktop directly into a dedicated 120V AC outlet.

Do not immerse the cooktop, cord, or plug in water or other liquids. Keep the appliance away from sources of moisture. Unplug the cooktop when not in use and before cleaning. If the cooktop malfunctions, disconnect it from the power source and contact customer support. Prioritize electrical safety for worry-free cooking.

Maintenance and Cleaning

Regular cleaning maintains optimal performance. Use a soft cloth for the glass surface and ensure the probe is clean for accurate temperature readings.

Cleaning the Glass Surface

Maintaining the glass surface of your NuWave 2 Induction Cooktop is crucial for both its appearance and functionality. Always ensure the cooktop is completely cool before attempting any cleaning. Avoid abrasive cleaners, scouring pads, or harsh chemicals, as these can cause scratches and damage the surface.

For everyday cleaning, a damp, soft cloth is usually sufficient to wipe away spills and food residue. For stubborn stains, a specialized glass cooktop cleaner can be used, following the manufacturer’s instructions carefully. Apply the cleaner sparingly and wipe in a circular motion.

After cleaning, wipe the surface with a clean, dry cloth to prevent streaks and ensure a spotless finish. Regular cleaning will help prolong the life of your cooktop and keep it looking its best.

Probe Care and Maintenance

Proper care of the probe is essential for accurate temperature readings and extending its lifespan. After each use, thoroughly clean the probe with a damp cloth and mild soap. Avoid immersing the probe’s handle or cable in water, as this can cause damage.

Ensure the probe is completely dry before storing it. Do not bend or kink the probe’s cable, as this can affect its functionality. Inspect the probe regularly for any signs of damage, such as cracks or frayed wires.

If the probe is damaged, discontinue use and contact NuWave customer support for assistance. Correct storage will prevent damage and ensure accurate readings for years to come.

Storage Instructions

When storing your NuWave 2 Induction Cooktop, ensure it is completely cool and dry. Disconnect the power cord from the outlet and coil it loosely for storage. Avoid storing the cooktop in a damp or humid environment, as this can cause damage to the internal components.

Protect the glass surface from scratches by storing it in its original packaging or covering it with a soft cloth. Keep the probe separate to prevent damage to the cooktop or the probe itself. Store in a safe, stable location where it won’t be accidentally knocked over.

Regularly check the storage area to ensure it remains clean and dry, preserving the cooktop’s condition.

Troubleshooting Common Issues

This section addresses frequent problems like the cooktop failing to power on, error codes, and probe malfunctions. Find solutions for a seamless cooking experience.

Cooktop Not Turning On

If your NuWave 2 isn’t powering on, first verify the power cord is securely connected to both the cooktop and a functioning electrical outlet. Ensure the outlet is receiving power by testing it with another device. Check the switch located on the back of the unit; it must be in the ‘on’ position.

Sometimes, a tripped circuit breaker or blown fuse can be the culprit. Reset the breaker or replace the fuse if necessary. If the issue persists, inspect the power cord for any visible damage. A damaged cord should be replaced immediately. Contact NuWave customer support if these steps don’t resolve the problem, as it could indicate an internal malfunction requiring professional attention.

Error Codes and Their Meanings

The NuWave 2 utilizes error codes to signal specific issues. While a comprehensive list isn’t readily available without the full manual, understanding potential causes is helpful. Error messages often relate to incompatible cookware, probe malfunctions, or internal temperature sensor problems.

If an error code appears, immediately stop using the cooktop and consult the complete NuWave cookbook or the official website (nuwavenow.com) for detailed explanations. Attempting to bypass error codes could damage the unit or pose a safety risk. Contacting NuWave customer support with the specific error code will expedite troubleshooting and ensure proper resolution.

Probe Not Reading Temperature

If the NuWave 2 probe isn’t displaying a temperature, several factors could be at play. First, ensure the probe is correctly inserted into the thickest part of the food, avoiding bone or fat. Verify the probe cable is securely connected to the cooktop’s control panel. A damaged probe or cable can also cause inaccurate readings or a complete failure to register temperature.

Try cleaning the probe tip with a damp cloth; residue can interfere with sensor accuracy. If the issue persists, test with a different probe if available. Contacting NuWave support is recommended for further diagnostics and potential replacement options.

Resources and Support

For assistance, visit the NuWave official website at nuwavenow.com. Access the complete cookbook and contact customer support for any questions or concerns.

NuWave Official Website

The official NuWave website, nuwavenow.com, serves as a central hub for all things NuWave, including comprehensive support for your PIC2 Induction Cooktop. Here, you’ll find exclusive deals, ensuring you receive the best possible price on authentic products and the latest innovations. Beyond purchasing, the website provides direct access to the complete NuWave cookbook, expanding your culinary possibilities with tailored recipes designed for induction cooking.

Registration of your cooktop is easily accomplished through a QR code or direct website visit, guaranteeing access to updates and enhanced customer service. NuWave prioritizes secure transactions and offers a wealth of information, from detailed product specifications to frequently asked questions. This online resource is your first stop for maximizing your NuWave cooking experience.

Customer Support Contact Information

For any questions or concerns regarding your NuWave 2 Induction Cooktop, dedicated customer support is readily available. The primary contact method is through email at helpnuwavenow.com, ensuring a prompt and detailed response to your inquiries. NuWave emphasizes a commitment to customer satisfaction, offering assistance with everything from initial setup and operation to troubleshooting error codes and understanding probe functionality.

While a direct phone number isn’t prominently displayed, utilizing the email support channel guarantees a documented record of your communication. The official website, nuwavenow.com, also features a comprehensive FAQ section and access to downloadable manuals, potentially resolving your issue independently. Expect knowledgeable and helpful assistance from the NuWave support team.

Accessing the Complete Cookbook

Enhance your NuWave 2 Induction Cooktop experience with the complete cookbook, offering a diverse range of recipes tailored for precision induction cooking. The cookbook, spanning 47 pages, provides detailed instructions and culinary inspiration, maximizing the cooktop’s capabilities. Currently, the cookbook is available as a PDF download, accessible through various online resources and potentially directly from the NuWave official website.

Vision Induction & Infrared Cookers Guide also contains valuable recipes and tips. Explore online platforms for downloadable versions, ensuring you have a comprehensive guide to unlock the full potential of your NuWave 2. Utilize the cookbook to master temperature settings, probe usage, and cooking specific foods with ease.

NuWave PIC Gold vs. PIC2: Key Differences

Comparing the PIC Gold and PIC2 reveals variations in features and model numbers. Understanding these distinctions helps users choose the best NuWave induction cooktop for their needs.

Feature Comparison

The NuWave PIC Gold and PIC2 models showcase notable differences in functionality. Both utilize induction cooking technology, offering precise temperature control and rapid heating. However, the PIC2 often includes an upgraded LED display for enhanced visibility and user interaction. Probe functionality, crucial for achieving desired internal temperatures, is a standard feature in both, though the PIC2 may offer improved probe accuracy.

Surface material, typically heat-resistant glass, remains consistent across models. Key distinctions lie in the control panel design and potentially, the range of available temperature settings. Model revisions, indicated by “Rev.1” or higher, often incorporate software updates and minor hardware improvements. Ultimately, the choice depends on individual cooking preferences and desired features.

Model Numbers and Revisions

NuWave induction cooktops are identified by specific model numbers, such as 30211 for the PIC2, aiding in accurate part identification and support requests. Revision numbers, denoted as “Rev.1” or higher, signify updates to the product’s software or hardware. These revisions often address user feedback, improve performance, or incorporate new features.

Checking the revision number is crucial when accessing support resources or downloading updated manuals. Earlier models, like the PIC Gold, may have different revision histories. NuWave’s website provides access to the latest documentation for each model and revision. Understanding these identifiers ensures compatibility and access to the most current information for your specific cooktop.

atv repair manual

ATV Repair Manuals: A Comprehensive Guide

ATV repair manuals are essential resources for both seasoned mechanics and enthusiastic owners‚ providing detailed guidance for maintaining and fixing these versatile machines.

These manuals cover a broad spectrum of information‚ from routine maintenance procedures to complex engine overhauls‚ ensuring your ATV remains in peak condition.

Accessing the right ATV repair manual empowers you to tackle repairs confidently‚ saving both time and money while extending the lifespan of your vehicle.

Understanding the intricacies of your ATV’s systems becomes significantly easier with a dedicated‚ comprehensive repair guide at your fingertips.

Understanding the Need for ATV Repair Manuals

ATV repair manuals are fundamentally crucial because they bridge the gap between complex machinery and the owner’s ability to maintain it effectively. Without a dedicated manual‚ diagnosing issues and performing repairs can quickly become overwhelming‚ potentially leading to further damage or unsafe operating conditions.

These manuals offer a structured approach to troubleshooting‚ providing step-by-step instructions‚ detailed diagrams‚ and crucial specifications. They empower owners to perform routine maintenance – oil changes‚ filter replacements‚ brake adjustments – independently‚ saving on costly mechanic fees.

More importantly‚ ATV repair manuals are indispensable when tackling more significant repairs‚ such as engine rebuilds or transmission servicing. They ensure the correct procedures are followed‚ minimizing the risk of errors and maximizing the longevity of the ATV. Ignoring proper repair protocols can compromise safety and performance‚ making a manual an invaluable investment for any ATV enthusiast.

Ultimately‚ a manual fosters self-reliance and a deeper understanding of your machine.

Why Use a Dedicated ATV Repair Manual?

Dedicated ATV repair manuals surpass generic repair guides by offering specificity tailored to your exact model and year. This precision is vital‚ as even slight variations between ATV models can necessitate different repair procedures and component specifications.

Unlike online forums or generalized advice‚ a manual provides verified‚ manufacturer-approved information‚ ensuring accuracy and reliability. They detail torque specifications‚ wiring diagrams‚ and parts identification – critical elements often missing from less formal sources.

Using a dedicated manual minimizes the risk of misdiagnosis and incorrect repairs‚ potentially preventing further damage and costly mistakes. They also enhance safety by outlining proper procedures and warning against potential hazards. Investing in a manual isn’t just about fixing your ATV; it’s about doing it correctly‚ safely‚ and efficiently‚ preserving its value and performance.

A manual is a long-term investment in your ATV’s wellbeing.

Where to Find ATV Repair Manuals

ATV repair manuals are readily available through various online platforms‚ forums‚ and manufacturer websites‚ offering both free and paid options for enthusiasts.

Resources like ATVConnection.com‚ ManualsLib.com‚ and QuadCrazy provide extensive collections‚ while CAT Net Explorer serves Arctic Cat owners.

Yamaha ATV Repair Manuals: Specific Resources

Yamaha ATV repair manuals benefit from several dedicated online resources catering specifically to this popular brand. ATVConnection.com boasts an impressive library‚ offering over 400 manuals spanning approximately ten different manufacturers‚ including a substantial collection for Yamaha ATVs.

QuadCrazy ATV Forum is another valuable destination‚ featuring a dedicated downloads section where users can access free Yamaha ATV repair manuals directly. This forum provides a community-driven approach to finding the information you need.

Furthermore‚ general repair manual websites‚ such as those offering manuals for Honda‚ Kawasaki‚ Suzuki‚ and Yamaha‚ also carry Yamaha-specific documentation‚ though these may not always be instant downloads.

These resources collectively provide a comprehensive range of options for Yamaha ATV owners seeking to perform maintenance and repairs independently.

Arctic Cat ATV Repair Manuals: Utilizing CAT Net Explorer

Arctic Cat ATV repair manuals are readily accessible through the official CAT Net Explorer platform‚ a comprehensive resource for owners and technicians alike. This system provides access to a wealth of information‚ including detailed users manuals‚ parts manuals‚ and crucial service manuals.

Beyond the core manuals‚ CAT Net Explorer also offers service bulletins‚ informative brochures‚ detailed wiring diagrams‚ and even kit instructions‚ ensuring a complete understanding of your machine.

The platform extends its utility with access to special tool information and helpful service videos‚ further simplifying complex repair procedures.

For Arctic Cat enthusiasts‚ CAT Net Explorer represents a centralized hub for all documentation needs‚ streamlining the maintenance and repair process.

Honda‚ Kawasaki‚ Suzuki‚ and Other Brands: Manual Availability

ATV repair manuals for brands like Honda‚ Kawasaki‚ and Suzuki‚ alongside numerous others‚ are widely available through various online and offline channels. While dedicated brand-specific platforms like CAT Net Explorer exist for Arctic Cat‚ owners of these other ATVs often rely on broader manual databases and specialized websites.

Several online retailers offer a substantial range of manuals‚ though these are frequently not available for instant download‚ requiring a processing and delivery timeframe.

Furthermore‚ comprehensive services provide manuals for a diverse array of manufacturers‚ including BMW‚ Ducati‚ and Yamaha‚ catering to a broad spectrum of ATV and motorcycle owners.

Finding the correct manual often involves searching through these extensive catalogs‚ ensuring compatibility with your specific ATV model and year.

Free Download Services for Motorcycle and ATV Manuals

Numerous online platforms offer free download services for motorcycle and ATV repair manuals‚ providing accessible resources for enthusiasts and DIY mechanics. These services typically host manuals for a wide range of manufacturers‚ including Yamaha‚ Suzuki‚ BMW‚ Ducati‚ Kawasaki‚ and Honda‚ among others.

Websites like ManualsLib.com boast extensive databases with over two million manuals for 40‚000 brands‚ offering free access and download options.

These platforms often include repair‚ owner’s‚ and maintenance manuals‚ alongside tutorials and microfiches‚ catering to diverse user needs.

However‚ users should exercise caution and verify the manual’s accuracy and completeness before relying on it for repairs.

ManualsLib.com: A Broad Database of Manuals

ManualsLib.com stands out as a comprehensive online resource‚ offering a vast database of over two million manuals for approximately 40‚000 different brands‚ including a substantial collection of ATV repair manuals.

This platform provides free access to instruction books and manuals‚ enabling users to search for specific models and download relevant documentation without cost.

The site’s user-friendly interface facilitates easy navigation and efficient searching‚ making it a popular choice for ATV owners seeking repair information.

While the availability of specific manuals can vary‚ ManualsLib.com consistently proves to be a valuable starting point for locating ATV repair resources.

QuadCrazy ATV Forum: Yamaha Manuals Download Section

QuadCrazy ATV Forum provides a dedicated space for Yamaha ATV enthusiasts‚ notably featuring a downloads section specifically for Yamaha ATV repair manuals.

This forum acts as a community-driven resource‚ where users can access and share valuable repair information‚ including service manuals‚ owner’s manuals‚ and parts lists.

The availability of these manuals is often facilitated by forum members who contribute to the collective knowledge base‚ making it a practical resource.

Users report finding free Yamaha ATV manuals readily available within this section‚ offering a convenient and accessible solution for repair needs.

It’s a great place to connect with other Yamaha ATV owners and find specific documentation.

ATVConnection.com: Extensive Manual Collection

ATVConnection.com stands out as a comprehensive online resource for ATV enthusiasts‚ boasting an extensive collection of ATV repair manuals for numerous brands.

The site reportedly hosts over 400 manuals‚ covering approximately ten different ATV manufacturers‚ making it a valuable hub for finding specific repair documentation.

Users appreciate the availability of these resources‚ emphasizing that while access may require some time investment‚ the manuals are ultimately free to download.

This platform caters to a wide range of ATV models and repair needs‚ offering a convenient solution for both basic maintenance and complex troubleshooting.

It’s a popular destination for those seeking readily available ATV repair manuals online.

Types of ATV Repair Manuals

ATV repair manuals come in diverse formats‚ including service‚ owner’s‚ and parts manuals‚ each serving unique purposes for maintenance and repair procedures.

Wiring diagrams are also crucial for electrical system diagnostics and troubleshooting.

Service Manuals: In-Depth Repair Procedures

Service manuals represent the most comprehensive type of ATV repair manual available‚ offering detailed‚ step-by-step instructions for virtually every repair and maintenance task imaginable.

These manuals are geared towards experienced mechanics or those comfortable with complex mechanical work‚ providing exploded views of components‚ precise torque specifications‚ and detailed troubleshooting guides.

They delve into intricate procedures like engine rebuilds‚ transmission overhauls‚ and complete suspension servicing‚ often including diagnostic flowcharts to pinpoint issues efficiently.

Service manuals typically cover topics such as removing and installing components‚ disassembling and reassembling systems‚ and performing adjustments to ensure optimal performance.

Essentially‚ a service manual is the definitive guide for anyone undertaking significant repairs on their ATV‚ ensuring the job is done correctly and safely.

They are invaluable for professional technicians and dedicated DIY enthusiasts alike.

Owner’s Manuals: Basic Maintenance and Operation

Owner’s manuals are the first point of reference for any ATV owner‚ providing essential information on safe operation‚ routine maintenance‚ and basic troubleshooting.

Unlike detailed service manuals‚ owner’s manuals focus on tasks that can be performed by the average user with minimal mechanical experience.

These guides typically cover topics like checking fluid levels‚ inspecting tires‚ lubricating moving parts‚ and performing simple adjustments.

They also include crucial safety information‚ operating instructions‚ and a basic understanding of the ATV’s controls and features.

Owner’s manuals are designed to help owners keep their ATVs in good working order and prevent minor issues from escalating into major repairs.

While not a substitute for a service manual‚ they are an indispensable resource for responsible ATV ownership and maintenance.

Parts Manuals: Identifying Components

Parts manuals are invaluable resources when undertaking ATV repairs‚ specifically designed to aid in identifying and locating individual components.

These manuals feature detailed exploded diagrams illustrating how all the parts of an ATV fit together‚ making disassembly and reassembly much easier.

Each part is typically labeled with a unique part number‚ allowing for accurate ordering of replacements from dealerships or online retailers.

ATV repair often requires sourcing specific parts‚ and a parts manual eliminates guesswork and ensures compatibility.

They are particularly useful when dealing with older ATVs where parts availability might be limited or documentation is scarce.

Combined with service manuals‚ parts manuals streamline the repair process‚ reducing downtime and ensuring accurate component replacement.

Wiring Diagrams: Electrical System Troubleshooting

Wiring diagrams are crucial components within an ATV repair manual‚ specifically when diagnosing and resolving electrical issues.

These diagrams visually represent the entire electrical system‚ showcasing the connections between various components like the battery‚ starter‚ lights‚ and sensors.

Understanding these diagrams allows you to trace circuits‚ identify shorts‚ and pinpoint faulty wiring or connectors.

ATV electrical systems can be complex‚ and a clear wiring diagram is essential for effective troubleshooting.

They often include color-coding information‚ making it easier to identify individual wires and their functions.

Using a multimeter in conjunction with the wiring diagram helps verify continuity and voltage‚ leading to accurate repairs and preventing further damage.

Navigating an ATV Repair Manual

ATV repair manuals are logically structured for efficient use‚ containing safety warnings‚ tool lists‚ and detailed procedures for successful repairs and maintenance.

Understanding Manual Organization

ATV repair manuals typically follow a standardized organizational structure designed for ease of use. Most begin with a preface outlining the manual’s scope and intended audience‚ followed by detailed safety precautions and warnings – always prioritize these. Subsequent sections are usually divided by system‚ such as engine‚ transmission‚ brakes‚ suspension‚ and electrical.

Within each system‚ you’ll find exploded diagrams‚ parts lists‚ and step-by-step repair procedures. Torque specifications are often presented in tables for quick reference. Wiring diagrams‚ crucial for electrical troubleshooting‚ are usually grouped together in a dedicated section. Many manuals also include a troubleshooting guide to help diagnose common issues.

Familiarizing yourself with this layout will significantly reduce the time spent searching for specific information‚ allowing for more efficient and effective repairs. Understanding the manual’s index is also vital for quickly locating specific components or procedures.

Safety Precautions and Warnings

ATV repair manuals consistently emphasize safety as paramount. Before commencing any repair‚ always disconnect the battery to prevent accidental electrical shock or system damage. Wear appropriate personal protective equipment (PPE)‚ including safety glasses‚ gloves‚ and sturdy footwear.

Be mindful of hot engine components and exhaust systems‚ allowing them to cool completely before handling. When working with fuels or flammable liquids‚ ensure adequate ventilation and eliminate all ignition sources. Support the ATV securely on jack stands – never work under an unsupported machine.

Pay close attention to warnings regarding specific procedures‚ such as handling hazardous materials or disassembling pressurized systems. Ignoring these warnings can result in serious injury or damage. Always consult the manual for specific safety guidelines related to your ATV model.

Tool Requirements and Specifications

ATV repair manuals meticulously detail the necessary tools for each procedure. Basic requirements typically include a socket set‚ wrench set (metric and standard)‚ screwdrivers (Phillips and flathead)‚ pliers‚ and a torque wrench. Specialized tools‚ like a chain breaker‚ carburetor synchronizer‚ or compression tester‚ may be needed for specific repairs.

The manual will also specify the correct size and type of tools to avoid damaging components. Using the wrong tool can strip bolts‚ round off nuts‚ or cause other issues. Furthermore‚ ATV repair manuals outline precise torque specifications for fasteners.

Adhering to these specifications is crucial for ensuring proper assembly and preventing component failure. Always verify tool compatibility and calibration before use‚ prioritizing quality and accuracy for successful repairs.

Torque Specifications: Ensuring Proper Fastening

ATV repair manuals consistently emphasize the critical importance of torque specifications. Applying the correct torque to fasteners—bolts‚ nuts‚ and screws—is paramount for safe and reliable ATV operation. Under-torquing can lead to components loosening and potential failure‚ while over-torquing risks stripping threads or damaging parts.

Manuals provide detailed charts listing the precise torque values (typically in foot-pounds or Newton-meters) for each fastener on the ATV. A calibrated torque wrench is essential for achieving these values accurately.

Always refer to the manual for the specific torque specification for each bolt‚ considering factors like bolt size‚ material‚ and application. Following these guidelines ensures proper clamping force‚ preventing vibrations and maintaining structural integrity.

Common ATV Repair Topics Covered in Manuals

ATV repair manuals thoroughly address engine repair‚ transmission service‚ brake maintenance‚ suspension adjustments‚ and electrical diagnostics‚ offering detailed guidance for all systems.

Engine Repair and Overhaul

ATV repair manuals dedicate significant sections to engine repair and overhaul procedures‚ recognizing the engine as the heart of the machine. These manuals provide step-by-step instructions for diagnosing engine problems‚ from simple issues like spark plug replacement to complex tasks such as piston replacement and cylinder honing.

Detailed exploded views illustrate engine components‚ aiding in proper assembly and disassembly. Manuals often include specifications for valve clearances‚ compression ratios‚ and other critical engine parameters. Troubleshooting guides help pinpoint the root cause of engine malfunctions‚ while torque specifications ensure proper fastener tightening‚ preventing damage and maintaining engine integrity.

Overhaul procedures are meticulously outlined‚ covering tasks like cylinder head rebuilding‚ crankshaft inspection‚ and carburetor cleaning or fuel injection system servicing. Safety precautions are emphasized throughout‚ highlighting potential hazards and necessary protective measures. Ultimately‚ these sections empower owners and mechanics to confidently address engine issues and restore optimal performance.

Transmission and Drivetrain Service

ATV repair manuals offer comprehensive guidance on servicing the transmission and drivetrain‚ crucial for power delivery and overall vehicle functionality. These sections detail procedures for inspecting‚ adjusting‚ and repairing components like the clutch‚ gearbox‚ differential‚ and drive chain or shaft.

Manuals provide clear instructions for troubleshooting common issues such as slipping clutches‚ gear shifting problems‚ and differential noise. Detailed diagrams illustrate the internal workings of the transmission‚ aiding in disassembly and reassembly. Specific torque specifications are included for all drivetrain fasteners‚ ensuring proper tightening and preventing component failure.

Furthermore‚ repair manuals cover maintenance tasks like fluid changes‚ chain adjustments‚ and bearing inspections. They also address more complex repairs‚ such as replacing gears‚ rebuilding the transmission‚ or servicing the differential. Safety warnings are prominently displayed‚ emphasizing the importance of proper procedures.

Brake System Maintenance and Repair

ATV repair manuals dedicate significant attention to brake system maintenance and repair‚ vital for rider safety and control. These sections provide detailed instructions for inspecting brake pads‚ rotors‚ calipers‚ and brake lines for wear and damage. Procedures for bleeding the brake system to remove air bubbles and restore optimal braking performance are clearly outlined.

Manuals offer step-by-step guidance on replacing brake pads‚ rotors‚ and calipers‚ including torque specifications for all fasteners. Troubleshooting sections address common brake issues like spongy brake feel‚ uneven braking‚ and brake fade. Diagrams illustrate the brake system’s components and their proper assembly.

Repair manuals also cover maintenance tasks such as cleaning and lubricating brake components. Safety precautions are emphasized throughout‚ highlighting the critical importance of a properly functioning brake system.

Suspension and Steering Adjustments

ATV repair manuals provide comprehensive guidance on suspension and steering adjustments‚ crucial for optimizing handling and rider comfort. These sections detail how to inspect shocks‚ springs‚ A-arms‚ and steering components for wear or damage. Instructions cover adjusting preload‚ compression damping‚ and rebound damping to fine-tune the suspension for different terrains and riding styles.

Manuals explain how to check and adjust wheel alignment‚ ensuring proper steering response and tire wear. Procedures for inspecting and replacing ball joints‚ tie rod ends‚ and steering bearings are included‚ along with torque specifications. Troubleshooting guides address common issues like excessive body roll‚ wandering steering‚ and harsh ride quality.

Repair manuals emphasize safety precautions when working on the suspension and steering systems‚ highlighting the importance of proper alignment and component integrity.

Electrical System Diagnostics and Repair

ATV repair manuals dedicate significant sections to electrical system diagnostics and repair‚ vital for addressing issues with starting‚ charging‚ lighting‚ and other electrical components; These manuals include detailed wiring diagrams‚ essential for tracing circuits and identifying faults. Procedures cover testing the battery‚ stator‚ regulator/rectifier‚ and ignition system using a multimeter and other diagnostic tools.

Manuals guide users through troubleshooting common electrical problems like blown fuses‚ faulty relays‚ and damaged wiring harnesses. Instructions detail how to inspect and repair connectors‚ switches‚ and sensors. Specific guidance is provided for diagnosing and resolving issues with the ATV’s electronic fuel injection (EFI) system‚ if equipped.

Repair manuals stress safety precautions when working with electrical systems‚ emphasizing the importance of disconnecting the battery before performing any repairs.

Cost Considerations for ATV Repair Manuals

ATV repair manual costs vary greatly‚ ranging from free online downloads to paid subscriptions and per-download options‚ impacting accessibility.

Evaluating value requires weighing the convenience of instant access against the potential expense of purchasing dedicated manuals.

Free vs. Paid Manuals: Weighing the Options

Choosing between free and paid ATV repair manuals involves considering several factors. Free manuals‚ readily available on sites like ManualsLib.com‚ QuadCrazy ATV Forum‚ and through Arctic Cat’s CAT Net Explorer‚ offer a cost-effective starting point for basic repairs and maintenance.

However‚ these free resources may lack the depth‚ clarity‚ or completeness found in professionally published‚ paid manuals.

Paid manuals often provide more detailed diagrams‚ step-by-step instructions‚ and comprehensive troubleshooting guides‚ proving invaluable for complex repairs.

Sites like RepairManualClub offer manuals for a per-download fee (around $5)‚ while others provide subscription services granting access to a wider range of models.

Ultimately‚ the best choice depends on your mechanical skill level‚ the complexity of the repairs you anticipate‚ and your budget.

For simple tasks‚ free manuals may suffice‚ but for extensive overhauls‚ investing in a paid manual is often a worthwhile expenditure.

Subscription Services: Access to Multiple Manuals

ATV repair manual subscription services present a compelling alternative to purchasing individual manuals‚ particularly for those working on diverse ATV models or frequently undertaking repairs.

These services grant access to a vast library of manuals‚ covering numerous makes and years‚ often for a fixed monthly or annual fee.

While initial costs may exceed a single manual purchase‚ the long-term value can be substantial‚ especially for professional mechanics or avid ATV enthusiasts.

Subscription models eliminate the need to repeatedly pay per download‚ as seen on platforms like RepairManualClub‚ offering unlimited access within the subscription period.

Consider the breadth of models supported and the frequency of updates when evaluating different subscription options.

Ensure the service covers your specific ATV’s make‚ model‚ and year to maximize its utility and avoid unnecessary expenses.

Per-Download Costs: Evaluating Value

ATV repair manuals available through per-download services offer a straightforward purchasing model‚ allowing users to acquire specific manuals as needed.

Sites like RepairManualClub exemplify this approach‚ charging a fee – often around $5 – for each manual downloaded.

While seemingly affordable for a single repair‚ these costs can accumulate quickly when addressing multiple issues or working on various ATV models.

Carefully assess your repair needs before opting for per-download services; if you anticipate frequent repairs‚ a subscription might prove more economical.

Consider the manual’s completeness and quality before purchasing; ensure it covers your ATV’s specific year and model.

Compare prices across different platforms to secure the best possible deal and avoid overspending on essential repair information.

1 2 3 4 5 6 11