study guide for the book of ezekiel

Article Plan: Study Guide for the Book of Ezekiel

This comprehensive study guide delves into Ezekiel‚ utilizing commentaries from Blenkinsopp‚ Allen‚ and Haggai‚ offering accessible biblical interpretation for pastors and students.

It explores Ezekiel’s literary coherence‚ examining themes of judgement‚ restoration‚ and the temple vision‚ alongside insights from the Seventh-day Adventist Bible Commentary.

Resources include passage-by-passage analyses‚ and a focus on understanding God’s character through careful biblical study‚ enhancing both teaching and personal enrichment.

Ezekiel stands as a pivotal figure among the Old Testament prophets‚ delivering a powerful message during a period of immense national crisis for Judah. His prophetic ministry‚ intricately woven with vivid imagery and symbolic acts‚ addresses themes of sin‚ judgement‚ and ultimately‚ the promise of restoration. This study guide aims to unpack the complexities of Ezekiel’s book‚ providing a framework for deeper understanding and application.

Understanding Ezekiel requires acknowledging the book’s unique literary style. Unlike some prophetic texts‚ Ezekiel exhibits a remarkable degree of internal coherence‚ presenting a carefully constructed narrative. Commentaries‚ such as those by Joseph Blenkinsopp and Leslie C. Allen‚ highlight this literary artistry‚ emphasizing both the final form and compositional structure of the book.

This introduction will lay the groundwork for exploring Ezekiel’s profound theological contributions‚ examining his visions of God’s glory‚ his role as a watchman‚ and his prophecies concerning the fate of Jerusalem and the nations. We will also consider the resources available – from the Bible Knowledge Commentary to the Anchor Yale Bible Commentaries – to aid in our study.

Exploring Ezekiel’s prophecies demands careful consideration of historical context‚ literary features‚ and theological depth‚ utilizing scholarly resources for insightful interpretation.

II. Historical Context of Ezekiel

Understanding Ezekiel’s world is crucial; he prophesied during a turbulent period in Judah’s history‚ specifically between 593-571 BC. This timeframe encompasses the reign of Jehoiakim‚ Jehoiachin‚ and Zedekiah‚ witnessing the escalating threat from Babylon.

The Babylonian exile profoundly shaped Ezekiel’s message. Jerusalem faced sieges‚ culminating in the destruction of the Temple in 586 BC and the deportation of many Judeans. Ezekiel himself was among those exiled‚ initially settling near the Chebar River in Babylon.

This context of national crisis and displacement fueled Ezekiel’s pronouncements of judgement against Judah’s sin and idolatry‚ alongside promises of future restoration. The political landscape‚ dominated by Nebuchadnezzar II‚ directly impacted the lives and faith of Ezekiel’s audience.

Recognizing these historical realities illuminates the urgency and relevance of Ezekiel’s prophetic voice‚ offering a window into a pivotal moment in Israel’s story.

III. Authorship and Date of Writing

The book of Ezekiel is universally attributed to the prophet Ezekiel‚ a priest exiled to Babylon with Jehoiachin in 597 BC. The text consistently identifies him as the speaker and recipient of divine revelations‚ establishing clear authorial intent.

Determining the precise dates of composition is complex‚ but scholars generally agree the prophecies span from 593 to 571 BC. Early chapters reflect events during the initial years of exile‚ while later sections address the fall of Jerusalem in 586 BC and subsequent events.

The book’s internal structure suggests multiple stages of writing‚ with some passages likely recorded shortly after the visions and others compiled later. The literary coherence noted by commentators indicates careful editing and arrangement.

Understanding authorship and dating is vital for interpreting Ezekiel’s message within its historical and literary context‚ appreciating the prophet’s unique voice and perspective.

IV. Ezekiel’s Audience and Setting

Ezekiel’s primary audience comprised Jewish exiles residing in Babylon along the Kebar River‚ approximately 300 miles south of Jerusalem. These were individuals forcibly removed from their homeland following the Babylonian conquest‚ experiencing profound loss and uncertainty.

The setting is crucial for understanding the prophecies; Ezekiel ministered within a foreign land‚ witnessing the realities of exile and the spiritual struggles of a displaced community. His messages addressed their despair‚ questioning of God’s justice‚ and longing for restoration.

The Babylonian context influenced Ezekiel’s symbolism and imagery‚ incorporating elements of Mesopotamian culture and religious practices. This allowed him to communicate effectively with his audience while challenging their idolatrous tendencies.

Recognizing the audience and setting illuminates the relevance of Ezekiel’s message‚ emphasizing themes of hope‚ repentance‚ and the promise of a new covenant amidst hardship.

V. Theological Themes in Ezekiel

Central to Ezekiel’s theology is the sovereignty of God‚ powerfully demonstrated through visions of His glory and control over nations. Despite Israel’s sin and exile‚ God remains faithful to His covenant promises‚ albeit through judgement.

The book emphasizes God’s holiness and justice‚ portraying the consequences of idolatry and disobedience. Ezekiel’s prophecies serve as a stern warning against compromising moral and spiritual integrity.

Restoration is a recurring theme‚ offering hope for a future return to the land and a renewed relationship with God. This restoration involves both physical and spiritual renewal‚ signified by the new covenant.

Ezekiel also explores the individual responsibility for sin and the possibility of repentance‚ highlighting God’s desire for genuine transformation. These themes resonate with broader biblical truths.

Ezekiel’s prophetic book‚ rich in symbolism‚ demands careful study‚ utilizing commentaries for deeper understanding of its complex visions and theological implications.

VI. The Vision of God’s Glory (Ezekiel 1-3)

The opening chapters of Ezekiel present a breathtaking and complex vision of God’s glory‚ establishing a foundational understanding for the entire book. This initial encounter‚ described with vivid imagery‚ showcases God’s majestic presence and sovereignty‚ setting the stage for Ezekiel’s prophetic commission.

Scholars‚ like those contributing to the Word Biblical Commentary‚ emphasize the importance of analyzing the literary structure of these chapters‚ noting the deliberate arrangement of details that contribute to the overall impact of the vision. The descriptions of the “four living creatures” and the “wheel within a wheel” are not merely fantastical elements‚ but symbolic representations of God’s power and movement.

Understanding the context of Ezekiel’s time‚ as highlighted in various commentaries‚ is crucial for interpreting this vision. Ezekiel witnessed the decline of Judah and the destruction of Jerusalem‚ and the vision of God’s glory serves as a reminder of His enduring presence even amidst chaos. This initial revelation prepares Ezekiel for the challenging task of delivering God’s message to a rebellious people‚ emphasizing both judgment and the potential for restoration.

Furthermore‚ the vision’s impact on Ezekiel’s subsequent prophecies cannot be overstated‚ as it provides the theological basis for his pronouncements of judgment and hope.

VII. Ezekiel’s Commission as a Watchman (Ezekiel 3:16-21)

Ezekiel’s commission as a “watchman” (Ezekiel 3:16-21) is a pivotal moment‚ defining his role and responsibility as a prophet. God explicitly charges Ezekiel to warn the people of impending judgment‚ making him accountable for their response – or lack thereof.

This passage highlights the crucial link between prophetic warning and divine justice. Ezekiel is not merely a messenger delivering bad news; he is a representative of God‚ and his faithfulness in proclaiming the message determines his own accountability. Commentaries‚ such as those found in the Bible Knowledge Commentary‚ emphasize the weight of this responsibility.

The watchman analogy is powerful‚ illustrating the urgency and importance of Ezekiel’s task. A watchman’s duty is to alert the city to danger‚ and Ezekiel’s duty is to warn Judah of God’s impending wrath. The consequences of failing to warn‚ or the people failing to heed the warning‚ are severe.

This commission underscores the theme of individual responsibility‚ both for the prophet and the people‚ within God’s plan.

VIII. Symbolic Acts and Prophecies (Ezekiel 4-5)

Chapters 4 and 5 of Ezekiel are characterized by striking symbolic acts designed to vividly illustrate the coming judgment upon Jerusalem and Judah. These aren’t arbitrary gestures; they are carefully orchestrated prophecies meant to capture the attention of the people and convey a powerful message.

The siege of Jerusalem is represented by Ezekiel’s lying on his side for 390 days‚ symbolizing the years of punishment. The division of hair‚ burning some‚ scattering others‚ and weighing the strands‚ graphically depicts the fate awaiting the inhabitants – destruction‚ exile‚ and a remnant.

These actions‚ as explored in commentaries like those by Blenkinsopp‚ demonstrate Ezekiel’s unique prophetic style. They move beyond verbal pronouncements to embody the message physically‚ making it unforgettable.

The purpose is not merely to predict doom‚ but to reveal God’s righteous judgment and offer a final opportunity for repentance‚ though the response is tragically minimal.

Ezekiel’s prophecies‚ explored through insightful commentaries‚ reveal God’s glory‚ judgment‚ and ultimate restoration plan for Israel‚ offering profound theological depth for study.

IX. Judgement Against Jerusalem (Ezekiel 6-7)

Ezekiel chapters 6 and 7 deliver a stark and uncompromising message of impending judgement upon Jerusalem‚ detailing the reasons for God’s righteous anger against the city and its inhabitants.

These chapters emphasize the pervasive idolatry‚ social injustice‚ and moral corruption that have deeply offended God‚ leading to an inevitable consequence of destruction and exile.

Ezekiel vividly portrays the horrors awaiting Jerusalem – famine‚ pestilence‚ sword‚ and scattering among the nations – serving as a warning to repent before it’s too late.

The prophet’s pronouncements aren’t merely predictions‚ but a passionate plea for Israel to turn back to God and embrace genuine repentance‚ though the judgement is portrayed as certain.

Studying these chapters requires grappling with the severity of God’s justice and the consequences of persistent disobedience‚ while also recognizing the underlying theme of God’s unwavering holiness.

Commentaries by Blenkinsopp and Allen provide valuable context‚ illuminating the historical and literary nuances of these powerful prophetic declarations.

X. The Cutting of the Hair – A Sign of Coming Judgement (Ezekiel 5)

Ezekiel 5 presents a striking symbolic act – the prophet is commanded to cut his hair‚ dividing it into portions to represent the fate awaiting Israel and Jerusalem.

This dramatic demonstration serves as a visual prophecy‚ foreshadowing the scattering of the people‚ the destruction of the city‚ and the diminishing of Israel’s glory.

The specific instructions regarding the hair – burning‚ scattering‚ and tossing in the wind – each symbolize different aspects of the impending judgement and exile.

Ezekiel’s actions aren’t arbitrary; they are divinely ordained signs intended to capture the attention of the people and communicate the gravity of their situation.

This chapter highlights the theme of corporate responsibility‚ emphasizing that the sins of the people have brought about this divine decree of judgement.

Scholarly resources‚ like the Word Biblical Commentary by Allen‚ offer deeper insights into the symbolism and theological implications of this powerful prophetic gesture.

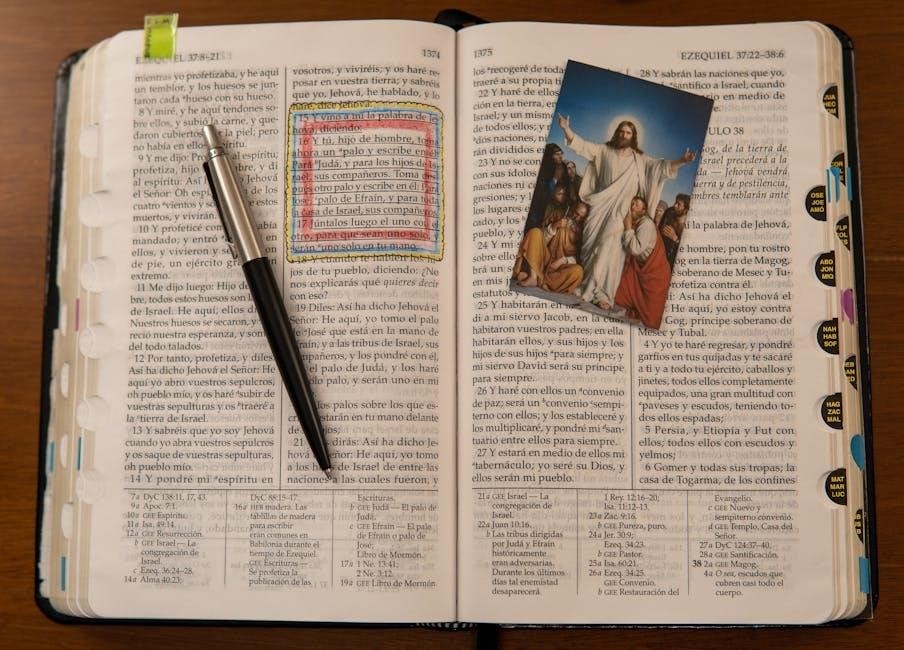
XI. The Valley of Dry Bones (Ezekiel 37)

Ezekiel 37 contains one of the most iconic and hope-filled passages in the Old Testament: the vision of the valley of dry bones.

This powerful imagery depicts a vast field of lifeless skeletons‚ representing the seemingly hopeless state of Israel – scattered‚ broken‚ and devoid of life.

God commands Ezekiel to prophesy to these bones‚ promising to breathe life into them‚ restoring them to a mighty army.

The vision symbolizes the national restoration of Israel‚ a future revival and return to the land after exile.

It’s a potent message of hope‚ demonstrating God’s power to bring life out of death and to fulfill His promises‚ even in the face of utter despair.

Commentaries‚ such as those found in the Bible Knowledge Commentary by Dyer‚ illuminate the spiritual significance and enduring relevance of this remarkable prophecy.

Ezekiel’s prophecies‚ explored through insightful commentaries‚ reveal a coherent literary structure focused on judgement‚ restoration‚ and God’s ultimate glory for all believers.

XII. The Temple Vision (Ezekiel 40-48)

Ezekiel’s detailed Temple vision (chapters 40-48) represents a pivotal section‚ offering a complex architectural blueprint and symbolic representation of future restoration. This isn’t merely a physical description; it’s a theological statement about God’s renewed presence with His people.

Scholars like Allen‚ in the Word Biblical Commentary‚ emphasize the importance of understanding the final form and composition of these chapters. The meticulous measurements and specifications demand careful study‚ revealing a deliberate order and purpose.

This vision contrasts sharply with the destruction of the first Temple‚ signaling a new era of worship and divine dwelling. Examining Ezekiel 41-42 provides a detailed examination of the Temple courts‚ while Ezekiel 43 highlights the return of God’s glory.

Ultimately‚ the Temple vision points towards a future reality‚ foreshadowing the ultimate fulfillment in the New Jerusalem‚ offering hope and a tangible promise of God’s faithfulness.

XIII. Detailed Examination of the Temple Courts (Ezekiel 41-42)

Ezekiel chapters 41-42 present an incredibly detailed architectural survey of the Temple courts‚ demanding close attention to the precise measurements and structural components. This meticulousness isn’t arbitrary; it reflects divine order and holiness.

The descriptions cover the porch‚ chambers‚ pillars‚ and gates‚ revealing a complex layout designed to facilitate worship and symbolize God’s presence. Understanding the function of each area is crucial for interpreting the vision’s theological significance.

Commentaries‚ such as those by Blenkinsopp‚ highlight the importance of considering the literary coherence of Ezekiel’s work. These chapters build upon the initial vision (40)‚ expanding the scope and providing greater clarity.

Studying these sections requires patience and a willingness to grapple with complex details‚ ultimately revealing a profound picture of God’s future dwelling place and the restoration of Israel.

XIV. The Glory of the Lord Returning to the Temple (Ezekiel 43)

Ezekiel 43 marks a pivotal moment – the dramatic return of the glory of the Lord to the newly envisioned Temple. This isn’t merely a physical re-entry‚ but a powerful demonstration of God’s renewed covenant relationship with Israel.

The chapter details the specific manner of God’s arrival‚ emphasizing the overwhelming power and holiness associated with His presence; This event signifies the fulfillment of promises and the hope of restoration.

Scholars‚ like Allen in the Word Biblical Commentary‚ emphasize the importance of understanding this return within the broader context of Ezekiel’s prophetic message. It’s a culmination of previous visions and prophecies.

Studying Ezekiel 43 requires recognizing the symbolic weight of the imagery. The glory’s return isn’t just about a building; it’s about God’s presence dwelling among His people once more‚ offering profound hope.

Ezekiel’s prophecies‚ explored through commentaries like Blenkinsopp’s “Interpretation‚” reveal a coherent literary structure focused on judgement‚ restoration‚ and God’s ultimate glory.

XV. The New Covenant and Restoration (Ezekiel 36-37)

Ezekiel 36-37 powerfully proclaims God’s promise of a New Covenant‚ shifting from judgement to restoration for Israel. This section details God’s intent to cleanse His people‚ not for their righteousness‚ but for His holy name’s sake (Ezekiel 36:22-23);

The promise extends beyond mere forgiveness‚ encompassing a new heart and spirit (Ezekiel 36:26-27)‚ enabling obedience to God’s laws. This internal transformation is crucial‚ signifying a radical change within the individuals and the nation.

The famous vision of the Valley of Dry Bones (Ezekiel 37) dramatically illustrates this restoration. These bones represent Israel‚ seemingly lifeless‚ but God breathes new life into them‚ symbolizing national revival and return to the land.

This restoration isn’t simply physical; it’s a spiritual reawakening‚ a renewal of covenant relationship. Commentaries‚ like those by Allen‚ emphasize the interplay between God’s initiative and Israel’s response in this transformative process.

XVI. Gog and Magog – Prophecy of Nations (Ezekiel 38-39)

Ezekiel 38-39 presents a vivid‚ though debated‚ prophecy concerning Gog of Magog‚ a northern nation leading a coalition against Israel. This invasion isn’t merely a political conflict‚ but a spiritual battle against God and His people‚ revealing His sovereign power.

The prophecy details Gog’s motives – to plunder and seize the land – and God’s decisive intervention‚ unleashing a devastating earthquake and internal strife among the invaders. This demonstrates God’s commitment to protecting His restored Israel.

Interpretations vary regarding the identity of Gog and Magog‚ with some seeing it as a historical enemy‚ while others view it as a symbolic representation of ongoing opposition to God’s kingdom.

Commentaries‚ such as Dyer’s in the Bible Knowledge Commentary‚ offer insights into the historical context and potential fulfillment of this prophecy‚ emphasizing God’s ultimate triumph over evil and the security of His people.

XVII. Division of the Land (Ezekiel 47-48)

Ezekiel 47-48 details a meticulous and symbolic division of the land of Israel‚ outlining tribal allotments for the restored nation. This section follows the vision of the temple and the river of life‚ signifying God’s renewed blessing and provision for His people.

The precise boundaries and portions assigned to each tribe demonstrate God’s fairness and order in establishing a new covenant community. This isn’t a literal blueprint for modern land division‚ but a prophetic depiction of future restoration.

The land’s fertility is emphasized‚ with the river flowing into the Dead Sea‚ bringing life and healing. This symbolizes the spiritual renewal and abundance that will characterize the restored Israel.

Scholarly resources highlight the symbolic nature of these chapters‚ emphasizing the theological significance of the land as a sign of God’s covenant faithfulness and the ultimate fulfillment of His promises to Abraham.

Ezekiel’s prophecies‚ explored through commentaries like those by Blenkinsopp and Allen‚ reveal God’s sovereignty and future restoration for Israel and all believers.

XVIII. Ezekiel and Other Prophetic Books – Comparisons

Comparing Ezekiel to other prophets‚ like Jeremiah and Isaiah‚ reveals unique emphases and shared themes of judgment and hope. While Jeremiah mourns Jerusalem’s fall with poignant lament‚ Ezekiel focuses on God’s glory departing and its eventual return.

Isaiah’s prophecies often highlight future messianic hope‚ whereas Ezekiel’s vision centers on a restored temple and renewed covenant. Both Daniel and Ezekiel share apocalyptic elements‚ particularly concerning future nations – Gog and Magog – and divine sovereignty.

Unlike the concise oracles of Amos or Hosea‚ Ezekiel’s book is characterized by detailed visions and symbolic acts. His emphasis on individual responsibility‚ as a watchman‚ differs from the national focus prevalent in some prophetic books. Studying these comparisons illuminates the multifaceted nature of God’s revelation.

Furthermore‚ Ezekiel’s detailed descriptions of the temple anticipate the ultimate fulfillment in Revelation‚ showcasing a consistent biblical narrative of God’s dwelling place with humanity.

XIX. Literary Features of Ezekiel

Ezekiel’s literary style is remarkably distinctive‚ marked by vivid imagery‚ symbolic actions‚ and complex visions. The book demonstrates a high degree of literary coherence‚ unlike many prophetic texts‚ as noted by scholars. His use of dramatic enactments – like cutting his hair or lying on his side – powerfully conveys messages of impending judgment.

Repetition and parallelism are common features‚ reinforcing key themes of God’s holiness and Israel’s sin. Ezekiel frequently employs numerical symbolism and precise measurements‚ particularly in the temple descriptions‚ adding to the book’s structured nature.

The narrative sections‚ interspersed with poetic oracles‚ create a dynamic reading experience. His language is often highly figurative‚ demanding careful interpretation to grasp the underlying meaning.

Analyzing these features reveals Ezekiel’s masterful storytelling and his deliberate crafting of a compelling theological message.

XX. Key Interpretive Challenges in Ezekiel

Interpreting Ezekiel presents unique challenges due to its symbolic language‚ complex visions‚ and historical distance. Understanding the cultural context of ancient Israel and the Near East is crucial‚ requiring engagement with resources exploring ancient Near Eastern thought.

The book’s prophetic style often blends literal and figurative elements‚ demanding discernment to avoid misinterpretation. Determining the precise historical referents of Ezekiel’s prophecies – like Gog and Magog – remains debated among scholars.

Reconciling Ezekiel’s emphasis on judgment with God’s character of mercy requires careful theological reflection.

Furthermore‚ navigating the detailed architectural descriptions of the temple demands attention to both symbolic and practical considerations. A willingness to have one’s views of God corrected through study is essential.

Ezekiel’s prophecies‚ rich in symbolism and divine encounters‚ demand careful study‚ utilizing commentaries and historical context for insightful interpretation and application.

XXI. Resources for Studying Ezekiel (Commentaries)

Numerous commentaries provide invaluable assistance when navigating Ezekiel’s complex prophecies and symbolic language. Blenkinsopp’s “Ezekiel: Interpretation” offers a robust scholarly approach‚ while Leslie C. Allen’s “Word Biblical Commentary” meticulously examines both the final form and composition of the text.

Tremper Longman highlights Allen’s strengths for expository preachers‚ students‚ and teachers. Rudolph W. Haggai’s “The Book of Ezekiel in Modern Study” provides historical context; For a broader perspective‚ the “Seventh-day Adventist Bible Commentary” offers a comprehensive‚ multi-volume analysis.

Layman’s Bible Commentary‚ specifically the volume on Ezekiel and Daniel by Howie Carl G.‚ presents accessible insights. Additionally‚ resources like the “Bible Knowledge Commentary” (Dyer’s contribution on Ezekiel) and commentaries focusing on the Ancient Near Eastern context can deepen understanding. Exploring these diverse resources will enrich your study significantly.

XXII. Application of Ezekiel’s Message Today

Ezekiel’s message‚ though rooted in ancient Israel’s judgment‚ resonates powerfully with contemporary challenges. The call to personal responsibility and repentance remains crucial‚ urging individuals to examine their hearts and turn from sin. The prophet’s emphasis on God’s sovereignty offers comfort amidst uncertainty‚ reminding believers of His ultimate control.

Ezekiel’s vision of restoration provides hope for brokenness‚ mirroring the potential for renewal in individuals‚ communities‚ and even nations. The importance of spiritual discernment – being a “watchman” – is vital in a world filled with deception.

Studying Ezekiel compels us to confront issues of social justice and idolatry‚ challenging us to live lives of integrity and faithfulness. Ultimately‚ Ezekiel’s prophecies point towards a future of God’s glorious reign‚ inspiring hope and perseverance in believers today.

XXIII. Conclusion: The Hope of Restoration in Ezekiel

The book of Ezekiel‚ initially a stark warning of judgment‚ culminates in a breathtaking vision of hope and restoration. Through symbolic acts and powerful prophecies‚ Ezekiel reveals God’s unwavering commitment to His people‚ even in their deepest exile. The temple vision (Ezekiel 40-48) isn’t merely architectural; it symbolizes a renewed relationship between God and humanity.

The promise of a new covenant (Ezekiel 36-37) offers forgiveness and spiritual transformation‚ while the valley of dry bones illustrates God’s power to resurrect and revitalize. Ezekiel’s message transcends historical context‚ offering enduring encouragement to those facing hardship and despair.

Ultimately‚ the study of Ezekiel affirms that God’s redemptive plan prevails‚ offering a future filled with glory‚ peace‚ and the abiding presence of the Lord.

ara zobayan autopsy report pdf

Ara Zobayan Autopsy Report: A Comprehensive Overview (February 15, 2026)

The 19-page Ara Zobayan autopsy report, released by the Los Angeles County Medical Examiner-Coroner, details blunt trauma as the cause of death, with no substances detected.

The tragic helicopter crash of January 26, 2020, in Southern California, resulted in the devastating loss of nine lives, including basketball legend Kobe Bryant and his daughter Gianna. Central to understanding the circumstances surrounding this event is the autopsy report of the pilot, Ara Zobayan (report number 2020-00803). This 19-page document, released by the Los Angeles County Medical Examiner-Coroner, provides crucial medical findings related to Zobayan’s death.

The report’s release is a significant step in the ongoing investigation, offering detailed insights into the nature and extent of the injuries sustained. It confirms that Zobayan’s cause of death was blunt trauma, and importantly, toxicology tests revealed no presence of drugs or alcohol in his system. This information, alongside findings from other victim autopsies – like those of Christina Mauser and Emily Noble – contributes to a comprehensive understanding of the crash’s impact.

II. The Victims and the Flight

The ill-fated Sikorsky S76B helicopter carried a total of nine individuals, including the pilot, Ara Zobayan, and passengers traveling to a youth basketball game. The loss extended beyond Kobe Bryant and his daughter, encompassing family members, teammates, and coaches. Understanding the flight path and conditions is crucial, and the National Transportation Safety Board (NTSB) investigation, aided by wreckage examination performed by Carol Hogan, is ongoing.

Ara Zobayan, born January 2, 1970, was the pilot responsible for navigating the aircraft. His autopsy report (2020-00803), a 19-page document, details the extent of his injuries as blunt trauma, with no evidence of impairment. The report, alongside those of other victims, provides a somber record of the crash’s physical toll, contributing to the broader investigation into the causes and contributing factors.

III. Initial Reports and Investigation

Immediately following the January 26, 2020 crash near Calabasas, California, initial reports focused on the high-profile nature of the passengers, particularly Kobe Bryant. However, a thorough investigation was swiftly launched by the NTSB, aiming to determine the cause of the accident. The Los Angeles County Medical Examiner-Coroner’s Department initiated the process of identifying the victims and performing autopsies, including that of pilot Ara Zobayan (report no. 2020-00803).

The 19-page Zobayan autopsy report, alongside reports for Christina Mauser and Emily Noble, became critical evidence. Preliminary findings indicated blunt trauma as the cause of death for all nine individuals, classified as an accident. Media requests for the reports were directed to the department’s public information office, highlighting the intense public and media scrutiny surrounding the tragedy.

IV. Obtaining the Autopsy Report

The Ara Zobayan autopsy report (2020-00803), a 19-page PDF document totaling 23.25 MB, was initially subject to media and public interest following the tragic helicopter crash. Access to the complete report was, and remains, managed by the Los Angeles County Medical Examiner-Coroner Department. Strict guidelines were implemented for media requests, directing inquiries to piocoroner.lacounty.gov, and information was also disseminated via the department’s official Twitter account, lacountymec.

The report, detailing the findings of the examination, became a key piece of evidence in the broader investigation. While initially restricted, the document’s availability facilitated transparency and allowed for independent analysis of the cause and manner of death, contributing to a comprehensive understanding of the events of January 26, 2020.

V. Key Findings of the Autopsy Report

The Ara Zobayan autopsy report, a crucial document in the investigation, definitively established the cause of death as blunt trauma. This determination stemmed from extensive injuries sustained during the helicopter crash. The manner of death was officially certified as an accident, ruling out any intentional harm or other contributing factors. Significantly, toxicological testing revealed the absence of any drugs or alcohol in Zobayan’s system at the time of the incident.

The report detailed extensive blunt force traumatic injuries, including multiple fractures to both the skull and spine, alongside significant lacerations to internal organs. These findings painted a clear picture of the catastrophic forces involved in the crash, solidifying the conclusion of accidental death.

A. Cause of Death: Blunt Trauma

The Los Angeles County Medical Examiner-Coroner’s report unequivocally states that Ara Zobayan’s cause of death was blunt trauma. This conclusion is based on a thorough post-mortem examination revealing widespread and severe injuries consistent with a high-impact crash. The autopsy documented extensive damage to Zobayan’s body, indicating he sustained significant force during the helicopter’s descent and subsequent impact.

Specifically, the report details multiple fractures and lacerations indicative of blunt force. This finding is central to understanding the immediate physiological consequences of the crash. The blunt trauma directly resulted in fatal injuries, making it the primary and overriding cause of death as determined by the medical examiner’s investigation.

B. Manner of Death: Accident

The official manner of death for Ara Zobayan, as certified by the Los Angeles County Medical Examiner-Coroner, is classified as an accident. This designation signifies that his death resulted from an unintentional event – the helicopter crash – and was not the result of suicide or intentional harm. The determination of ‘accident’ reflects a careful consideration of all available evidence, including the autopsy findings and the ongoing investigation by the National Transportation Safety Board (NTSB).

This classification is crucial, distinguishing the tragedy from other potential causes of death. It acknowledges the unforeseen and unintended nature of the event, emphasizing that Zobayan’s death was not self-inflicted or due to criminal intent. The ‘accident’ ruling provides a clear and legally defined context for understanding the circumstances surrounding his passing.

C. Absence of Drugs and Alcohol

Toxicological testing conducted as part of Ara Zobayan’s autopsy revealed no presence of drugs or alcohol in his system at the time of death. This critical finding eliminates substance impairment as a contributing factor to the helicopter crash. The comprehensive toxicological analysis, performed by the Los Angeles County Medical Examiner-Coroner’s Department, screened for a wide range of substances, ensuring a thorough and accurate assessment;

The absence of any detectable intoxicants reinforces the focus of the investigation on other potential causes, such as weather conditions, mechanical failure, or pilot error. This clarity is vital for understanding the sequence of events leading to the tragic accident and for implementing preventative measures to enhance aviation safety in the future.

VI. Detailed Anatomical Findings

The autopsy of Ara Zobayan revealed extensive blunt force traumatic injuries, indicative of a high-impact crash. Multiple fractures were identified throughout the skeletal structure, most notably affecting the skull and spine. These fractures demonstrate the significant force exerted upon the body during the impact sequence. Internal examination disclosed multiple lacerations to vital organs, further illustrating the severity of the trauma sustained.

The anatomical findings paint a clear picture of the physical forces involved in the crash, confirming the catastrophic nature of the event. Microscopic examination of the heart showed mild fibrosis, though this was not considered a contributing factor to the accident. The detailed documentation of these injuries is crucial for reconstructing the events and understanding the mechanisms of injury.

A. Skull Fractures

The Ara Zobayan autopsy report explicitly details multiple fractures of the skull, a key component of the blunt trauma identified as the cause of death. These fractures weren’t isolated; they were extensive and distributed across various regions of the cranial vault, indicating significant force application. The pattern of these fractures suggests a high-energy impact, consistent with a helicopter crash scenario.

Detailed examination revealed the complexity of these injuries, with both linear and comminuted fractures present. This suggests multiple points of impact and varying degrees of force. The severity of the skull fractures directly contributed to the fatal outcome, impacting the brain and neurological function. Documentation of these fractures is vital for forensic reconstruction and understanding the crash dynamics.

B. Spinal Fractures

The autopsy report of Ara Zobayan confirms the presence of multiple spinal fractures, alongside the documented skull fractures, as a critical component of the blunt force trauma. These fractures weren’t limited to a single vertebral level but were observed throughout the spinal column, indicating widespread impact and instability. The nature of these fractures suggests a significant compressive force was exerted upon the spine.

The spinal injuries likely resulted in immediate and severe neurological compromise, contributing to the rapid fatality. Documentation details the specific vertebrae affected and the type of fracture observed – including compression, transverse, and comminuted fractures. These findings are crucial for understanding the biomechanics of the crash and the extent of Zobayan’s injuries, supporting the accident classification.

C. Internal Organ Lacerations

The Ara Zobayan autopsy report meticulously details extensive internal organ lacerations, a direct consequence of the severe blunt force trauma sustained during the helicopter crash. Multiple organs exhibited tearing and damage, including the heart, lungs, and liver. These lacerations weren’t superficial; they were deep and substantial, indicating a massive impact force distributed throughout the body.

The severity of these internal injuries would have rapidly led to internal hemorrhage and organ failure, contributing significantly to Zobayan’s immediate death. The report specifies the extent and location of each laceration, providing a comprehensive picture of the internal damage. This detailed documentation is vital for reconstructing the crash dynamics and understanding the lethal nature of the impact forces experienced by the pilot.

VII. Microscopic Examination Results

The microscopic examination of tissue samples from Ara Zobayan, as detailed in the autopsy report, revealed mild fibrosis within the heart, indicating pre-existing, though not acutely significant, cardiac changes. This finding suggests a degree of chronic stress or prior minor injury to the heart muscle, but it wasn’t a contributing factor to the crash.

However, the primary microscopic findings centered on evidence of widespread tissue disruption and damage consistent with blunt force trauma. Cellular structures were fragmented and distorted across multiple organs, confirming the macroscopic observations of lacerations and internal injuries. These microscopic details provide crucial corroboration of the trauma’s severity and help establish the mechanism of death, reinforcing the conclusion of accidental blunt trauma.

VIII. Toxicological Testing Details

Comprehensive toxicological analysis was conducted as part of Ara Zobayan’s autopsy, meticulously screening for a wide range of substances, including alcohol, prescription medications, and illicit drugs. The Los Angeles County Medical Examiner-Coroner’s report definitively states that no drugs or alcohol were detected in Zobayan’s system at the time of death.

This finding is particularly significant, as it eliminates substance impairment as a contributing factor to the helicopter crash. The toxicology screen included analysis of blood and urine samples, ensuring a thorough assessment. The absence of any detectable substances supports the conclusion that the crash was a tragic accident resulting solely from the physical trauma sustained during the impact, and not influenced by any external chemical factors.

IX. The Role of the Los Angeles County Medical Examiner-Coroner

The Los Angeles County Medical Examiner-Coroner Department played a crucial role in investigating the deaths resulting from the tragic helicopter crash, including conducting the autopsy on Ara Zobayan. Their responsibilities encompassed identifying the deceased, determining the cause and manner of death, and officially documenting all findings in detailed autopsy reports.

The department released the 19-page autopsy report for Zobayan, providing critical information regarding the extent of his injuries – specifically, blunt trauma. They also handled media inquiries, with Sarah Ardalani serving as the designated media contact. Public access to the reports was facilitated through piocoroner.lacounty.gov, ensuring transparency while adhering to legal and privacy regulations. Their work was foundational to the broader NTSB investigation.

X. Public Access to the Autopsy Report

Access to the Ara Zobayan autopsy report, a 19-page document detailing the findings of the examination, was managed by the Los Angeles County Medical Examiner-Coroner Department. Recognizing public interest and the importance of transparency, the department established a clear protocol for releasing the information.

Specifically, the department directed all strictly media requests to piocoroner.lacounty.gov, ensuring a centralized and organized response system. They also maintained an official Twitter page, lacountymec, for disseminating updates and information. This approach balanced the public’s right to know with the need to respect the privacy of the deceased and their families, while facilitating responsible reporting on the tragic event and the report’s key findings.

XI. NTSB Investigation and Findings

The National Transportation Safety Board (NTSB) conducted a thorough investigation into the helicopter crash that claimed the lives of Ara Zobayan and eight others. Carol Hogan played a crucial role, examining the wreckage as part of the NTSB’s comprehensive assessment of the incident.

While the Ara Zobayan autopsy report confirmed blunt trauma as the cause of death, the NTSB’s investigation extended beyond the immediate physical injuries. It focused on determining the factors that contributed to the crash, including pilot performance, weather conditions, and mechanical issues. The autopsy findings provided critical context, supporting the broader investigation’s goal of understanding the sequence of events and preventing similar tragedies in the future. The NTSB’s final report will detail these findings.

XII. Carol Hogan’s Involvement in the Wreckage Examination

Carol Hogan’s expertise was instrumental in the National Transportation Safety Board’s (NTSB) investigation of the Sikorsky S76B helicopter crash. She meticulously examined the wreckage, documenting damage patterns and collecting crucial evidence to determine the crash’s contributing factors.

Her work complemented the findings of the Ara Zobayan autopsy report, which detailed the blunt force trauma sustained by the pilot. While the autopsy established the how of the injuries, Hogan’s wreckage examination aimed to uncover the why – the circumstances that led to those injuries. Photographs show her on-site, documenting the scene (image file 49456438822.jpg). This detailed analysis was vital for reconstructing the flight path and understanding the forces involved in the tragic accident.

XIII. Comparison with Other Victim Autopsy Reports (Christina Mauser, Emily Noble)

The Los Angeles County Medical Examiner-Coroner consistently certified the manner of death as an accident for all nine victims, including Ara Zobayan, Christina Mauser, and Emily Noble. Crucially, all autopsy reports – Zobayan’s (2020-00803), Mauser’s (2020), and Noble’s – identified blunt trauma as the primary cause of death.

This uniformity in findings suggests a catastrophic impact event affecting all passengers and the pilot. While individual reports detail specific fracture patterns and internal injuries, the overarching cause remained consistent. Mauser’s report spans 20 pages (810×1756, 25.15MB), and Noble’s is 5 pages long. The similarity in autopsy conclusions reinforces the NTSB’s investigation into external factors contributing to the crash, rather than individual health issues.

XIV. Document Details: Report Number, Pages, and Size

The official Ara Zobayan autopsy report is designated report number 2020-00803 by the Los Angeles County Department of Medical Examiner-Coroner. This comprehensive document comprises a total of 19 pages, providing a detailed account of the examination performed on January 28, 2020.

The digital file, a PDF, has dimensions of 1,237 x 1,616 pixels and occupies a file size of 23.25 MB. This substantial size reflects the inclusion of detailed anatomical findings, microscopic examination results, and toxicological testing data. Access to the report is subject to media requests directed to piocoroner.lacounty.gov, and updates are available via the department’s Twitter page, lacountymec.

XV. Media Coverage and Public Response

The release of the 19-page Ara Zobayan autopsy report generated significant media coverage, focusing on the confirmed cause of death – blunt trauma – and the absence of any intoxicating substances. News outlets widely reported the findings from the Los Angeles County Medical Examiner-Coroner’s office.

Public response was characterized by a somber acknowledgment of the tragic circumstances surrounding the helicopter crash. Media requests were directed to the coroner’s office’s public information officer, Sarah Ardalani. The department utilized its official Twitter account, lacountymec, to disseminate information and address public inquiries. Coverage extended to comparisons with the autopsy reports of other victims, like Christina Mauser and Emily Noble, highlighting the consistent findings of blunt force injuries.

XVI. Ongoing Analysis and Implications of the Report

The Ara Zobayan autopsy report, alongside those of the other victims, continues to be a crucial component of the National Transportation Safety Board’s (NTSB) investigation. Carol Hogan’s examination of the wreckage directly correlates with the documented blunt force trauma detailed in the report, aiding in reconstructing the crash sequence.

Further analysis focuses on understanding the specific mechanisms of injury and their relationship to the impact forces. The report’s confirmation of accidental death, with no contributing substances, reinforces the investigation’s focus on environmental factors and potential mechanical failures. The 23.25 MB PDF document, comprising 19 pages, remains a key piece of evidence, informing ongoing safety recommendations and preventative measures within the aviation industry.

bosch classixx washing machine user manual

Welcome! This guide assists with your Bosch Classixx, offering setup, operation, and maintenance details. Register your device on MyBosch for exclusive benefits and further assistance.

Understanding the Classixx Series

Bosch Classixx washing machines represent a commitment to reliable performance and efficient laundry care, designed for everyday use. This series balances practicality with innovative features, offering a range of models to suit diverse household needs. ManualsLib hosts numerous Classixx manuals, including those for the 7 WAE28369GB and 1400 Express WFO2867GB, demonstrating the breadth of the series.

The Classixx line often incorporates VarioPerfect technology, as seen in the 6 VarioPerfect model, optimizing water and energy consumption. These machines are designed for ease of use, with clear control panels and a selection of specialized programs. Accessing the user manual, readily available online, is crucial for maximizing your machine’s potential and understanding its specific capabilities. Registering your device on MyBosch unlocks additional support and benefits.

Safety Precautions

Prioritize safety when installing and operating your Bosch Classixx washing machine. Always disconnect the appliance from the electrical supply before cleaning or performing maintenance. Ensure proper grounding to prevent electric shock. Do not use extension cords or adapters; connect directly to a suitable outlet.

Keep children and pets away from the washing machine during operation. Never open the door while a wash cycle is in progress. Avoid contact with detergent solutions, as they can cause skin and eye irritation. Refer to the user manual for detailed safety instructions specific to your model – resources are available on ManualsLib for various Classixx series. Registering on MyBosch provides access to updated safety information and support.

Installation Guide

Proper installation is crucial for optimal performance. This section details unpacking, connecting water, drainage, and electrical components, ensuring safe and efficient operation.

Unpacking and Positioning

Carefully unpack your Bosch Classixx washing machine, removing all packaging materials, including transport bolts – these are vital to remove! Inspect the appliance for any visible damage sustained during shipping. If damage is present, immediately contact the retailer or Bosch customer support.

Position the washing machine on a firm, level surface. Adjust the leveling feet to ensure stability and minimize vibration during operation; Ensure there is sufficient space around the machine for ventilation and access for maintenance. Avoid direct sunlight and extreme temperatures.

Confirm the water supply and drainage connections are readily accessible before finalizing the machine’s position. Incorrect positioning can lead to operational issues and potential damage, so take your time and double-check everything!

Connecting to Water Supply

Connect the inlet hose to both the washing machine and a suitable water tap with a ¾ inch thread. Ensure the hose is securely tightened to prevent leaks. Use only the supplied inlet hose; do not reuse old hoses. A protective filter is integrated within the inlet hose connection – regularly check and clean this filter to maintain optimal water flow.

Verify the water pressure is within the recommended range specified in the full user manual. Insufficient water pressure can affect washing performance. Open the water tap slowly to allow the system to pressurize gradually, checking for any leaks at the connections.

Always follow local plumbing regulations when connecting the water supply. A faulty connection can cause significant water damage, so double-check everything!

Connecting to Drainage

Securely attach the drain hose to a suitable standpipe or sink drain with a diameter of at least 60cm and a height between 60-90cm. Ensure the hose is positioned firmly to prevent it from slipping out during operation. Avoid kinks or sharp bends in the drain hose, as these can restrict water flow and cause drainage issues.

The drain hose must be securely fastened to prevent siphoning. Check the user manual for specific instructions regarding securing the hose at the correct height. Proper installation is crucial to avoid wastewater backflow.

Regularly inspect the drain hose for any signs of damage or wear and tear, replacing it if necessary. A damaged hose can lead to leaks and potential water damage.

Electrical Connection

Important: Electrical installation must comply with local regulations and should only be performed by a qualified electrician. Before connecting, ensure the voltage and frequency of the power supply match the specifications on the washing machine’s rating plate. The machine requires a grounded outlet with the correct fuse rating to prevent electrical hazards.

Never use extension cords or adapters. Connect the power cord directly to a wall socket. Avoid using multi-socket outlets or power strips, as they may not provide sufficient power. Regularly inspect the power cord for damage and replace it if necessary.

Ensure the power socket is easily accessible to allow for quick disconnection in emergencies.

Operating Your Washing Machine

Get started! Familiarize yourself with the control panel, laundry loading, detergent use, program selection, and initiating wash cycles for optimal performance.

Control Panel Overview

Navigating the Controls: The Bosch Classixx washing machine features an intuitive control panel designed for ease of use. Typically, a rotary dial selects the desired wash program – options include delicates, quick wash, and eco modes. Digital displays clearly indicate the remaining wash time and selected settings.

Key Buttons & Indicators: Essential buttons manage functions like start/pause, temperature adjustment, and spin speed selection. Indicator lights illuminate to show the active program stage – washing, rinsing, spinning, or completion. Some models include specialized buttons for stain removal or extra rinse cycles.

Understanding Symbols: Familiarize yourself with the symbols representing different fabric types and wash intensities. Refer to the full user manual for a detailed explanation of each symbol and function, ensuring optimal laundry care and machine performance.

Loading Laundry

Preparing Your Load: Before loading, always empty pockets, close zippers, and untangle garments. Separate laundry by color, fabric type, and soil level to prevent dye transfer and damage. Delicate items should be placed inside a mesh laundry bag for added protection during the wash cycle.

Optimal Load Size: Avoid overloading the drum, as this can reduce washing efficiency and potentially damage the machine. Consult the user manual for recommended load capacities based on the selected program and fabric type. A loosely filled drum allows for proper agitation and rinsing.

Distributing the Load: Distribute items evenly around the drum to maintain balance during spinning. Uneven loads can cause excessive vibration and noise. Ensure items aren’t wrapped around the central agitator, if present.

Detergent Dispenser

Understanding the Compartments: Your Bosch Classixx detergent dispenser typically features separate compartments for pre-wash detergent, main wash detergent, and fabric softener. Refer to the symbols on the dispenser for correct placement. Using the wrong compartment can affect washing performance;

Detergent Amounts: Always follow the detergent manufacturer’s instructions regarding dosage. Adjust the amount based on load size, water hardness, and soil level. Overusing detergent can leave residue on clothes and in the machine.

Liquid vs. Powder Detergent: Both liquid and powder detergents can be used. For liquid detergents, use the designated compartment and avoid overfilling. Powder detergent should be added loosely, not compacted. Fabric softener should be diluted with water before adding.

Program Selection

Choosing the Right Cycle: Your Bosch Classixx washing machine offers a variety of programs tailored to different fabric types and soil levels. Carefully select the program that best suits your laundry needs for optimal results and fabric care. Common programs include cottons, delicates, synthetics, and quick wash.

Program Indicators: The control panel displays indicators for each program, often with symbols representing the recommended fabric type and wash temperature. Consult the program overview in this manual for detailed descriptions of each cycle’s settings.

Special Functions: Many programs allow you to customize settings like temperature, spin speed, and pre-wash. Utilize these options to fine-tune the wash cycle to your specific requirements, ensuring efficient cleaning and protecting your garments.

Starting a Wash Cycle

Initiating the Wash: Once you’ve selected your desired program, loaded the laundry, and added detergent, you’re ready to begin. Ensure the door is securely closed; the machine won’t start otherwise. Press the ‘Start/Pause’ button to initiate the wash cycle. The display will show the remaining time.

Cycle Monitoring: During the wash, you can monitor the progress on the display. Avoid interrupting the cycle unless absolutely necessary. If you need to pause, press the ‘Start/Pause’ button again.

Cycle Completion: Upon completion, the machine will beep, and the display will indicate ‘End’. Wait for the door lock to release before opening it. Remove your clean laundry promptly to prevent creasing and mildew.

Special Programs & Functions

Explore options! Your Bosch Classixx offers specialized programs like Delicate/Silk, Quick Wash, and Eco, alongside adjustable spin speeds for optimal results.

Delicate/Silk Program

Gentle Care for Fine Fabrics: The Delicate/Silk program is specifically designed for washing items requiring extra care, such as lingerie, silk blouses, and other delicate materials. This program utilizes a reduced drum action and lower water temperature to minimize the risk of damage or stretching.

Program Settings: When selecting this program, the washing machine automatically adjusts the spin speed to a lower setting, typically around 400-600 RPM, to prevent excessive wrinkling and maintain the fabric’s integrity. The water temperature is also carefully controlled to avoid shrinking or color fading.

Loading Considerations: It is recommended to place delicate items inside a laundry bag to provide an additional layer of protection during the wash cycle. Avoid overloading the machine, as this can reduce the effectiveness of the gentle wash action. Always check the care label on your garments before selecting this program.

Quick Wash Program

For Lightly Soiled Laundry: The Quick Wash program is ideal for refreshing lightly soiled clothes, offering a significantly reduced wash cycle duration. This program is perfect when you need clean clothes in a hurry, providing a convenient solution for everyday laundry needs. It’s designed for smaller loads and items that don’t require intensive cleaning.

Program Efficiency: This cycle utilizes a higher water flow rate and optimized drum movements to achieve effective cleaning in a shorter timeframe, typically around 15-30 minutes. While efficient, it’s important to note that the Quick Wash program may not be suitable for heavily stained or soiled items.

Detergent Usage: Use a reduced amount of detergent compared to a standard wash cycle to prevent excessive sudsing. Always check the garment care label before using this program to ensure compatibility.

Eco Program

Energy and Water Saving: The Eco Program, also known as the ‘EcoSilence Drive’ program on some models, is designed to minimize both water and energy consumption during the wash cycle. This program operates at a lower temperature, typically 40°C or lower, and adjusts the drum movements to optimize cleaning efficiency while reducing environmental impact.

Extended Wash Duration: While incredibly efficient, the Eco Program generally has a longer wash duration compared to other cycles. This extended time allows for thorough cleaning using less energy and water, making it a sustainable choice for everyday laundry.

Load Capacity: For optimal results, fully load the washing machine when using the Eco Program. This ensures maximum efficiency and minimizes wasted resources. Always refer to the garment care labels for washing instructions.

Spin Speed Selection

Adjusting Moisture Levels: Your Bosch Classixx washing machine allows you to select the spin speed, measured in revolutions per minute (RPM), to customize the moisture content of your laundry after washing. Higher spin speeds extract more water, reducing drying time, but can also increase wrinkling.

Fabric Considerations: Delicate fabrics, like silk or lace, require lower spin speeds (e.g., 400-800 RPM) to prevent damage. Sturdier items, such as towels and jeans, can withstand higher spin speeds (e.g., 1200-1400 RPM) for more efficient water removal.

Spin Speed Options: Available options typically range from ‘No Spin’ to maximum spin speed. Selecting ‘No Spin’ leaves garments very wet, ideal for hand-drying. Always check garment care labels before choosing a spin speed.

Maintenance and Cleaning

Regular upkeep ensures optimal performance and longevity of your Bosch Classixx. Clean the detergent dispenser, drum, and filter routinely for best results.

Cleaning the Detergent Dispenser

Maintaining a clean detergent dispenser is crucial for optimal washing performance and preventing residue buildup. Periodically, remove the dispenser drawer – typically by pressing a release button or lever – and rinse it thoroughly under warm running water. Stubborn detergent or fabric softener residue can be loosened with a soft brush or cloth.

Inspect the individual compartments within the drawer for any blockages and clear them as needed. Pay particular attention to the pre-wash compartment, as this area is prone to clogging; After cleaning, ensure the dispenser is completely dry before reinserting it into the washing machine. A buildup of detergent can affect the wash cycle and potentially damage your clothes, so regular cleaning is highly recommended. Refer to your Bosch Classixx user manual for specific instructions related to your model.

Cleaning the Drum

Regular drum cleaning keeps your Bosch Classixx washing machine fresh and hygienic, preventing unpleasant odors and residue buildup. To clean the drum, run an empty wash cycle at a high temperature – typically 90°C (194°F) – using a washing machine cleaner or a cup of white vinegar. This helps to dissolve any lingering detergent, fabric softener, and limescale deposits.

Ensure no laundry is inside during this cleaning cycle. For optimal results, repeat this process every few months, or more frequently if you regularly wash at low temperatures. After the cycle completes, wipe down the drum interior with a clean, damp cloth. A clean drum ensures your clothes are thoroughly cleaned and remain fresh. Consult your Bosch Classixx user manual for specific drum cleaning recommendations for your model.

Filter Cleaning

Regular filter cleaning is crucial for maintaining your Bosch Classixx washing machine’s performance and preventing drainage issues. The filter, typically located behind a small access panel at the front of the machine, traps lint, hair, and small objects. Before cleaning, ensure the machine is switched off and unplugged. Place a shallow container beneath the access panel to catch any residual water.

Carefully open the panel and unscrew the filter cap – be prepared for water to flow out. Remove any debris from the filter and clean it thoroughly under running water. Check the filter housing for obstructions as well. Reinsert the cleaned filter, ensuring it’s securely tightened, and close the access panel. Clean the filter periodically, as outlined in your Bosch Classixx user manual, to ensure optimal operation.

Troubleshooting

Encountering issues? Consult the error codes in your manual or check for common problems like drainage failures. Refer to the user guide for solutions.

Common Error Codes

Understanding error codes is crucial for diagnosing issues with your Bosch Classixx washing machine. These codes provide valuable insights into the problem, allowing for quicker resolution. For example, an E11 code often indicates a water supply issue – check the inlet hose for kinks or obstructions and ensure the water tap is fully open. A frequently appearing E15 suggests a drainage problem; inspect the drain hose for blockages and verify the drain pump filter is clean.

Other common codes include: E09 (improper foam detection, use less detergent), E24 (door not properly closed – ensure it latches securely), and E22 (water level too high – may indicate a faulty pressure switch). Always consult your full user manual for a comprehensive list and specific troubleshooting steps related to your particular Bosch Classixx model. Ignoring error codes can lead to further damage, so prompt attention is recommended.

Machine Not Draining

If your Bosch Classixx washing machine isn’t draining, several factors could be at play. First, check the drain hose for any kinks, bends, or obstructions that might be restricting water flow. Ensure the hose isn’t inserted too far into the drainpipe, as this can also cause siphoning issues. Crucially, inspect and clean the drain pump filter. This filter catches lint, buttons, and other debris, and a clogged filter is a common cause of drainage problems.

Locate the filter access panel (usually at the front, bottom of the machine) and carefully remove and clean the filter. If the issue persists, verify the drain pump itself isn’t faulty. A professional appliance repair technician may be needed for this diagnosis. Always disconnect the power before attempting any maintenance.

informative speech outline examples pdf

Informative Speech Outline Examples: A Comprehensive Guide (Updated 02/15/2026)

Discover readily available informative speech outline examples in PDF format, serving as adaptable templates for structuring your presentations effectively and efficiently.

These PDF resources offer pre-designed frameworks, including sections for attention-getters, thesis statements, and detailed body organization, streamlining the preparation process.

Utilize these examples to understand proper formatting, logical flow, and the inclusion of supporting materials, enhancing clarity and impact for your audience.

Informative speech outlines are foundational blueprints for delivering clear, concise, and engaging presentations. They move beyond simple notes, providing a structured framework that ensures logical progression and comprehensive coverage of a chosen topic. Utilizing informative speech outline examples, often found in PDF format, is a highly recommended practice, especially for novice speakers.

These PDF examples demonstrate how to effectively organize thoughts, incorporating essential elements like attention-grabbing introductions, well-developed body sections, and impactful conclusions. They showcase various approaches to structuring information, allowing speakers to adapt templates to suit their specific needs and audience. A well-crafted outline isn’t merely a preparation tool; it’s a roadmap that guides both the speaker and, indirectly, the listener through the information presented.

Exploring available examples helps understand the importance of a strong thesis statement and previewing main points, crucial components for audience comprehension. They also illustrate how to seamlessly transition between ideas, maintaining a cohesive and engaging flow throughout the speech.

II. The Core Purpose of an Informative Speech

The primary goal of an informative speech is to enhance understanding within the audience – to impart knowledge, clarify concepts, or illuminate a subject matter. It differs fundamentally from persuasive speaking, focusing on objective presentation rather than advocating for a specific viewpoint. Examining informative speech outline examples, often available as PDF downloads, reveals how structure directly supports this purpose.

Effective outlines, as demonstrated in these examples, prioritize clarity and logical organization. They ensure information is presented in a manner easily digestible by the listener. A well-structured speech, guided by a detailed outline, minimizes confusion and maximizes retention. The PDF resources showcase how to break down complex topics into manageable segments, using supporting materials to reinforce key ideas.

Ultimately, the core purpose is achieved through meticulous preparation and a commitment to delivering accurate, unbiased information, a process greatly aided by utilizing pre-designed outline templates.

III. Understanding the Basic Structure

A standard informative speech follows a tripartite structure: introduction, body, and conclusion. Informative speech outline examples, frequently found as PDF documents, consistently reflect this organization. The introduction grabs attention and establishes the speech’s purpose, often including a thesis statement. The body develops the core content, utilizing supporting evidence and logical sequencing.

These PDF outlines demonstrate how to effectively transition between main points, ensuring a cohesive flow of information. The conclusion summarizes key takeaways and reinforces the central message. Studying these examples reveals a common pattern: a clear attention device, a well-defined thesis, logically organized main points, and a memorable conclusion.

Understanding this basic framework, as illustrated in the PDF templates, is crucial for crafting a speech that is both informative and engaging.

The introduction, as detailed in many informative speech outline examples available in PDF format, is paramount for engaging your audience. Effective attention-getting strategies include startling statistics, relevant anecdotes, rhetorical questions, or compelling visuals. PDF templates often dedicate a specific section – labeled “Attention Device” – to this crucial element.

These examples showcase how a strong opening immediately establishes the speech’s relevance and piques listener interest. A well-crafted introduction smoothly transitions into the thesis statement, clearly outlining the speech’s central theme. The PDF outlines emphasize the importance of a concise and impactful opening to capture and maintain audience attention throughout the presentation.

Remember, a captivating introduction sets the stage for a successful informative speech.

III.B. Body: Developing the Core Content

Informative speech outline examples in PDF format consistently demonstrate a structured body, organized around clearly defined main points. These PDF templates typically allocate significant space to detailing each point with supporting materials – examples, statistics, and testimony – to enhance understanding and credibility.

The body is where you elaborate on your thesis, providing in-depth information and analysis. PDF outlines emphasize logical organization, often suggesting chronological, spatial, or topical arrangements. Each main point should be thoroughly developed, ensuring a cohesive and informative presentation.

Effective use of supporting evidence, as highlighted in these examples, strengthens your arguments and keeps the audience engaged. A well-developed body is the heart of a successful informative speech.

III.C. Conclusion: Summarizing and Reinforcing

Informative speech outline examples in PDF format consistently feature a concise conclusion designed to leave a lasting impression. These PDF templates emphasize summarizing the main points discussed throughout the speech, reinforcing the core message for the audience.

A strong conclusion doesn’t introduce new information; instead, it restates key takeaways in a memorable way. Many PDF outlines suggest ending with a powerful statement or call to reflection, solidifying the speech’s impact.

Avoid simply repeating the introduction. Instead, synthesize the information presented and connect it back to the initial attention-getter. Effective conclusions, as demonstrated in these examples, provide closure and enhance audience retention.

IV. Key Components of a Detailed Outline

Informative speech outline examples, often available as PDF downloads, highlight several crucial components for effective organization. These PDF resources consistently demonstrate the importance of a clear attention device, a well-defined thesis statement, and a logical preview of main points.

Detailed outlines also include specific supporting materials for each main point – examples, statistics, and testimony – all meticulously noted. The PDF templates emphasize the need for transitions between points, ensuring a smooth flow of information.

Furthermore, these examples showcase the inclusion of speaker notes regarding credibility, research sources, and personal connections to the topic, enhancing the speech’s overall impact and trustworthiness.

IV.A. Attention Device Strategies

Informative speech outline examples in PDF format frequently showcase diverse attention-getting strategies. These PDF resources demonstrate techniques like startling statistics, relevant anecdotes, rhetorical questions, and vivid descriptions to immediately engage the audience.

Many examples illustrate the power of a compelling story or a relatable scenario to establish a connection with listeners. Others utilize humor, carefully chosen to be appropriate and enhance understanding, not distract.

The PDF outlines emphasize that the attention device must be directly relevant to the speech’s topic, smoothly transitioning into the thesis statement and preview of main points. Effective strategies, as shown in these examples, create curiosity and motivate the audience to listen attentively.

V. Establishing Credibility as a Speaker

Informative speech outline examples, often found in PDF format, consistently highlight the importance of speaker credibility. These PDF documents demonstrate how to build trust with your audience through meticulous research and proper source citation.

Many examples emphasize detailing the research process – where information was gathered, and the qualifications of sources used. Furthermore, these PDF outlines suggest establishing a personal connection to the topic, explaining why you are knowledgeable and passionate about it.

The examples show that sharing relevant experiences or demonstrating genuine interest enhances your authority. A strong credibility statement, as illustrated in these PDF resources, assures the audience that your information is reliable and trustworthy.

V.A. Research and Source Citation

Informative speech outline examples in PDF format universally stress thorough research as foundational to credibility. These PDF templates often include dedicated sections for listing sources, demonstrating a commitment to factual accuracy.

PDF outlines showcase various citation methods, emphasizing the need to clearly identify where information originates. This includes specifying databases, academic journals, reputable websites, and expert testimonies. The examples demonstrate that proper citation avoids plagiarism and strengthens your argument.

Many PDF resources advise detailing the scope of research – the number of sources consulted and the time invested. This transparency further builds trust with the audience, proving you’ve undertaken a comprehensive investigation of the topic.

V.B. Personal Connection to the Topic

Informative speech outline examples, frequently available as PDF downloads, highlight the importance of establishing a personal link to your subject matter. These PDF templates often prompt speakers to articulate “What personally connects you to this topic?”

PDF outlines demonstrate that sharing a relevant anecdote, experience, or passion can significantly enhance audience engagement. This personal touch humanizes the presentation and fosters a stronger connection with listeners.

The examples emphasize that the connection should be genuine and relevant, avoiding forced or superficial narratives. A well-articulated personal connection demonstrates enthusiasm and investment in the topic, boosting speaker credibility. Many PDF guides suggest briefly outlining this connection within the introduction.

VI. Crafting a Strong Thesis Statement

Informative speech outline examples, often found as PDF documents, consistently emphasize the crucial role of a well-defined thesis statement. These PDF templates typically include a dedicated space for its formulation, underscoring its importance.

The PDF resources illustrate that a strong thesis should clearly and concisely state the main point of your speech. It acts as a roadmap for both the speaker and the audience, providing focus and direction. Examples demonstrate that it shouldn’t be a question, but a declarative statement.

Many PDF guides advise crafting a thesis that is specific, arguable (even in an informative speech – it’s a focused claim), and previewing the key areas you’ll cover; A robust thesis statement, as shown in these examples, is foundational to a successful informative speech.

VII. Previewing Main Points

Informative speech outline examples, frequently available as PDF downloads, consistently highlight the necessity of previewing main points within the introduction. These PDF templates often dedicate a specific section to this crucial element of speech structure.

The PDF resources demonstrate that previewing acts as a signpost for the audience, outlining the key areas that will be discussed. Examples show this is typically achieved through a concise list or a brief narrative overview of the main points.

These PDF guides emphasize that a clear preview enhances audience comprehension and retention. It prepares listeners to follow the speech’s logical progression. Utilizing previewing techniques, as illustrated in these examples, significantly improves the overall effectiveness of your informative presentation.

VIII. Developing the Body of the Speech

Informative speech outline examples in PDF format dedicate the most substantial portion to developing the body of the speech, showcasing detailed organization. These PDF templates emphasize a logical structure for presenting core content.

Examples within these PDF guides illustrate how to expand upon previewed main points, utilizing supporting materials like statistics, examples, and testimony. The PDF resources stress the importance of thorough research and credible sourcing to bolster claims.

These PDF outlines demonstrate techniques for crafting clear and concise explanations, ensuring audience understanding. They also highlight the need for a smooth flow between ideas. Following these examples ensures a well-developed and engaging body, forming the foundation of a successful informative speech.

VIII.A. Organizing Main Points Logically

Informative speech outline examples, often found in PDF format, consistently emphasize logical organization of main points as crucial for clarity. These PDF templates demonstrate several effective methods, such as chronological, spatial, or topical arrangements.

PDF guides showcase how to structure points from general to specific, or problem-solution, enhancing audience comprehension. Examples illustrate the importance of creating a clear hierarchy, with each point directly supporting the thesis statement.

These PDF resources highlight the benefit of outlining points in a way that builds upon each other, creating a cohesive narrative. Following these examples ensures a well-structured speech, making it easier for the audience to follow and retain information.

VIII.B. Using Supporting Materials (Examples, Statistics, Testimony)

Informative speech outline examples in PDF format consistently demonstrate the vital role of supporting materials. These PDF templates showcase how to effectively integrate examples, statistics, and testimony to bolster claims and enhance credibility.

PDF guides illustrate the importance of citing sources for statistics and testimony, establishing trust with the audience. Examples demonstrate how anecdotes and vivid descriptions can make complex information more relatable and memorable.

These PDF resources emphasize balancing different types of support – a statistic followed by a clarifying example, for instance. Following these examples ensures a well-supported speech, increasing its persuasiveness and impact, and solidifying understanding.

IX. Transitioning Between Main Points

Informative speech outline examples, often available as PDF downloads, highlight the crucial element of smooth transitions. These PDF templates demonstrate how to connect ideas logically, preventing a disjointed presentation.

PDF guides showcase transition phrases – “similarly,” “in contrast,” “furthermore” – that signal shifts in thought. Examples illustrate summarizing previous points before introducing new ones, reinforcing understanding.

Analyzing these PDF resources reveals how transitions act as signposts, guiding the audience through the speech’s structure. Effective transitions, as shown in these examples, maintain audience engagement and comprehension, creating a cohesive and impactful delivery.

X. Conclusion Strategies: Leaving a Lasting Impression

Informative speech outline examples in PDF format consistently emphasize strong conclusions. These PDF resources demonstrate techniques for summarizing key points, reinforcing the thesis, and creating a memorable final impression.

PDF guides often showcase conclusion types: a call to action, a thought-provoking question, or a return to the opening attention-getter. Examples illustrate avoiding new information in the conclusion, focusing instead on synthesis.

Analyzing these PDF outlines reveals how a well-crafted conclusion solidifies understanding and leaves a lasting impact on the audience. Effective conclusion strategies, as demonstrated in these examples, ensure the speech’s message resonates long after delivery.

XI. Common Outline Formats (PDF Examples)

Informative speech outline examples available as PDF downloads typically adhere to several standard formats. These PDF resources commonly present outlines using Roman numerals (I, II, III) for main points, capital letters (A, B, C) for subpoints, and Arabic numerals (1, 2, 3) for supporting details.

PDF guides often showcase both full-sentence and keyword outlines. Full-sentence outlines provide complete thoughts, while keyword outlines use concise phrases. Examples demonstrate the benefits of each approach based on speaker preference and speech complexity.

Analyzing these PDF outlines reveals consistent elements: introduction, body, and conclusion, each meticulously structured. These examples offer visual clarity, aiding in organization and delivery, ensuring a logical flow of information for the audience.

XII. Utilizing Templates for Efficiency

Informative speech outline examples in PDF format serve as invaluable templates, dramatically increasing efficiency in speech preparation. These pre-structured documents eliminate the need to start from scratch, providing a ready-made framework for organizing thoughts and research.

PDF templates often include designated sections for attention devices, thesis statements, main points, and supporting evidence, guiding the speaker through each stage of outline creation. Utilizing these examples saves significant time and reduces the potential for overlooking crucial elements.

By simply plugging in content into these PDF templates, speakers can focus on refining their message and practicing delivery, rather than struggling with structural formatting. This streamlined approach ensures a well-organized and impactful presentation.

XIII. Avoiding Wordiness in Outlines and Speeches

Informative speech outline examples, often found as PDF documents, demonstrate concise language and focused phrasing – crucial for avoiding wordiness. Studying these examples reveals how to express ideas efficiently, both in the outline itself and in the delivered speech.

Effective outlines, as showcased in PDF templates, prioritize keywords and phrases over lengthy sentences. This practice translates directly to a more impactful speech, keeping the audience engaged and preventing information overload. Analyzing these examples highlights the importance of brevity.

The research indicates that wordiness often appears in conclusion sections; therefore, PDF outline examples can guide speakers toward succinct summaries and reinforcing statements, ensuring a clear and memorable closing.

XIV. The Role of Standard Literary Words

Informative speech outline examples, particularly those available as PDF downloads, often model the use of precise and standard literary vocabulary. These examples demonstrate how carefully chosen words enhance clarity and professionalism in both the outline’s structure and the speech’s delivery.

Employing standard literary words, as illustrated in well-crafted PDF outlines, elevates communication from colloquial to formal, establishing speaker credibility and resonating with a wider audience. These examples showcase how to avoid slang or overly casual language.

The research emphasizes that polished speech relies on this vocabulary; therefore, studying PDF outline examples provides insight into selecting words that convey meaning accurately and effectively, contributing to a sophisticated and impactful presentation.

XV. Time Management in Informative Speeches (3-5 Minute Range)

Informative speech outline examples in PDF format frequently illustrate effective time allocation strategies for speeches within the 3-5 minute timeframe. These examples demonstrate how to structure content to fit the allotted time, ensuring a concise and engaging presentation.

Analyzing PDF outlines reveals a common approach: dedicating a specific portion of time to the introduction, body, and conclusion. These examples often include estimated timings for each main point, promoting balanced coverage of the topic.

Furthermore, PDF resources emphasize the importance of rehearsal to refine pacing and eliminate unnecessary content. Studying these examples helps speakers learn to prioritize information and deliver a well-timed, informative speech.

XVI. Examples of Informative Speech Topics

Informative speech outline examples available as PDF downloads often showcase a diverse range of topics, providing inspiration for your own presentation. These examples frequently include subjects like “healthy eating on the run,” demonstrating practical, everyday themes suitable for informative speeches.

Exploring PDF resources reveals topics spanning history, science, culture, and current events. These examples illustrate how to structure information around a central theme, offering a clear and concise explanation for the audience.

Many PDF outlines feature topics adaptable to various audiences and skill levels. Studying these examples can help you identify a topic that aligns with your interests and expertise, ensuring an engaging and well-prepared speech.

XVII. Research Resources for Speech Preparation

When utilizing informative speech outline examples in PDF format, remember to supplement them with thorough research. Online platforms offer free outline templates, including those specifically for informative speeches, aiding in structure and organization.

Academic databases and library resources provide credible sources for supporting your speech content. Examining PDF examples can highlight the importance of source citation to establish credibility as a speaker.

Websites offering free essay outline templates can also be valuable, providing a foundation for developing a comprehensive speech outline. Remember to critically evaluate all sources and ensure accuracy when preparing your informative speech.

XVIII. Adapting Outlines for Different Audiences

Informative speech outline examples in PDF format provide a solid base, but adaptation is crucial for diverse audiences. Consider their existing knowledge and tailor your language accordingly. A technical audience requires different explanations than a general one.

Reviewing PDF examples can demonstrate how varying levels of detail impact audience comprehension. Adjust the complexity of supporting materials – statistics, testimony, or examples – to match their understanding.

Remember to maintain clarity and avoid jargon when addressing a non-expert audience. Effective adaptation ensures your message resonates, regardless of the listeners’ background, maximizing the speech’s impact and informational value.

XIX. The Importance of Practice and Rehearsal

Even with excellent informative speech outline examples – often found in PDF format – practice is paramount. A well-structured outline is merely a blueprint; rehearsal brings it to life.

Utilize your PDF outline as a script, but avoid reading verbatim. Aim for conversational delivery, maintaining eye contact and natural pacing. Time yourself during rehearsals to ensure adherence to the 3-5 minute range.

Record yourself to identify areas for improvement – filler words, awkward pauses, or unclear phrasing. Consistent practice builds confidence and fluency, transforming a good outline into a compelling and informative speech. Mastering the material ensures a polished and impactful presentation.

XX. Utilizing Visual Aids Effectively

While informative speech outline examples (often in PDF format) focus on content structure, remember visual aids enhance understanding and engagement. Keep slides concise, using keywords and impactful images – avoid overwhelming text.

Ensure visuals directly support your points, not distract from them. Charts and graphs effectively present statistics, while images illustrate complex concepts. Maintain a consistent design aesthetic for a professional look.

Practice integrating visuals seamlessly into your delivery. Don’t simply read slides; elaborate on the information presented. Remember, visual aids are aids – your speech should remain the primary focus, guided by your detailed PDF outline.

XXI. Common Mistakes to Avoid in Outlines

When utilizing informative speech outline examples – frequently found as PDF downloads – avoid common pitfalls. Overly detailed outlines can hinder, not help, your delivery; focus on key points, not verbatim scripting.

Don’t neglect transitions between ideas. A logical flow, clearly indicated in your outline, is crucial for audience comprehension. Ensure your thesis statement is specific and focused, guiding the entire speech.

Avoid wordiness, a common issue identified in academic writing analysis. Keep language concise and impactful. Finally, don’t underestimate the importance of practice; a well-structured PDF outline is only the first step towards a successful presentation.

XXII. Evaluating and Refining Your Outline

After constructing your outline, potentially using informative speech outline examples in PDF format as a guide, rigorous evaluation is essential. Assess the logical progression of your main points – does one idea naturally lead to the next?

Check for sufficient supporting material; examples, statistics, and testimony bolster credibility. Ensure your thesis statement remains central and is consistently reinforced throughout the outline.

Critically review for wordiness, striving for conciseness. A refined outline should be a clear, concise roadmap for your speech. Consider seeking feedback from peers to identify areas for improvement, ensuring a polished and impactful presentation.

XXIII. Finding Free Outline Templates Online

Numerous websites offer free informative speech outline examples in PDF and other formats. These resources can significantly expedite the outlining process, providing pre-structured templates to adapt to your specific topic.

Explore educational websites, public speaking resources, and even general document template repositories. Search terms like “informative speech outline template” or “speech outline PDF” will yield relevant results.

Remember to critically evaluate the quality of the template; ensure it aligns with best practices for speech organization and includes essential elements like introduction, body, and conclusion sections. Adapt these templates to fit your unique content and speaking style.

secret santa questionnaire free pdf

Secret Santa Questionnaire: A Comprehensive Guide (Free PDF Focus)

Navigating the festive season with a Secret Santa exchange? A well-crafted questionnaire, often available as a free PDF, streamlines the gifting process, ensuring thoughtful presents and joyful surprises for everyone involved.

Utilizing a PDF format offers easy distribution and collection, while focusing on key details like interests, dislikes, and wishlists, ultimately enhancing the Secret Santa experience for all participants.

What is a Secret Santa Questionnaire?

A Secret Santa questionnaire, frequently distributed as a convenient free PDF, is a vital tool for organizing a successful and enjoyable gift exchange. It’s essentially a form designed to gather essential information about each participant’s preferences, ensuring gifts are both thoughtful and appreciated.

This document moves beyond simple wishlists, delving into areas like hobbies, interests, dislikes, and even practical details such as clothing or shoe sizes. The goal is to provide the anonymous gift-giver with enough insight to select a present that truly resonates with the recipient.

PDF format is popular due to its universal accessibility and ease of distribution via email or shared drives. A well-designed questionnaire minimizes the risk of unwanted or unappreciated gifts, fostering a more positive and inclusive Secret Santa experience for everyone involved. It’s the cornerstone of a truly successful gifting event!

Why Use a Questionnaire for Secret Santa?

Employing a Secret Santa questionnaire – often readily available as a free PDF download – dramatically improves the gift-giving experience. Without one, gift selection relies heavily on guesswork, potentially leading to unwanted or impractical presents. A questionnaire eliminates this uncertainty, ensuring thoughtful and personalized gifts.

It fosters inclusivity by allowing participants to discreetly share preferences and avoid items they dislike. This is particularly important in diverse groups with varying tastes. The PDF format simplifies distribution and collection, making organization effortless.

Furthermore, a questionnaire sets clear expectations regarding price ranges and desired items, preventing awkwardness or disappointment. Ultimately, using a free PDF questionnaire transforms a potentially haphazard exchange into a fun, considerate, and genuinely enjoyable Secret Santa event for all.

Benefits of a Free PDF Questionnaire

Opting for a free PDF Secret Santa questionnaire offers numerous advantages. PDFs are universally accessible, viewable on virtually any device without requiring specialized software. This ensures everyone can participate, regardless of their tech setup. They’re also easily printable for those preferring a physical form.

Cost-effectiveness is a major benefit – eliminating design or creation expenses. Many websites provide customizable templates, saving valuable time and effort. The standardized format of a PDF simplifies data collection and organization, streamlining the matching process.

PDFs maintain formatting consistency, preventing layout issues during distribution; They also offer a degree of security, allowing for password protection if desired. Utilizing a free PDF questionnaire is a practical, efficient, and accessible solution for a successful Secret Santa exchange.

Designing Your Secret Santa Questionnaire

Crafting an effective Secret Santa questionnaire, often as a free PDF, requires careful consideration of key questions to gather insightful preferences for perfect gift selections.

Key Questions to Include ౼ Interests

Understanding participant interests is paramount when designing a Secret Santa questionnaire, especially in PDF format for easy distribution. Begin with broad categories: “What are your favorite hobbies?” and “What types of books, movies, or music do you enjoy?”

Expand with more specific options. Include questions like: “Are you interested in gaming, cooking, sports, art, or travel?” Offer a multiple-choice format with an “other” option for personalized responses.

Consider asking about favorite colors, animals, or characters. A free PDF questionnaire should allow ample space for detailed answers. Don’t forget to ask about preferred brands or stores – this provides valuable guidance for gift-givers.

Finally, a simple “What are you passionate about?” can reveal unexpected interests, leading to truly thoughtful gifts. Remember, the goal is to gather enough information to select a present the recipient will genuinely appreciate.

Key Questions to Include ౼ Dislikes

Equally important as understanding interests is identifying dislikes within your Secret Santa questionnaire, particularly when utilizing a convenient PDF format. Directly ask: “Are there any gifts you absolutely would not want?” This straightforward question can prevent awkward or unwanted presents.

Expand with specific categories: “Are you allergic to anything (food, scents, materials)?” and “Are there any types of gifts you dislike (e.g., clothing, mugs, novelty items)?” Offer a checkbox list for common dislikes.

Include a space for “Things I strongly dislike” allowing for personalized responses. A free PDF questionnaire should prioritize sensitivity; frame questions politely.

Consider asking about disliked colors or patterns. Emphasize that honesty is appreciated to ensure a positive gifting experience. This section is crucial for avoiding gifts that might be offensive or unusable.

Key Questions to Include ౼ Wishlist (Price Range)

A crucial component of any effective Secret Santa questionnaire, especially a free PDF version, is the wishlist section with a defined price range. Ask: “Please list 3-5 items you’d genuinely like to receive.” This provides concrete ideas for gift-givers.

Immediately follow with a clear price limit: “Gifts should not exceed [Dollar Amount].” Establishing a budget prevents overspending and ensures fairness. Offer tiered price ranges (e.g., under $10, $10-$20, $20-$30) for flexibility.

Include a “Notes” field for wishlist items: “Any specific colors, sizes, or brands you prefer?” This adds detail.

Consider an “Optional” section: “Are there any experiences you’d enjoy (e.g., movie tickets, coffee dates)?” A well-structured PDF wishlist section maximizes gift satisfaction.

Key Questions to Include ─ Size Information (Clothing/Shoes)

For participants considering clothing or shoes as potential gifts, a dedicated size information section within your Secret Santa questionnaire – particularly a free PDF template – is essential. Clearly ask for specific sizes: “Clothing Size (US/UK/EU):” and “Shoe Size (US/UK/EU):”.

Avoid ambiguity by requesting both numerical and letter sizes where applicable (e.g., “Size 6/Small”). Include separate questions for different clothing types (e.g., shirts, pants, dresses) as sizes can vary.

Add a field for preferred fit: “Do you prefer a relaxed, fitted, or oversized fit?” This minimizes returns.

A “Notes” section is helpful: “Any brands that fit you particularly well?” A detailed PDF size guide ensures a perfect fit and a delighted recipient.

Key Questions to Include ─ Hobbies & Activities

Uncovering a participant’s passions through a Secret Santa questionnaire – ideally a readily available free PDF – is crucial for a truly personalized gift. Include open-ended questions like, “What are your favorite hobbies and activities?” and “What do you enjoy doing in your free time?”.

Offer multiple-choice options for common interests: “Do you enjoy reading, gaming, cooking, sports, hiking, or crafting?”. Provide space for “Other” with a text field for specifics.

Consider questions about preferred genres (books, movies, music) or specific teams/artists.

A well-designed PDF questionnaire should also ask about any related collections or ongoing projects. This information empowers gift-givers to select presents that genuinely resonate with the recipient’s interests, making the Secret Santa exchange more meaningful.

Finding & Utilizing Free Secret Santa PDF Questionnaires

Numerous websites offer downloadable free PDF templates for Secret Santa questionnaires, simplifying event organization and ensuring comprehensive participant information is gathered efficiently.

Popular Websites Offering Free Templates

Several online resources provide readily available, free PDF Secret Santa questionnaire templates. Websites like TemplateLab and Etsy (offering free printables amongst paid options) host a variety of designs, catering to different aesthetic preferences and levels of detail.

Additionally, sites specializing in party planning, such as Punchbowl or even general template repositories like Canva, frequently include customizable Secret Santa questionnaires. These platforms often allow for basic editing before downloading as a PDF.

Pinterest is also a valuable source, acting as a visual search engine leading to numerous blog posts and downloadable PDFs. Remember to always preview the questionnaire to ensure it includes all necessary questions regarding interests, dislikes, sizes, and wishlists before distributing it to participants. A quick search for “free Secret Santa questionnaire PDF” will yield a wealth of options!

Customizing Pre-Made PDF Templates

While utilizing a pre-made free PDF Secret Santa questionnaire saves time, customization is often key to gathering the most useful information. Many PDF editors, both free and paid, allow you to add or remove questions, adjust the layout, and incorporate your event’s branding.

Consider adding specific questions tailored to your group’s interests or dietary restrictions. You might also want to adjust the price range section to align with your budget. Don’t hesitate to reword questions for clarity or add space for more detailed answers.

Simple edits like changing fonts or adding a logo can also enhance the questionnaire’s visual appeal. Remember to save a copy with your customizations before distributing, ensuring the original template remains untouched for future use. A personalized questionnaire demonstrates thoughtfulness and encourages more comprehensive responses.

Using PDF Editors for Personalization

To truly tailor your free PDF Secret Santa questionnaire, leverage the power of PDF editors. Numerous options exist, ranging from free online tools like Smallpdf and iLovePDF to more robust paid software like Adobe Acrobat Pro. These editors allow for extensive personalization beyond simple text edits.

You can insert images, adjust font styles and sizes, rearrange question order, and even add fillable form fields for easier completion. Consider adding your company logo or a festive graphic to enhance the visual appeal. Some editors also enable you to protect the PDF with a password, ensuring confidentiality.

Experiment with different layouts to improve readability and user experience. Remember to save your customized questionnaire as a new file to preserve the original template. A well-personalized questionnaire shows attention to detail and encourages participation.

Ensuring Questionnaire Anonymity

Maintaining participant anonymity is crucial for a successful Secret Santa exchange. When utilizing a free PDF questionnaire, take steps to protect individual responses. Avoid including directly identifying information like names on the questionnaire itself; instead, use a unique identifier or number assigned to each participant.

If collecting responses digitally, utilize a secure platform or email address dedicated solely to the Secret Santa. When compiling data, remove any identifiers before sharing it with the gift-giver. Consider using a designated organizer who acts as a central point of contact, shielding participants from direct interaction.

Clearly communicate the anonymity policy to all participants, reassuring them that their responses will be kept confidential. This fosters trust and encourages honest answers, leading to more thoughtful gifts.

Creating Your Own Secret Santa Questionnaire (PDF)

Designing a custom Secret Santa questionnaire in PDF format allows tailored questions, ensuring relevant gift ideas. Software options range from free tools to professional suites, offering flexibility.

Software Options for PDF Creation (Free & Paid)

Numerous software solutions cater to PDF creation, ranging from complimentary options to robust, paid programs. For free alternatives, consider PDFescape, offering online editing and creation without registration, or LibreOffice Draw, a versatile open-source suite capable of designing and exporting to PDF. Google Docs also provides a simple route – create your questionnaire within Docs and then download it as a PDF file.

However, for more advanced features and control, paid software like Adobe Acrobat Pro provides comprehensive editing, form creation, and security options. Microsoft Word, with a subscription, also offers excellent PDF capabilities. Canva, while primarily a graphic design tool, allows for visually appealing questionnaire creation and PDF export. The choice depends on your needs; basic questionnaires are easily handled by free tools, while complex designs or form functionalities benefit from paid software’s enhanced features.

Remember to prioritize user-friendliness and accessibility when selecting your software.

Formatting for Readability & Ease of Use

Prioritize clear and concise formatting when designing your Secret Santa questionnaire PDF. Utilize a legible font size (11-12pt) and ample white space to prevent visual clutter. Employ bullet points or numbered lists for questions requiring multiple answers, enhancing scannability. Group related questions together with clear headings and subheadings.

Consider using a consistent layout throughout the document. Avoid overly complex designs or distracting colors. Ensure sufficient space is provided for responses, especially for open-ended questions. For digital forms, incorporate fillable fields to simplify completion and data collection. A well-structured questionnaire encourages participation and provides organizers with easily digestible information.

Test the questionnaire on a sample audience to identify any areas needing improvement regarding clarity or usability.

Adding Visual Appeal to Your Questionnaire

Elevate your Secret Santa questionnaire PDF beyond basic text with thoughtful visual elements. Incorporate a festive theme using subtle colors, borders, or relevant imagery – snowflakes, ornaments, or gift boxes – to create a cheerful atmosphere. However, avoid overwhelming the design; maintain a balance between aesthetics and readability.

Consider adding a logo or branding if the Secret Santa is part of a larger event or organization. Use consistent fonts and color schemes throughout the document. A visually appealing questionnaire feels more inviting and encourages participants to engage. Remember to optimize images for web viewing to minimize file size and ensure quick loading times. A touch of creativity can significantly enhance the overall experience.

Ensure visual elements don’t hinder accessibility for all participants.

Testing Your Questionnaire Before Distribution

Before widely distributing your Secret Santa questionnaire PDF, rigorous testing is crucial. Share it with a small group of trusted colleagues or friends and ask for honest feedback. Specifically, request them to check for clarity, ease of understanding, and any potential ambiguities in the questions.

Verify that all fields function correctly, especially if using interactive PDF features like fillable forms. Ensure the formatting remains consistent across different devices and PDF readers. Confirm that the PDF is accessible – can it be easily opened and completed by everyone? Address any identified issues before sending it to the larger group. A pre-distribution test saves potential headaches and ensures a smooth, enjoyable Secret Santa experience for all involved.

Thorough testing demonstrates attention to detail and respect for participants’ time.

Distributing & Collecting Questionnaires

Seamless distribution of your Secret Santa questionnaire PDF via email or shared drives is key. Establish a secure collection method and a firm submission deadline.

Efficiently gathering responses ensures timely gift preparation.

Digital Distribution Methods (Email, Shared Drive)

Email remains a highly effective method for distributing your Secret Santa questionnaire PDF. Attach the file to a group email, ensuring all participants are included. A clear and concise email subject line, such as “Secret Santa Questionnaire – Please Complete,” will maximize visibility and encourage prompt responses. Consider using a blind carbon copy (BCC) to protect participant email addresses and maintain anonymity.

Alternatively, utilizing a shared drive – like Google Drive, Dropbox, or OneDrive – offers a centralized location for the questionnaire. Create a dedicated folder, upload the PDF, and share a link with participants. This method simplifies access and allows for easy tracking of submissions. Ensure appropriate permission settings are in place, granting viewing access to all and potentially editing access to a designated organizer. Regularly check the shared drive to monitor completion rates and send reminders as needed. Both methods support a convenient and organized approach to questionnaire distribution.

Collecting Responses Securely

When gathering completed Secret Santa questionnaire PDFs, prioritize data security and participant privacy. Avoid requesting sensitive personal information beyond what’s necessary for gift selection. If collecting responses via email, emphasize the importance of replying only to the designated organizer and not to the entire group, minimizing accidental exposure of details.

For shared drive submissions, leverage the platform’s security features. Restrict editing access to prevent accidental alterations of responses. Consider using password protection for the folder, adding an extra layer of security. If utilizing online form builders to convert the PDF into a digital form, choose a reputable provider with robust data encryption and privacy policies. Regularly back up collected data to prevent loss and ensure compliance with data protection regulations. Maintaining confidentiality builds trust and enhances the overall Secret Santa experience.

Setting a Clear Deadline for Submissions

Establishing a firm deadline for returning the Secret Santa questionnaire PDF is crucial for a smooth gift-giving process. Communicate the date prominently in the initial announcement and reiterate it in reminder messages. Allow sufficient time for participants to thoughtfully complete the form, but avoid extending the deadline excessively, which can delay gift purchasing.

Consider a buffer period of at least one to two weeks between the deadline and the gift exchange date. This provides ample time for organizing responses, matching participants, and allowing everyone to shop. Clearly state the consequences of late submissions – perhaps exclusion from the gift exchange or a less personalized gift. Utilize calendar invites or automated reminders to ensure everyone is aware of the approaching deadline. A well-defined timeline minimizes stress and maximizes participation.

Analyzing Responses & Preparing for Gift-Giving

Collected Secret Santa questionnaire PDF responses require careful organization to reveal preferences and facilitate thoughtful gift selection, ensuring a delightful exchange for all participants.

Organizing Collected Data

Once all Secret Santa questionnaires, ideally in PDF format, are gathered, the next crucial step is meticulous data organization. Begin by creating a spreadsheet or utilizing a dedicated software tool to compile responses. Each participant should have a dedicated row, with columns representing each question from the questionnaire – interests, dislikes, wishlist items, sizes, and hobbies.

Standardizing responses is key; for example, convert free-text answers into categories or tags. This simplifies analysis and matching. Consider using color-coding to highlight important details, like allergies or strong dislikes. Ensure data privacy by assigning anonymous identifiers to each participant instead of using names directly. A well-organized dataset is the foundation for successful gift matching and a joyful Secret Santa experience, maximizing the impact of the free PDF questionnaire.

Matching Participants (Randomization Methods)

After organizing the data from your Secret Santa questionnaires – often collected as PDFs – the exciting part begins: matching gift-givers to recipients! Several randomization methods exist. The simplest is a manual draw, using names or assigned numbers. However, for larger groups, online Secret Santa generators are highly recommended. These tools ensure fairness and prevent self-gifting.

More sophisticated methods consider questionnaire responses. For instance, you could prioritize matching individuals with similar interests, increasing the likelihood of a truly appreciated gift. However, pure randomization is often preferred to maintain the ‘secret’ element. Regardless of the method, document the pairings carefully and securely. The goal is a fair and fun exchange, leveraging the insights gained from the free PDF questionnaire to enhance the gifting experience.

Maintaining Secrecy During the Gift-Buying Process

Crucially, maintaining secrecy is paramount to a successful Secret Santa! Once participants are matched – informed by the details within their submitted free PDF questionnaires – strict confidentiality is essential. Avoid discussing gift ideas openly, especially around potential recipients. Utilize discreet communication channels, like private messaging or email, for any necessary coordination.

Resist the temptation to hint at your gift or ask leading questions. When shopping, be mindful of your online browsing history and avoid leaving receipts or packaging materials in plain sight. Consider shipping gifts directly to a designated organizer to further safeguard the surprise. Remember, the joy of Secret Santa lies in the unexpected delight, so preserving the mystery is key to a truly festive experience.

Troubleshooting Common Issues

Addressing incomplete free PDF questionnaires or handling sensitive data (allergies) requires tact. If a participant misses the deadline, a gentle reminder or reassignment may be necessary.

Dealing with Incomplete Questionnaires

Incomplete Secret Santa questionnaires, even when utilizing a convenient free PDF template, are a common hurdle. First, send a polite reminder to the participant, emphasizing the deadline and the importance of their input for a thoughtful gift.

If no response follows, consider a secondary approach: gently reach out personally, offering assistance or clarifying any potential confusion regarding the questionnaire’s sections.

For truly unresponsive individuals, you have a few options. You could attempt to glean information from mutual acquaintances, respecting privacy boundaries, of course. Alternatively, embrace a degree of creative liberty, focusing on generally appreciated gifts or broad interests.

However, avoid overly personal gifts based on limited information. A fallback strategy is a universally appealing gift card, ensuring the recipient can choose something they genuinely desire. Maintaining fairness and inclusivity is paramount, even with incomplete data.

Handling Sensitive Information (Allergies, etc.)

Utilizing a free PDF Secret Santa questionnaire necessitates careful consideration of sensitive information. Explicitly state in the questionnaire’s introduction that all data will be treated with strict confidentiality and used solely for gift selection.

Include a dedicated section for allergies, dietary restrictions, or other sensitivities, emphasizing the importance of accurate disclosure for safety reasons. Assure participants that this information will only be shared with their assigned gift-giver.

Consider offering an “opt-out” option for sharing specific details, allowing individuals to maintain control over their personal information.

As the organizer, maintain a secure record of the completed questionnaires, limiting access to only those involved in the gift-matching process. Remind gift-givers to respect the confidentiality of the information provided and prioritize safety when selecting gifts.

What to do if a Participant Doesn’t Submit a Questionnaire

Despite reminders, some participants may fail to submit their free PDF Secret Santa questionnaire. Establish a clear deadline and follow up individually with non-responders a few days prior. Offer assistance if they’re experiencing difficulties accessing or completing the form.

If a questionnaire remains unsubmitted close to the gift-giving date, you’ll need a contingency plan. Consider assigning a “default” gift based on general preferences or common interests within the group. Alternatively, the assigned gift-giver could opt for a universally appealing present, like a gift card.

Communicate this plan to all participants to manage expectations. Emphasize that the goal is inclusivity and ensuring everyone receives a gift, even without detailed preferences. Document the situation for future event planning;

guide bra types

Guide to Bra Types: A Comprehensive Overview (Updated 02/15/2026)

Discover the world of bras! This guide simplifies finding your perfect fit‚ covering styles‚ sizing‚ and features for ultimate comfort and support‚ as of today’s date.

Understanding Bra Sizing & Fit

Navigating bra sizing can feel complex‚ but understanding the basics is crucial for comfort and support. It’s about more than just numbers; it’s about how a bra interacts with your unique body shape. Many women are wearing the wrong size‚ leading to discomfort and a lack of proper support.

Traditional sizing relies on band size and cup size‚ but variations exist between brands. Accurate measurement is the first step‚ utilizing a flexible measuring tape. Remember to measure snugly around your ribcage and then around the fullest part of your bust. Online bra size calculators can offer a starting point‚ but a professional fitting is invaluable.

Fit isn’t solely about size; it’s about how the bra feels. Straps shouldn’t dig in‚ the band should be snug but not constricting‚ and the cups should fully encapsulate your breast tissue without spillage or gaping. Consider that bra sizes can fluctuate due to weight changes‚ hormonal shifts‚ or even time of the month. Prioritize comfort and support above all else!

The Importance of Proper Bra Fit

A well-fitting bra is fundamental to both physical comfort and overall well-being. It’s as crucial as properly fitted shoes‚ impacting posture‚ back health‚ and even confidence. Ill-fitting bras can cause a multitude of problems‚ including back pain‚ shoulder grooves‚ skin irritation‚ and headaches. For too long‚ women have tolerated discomfort‚ believing it’s simply part of wearing a bra.

Proper support minimizes breast movement‚ reducing strain on Cooper’s ligaments – the tissues responsible for maintaining breast shape. A correctly fitted bra enhances your silhouette‚ making clothes fit better and boosting self-assurance. It’s not about conforming to a specific shape‚ but about celebrating and supporting your natural form.

Investing in a professional bra fitting is a worthwhile investment in your health and comfort. Don’t rely solely on old sizing; bodies change! Regularly reassess your fit‚ especially after weight fluctuations or life events. A comfortable‚ supportive bra empowers you to move through your day with confidence and ease.

How to Measure Your Bra Size

Accurate measurement is the cornerstone of finding your perfect bra fit. Begin by measuring your band size: stand naturally and measure snugly around your torso directly under your breasts‚ ensuring the measuring tape is level all the way around. Round to the nearest whole number – if it’s an odd number‚ add one inch.

Next‚ measure your bust size. Bend forward slightly‚ allowing all breast tissue to fall naturally into the measuring cup. Measure loosely around the fullest part of your bust‚ keeping the tape measure level. Do not pull it tight!

To determine your cup size‚ subtract your band size from your bust size. The difference corresponds to a cup size (e.g.‚ 1 inch = A cup‚ 2 inches = B cup‚ and so on). Consult a bra size conversion chart for accurate results‚ as sizing can vary between brands. Remember‚ these are starting points; a professional fitting is always recommended.

Bra Size Conversion Charts (US‚ UK‚ EU‚ AU)

Navigating bra sizes globally can be complex‚ as standards differ across regions. Understanding these conversions is crucial for online shopping or when traveling. Here’s a general guide‚ but remember brand variations exist‚ so always double-check specific size charts.

US to UK: Typically‚ add 1-2 band sizes and maintain the cup letter. US to EU: Band sizes are often similar‚ but cup sizes may differ – a US C might be an EU C/D. US to AU: Australian sizing closely mirrors UK sizing.

UK to EU: Conversion can be tricky; a UK 34C might translate to a 75C in EU sizing. EU to AU: Similar to US/AU‚ Australian sizing aligns closely with UK standards. Always prioritize measuring yourself and consulting brand-specific charts for the most accurate fit. Online resources offer detailed conversion tools for various brands.

Common Bra Styles

Explore popular bra styles like full coverage‚ demi‚ balconette‚ plunge‚ and strapless options. Each design offers unique support and aesthetics for diverse needs.

Full Coverage Bras

Full coverage bras are designed to completely encapsulate the breasts‚ providing maximum support and minimizing cleavage. These bras are an excellent choice for everyday wear‚ offering comfort and security throughout the day. They are particularly well-suited for larger bust sizes‚ offering reliable lift and preventing spillage.

The cups typically extend higher under the armpit‚ creating a smooth silhouette under clothing. Full coverage styles often feature wider straps for enhanced support and a more stable fit. Padding options vary‚ ranging from unlined for a natural shape to lightly padded for added modesty or shaping.

These bras are ideal for those seeking a secure and comfortable fit‚ especially during physical activity or for individuals who prefer a more modest look. They are a foundational piece for any lingerie drawer‚ offering versatility and reliable support. Finding the right size is crucial for optimal comfort and effectiveness.

Demi Bras

Demi bras‚ also known as half-cup bras‚ offer a more revealing and lifted look compared to full coverage styles. They typically cover about half to three-quarters of the breast‚ creating a rounded‚ natural shape and enhancing cleavage. These bras are a popular choice for wearing with lower-cut tops and dresses‚ providing both support and a touch of allure.

Demi bras often feature angled cups and strategically placed padding to lift and shape the breasts without excessive coverage. They are available in a variety of styles‚ including underwire and wireless options‚ catering to different preferences and support needs. The straps are generally designed to be slightly wider set to accommodate the cup shape.

Finding the right demi bra fit is essential to prevent spillage or discomfort. They are a fantastic option for those wanting a flattering silhouette and a boost of confidence‚ offering a balance between support and a sensual aesthetic.

Balconette Bras

Balconette bras are characterized by their horizontally cut cups that provide lift and create a rounded‚ uplifted breast shape. Unlike full coverage bras‚ they offer less coverage‚ typically covering only the bottom half of the breast. This style is designed to enhance cleavage and works beautifully with wider-neckline clothing‚ like off-the-shoulder tops or square necklines.

The angled cut of the cups in a balconette bra pushes the breasts upwards and together‚ creating a noticeable lift and a flattering silhouette. They often feature underwire for added support and come in padded or unpadded versions‚ depending on the desired level of enhancement. Straps are usually set wider apart to provide optimal support and stability.

Proper fit is crucial with balconette bras to avoid spillage or discomfort. They are a stylish choice for those seeking a lift‚ shape‚ and a touch of vintage-inspired elegance.

Plunge Bras

Plunge bras‚ also known as low-cut bras‚ are specifically designed with a deep V-shaped center gore. This unique construction makes them ideal for wearing with clothing that features low necklines – think plunging dresses‚ tops with deep V-necks‚ or even revealing blouses. They minimize visible bra lines and offer a seamless look under challenging outfits.

While offering minimal coverage‚ plunge bras don’t necessarily sacrifice support. Many feature underwire and strategically placed padding to provide lift and shape. The angled straps often converge towards the center‚ enhancing the plunging effect and ensuring a secure fit. Finding the right plunge bra involves considering the depth of the plunge and ensuring the nipples remain fully covered.

They are a versatile addition to any lingerie drawer‚ offering both style and functionality for a confident‚ low-cut look.

Strapless Bras

Strapless bras are a wardrobe staple‚ designed to be worn without shoulder straps‚ offering versatility with off-the-shoulder tops‚ strapless dresses‚ and one-shoulder styles. Achieving a secure and comfortable fit with a strapless bra is crucial‚ as they rely heavily on a snug band and well-engineered construction to provide support.

Key features often include a firm‚ reinforced band‚ silicone or rubberized lining along the edges to prevent slipping‚ and internal side boning for added stability. Many strapless bras also come with detachable straps‚ allowing for conversion to a traditional bra style when desired. Proper sizing is paramount; a band that’s too loose will result in the bra sliding down.

Look for options with multiple hook-and-eye closures for a customized fit. Modern designs prioritize comfort and support‚ ensuring a confident‚ secure feel all day long.

Specialty Bra Types

Explore specialized bras designed for specific needs – from high-impact sports to seamless looks. Discover options like minimizers‚ longlines‚ and wireless styles for tailored support.

Sports Bras

Sports bras are engineered to minimize breast movement during physical activity‚ offering crucial support and comfort. They differ significantly from everyday bras‚ prioritizing impact reduction and moisture-wicking capabilities. Choosing the right sports bra depends on the intensity of your workout; low-impact activities like yoga benefit from compression styles‚ while high-impact exercises such as running require encapsulation for maximum support.

Encapsulation sports bras feature individual cups that hold each breast separately‚ providing excellent support and shape. Compression bras‚ conversely‚ press the breasts against the chest wall‚ minimizing movement. Features to look for include adjustable straps‚ breathable fabrics‚ and wide underbands for enhanced comfort and a secure fit. Proper fit is paramount – a too-tight sports bra can restrict movement and cause discomfort‚ while a too-loose one won’t provide adequate support. Consider trying on sports bras with the clothing you typically wear during workouts to ensure a comfortable and functional fit. Many brands now offer fit guides utilizing diverse body types‚ aiding in finding the perfect match.

T-Shirt Bras

T-shirt bras are designed for seamless wear under fitted clothing‚ particularly t-shirts‚ hence the name. They feature smooth‚ molded cups without any lace or embellishments that could create visible lines. These bras prioritize a natural‚ rounded shape and a discreet profile‚ making them a wardrobe staple for everyday wear. The key characteristic is their ability to remain virtually invisible under clothing.

Construction typically involves seamless or lightly lined cups‚ often made of microfiber or smooth cotton blends. Padding is usually moderate‚ providing shape and coverage without adding significant volume. T-shirt bras come in various styles‚ including full coverage‚ demi‚ and balconette‚ offering options to suit different necklines and preferences. A well-fitting t-shirt bra should lie flat against your chest without any gaps or spillage. Look for options with comfortable straps and a secure band to ensure all-day support; Many brands now focus on inclusive sizing and diverse body representation in their fit guides‚ helping women find the perfect‚ invisible fit.

Wireless Bras

Wireless bras offer comfort and support without the constraints of an underwire. They are an excellent choice for those seeking a more natural feel‚ especially during relaxation or low-impact activities. These bras rely on band strength‚ cup construction‚ and supportive fabrics to provide lift and shape‚ rather than a rigid wire; They are often favored by individuals sensitive to underwires or those prioritizing all-day comfort.

Construction varies widely‚ ranging from simple bralettes to more structured wireless designs with molded cups and wider bands. Materials commonly used include cotton‚ microfiber‚ and stretch lace. Wireless bras are available in numerous styles‚ including full coverage‚ demi‚ and longline‚ catering to diverse preferences and needs. Finding the right fit is crucial; a snug band and well-shaped cups are essential for adequate support. Modern wireless bras often incorporate innovative designs and fabrics to deliver enhanced comfort and support‚ challenging the notion that wireless means sacrificing lift or shape.

Minimizer Bras

Minimizer bras are ingeniously designed to visually reduce the bust’s appearance‚ offering a more streamlined silhouette under clothing. Unlike reducing bras which physically compress breast tissue‚ minimizers redistribute it‚ creating a smoother‚ lower profile. They achieve this through specific cup construction‚ often utilizing side support panels and shallower cups that spread breast tissue outwards and downwards.

Ideal for those desiring a less prominent bust line without sacrificing comfort‚ minimizers are particularly popular with women who find full-coverage bras too bulky. They work exceptionally well under fitted clothing‚ providing a more polished look. While they don’t change breast size‚ they alter the projection‚ making the bust appear smaller. Many minimizer bras incorporate underwire for added support and shaping‚ though wireless options are also available. Proper fit is paramount; the band should be snug‚ and the cups should fully encapsulate breast tissue without spillage or gaping.

Longline Bras

Longline bras extend further down the torso than traditional bras‚ typically reaching to just below the bust or even the waist. This extended band provides exceptional support and shaping‚ creating a smooth‚ streamlined silhouette. Historically popular in vintage fashion‚ longline bras are experiencing a modern resurgence‚ offering both functionality and a touch of retro elegance.

The extended band distributes weight more evenly‚ reducing strain on the shoulders and back. This makes them a comfortable choice for women with larger busts or those seeking all-day support. Longline bras often feature stronger side panels and reinforced construction for enhanced lift and containment. They can be found in a variety of styles‚ including underwire and wireless options‚ as well as padded and unpadded versions. They pair beautifully with high-waisted bottoms‚ accentuating the waistline and creating a flattering hourglass figure. Finding the correct band size is crucial for optimal comfort and support.

Bra Features & Construction

Explore key bra components! Understanding underwire‚ band adjustments‚ and cup styles unlocks a perfect fit‚ enhancing comfort and support for every body type.

Underwire vs. Non-Underwire

Underwire bras feature a supportive‚ curved wire encased within the bra cup‚ providing lift‚ shape‚ and separation. They are excellent for fuller busts and offer significant support‚ defining the breast form and preventing sagging. However‚ some individuals find underwire uncomfortable‚ experiencing poking or chafing if the fit isn’t precise.

Non-underwire bras‚ conversely‚ lack this internal structure. They rely on fabric construction‚ reinforced seams‚ and band support to provide a natural shape and comfortable feel. These are ideal for everyday wear‚ lounging‚ or for those sensitive to underwire. While offering less lift than underwire styles‚ modern non-underwire designs utilize innovative techniques to deliver substantial support.

Choosing between the two depends on personal preference‚ body type‚ and desired level of support. Consider your activity level and comfort needs when making your selection. Both underwire and non-underwire bras can be found in various styles‚ catering to diverse needs and preferences.

Bra Band & Strap Adjustments

Proper bra fit hinges on correct band and strap adjustments. The band‚ providing the majority of support (around 80%)‚ should be snug but comfortable‚ sitting horizontally around your ribcage. It shouldn’t ride up in the back or feel overly tight. Start with the loosest hook and adjust as needed.

Strap adjustments influence lift and comfort. They should be firm enough to support your breasts without digging into your shoulders. Avoid overly tight straps‚ which can cause discomfort and leave marks. Adjust them equally to maintain a balanced fit and prevent one side from slipping.

Regularly re-evaluate these adjustments‚ as your body can change. Weight fluctuations‚ or even time of the month‚ can impact fit. A well-fitted bra feels secure and comfortable‚ allowing for a full range of motion without shifting or digging. Don’t hesitate to seek professional fitting assistance for optimal results.

Cup Styles & Padding Options

Bra cups come in diverse styles‚ impacting shape and support. Full-coverage cups offer maximum containment‚ while demi cups provide a lifted‚ rounded look. Balconette cups create a wider set appearance‚ and plunge cups suit low-cut outfits. Understanding these shapes is key to finding your ideal style.

Padding options range from unlined to heavily padded. Unlined bras offer a natural shape‚ while lightly padded bras provide subtle smoothing. Moderate padding enhances shape and provides additional coverage. Heavily padded bras can add size and create a dramatic silhouette.

Consider your clothing and desired look when choosing padding. Seamless cups are ideal under t-shirts‚ while molded cups offer a defined shape. Experiment to discover what feels most comfortable and flattering for your body and lifestyle. Proper cup fit prevents spillage and ensures all breast tissue is contained.

fun choir warm ups pdf

Article Plan: Fun Choir Warm-Ups PDF

This comprehensive guide details engaging vocal and physical exercises, including games like “The Impossible to Sing Song,” and tongue twisters,
presented as downloadable PDFs for effective choir preparation and rehearsal planning․

Choir warm-ups are essential preparatory exercises, encompassing both verbal and physical activities, designed to energize singers, sharpen focus, and gently prepare vocal mechanisms for performance․ These routines, often lasting 5-8 minutes, are a cornerstone of effective choral rehearsals, as highlighted by resources like Leo Rutherford’s “The Book of Games and Warm Ups for Group Leaders․”

Warm-ups aren’t merely about vocalization; they cultivate a shared sense of readiness and ensemble connection․ They establish a positive rehearsal atmosphere and proactively address potential vocal strain․ Modern approaches, like those found in “Evoking Sound,” emphasize structured methods and core exercises․ The following exploration will delve into a variety of fun and practical warm-up techniques, readily available as PDF resources, to elevate your choir’s performance․

Why Warm-Ups are Crucial for Choirs

Choir warm-ups are fundamentally crucial because they prepare the entire vocal instrument – body, breath, and voice – for the demands of singing․ As Music Education Consultants, Inc․ points out, warm-ups establish good unison and rhythmic precision, building vital pitch awareness within the ensemble․

Skipping warm-ups risks vocal strain, inaccurate pitch, and a lack of ensemble cohesion․ A well-structured warm-up routine proactively prevents these issues, fostering a healthier and more musically satisfying experience for all singers․ They are not simply a preliminary step, but an integral component of effective choral training, laying the groundwork for a polished and expressive performance, readily supported by downloadable PDF guides․

Benefits of Vocal Warm-Ups

Vocal warm-ups deliver a multitude of benefits, directly impacting a choir’s performance quality․ They demonstrably improve vocal range, allowing singers to comfortably access higher and lower notes, and crucially, enhance breath control, providing the necessary support for sustained phrases and dynamic expression․

Furthermore, consistent warm-ups cultivate pitch accuracy, minimizing errors and fostering harmonic clarity․ Resources like “Evoking Sound” emphasize methodical procedures․ These exercises, often available as convenient PDF downloads, aren’t just about technical skill; they build confidence and create a shared focus, preparing the choir mentally and physically for a successful rehearsal or performance․

Improving Vocal Range

Expanding vocal range requires consistent, targeted warm-up exercises․ Techniques like ascending and descending scales, coupled with arpeggios, gently stretch vocal muscles, increasing flexibility and access to both higher and lower registers․

PDF resources often include specific vocalizing patterns designed for this purpose․ Warm-ups should progress gradually, avoiding strain․ The “Book of Games and Warm Ups” suggests playful approaches to range building․ A choir’s ability to navigate a wider range enhances musical expression and allows for more complex repertoire choices, ultimately enriching the overall sound․

Enhancing Breath Control

Effective breath control is foundational for choral singing, impacting tone quality, phrasing, and stamina․ Warm-ups focusing on diaphragmatic breathing – deep, controlled inhales expanding the abdomen – are crucial․

Exercises like sustained tones on a single pitch, gradually increasing duration, build breath support․ PDF resources often feature breathing exercises, and the importance of establishing good unison relies on consistent breath management․ “Evoking Sound” details procedures for core vocal exercises․ Strong breath control allows singers to maintain consistent sound and navigate challenging musical passages with ease and confidence․

Developing Pitch Accuracy

Precise pitch is paramount in choral music, and warm-ups are vital for honing this skill․ Interval training – singing ascending and descending intervals – strengthens a choir’s ability to hear and reproduce accurate pitches․

Pitch matching exercises, where singers echo a given note or phrase, are also beneficial․ Resources like “Evoking Sound” offer methods for pitch development․ Warm-ups build pitch awareness, establishing a foundation for harmonious blend․ Consistent practice, utilizing PDF-based exercises, improves intonation and overall musicality, leading to a polished and refined choral sound․

Physical Warm-Ups for Choirs

Before vocalizing, physical preparation is crucial for releasing tension and improving posture․ Stretching exercises, focusing on the neck, shoulders, and back, enhance breath support and vocal projection․

Posture and alignment drills – standing tall with relaxed shoulders – optimize airflow and resonance․ A 5-8 minute routine, as suggested by resources like the “Book of Games and Warm Ups,” can significantly impact vocal quality․ These exercises, often found in downloadable PDF warm-up packs, prepare the body for singing, preventing strain and promoting a free, open sound․

Stretching Exercises

Targeted stretches release tension in key areas for singers․ Gentle neck rolls, shoulder circles, and back extensions improve flexibility and range of motion․ Arm stretches, reaching overhead and across the body, open the chest cavity, aiding in breath support․

These exercises, often incorporated into a 5-8 minute physical warm-up routine, prepare the body for vocal demands․ Resources like choral warm-up PDFs emphasize the importance of slow, controlled movements, avoiding any bouncing or strain․ Prioritizing physical release enhances vocal freedom and prevents injury during rehearsals and performances․

Posture and Alignment

Proper posture is foundational for optimal vocal production․ Encourage singers to stand tall with relaxed shoulders, a neutral spine, and a slightly engaged core․ Feet should be shoulder-width apart, providing a stable base․ Visual cues, like imagining a string pulling from the crown of the head, can aid alignment․

Choral warm-up resources often include alignment checks as part of the physical preparation․ Good posture facilitates diaphragmatic breathing and allows for unrestricted airflow․ Maintaining correct alignment throughout rehearsal builds healthy vocal habits and improves overall sound quality within the choir․

Speech Warm-Ups for Vocal Preparation

Speech warm-ups are vital precursors to singing, activating vocal muscles and improving articulation․ Begin with simple exercises like yawning to release tension in the jaw and throat․ Then, progress to tongue twisters – a fun and effective way to enhance clarity and diction․

Consonant exercises, where sections repeat a consonant in varying rhythms, build rhythmic precision and vocal agility․ These warm-ups, detailed in resources like “The Book of Games and Warm Ups,” prepare the vocal mechanism for the demands of choral singing․ They increase focus and energy before vocalizing․

Breathing Exercises for Choral Singers

Proper breathing is foundational for choral singing, impacting tone quality, stamina, and control․ Begin with diaphragmatic breathing exercises – inhaling deeply, expanding the abdomen, and exhaling slowly․ Encourage singers to feel the support of their core muscles․

Exercises like sustained ‘sss’ or ‘shhh’ sounds help develop breath control and consistency․ “Evoking Sound” details comprehensive methods․ These warm-ups, taking 5-8 minutes as suggested by resources, establish a relaxed yet supported airflow, crucial for unified phrasing and dynamic expression within the choir․ Consistent practice builds vocal endurance․

Vocalizing Techniques

Effective vocalizing prepares the voice for singing, enhancing range and flexibility․ Lip trills and tongue rolls, as core exercises, loosen articulators and promote consistent airflow․ Humming exercises, detailed in choral warm-up methods, focus resonance and blend․

Progress to simple scales and arpeggios, gradually expanding the vocal range․ Resources emphasize core vocal exercises․ These techniques, part of a 5-8 minute warm-up routine, improve pitch accuracy and vocal agility․ Encourage singers to maintain relaxed posture and open throats throughout vocalization, building a solid foundation for choral performance․

Lip Trills and Tongue Rolls

Lip trills (“brrr”) and tongue rolls (“rrr”) are foundational vocalizing techniques․ These exercises effectively loosen the articulators – lips, tongue, and jaw – promoting vocal flexibility and reducing tension․ They encourage consistent airflow, vital for sustained notes and choral blend․

Begin slowly, focusing on a relaxed, even sound․ Gradually increase the tempo and range․ These techniques, often included in 5-8 minute warm-up routines, are beneficial for all voice types․ Resources like “Evoking Sound” detail their application․ They prepare the vocal mechanism for more complex exercises and singing, improving overall vocal health․

Humming Exercises

Humming is a gentle yet powerful vocal warm-up, ideal for establishing resonance and breath support․ It encourages forward placement of sound, minimizing strain and maximizing vocal efficiency․ Start with a comfortable pitch and gradually explore the vocal range, maintaining a consistent, relaxed hum․

Humming exercises, often part of a choral rehearsal’s initial 5-8 minutes, help singers connect with their bodies and focus their attention․ Resources like “Evoking Sound” emphasize their importance․ Vary the vowel shape within the hum to explore different tonal qualities, preparing the voice for more complex musical passages and improving blend․

Rhythmic Warm-Ups

Rhythmic warm-ups are crucial for establishing a shared sense of time and precision within the choir․ These exercises move beyond simply keeping a beat; they build internal pulse and ensemble coordination․ Clapping and stomping simple rhythms are excellent starting points, progressing to more complex patterns․

A fun technique involves dividing the choir into sections, each assigned a different consonant to articulate in varying rhythms – half notes, quarter notes, eighth notes․ This, as highlighted in available resources, fosters rhythmic awareness․ These activities, often found in “The Book of Games and Warm Ups,” prepare singers for accurate performance․

Clapping and Stomping Rhythms

Beginning with simple clapping and stomping rhythms is a foundational element of any effective choral warm-up․ Start with steady quarter notes, ensuring everyone maintains a consistent pulse․ Gradually introduce variations – adding rests, changing the tempo, or incorporating syncopation․

Progress to more complex patterns, like dotted rhythms or triplets, challenging the choir’s rhythmic accuracy․ Encourage singers to feel the beat internally, not just react to the sound․ These exercises, often a starting point in a 5-8 minute warm-up routine, build ensemble cohesion and prepare voices for rhythmic precision, as emphasized in resources like those from Music Education Consultants, Inc․

Consonant Rhythm Exercises

Consonant rhythm exercises are a playful yet powerful tool for developing rhythmic awareness within a choir․ Divide the choir into sections, assigning each a different consonant sound – ‘p’, ‘t’, ‘k’, for example․ Each section then articulates their consonant using varying rhythms: half notes, quarter notes, eighth notes, and beyond․

This dynamic activity, highlighted in various warm-up resources, encourages active listening and coordination․ Switching up the rhythms keeps the exercise engaging and challenges singers to adapt quickly․ It’s a fantastic way to build rhythmic precision and ensemble unity, preparing the choir for more complex musical passages․

Pitch Matching Exercises

Developing accurate pitch is fundamental for any choir, and dedicated pitch matching exercises are crucial․ Begin with simple exercises where the director plays or sings a single note, and the choir immediately replicates it․ Gradually increase the complexity by introducing short melodic phrases․

These exercises, often included in choral warm-up PDFs, build aural skills and strengthen the connection between hearing and vocal production․ Consistent practice enhances the choir’s ability to sing in tune and establish a unified sound․ Focus on clear articulation and attentive listening to maximize the benefits of these foundational exercises;

Interval Training for Choirs

Interval training significantly improves a choir’s harmonic awareness and sight-reading skills․ Start with simple intervals like perfect fifths and octaves, having singers identify and reproduce them․ Progress to more challenging intervals – major and minor seconds, thirds, and sevenths – using solfège or numbers․

Many fun choir warm-up PDFs incorporate interval exercises as playful games․ This approach makes learning intervals more engaging and less intimidating․ Regular interval practice builds a strong musical foundation, enabling singers to navigate complex harmonies with confidence and precision, ultimately enhancing the choir’s overall musicality․

Dynamic Warm-Ups

Dynamic warm-ups prepare the voice for a full range of expression and prevent strain․ Unlike static stretches, these involve movement․ Begin with gentle sirens – gliding up and down the vocal range – and gradually increase the dynamic level․ Incorporate scales and arpeggios sung with varying volumes, from piano to forte․

Many “fun choir warm-ups PDF” resources suggest exercises that combine dynamics with articulation․ For example, staccato notes followed by legato phrases․ This builds vocal agility and control․ Dynamic warm-ups are crucial for preparing singers for performances requiring nuanced phrasing and emotional delivery․

Fun and Engaging Warm-Up Games

Injecting playfulness into warm-ups boosts energy and focus․ “The Impossible to Sing Song,” a popular choice found in many “fun choir warm-ups PDF” guides, challenges singers with deliberately awkward phrasing and rhythms․ Tongue twisters, like “Never Hug a Hibble,” improve articulation and diction while eliciting laughter․

Another engaging game involves dividing the choir into sections, assigning each a consonant, and having them repeat it in different rhythms․ This builds rhythmic precision and ensemble awareness․ These games aren’t just about fun; they subtly reinforce essential vocal and musical skills, making rehearsal more enjoyable and productive․

The Impossible to Sing Song

This game, frequently featured in “fun choir warm-ups PDF” resources, is designed to be delightfully challenging․ It involves presenting singers with a short musical phrase intentionally crafted with awkward intervals, unusual rhythms, and difficult vowel combinations․ The goal isn’t perfection, but rather to encourage flexibility and quick thinking․

“The Impossible to Sing Song” forces singers to actively listen, adjust rapidly, and support each other․ It’s a fantastic way to break down inhibitions and build ensemble cohesion․ The inherent silliness also creates a relaxed atmosphere, preparing the choir for more focused work․ It’s a memorable and effective warm-up staple․

Tongue Twisters as Warm-Ups

Tongue twisters, often included in “fun choir warm-ups PDF” collections, are a playful yet powerful tool for vocal preparation․ They demand precise articulation, clear diction, and focused breath control – all essential for choral singing․ Examples like “To sit in solemn silence in a dull, dark dock” challenge singers to navigate complex consonant clusters and rapid-fire phrasing;

Assigning different rhythms to tongue twisters, as suggested in resources, adds another layer of complexity, enhancing rhythmic precision․ This exercise isn’t just about speed; it’s about maintaining clarity and control while increasing vocal agility․ They’re a fun way to sharpen skills!

Warm-Up Resources: PDF Downloads

Numerous “fun choir warm-ups PDF” resources are readily available online, offering structured exercises for vocal and physical preparation․ Publications like “The Book of Games and Warm Ups for Group Leaders” by Leo Rutherford provide a wealth of ideas, while “Evoking Sound: The Choral Warm-Up” by GIA Publications offers detailed methods and procedures․

Additional downloadable PDFs include rehearsal planners, aiding in the integration of warm-ups into practice schedules․ These resources often contain exercises targeting breath control, pitch accuracy, and rhythmic precision․ Utilizing these PDFs ensures a well-rounded and effective warm-up routine for choirs of all levels․

Planning a Choir Rehearsal with Warm-Ups

Integrating warm-ups into your choir rehearsal is crucial for optimal performance․ Dedicate approximately 5-8 minutes at the beginning to physical, vocal, and singing exercises․ Structure this time with a progression – starting with physical stretches, moving to speech and breathing exercises, and culminating in vocalizing and pitch matching․

Consider incorporating fun games like consonant rhythm exercises, where sections practice rhythms with assigned consonants, or “The Impossible to Sing Song․” A well-planned warm-up not only prepares voices but also establishes unison, rhythmic precision, and pitch awareness, setting a positive tone for the entire rehearsal․

Warm-Up Considerations for Different Age Groups

Adapting warm-ups to suit different age groups is essential for engagement and effectiveness․ Younger choirs benefit from highly playful and energetic activities, like simple clapping rhythms and silly tongue twisters, keeping sessions brief and focused․ Teen choirs appreciate more challenging exercises, including interval training and dynamic warm-ups, fostering independence․

Adult choirs can handle complex vocalizing and extended breathing exercises․ Regardless of age, prioritize clear instructions and positive reinforcement․ Ensure warm-ups are accessible and enjoyable, building confidence and a sense of community within the choir․

The Role of Warm-Ups in Establishing Unison

Warm-ups are instrumental in cultivating a unified choral sound, directly impacting the choir’s ability to sing in unison․ Pitch matching exercises, a core component of effective warm-ups, train singers to accurately replicate and sustain a common pitch․

Rhythmic precision, honed through clapping and stomping exercises, ensures synchronized entrances and consistent timing․ These activities build a shared musical awareness, fostering attentive listening and collaborative blending․ Consistent warm-up routines establish a foundation for cohesive performance, allowing the choir to achieve a remarkably unified and polished sound․

Warm-Ups and Rhythmic Precision

Rhythmic warm-ups are vital for developing a choir’s collective sense of timing and accuracy․ Exercises like clapping and stomping rhythms, alongside consonant rhythm drills, challenge singers to internalize and execute complex patterns together․

Dividing the choir into sections, each assigned a different rhythm for a single consonant, promotes focused listening and coordination․ These activities build a strong rhythmic foundation, minimizing discrepancies and enhancing the overall clarity and impact of the choral performance․ Consistent practice translates to improved ensemble precision and a more polished sound;

Utilizing Warm-Ups to Build Pitch Awareness

Warm-ups are instrumental in cultivating a choir’s sensitivity to pitch and intonation․ Pitch matching exercises, alongside interval training, help singers accurately identify and reproduce specific notes and harmonic relationships․

Regularly incorporating these exercises into rehearsals establishes a shared understanding of tonal accuracy․ This focused practice minimizes pitch drift and fosters a more unified and harmonious sound․ By consistently engaging in pitch-focused warm-ups, choirs develop a heightened awareness of their individual and collective intonation, leading to improved musicality and performance quality․

Advanced Choral Warm-Up Techniques

Beyond basic vocalization, advanced techniques refine a choir’s musicality․ These include complex harmonic exercises, sight-reading drills integrated into warm-up routines, and polyrhythmic patterns to challenge coordination․

Exploring microtonal intervals and extended vocal techniques expands the choir’s sonic palette․ Utilizing call-and-response patterns with varying complexities enhances listening skills and ensemble responsiveness․ These advanced warm-ups, often found in resources like “Evoking Sound,” demand focused attention and build a choir’s capacity for nuanced musical expression, ultimately elevating performance standards․

Making Warm-Ups a Consistent Practice

Establishing consistent warm-up routines is paramount for sustained choral success․ Integrating 5-8 minutes of physical, vocal, and singing exercises at the start of each rehearsal, as suggested by resources like the PSMF Warm-Ups guide, fosters healthy vocal habits and ensemble cohesion․

Regular warm-ups build pitch awareness, rhythmic precision, and unison, crucial elements highlighted by Music Education Consultants․ Viewing warm-ups not as preparatory tasks, but as integral musical experiences, cultivates engagement and unlocks a choir’s full potential․ Prioritizing these practices ensures consistent improvement and joyful music-making․

carel ir33 user manual

Carel IR33 User Manual: A Comprehensive Guide

Carel’s IR33 controllers offer advanced refrigeration solutions, featuring a two-level menu system and customizable parameters for optimal performance and application flexibility.

The Carel IR33 controller represents a foundational element in CAREL’s range of refrigeration solutions, designed for a broad spectrum of applications. Released initially in 2008 (rel. 1.0 ⎻ 16.04.2008), the IR33 provides versatile control for refrigerated and deep-freeze storage. This universal controller, available in various models like IR33, IR33 DIN, and IR33 Power, offers precise temperature management and operational efficiency.

It features a user-friendly interface with a two-level programming system (Level 1 & Level 2) allowing for customized settings. The IR33 is equipped with a 16A compressor relay and supports 0-10V outputs and temperature inputs, making it adaptable to diverse system configurations. Understanding its capabilities unlocks enhanced control and optimization within refrigeration systems.

Understanding IR33 Applications in Refrigeration

The Carel IR33 controller excels in a wide array of refrigeration applications, from basic temperature control to complex system management. It’s ideally suited for refrigerated and deep-freeze storage, ensuring precise and reliable operation. Its versatility extends to various case types and configurations, offering adaptable solutions for diverse needs.

The IR33’s ability to handle 0-10V outputs and temperature inputs allows integration with various sensors and actuators. Its 16A compressor relay provides robust control of refrigeration compressors. Users can leverage the two-level programming system to tailor the controller’s behavior to specific application requirements, maximizing efficiency and performance within their refrigeration systems.

IR33 Model Variations: IR33, IR33 DIN, IR33 Power

Carel offers the IR33 controller in several variations to suit different installation and application needs. The standard IR33 is a universal controller for panel installation, featuring two relays and two 0-10V outputs. The IR33 DIN version is designed for DIN rail mounting, providing a compact solution for space-constrained environments.

The IR33 Power model expands functionality with enhanced power capabilities. These variations share core features like the two-level programming system and customizable parameters, but differ in physical form and specific input/output configurations. Choosing the right model ensures optimal integration and performance within your refrigeration system, offering flexibility and scalability.

Getting Started with Your IR33

Before operation, familiarize yourself with the IR33 controls and ensure proper power supply – either 1-4Vac/dc or 115-230Vac – is connected.

Power Supply Requirements: 1-4Vac/dc & 115-230Vac

The Carel IR33 controllers demonstrate versatile power options, accommodating both 1 to 4Vac/dc and 115-230Vac power sources. This flexibility simplifies integration into diverse refrigeration systems. Users can select the appropriate power input based on their existing infrastructure.

For installations requiring low voltage operation, optional transformers are readily available to convert 110Vac or other standard voltages down to the necessary 1-4Vac/dc range. Careful consideration of the power supply is crucial for ensuring stable and reliable controller performance. Incorrect voltage application can lead to malfunction or damage. Always verify compatibility before connecting the power source to the IR33 unit, and consult the full documentation for detailed wiring diagrams and safety precautions.

Initial Setup and Familiarization with Controls

Before operating your Carel IR33 controller, thorough familiarization with its controls is essential for maximizing performance. Begin by carefully inspecting the unit for any signs of damage incurred during shipping. Ensure the controller is properly mounted and wired according to the installation guidelines.

Take time to identify each button, display element, and input/output terminal. The IR33 features a user-friendly interface designed for intuitive navigation. Understanding the function of each control allows for efficient programming and troubleshooting. Refer to the detailed diagrams within this manual to pinpoint specific components. Get the most out of your new controller by understanding its features and capabilities from the start!

Navigating the IR33 Menu System

The Carel IR33 controller utilizes a straightforward, two-level menu system – Level 1 and Level 2 – enabling comprehensive programming of operational settings.

Level 1 Programming Settings

Level 1 settings within the Carel IR33 controller focus on the most frequently adjusted parameters for typical refrigeration applications. These settings allow for quick and easy configuration of essential functions without requiring in-depth technical knowledge. Users can readily modify parameters like setpoints, temperature units (Celsius or Fahrenheit), and display configurations directly from this level.

Common adjustments in Level 1 include defining the evaporator and condenser setpoints, configuring defrost cycles, and setting alarm thresholds. The intuitive menu structure guides users through each parameter, providing clear descriptions and acceptable value ranges. This level prioritizes accessibility, enabling technicians to efficiently adapt the controller to specific refrigeration needs. It’s designed for everyday operational adjustments, ensuring optimal performance and responsiveness.

Level 2 Programming Settings

Accessing Level 2 of the Carel IR33 controller unlocks advanced configuration options, catering to experienced technicians and specialized applications. Unlike Level 1, these settings delve into more intricate parameters influencing the controller’s behavior and functionality. This level allows customization beyond standard refrigeration needs, offering precise control over system operation.

Within Level 2, users can modify parameters related to relay logic, input/output configurations, and advanced alarm management. It provides access to settings affecting compressor protection, fan control, and defrost termination criteria. While offering greater flexibility, Level 2 requires a thorough understanding of refrigeration principles and the IR33’s internal workings. Incorrect adjustments can impact system performance, so caution and expertise are essential.

IR33 Controller Parameters and Customization

The Carel IR33 allows extensive parameter modification, offering six customizable default parameter sets to tailor operation to specific refrigeration application requirements.

Default Parameter Settings

The Carel IR33 controller is pre-configured with a set of default parameter settings designed to provide a functional baseline for a wide range of refrigeration applications. These settings cover essential operational aspects, including temperature control ranges, defrost cycles, alarm thresholds, and relay configurations.

However, it’s crucial to understand that these defaults may not be optimal for every specific installation. The IR33’s strength lies in its ability to be customized. While the default parameters offer a starting point, users are encouraged to review and adjust them based on the unique characteristics of their refrigeration system and the specific requirements of the application.

Carel provides detailed documentation outlining each parameter and its impact on system behavior. Before modifying any settings, it is highly recommended to thoroughly familiarize yourself with the parameter descriptions to avoid unintended consequences. The six customizable sets allow for saving different configurations for various scenarios.

Modifying and Resetting Parameters

Adjusting IR33 parameters is done through its intuitive menu system, accessible via the control panel. Navigate to the desired parameter using the up/down arrows and modify its value using the appropriate keys. Always confirm changes to save them to memory. Careful consideration is vital before altering any setting, as incorrect values can impact system performance.

Should you need to revert to the original configuration, the IR33 offers a reset function. This restores all parameters to their factory default settings. However, be aware that this action will erase any custom configurations you’ve implemented.

The controller allows stepping out of the parameter setting procedure to display the current temperature value. Before resetting, document your custom settings for easy re-entry. Remember to consult the comprehensive user manual for detailed instructions and parameter explanations.

IR33 Technical Specifications

The IR33 boasts a 16A compressor relay and versatile input/output options, including 0-10V outputs and temperature inputs for diverse refrigeration needs.

Relay Specifications: 16A Compressor Relay

The Carel IR33 controller is commonly equipped with a robust 16A relay specifically designed for compressor control within refrigeration systems. This relay capacity allows for the management of a wide range of compressor sizes typically found in commercial and industrial refrigeration applications.

The 16A rating signifies the maximum current the relay can safely switch, ensuring reliable operation and preventing damage to both the relay and the connected compressor. Selecting a relay with adequate capacity is crucial for system longevity and preventing unexpected downtime.

Furthermore, the inclusion of this relay simplifies wiring and control, providing a direct interface between the IR33 controller and the compressor. This feature contributes to the overall efficiency and ease of installation of refrigeration systems utilizing the Carel IR33;

Input/Output Configuration: 0-10V Outputs & Temperature Inputs

The Carel IR33 controller boasts versatile input/output (I/O) capabilities, featuring both 0-10V outputs and a range of temperature input options. The 0-10V outputs enable proportional control of devices like fans, valves, and dampers, allowing for precise adjustments based on system demands. This analog output provides smooth and efficient operation, optimizing energy consumption and maintaining stable conditions.

Regarding inputs, the IR33 accepts temperature signals from various sensors, including thermistors and thermocouples. These inputs are crucial for monitoring critical temperatures within the refrigerated system, enabling accurate control and protection.

The combination of these I/O features makes the IR33 adaptable to diverse refrigeration applications, offering flexibility and control for optimal performance.

Troubleshooting Common IR33 Issues

If issues arise, the controller can display current temperature values, and any modifications can be easily reset to restore optimal IR33 functionality.

Displaying Current Temperature Values

The Carel IR33 controller provides a straightforward method for displaying current temperature readings, crucial for monitoring system performance and diagnosing potential issues. Should the controller step out of the parameter setting procedure, the display will automatically revert to showcasing the present temperature value. This feature allows for immediate verification of operational status without navigating through menus.

This real-time temperature display is invaluable for technicians and operators alike, offering a quick assessment of the refrigerated or deep-freeze environment. It ensures that the system is functioning within the desired parameters and promptly identifies any deviations that may require attention. Regularly checking the displayed temperature contributes to proactive maintenance and prevents potential problems before they escalate, ultimately safeguarding product integrity and system efficiency.

Resetting Modifications

The Carel IR33 controller offers a reset function to revert any unintended or incorrect parameter modifications, ensuring optimal system operation. This feature is particularly useful if adjustments have been made during programming that negatively impact performance or cause unexpected behavior. The reset process effectively restores the controller to its previously saved configuration.

Initiating a reset clears any changes made to the parameters, returning them to their default or last known stable settings. This is a vital troubleshooting step when encountering issues after parameter adjustments. It’s important to understand that a reset will erase all recent modifications, so careful consideration should be given before proceeding. Proper documentation of parameter changes prior to resetting is highly recommended for efficient restoration if needed.

Resources and Support

Carel provides extensive online technical literature and dedicated support channels, including Carel-cz.cz and Carel Thailand, for IR33 assistance.

Downloading Technical Literature from Carel Website

Carel’s official website serves as a comprehensive repository for all technical documentation related to the IR33 controller series. Users can readily access a wealth of resources, including detailed user manuals, technical specifications, application notes, and software updates. This online library ensures that installers, technicians, and end-users have immediate access to the information needed for successful installation, configuration, and maintenance of their IR33 systems.

To locate the necessary documentation, navigate to the Carel website (www.carel.com) and utilize the search function, entering “IR33” or the specific model number (e.g., IR33E7HB20). The search results will direct you to the relevant product page, where downloadable PDFs and other supporting materials are readily available. Regularly checking the website for updates is recommended to ensure you have the latest information regarding your IR33 controller.

Contacting Carel Support (Carel-cz.cz, Carel Thailand)

Carel provides dedicated support channels to assist users with any questions or issues regarding the IR33 controller. For customers in the Czech Republic and surrounding regions, Carel-cz.cz offers localized support via email and potentially phone. Their team can provide assistance with technical inquiries, troubleshooting, and warranty claims.

Additionally, Carel Thailand Co., Ltd. (address: 444 4th…) serves as a key support hub for customers in Thailand and Southeast Asia. Contacting them directly ensures access to regional expertise and faster response times. When reaching out, be prepared to provide your IR33 model number and a detailed description of the problem. You can also explore the global Carel website for additional contact information and support resources tailored to your specific location.

spi exam sample questions pdf

ARDMS SPI Exam Sample Questions PDF: A Comprehensive Study Plan

Navigating the ARDMS SPI exam requires focused preparation‚ and utilizing sample questions in PDF format is a cornerstone of success.
Numerous resources‚ both official and third-party‚ offer these valuable tools for effective study.

Understanding the SPI Exam

The Sonography Principles and Instrumentation (SPI) exam‚ administered by the American Registry for Diagnostic Medical Sonography (ARDMS)‚ assesses a candidate’s foundational knowledge of ultrasound physics‚ instrumentation‚ and hemodynamics.
Successfully passing this exam is crucial for sonographers seeking certification.
Preparation often involves utilizing sample questions‚ readily available as PDFs‚ to familiarize oneself with the exam’s format and content.

These PDFs provide a realistic practice experience‚ mirroring the multiple-choice‚ image-based‚ and calculation-based questions encountered on the actual SPI exam.
Resources like McRee Learning Center‚ Prepry‚ and U Test Prep offer comprehensive SPI practice materials.
Understanding the exam’s scope and leveraging these resources is key to achieving a passing score.

What is the ARDMS SPI Exam?

The ARDMS SPI Exam is a standardized assessment designed to evaluate a sonographer’s understanding of the fundamental principles underpinning diagnostic ultrasound. It specifically tests knowledge of ultrasound physics‚ instrument operation‚ image formation‚ and Doppler techniques.
Passing this exam is a prerequisite for ARDMS certification in various sonography specialties.

Candidates preparing for the SPI exam frequently utilize sample questions‚ often found in PDF format‚ to gauge their preparedness.
These practice questions‚ offered by providers like Prepry and U Test Prep‚ simulate the exam’s style and difficulty.
Accessing and studying these PDFs is a vital component of a comprehensive study plan‚ enhancing familiarity and boosting confidence.

SPI Exam Content Outline

The ARDMS SPI Exam comprehensively covers several key areas crucial to sonography practice. Core topics include ultrasound physics fundamentals – encompassing wave properties‚ acoustic impedance‚ and attenuation – and image optimization techniques‚ focusing on resolution‚ artifacts‚ and contrast.

Furthermore‚ the exam assesses understanding of hemodynamics and Doppler principles‚ alongside instrument performance evaluation‚ including quality assurance and machine controls. Sample questions in PDF format‚ sourced from McRee Learning Center and other platforms‚ mirror this content distribution.
Effective preparation involves mastering these areas‚ and utilizing practice PDFs allows candidates to identify knowledge gaps and refine their understanding before the actual exam.

Importance of Sample Questions

Sample questions‚ particularly in PDF format‚ are indispensable for ARDMS SPI exam preparation. They provide a realistic preview of the question style‚ difficulty‚ and content emphasis encountered on the actual exam. Utilizing these resources‚ like those offered by Prepry and U Test Prep‚ allows candidates to assess their current knowledge base and pinpoint areas needing further study.

Moreover‚ practice questions build familiarity with the exam format‚ reducing test-day anxiety and improving time management skills. Analyzing incorrect answers reveals conceptual misunderstandings‚ while consistent practice reinforces learned material. Accessing PDFs from various sources‚ including CliffsNotes‚ offers diverse perspectives and strengthens overall comprehension‚ ultimately boosting confidence and exam performance.

Accessing SPI Exam Sample Questions in PDF Format

Numerous avenues exist for obtaining SPI exam sample questions in PDF format‚ ranging from official ARDMS resources to third-party providers like McRee Learning Center.

Official ARDMS Resources

While the ARDMS doesn’t offer a comprehensive‚ free PDF of sample questions mirroring the full exam experience‚ they do provide a limited sample through their website. This sample offers a glimpse into the question style and content focus‚ serving as a starting point for familiarization.

However‚ prospective test-takers should understand that this official sample is intentionally concise. It’s best used to understand the format‚ not to fully prepare. ARDMS primarily directs candidates towards purchasing full-length practice exams through authorized vendors.

Checking the ARDMS website regularly for updates regarding available resources is crucial‚ as offerings can change. Focusing on the content outline provided by ARDMS is also vital for targeted preparation‚ complementing any sample questions obtained.

Third-Party Providers Offering SPI PDFs

Several companies specialize in ARDMS exam preparation‚ offering SPI sample question PDFs. McRee Learning Center provides sample quizzes and full practice exams‚ focusing on detailed explanations. Prepry offers practice tests designed to simulate the exam environment and adapt to individual learning needs. U Test Prep is another popular choice‚ promising high scores through comprehensive practice materials.

Additionally‚ resources like CliffsNotes‚ while not solely dedicated to ARDMS SPI‚ can provide foundational physics practice relevant to the exam’s principles. These PDFs vary in price and content volume‚ so careful evaluation is essential.

It’s important to note that these are unofficial resources and should be used as supplementary study aids.

Free vs; Paid Sample Question PDFs

The availability of both free and paid SPI sample question PDFs presents a crucial decision for examinees. Free resources‚ like those found through unofficial practice tests‚ offer a low-cost entry point for familiarization with question formats. However‚ these often have limited content and may lack detailed explanations.

Paid PDFs‚ offered by providers like McRee Learning Center‚ Prepry‚ and U Test Prep‚ generally provide a more extensive question bank‚ in-depth rationales for correct and incorrect answers‚ and simulated exam conditions. While requiring an investment‚ they often lead to more effective preparation.

Consider your learning style and budget when choosing; a combination of both may be optimal.

Evaluating the Quality of PDF Resources

Assessing the quality of SPI sample question PDFs is paramount for effective exam preparation. Look for resources with questions mirroring the ARDMS exam’s style and difficulty. Detailed answer explanations are crucial – simply knowing the correct answer isn’t enough; understanding why is vital.

Check for recent updates; the SPI exam evolves‚ and outdated materials can be misleading. Beware of PDFs with numerous errors or poorly written questions. Verify the source’s reputation; established providers like those mentioned generally offer higher-quality content.

A good resource will also offer a realistic exam simulation experience.

Key Topics Covered in SPI Sample Questions

Sample questions heavily emphasize ultrasound physics‚ hemodynamics‚ image optimization‚ and instrument performance. Mastering these areas is crucial for success on the ARDMS SPI exam.

Ultrasound Physics Fundamentals

A strong grasp of ultrasound physics is paramount‚ and sample questions frequently assess this foundational knowledge. Expect questions covering sound wave properties – frequency‚ wavelength‚ velocity‚ and attenuation – and their impact on image formation. Understanding acoustic impedance‚ reflection‚ refraction‚ and absorption is vital.

Furthermore‚ questions delve into Doppler principles‚ including frequency shifts and spectral analysis. Sample PDFs often present scenarios requiring calculations of depth‚ time gain compensation (TGC)‚ and resolution. Be prepared to differentiate between various modes like B-mode‚ M-mode‚ and color Doppler. Finally‚ knowledge of bioeffects and ALARA principles (As Low As Reasonably Achievable) is consistently tested within these physics-focused questions.

Image Optimization Techniques

Sample SPI exam questions heavily emphasize image optimization‚ testing your ability to manipulate controls for optimal visualization. Expect scenarios requiring adjustments to gain‚ time gain compensation (TGC)‚ and depth settings to enhance image quality. Understanding focal zone manipulation and its effect on resolution is crucial.

Questions frequently assess your knowledge of resolution – axial‚ lateral‚ and temporal – and how to maximize each. Furthermore‚ you’ll encounter questions regarding reducing artifacts like shadowing‚ reverberation‚ and comet-tail. The ability to recognize and correct for suboptimal image appearance is key. Finally‚ mastering techniques for harmonic imaging and compound imaging will prove beneficial when tackling these questions.

Hemodynamics and Doppler Principles

SPI exam sample questions dedicate significant attention to hemodynamics and Doppler physics. Expect calculations involving velocity‚ flow volume‚ and resistance‚ often presented in clinical scenarios. Understanding the Doppler equation and its application to spectral and color Doppler is paramount.

Questions will assess your knowledge of angle correction‚ aliasing‚ and the impact of vessel depth on Doppler shifts. Furthermore‚ you’ll encounter questions regarding waveform analysis – normal and abnormal patterns for arterial and venous flow. The ability to differentiate between stenosis‚ turbulence‚ and normal flow is crucial. Finally‚ mastering concepts like pulsatility index (PI) and resistance index (RI) will aid in accurate interpretation.

Instrument Performance Evaluation

Sample SPI exam questions heavily emphasize instrument performance evaluation and quality control. Expect questions covering topics like time-gain compensation (TGC)‚ image resolution‚ and spatial pulse length. Understanding how these parameters affect image quality is vital.

Questions will likely assess your knowledge of artifact recognition – identifying and explaining the causes of common ultrasound artifacts. Furthermore‚ you’ll encounter scenarios requiring you to optimize machine settings for specific clinical applications. The ability to perform and interpret quality assurance (QA) tests‚ including phantom studies‚ is crucial. Finally‚ questions may address transducer characteristics and their impact on image formation.

Types of Questions Found in SPI Exams

The SPI exam utilizes diverse question formats‚ including multiple-choice‚ image-based analysis‚ calculations‚ and realistic patient scenarios to assess your understanding.

Multiple Choice Questions

Multiple-choice questions form a significant portion of the ARDMS SPI exam‚ testing your foundational knowledge of sonography principles and instrumentation. These questions typically present a stem – a question or incomplete statement – followed by several answer options‚ only one of which is correct.

Effective preparation involves not just memorizing facts‚ but understanding the reasoning behind the correct answers. Sample PDFs often include detailed explanations for both correct and incorrect choices‚ aiding in comprehension. Expect questions covering ultrasound physics‚ hemodynamics‚ image optimization‚ and instrument performance.

Practice identifying keywords in the stem and eliminating obviously wrong answers. Time management is crucial; learn to pace yourself and avoid spending too long on any single question. Regularly reviewing answered questions‚ especially those missed‚ reinforces learning and identifies areas needing further study.

Image-Based Questions

Image-based questions are a critical component of the ARDMS SPI exam‚ demanding visual acuity and a strong understanding of ultrasound artifacts and pathology; Sample PDFs frequently incorporate grayscale images‚ Doppler waveforms‚ and even color Doppler displays. You’ll be asked to identify normal anatomy‚ recognize common artifacts (like acoustic shadowing or reverberation)‚ or interpret the significance of specific findings.

Preparation requires diligent study of ultrasound images‚ focusing on pattern recognition and the correlation between image characteristics and underlying physics. Practice analyzing images systematically‚ noting brightness‚ echogenicity‚ and spatial relationships.

Understanding how machine settings influence image appearance is also vital. Reviewing sample PDFs with detailed image explanations will significantly enhance your ability to confidently answer these challenging questions.

Calculations and Problem Solving

A significant portion of the ARDMS SPI exam assesses your ability to apply physics principles through calculations. Sample question PDFs often include problems related to velocity‚ frequency‚ power‚ intensity‚ and thermal index. Expect to perform calculations involving Doppler shift‚ acoustic impedance‚ and attenuation coefficients.

Mastering these calculations requires a solid grasp of the underlying formulas and units. Practice converting between different units of measurement and applying the correct formulas to solve various scenarios.

Many resources‚ like McRee Learning Center and Prepry‚ provide practice problems with step-by-step solutions within their PDF materials. Consistent practice is key to building speed and accuracy in these calculations.

Scenario-Based Questions

SPI exam sample questions frequently present real-world clinical scenarios‚ demanding application of your knowledge to practical situations. These questions often describe a patient case and ask you to determine the appropriate imaging technique‚ transducer frequency‚ or machine settings.

PDF resources from providers like U Test Prep and Prepry emphasize these scenario-based questions to simulate the exam’s complexity. You’ll need to analyze the information provided‚ identify key factors‚ and select the most appropriate course of action.

Developing strong critical thinking skills is crucial for success. Practice interpreting scenarios and justifying your answers based on established sonographic principles.

Strategies for Using Sample Questions Effectively

Maximize your learning by simulating exam conditions with timed practice‚ meticulously analyzing incorrect answers‚ and pinpointing weak areas for focused review.

Timed Practice Simulations

Replicating the actual exam environment is crucial for success. Utilize sample question PDFs to conduct timed practice simulations‚ mirroring the pressure and constraints of the ARDMS SPI exam. This approach builds both speed and accuracy.

Start by allocating the same time per question as the real exam. Gradually decrease the time as you become more comfortable. Analyze your performance – not just the correct answers‚ but how you arrived at them.

Identify questions where you struggled with timing. Were you unsure of the content‚ or did you simply run out of time? This self-assessment is invaluable. Consistent timed practice builds stamina and reduces test anxiety‚ ultimately boosting your confidence on exam day.

Analyzing Incorrect Answers

Don’t simply mark an answer as incorrect and move on. Thoroughly analyze why you missed the question. Was it a misunderstanding of the underlying physics principles? A misinterpretation of the question itself? Or a careless error?

Review the correct answer explanation carefully. Understand the reasoning behind it. Refer back to your study materials – textbooks‚ notes‚ or online resources – to reinforce the concepts.

Categorize your errors. Are you consistently struggling with hemodynamics‚ image optimization‚ or instrument performance? Identifying patterns reveals your weak areas. This focused approach allows you to tailor your study plan for maximum impact‚ ensuring you address your specific knowledge gaps effectively.

Identifying Weak Areas

Consistent performance analysis of SPI sample questions reveals crucial knowledge gaps. Track your scores by topic – ultrasound physics‚ hemodynamics‚ image optimization‚ and instrument performance. Notice recurring themes in your incorrect answers. Are you consistently missing questions related to Doppler principles or artifact recognition?

Detailed score reports‚ often provided by paid resources like McRee Learning Center and Prepry‚ can pinpoint specific areas needing improvement. Don’t rely solely on overall scores; delve into the granular data.

Once identified‚ dedicate focused study time to these weak areas. Utilize targeted practice questions and review relevant textbook chapters. Addressing these deficiencies is paramount for SPI exam success.

Creating a Personalized Study Schedule

Effective SPI exam preparation demands a tailored study schedule‚ informed by your performance on sample questions. Begin by allocating time based on identified weak areas – prioritize topics where you consistently struggle. Integrate timed practice simulations mirroring the exam’s format‚ utilizing PDF resources from providers like U Test Prep.

Schedule regular review sessions to reinforce learned concepts. Don’t cram; spaced repetition is more effective. Incorporate breaks to prevent burnout. A realistic schedule‚ accounting for your commitments‚ is crucial.

Regularly reassess and adjust your schedule based on progress. Track your scores on practice exams and refine your focus accordingly. Consistency is key to success.

Popular SPI Exam Preparation Resources

Several platforms‚ including McRee Learning Center‚ Prepry‚ and U Test Prep‚ provide valuable SPI exam preparation materials‚ often featuring comprehensive sample question PDFs.

McRee Learning Center

McRee Learning Center is a widely recognized resource for ARDMS exam preparation‚ offering a structured approach to mastering the SPI content. They provide a sample quiz‚ allowing prospective students to experience their question style and assess their current knowledge base.

Their full-length practice exams‚ available for purchase‚ are designed to simulate the actual exam environment‚ aiding in time management and building confidence. McRee focuses on detailed explanations accompanying each question‚ crucial for understanding the underlying principles and avoiding repeated errors.

Many users report that McRee’s materials effectively bridge the gap between theoretical knowledge and practical application‚ ultimately contributing to improved scores on the ARDMS SPI exam. They aim to help you pass the first time!

Prepry

Prepry positions itself as a comprehensive solution for ARDMS SPI exam success in 2024 and beyond. They emphasize “top tips” alongside their practice tests‚ suggesting a holistic study approach that goes beyond rote memorization. Prepry aims to help candidates study smarter‚ adapting to individual learning styles and identifying knowledge gaps.

Their materials are designed to mirror the current exam format and content‚ ensuring relevance and maximizing practice effectiveness. Prepry’s focus is on providing a realistic exam simulation‚ helping students build stamina and reduce test anxiety.

Users appreciate Prepry’s commitment to staying updated with ARDMS changes‚ offering current and reliable practice resources for optimal preparation.

U Test Prep

U Test Prep offers a full-length SPI exam designed to help candidates achieve their highest possible scores. They emphasize the importance of passing the Sonography Principles & Instrumentation (SPI) exam on the first attempt‚ highlighting the value of thorough preparation. Their sample quiz‚ available for free‚ provides a taste of their comprehensive question bank.

U Test Prep’s materials are geared towards simulating the actual exam experience‚ focusing on content depth and question style. They aim to equip students with the knowledge and confidence needed to succeed.

The platform’s goal is to help students reach their professional goals through effective exam preparation and a strong understanding of sonography principles.

CliffsNotes (Related Physics Practice)

While not directly focused on ARDMS SPI exam sample questions‚ CliffsNotes offers valuable physics practice materials that can supplement your study plan. Specifically‚ a “Lab 4, Practice Exam” from a PHYS 1730 Lab Sections course (Fall 2019) is available as a PDF. This resource‚ from the University of North Texas‚ Dallas‚ contains 30 multiple-choice questions.

Although geared towards mechanics‚ the underlying physics principles covered are foundational to ultrasound. Utilizing these practice questions can reinforce core concepts essential for the SPI exam.

It’s important to remember this is a related‚ not a direct‚ SPI preparation tool‚ but can aid in strengthening physics fundamentals.

Specific Topics to Focus On Based on Sample Questions

Prioritize mastering artifact recognition‚ quality assurance‚ machine controls‚ and patient safety protocols‚ as these areas are frequently assessed in SPI exam sample questions.

Artifact Recognition

Understanding and identifying various ultrasound artifacts is crucial for the ARDMS SPI exam. Sample questions frequently present images containing acoustic shadowing‚ reverberation artifacts‚ and comet-tail artifacts‚ requiring candidates to differentiate between normal anatomy and pathology.

Furthermore‚ recognizing artifacts related to patient positioning‚ probe pressure‚ and equipment malfunction is essential. Practice identifying artifacts caused by aliasing‚ wrapping‚ and moiré patterns‚ common in Doppler imaging.

Effective preparation involves studying the underlying physics principles that create these artifacts and correlating them with image appearances. Many sample PDFs include image-based questions specifically designed to test artifact recognition skills‚ building confidence and exam readiness.

Quality Assurance Procedures

A significant portion of the SPI exam assesses knowledge of ultrasound quality assurance (QA). Sample questions often focus on topics like daily‚ weekly‚ and annual QA testing protocols‚ emphasizing the importance of maintaining optimal image quality and patient safety.

Candidates should be prepared to answer questions regarding phantom scans‚ depth and resolution measurements‚ and documentation requirements. Understanding the purpose of each QA test and acceptable limits is vital.

PDF resources frequently include scenarios requiring application of QA principles to real-world situations. Mastering these procedures demonstrates a commitment to accurate diagnosis and responsible sonographic practice‚ directly impacting exam performance.

Machine Controls and Settings

SPI exam sample questions heavily emphasize understanding ultrasound machine controls and their impact on image formation. PDFs often present scenarios requiring adjustments to TGC‚ gain‚ depth‚ frequency‚ and focal zones to optimize image quality for various anatomical structures.

Candidates must demonstrate knowledge of how each control affects brightness‚ resolution‚ and penetration. Questions frequently assess the ability to select appropriate presets for different examinations and recognize the consequences of improper settings.

Proficiency in manipulating machine controls is crucial for producing diagnostic images. Sample PDFs provide opportunities to practice these skills virtually‚ reinforcing understanding and building confidence for the practical exam component.

Patient Safety Protocols

ARDMS SPI exam sample questions consistently assess knowledge of patient safety protocols within the ultrasound environment. PDFs often include scenarios requiring correct application of ALARA (As Low As Reasonably Achievable) principles to minimize exposure.

Candidates are expected to understand bioeffects – thermal‚ mechanical‚ and cavitation – and how to mitigate risks through appropriate technique selection and parameter adjustments. Questions may cover infection control procedures‚ proper documentation‚ and recognizing contraindications to ultrasound.

A strong grasp of these protocols is vital for ethical and responsible practice. Sample PDFs offer valuable practice in applying safety guidelines to various clinical situations‚ preparing candidates for real-world scenarios.

hero party must fall guide

Understanding the “Hero Party Must Fall” Trope

The “Hero Party Must Fall” trope explores subverted expectations, challenging the traditional narrative of triumphant heroes.
It delves into the captivating appeal of witnessing even the most courageous leaders succumb to adversity, often through strategic villainy.

Historical Roots of Heroic Downfalls

The concept of heroic downfalls isn’t new; it’s deeply embedded in storytelling traditions. Classical epics like Gilgamesh, The Iliad, and Beowulf frequently depict heroes facing tragic fates, often due to hubris or unavoidable destiny. These early narratives established a precedent for exploring the fragility of even the most powerful figures.

Later literary works continued this trend, showcasing the consequences of ambition and the inevitability of loss. The fall of figures in tragedies, like those penned by Shakespeare, demonstrate the enduring fascination with witnessing the downfall of those held in high esteem. This fascination stems from a recognition of human fallibility and the unpredictable nature of fate, laying the groundwork for the modern “Hero Party Must Fall” trope.

Literary Precedents: From Epic Poems to Modern Fiction

Tracing the trope’s evolution reveals a consistent thread through literature. La Chanson de Roland exemplifies the heroic ideal, yet even within such tales, foreshadowing of potential loss exists. Moving into modern fiction, authors began actively subverting expectations, challenging the guaranteed victory of protagonists.

The rise of anti-heroes and morally grey characters further paved the way. Stories began to explore the consequences of power and the corrupting influence of conflict. This shift culminated in narratives where the “hero party” isn’t destined for triumph, but rather faces calculated defeat, often at the hands of a formidable antagonist. This subversion provides compelling drama and thematic depth.

The Appeal of Subverting Expectations

The allure of a fallen hero party lies in its unexpectedness and emotional resonance. Audiences are accustomed to narratives of triumph, making defeat a powerful and memorable experience. This subversion challenges the conventional power fantasy, grounding the story in a sense of realism and consequence.

Furthermore, it allows for exploration of complex themes – the fragility of hope, the cost of ambition, and the inevitability of loss. Witnessing a well-prepared party overcome by a cunning villain, like Strahd, evokes a sense of dramatic irony and intellectual satisfaction. It’s a compelling narrative twist that resonates deeply with players and readers alike.

Strahd von Zarovich as a Prime Example

Strahd embodies the “Hero Party Must Fall” trope, masterfully utilizing legendary actions, strategic positioning, and exploiting player vulnerabilities to achieve ultimate dominance.

Strahd’s Tactics: Utilizing Legendary Actions & Positioning

Strahd’s success hinges on intelligent tactical deployment, particularly his legendary actions. He doesn’t simply brute-force encounters; instead, he conserves resources and manipulates the battlefield. A key tactic, as observed in numerous campaigns, involves maintaining a safe distance from area-of-effect threats like the Daylight spell from the Amulet of Ravenkind.

He achieves this through strategic movement utilizing his legendary actions, consistently repositioning to avoid damage while maximizing his own offensive capabilities. This isn’t passive evasion; Strahd actively uses these actions to control the flow of combat, dictating engagement ranges and forcing the party into disadvantageous positions. He’s a predator, carefully circling his prey before striking with devastating efficiency.

Exploiting Player Weaknesses: Amulet of Ravenkind Counterplay

The Amulet of Ravenkind, while potent, presents vulnerabilities a clever villain can exploit. Strahd, demonstrably, understands this. Rather than directly confronting the amulet’s Daylight effect, he prioritizes maintaining distance through strategic positioning and his legendary actions. This denies the party the opportunity to capitalize on his vulnerability to sunlight.

Furthermore, a skilled Strahd won’t allow the amulet to dictate the battlefield. He’ll utilize minions to draw fire, creating diversions while he maneuvers. He understands the amulet’s power is limited by its activation requirements and range, turning those limitations into advantages. Anticipating and countering this specific threat is crucial for a successful villainous strategy.

Damage Output & Attack Patterns: Unholy Reaver & Spellcasting

Strahd’s combat prowess stems from a blend of martial skill and dark magic. He consistently delivers substantial damage, often utilizing three attacks per round with his Unholy Reaver sword. This weapon, combined with his inherent strength, poses a significant threat to even heavily armored heroes.

Beyond melee attacks, Strahd employs a diverse spell list, including area-of-effect control like Whirlwind, capable of restraining multiple party members simultaneously. He complements this with direct damage spells like Fireball, Lightning Bolt, and Eldritch Blast, maximizing his offensive output and keeping the party constantly pressured.

Common Pitfalls Leading to Hero Party Failure

Hero parties often falter through overconfidence in direct attacks, neglecting strategic positioning, and underestimating the villain’s intelligence and carefully laid plans for domination.

Over-Reliance on Direct Confrontation

A frequent downfall for hero parties stems from a singular focus on direct, head-on assaults. Players, embodying courageous characters, often prioritize charging into battle, believing raw power will overcome obstacles. However, a cunning villain, like Strahd von Zarovich, anticipates this predictable behavior.

He skillfully utilizes terrain, legendary actions to maintain distance, and strategically placed minions to exploit this tendency. The Reddit post highlights a scenario where a villain effectively countered a party’s aggressive spellcasting – Fireball, Lightning Bolt – with a restraining Whirlwind spell.

This demonstrates that brute force alone is insufficient; a nuanced approach, incorporating tactical maneuvering and exploiting enemy weaknesses, is crucial for success. Ignoring strategic options invites defeat.

Ignoring Environmental Hazards & Strategic Positioning

A critical error hero parties make is neglecting the battlefield itself. Focusing solely on the villain while disregarding surroundings creates vulnerabilities a clever opponent will exploit. Strategic positioning offers advantages – high ground, chokepoints, cover – that can dramatically shift the encounter’s balance.

Strahd, as exemplified in the Reddit discussion, actively uses his legendary actions to avoid unfavorable positions, specifically distancing himself from area-of-effect attacks like the Amulet of Ravenkind’s Daylight.

Ignoring environmental factors – difficult terrain, collapsing structures, magical effects – is akin to fighting with a self-imposed handicap. A successful villain understands and weaponizes the environment, turning it against the heroes.

Underestimating the Villain’s Intelligence & Planning

A fatal flaw for many hero parties is assuming villains act solely on brute force or chaotic impulses. Truly dangerous antagonists are meticulous planners, anticipating hero actions and crafting elaborate schemes. Strahd von Zarovich, a prime example, isn’t simply a powerful combatant; he’s a master manipulator.

He doesn’t rush into direct confrontation, instead leveraging legendary actions for tactical advantage, as noted in the Reddit AMA. This demonstrates foresight and a calculated approach.

Assuming a villain lacks depth or strategic thinking allows them to dictate the terms of engagement, leading the heroes into carefully constructed traps and unfavorable situations.

Building a Villain to Defeat a Hero Party

Crafting a formidable foe requires careful stat allocation, impactful legendary actions, and effective minion management to exploit hero weaknesses and ensure a challenging encounter.

Stat Allocation & Ability Selection

Prioritize stats that enhance control and survivability, rather than solely focusing on raw damage output. A villain utilizing area-of-effect spells, like the Whirlwind example, benefits from high Constitution and Wisdom. Consider abilities that impose debuffs or restrain opponents, disrupting the hero party’s strategies.

Intelligence is crucial for a villain who relies on tactical planning and exploiting player vulnerabilities. Don’t neglect Charisma if psychological warfare and manipulation are key components of your villain’s approach. Carefully select spells and abilities that counter common hero archetypes – for instance, spells that negate magical defenses against a powerful mage.

Remember, a well-rounded villain isn’t necessarily the strongest, but the most adaptable and cunning, capable of turning the heroes’ strengths against them.

Legendary Actions: Maximizing Impact & Control

Legendary Actions are pivotal for disrupting the hero party’s turn order and maintaining battlefield control. Mimic Strahd’s tactics by utilizing actions to reposition, staying out of range of powerful area-of-effect spells like the Amulet of Ravenkind’s Daylight. Prioritize actions that impose disadvantage on attack rolls or force disadvantageous movement.

Don’t waste actions on simple attacks; instead, focus on hindering the heroes’ most potent abilities. Consider actions that allow you to impose conditions like frightened or restrained, further limiting their options. A well-timed Legendary Action can completely dismantle a carefully planned strategy.

Remember, control is paramount – dictate the flow of combat and force the heroes to react to your actions.

Minion Management: Utilizing Allies Effectively

Minions aren’t simply cannon fodder; they’re tactical assets. Deploy them to absorb damage, screen your main villain, and create chokepoints. Utilize their numbers to surround and isolate key members of the hero party, disrupting their formations and preventing coordinated attacks.

Don’t be afraid to sacrifice minions strategically. A well-placed minion can trigger opportunity attacks or absorb a critical hit intended for the villain. Command them to harass spellcasters, forcing them to expend resources on minor threats.

Effective minion management maximizes your villain’s survivability and control over the battlefield, turning a potential rout into a calculated victory.

Specific Strategies for Villainous Success

Villainous triumph hinges on control and disruption. Employ area-of-effect spells like Whirlwind to restrain heroes, coupled with targeted debuffs and psychological manipulation for maximum impact.

Area of Effect Control & Restraint (Whirlwind Example)

Controlling the battlefield is paramount when aiming to defeat a hero party. Area of effect (AoE) spells, such as the Whirlwind spell, offer exceptional opportunities to restrain multiple characters simultaneously, disrupting their formations and coordinated attacks. This allows a villain to dictate the pace of combat and isolate key targets.

As demonstrated in a Curse of Strahd campaign, a well-timed Whirlwind can completely neutralize a party, preventing them from utilizing abilities or maneuvering effectively. Combining AoE control with strategic positioning – maintaining distance from abilities like the Amulet of Ravenkind’s Daylight – amplifies its effectiveness. This creates a window for focused attacks and exploitation of vulnerabilities, turning the tide of battle decisively in the villain’s favor.

Targeted Debuffs & Status Effects

Beyond raw damage, debilitating status effects are crucial for dismantling a hero party. Targeted debuffs can cripple a warrior’s strength, silence a mage’s spellcasting, or reduce a leader’s charisma, eroding their effectiveness. Strategic application of these effects disrupts synergy and forces difficult choices.

Consider vulnerabilities inherent in hero archetypes. A powerful mage, reliant on spell slots, becomes significantly less threatening when silenced or suffering disadvantage on concentration checks. A courageous leader, fueled by confidence, can be demoralized by fear or disadvantage on ability checks. Exploiting these weaknesses, combined with sustained damage, accelerates the party’s downfall, turning their strengths into liabilities.

Psychological Warfare & Manipulation

A truly effective villain understands that battles aren’t solely fought with swords and spells. Psychological manipulation can sow discord within the hero party, exploiting ideological differences and forcing difficult moral choices. Presenting scenarios where “we can’t reconcile our differences” can fracture alliances, turning allies against each other.

Targeting a leader’s pride or overconfidence, or preying on a character’s past trauma, can create internal division. Offer tempting, yet ethically questionable, solutions. The goal isn’t just to defeat the heroes physically, but to break their spirits and erode their belief in their cause, leading to a bitter and complete collapse.

The Role of Alignment & Moral Conflict

Moral grey areas are crucial; forcing difficult choices and exploiting ideological divides within the party weakens resolve.
Alignment clashes can escalate to irreconcilable differences, ultimately leading to tragic outcomes.

Forcing Difficult Choices & Internal Division

A truly effective villain doesn’t simply overpower a hero party; they dismantle it from within. This is achieved by presenting agonizing dilemmas with no easy answers, forcing characters to compromise their values.

Consider scenarios where saving one innocent requires sacrificing another, or where upholding a moral code clashes with the immediate need to survive. These choices breed resentment and distrust.

Exploit pre-existing tensions within the group – differing beliefs about justice, methods, or even personal loyalties. A well-placed lie or manipulated situation can amplify these cracks, turning allies against each other. The goal isn’t just to inflict damage, but to sow discord, fracturing the party’s unity and leaving them vulnerable.

Exploiting Ideological Differences

Hero parties are rarely monolithic in their beliefs. A paladin’s unwavering devotion to law may clash with a rogue’s pragmatic approach, or a cleric’s faith might be challenged by a wizard’s skepticism. A cunning villain will identify and exacerbate these fault lines.

Present situations where the “right” course of action is deeply ambiguous, appealing to different characters’ core principles. Frame choices as a conflict between ideologies, not simply good versus evil.

Subtly manipulate events to reinforce existing biases, pushing characters further into their respective corners. The ultimate aim is to reach a point where reconciliation becomes impossible – a “we can’t reconcile our differences” scenario – leading to internal conflict and potential betrayal.

The “We Can’t Reconcile” Scenario: A Bitter End

The culmination of ideological conflict arrives when compromise proves unattainable. Characters, once allies, now view each other through a lens of fundamental disagreement, perceiving actions as betrayals of core values. This isn’t merely a disagreement; it’s a fracturing of trust.

The villain doesn’t necessarily cause this split, but skillfully exploits pre-existing tensions. Present a final, irreversible choice that forces characters to definitively side with opposing ideologies.

The resulting fallout should be devastating – perhaps even lethal – as former companions become adversaries. A truly bitter end sees the party shattered, their quest abandoned, and their heroism extinguished, proving that even noble intentions can lead to ruin.

Analyzing Hero Archetypes & Their Vulnerabilities

Understanding hero archetypes – the courageous leader, powerful mage, and skilled warrior – reveals inherent weaknesses. Pride, resource dependence, and predictability can be exploited for a tragic fall.

The Courageous Leader: Pride & Overconfidence

The courageous leader archetype, often the party’s face and tactical mind, frequently suffers from debilitating pride and overconfidence. This vulnerability stems from a history of success, fostering a belief in their own infallibility. A clever villain can exploit this by presenting scenarios that subtly inflate the leader’s ego, leading to reckless decisions.

Furthermore, leaders often prioritize the well-being of their companions, making them susceptible to manipulation through threats against the party. A villain might feign weakness or create a false dilemma, forcing the leader to choose between their principles and the safety of those they protect. This internal conflict can cloud judgment and create openings for devastating attacks or strategic maneuvers.

Ultimately, the leader’s unwavering belief in their own abilities, coupled with their protective instincts, becomes their greatest weakness, paving the way for a dramatic downfall.

The Powerful Mage: Dependence on Resources & Spell Slots

The powerful mage, a cornerstone of many hero parties, wields immense power but is fundamentally limited by finite resources. Spell slots, components, and even the mage’s own stamina are crucial for their effectiveness. A discerning villain understands this dependency and will actively work to deplete these resources.

Strategies include prolonged engagements, forcing the mage to expend high-level spells on trivial threats, or employing anti-magic fields and abilities to render their power useless. Disrupting the mage’s concentration during spellcasting is also vital, wasting valuable resources and creating openings for attack.

Furthermore, a mage’s reliance on preparation can be exploited; ambushes and unexpected encounters can leave them scrambling for solutions with limited options.

The Skilled Warrior: Predictability & Physical Limitations

The skilled warrior, often the party’s frontline, excels in direct combat but suffers from inherent predictability and physical constraints. Their tactics, while effective, can become repetitive, allowing a clever villain to anticipate and counter their moves.

Exploiting the warrior’s reliance on melee range is key; maintaining distance and utilizing area-of-effect attacks can bypass their defenses. Furthermore, warriors are susceptible to exhaustion and injury. Prolonged battles, debilitating status effects, and targeting weak points can significantly reduce their combat effectiveness.

A villain can also leverage the warrior’s protective instincts, forcing them to make difficult choices that compromise their own safety for the sake of their allies.

1 22 23 24 25 26 40